Table of Contents >> Show >> Hide
- Why a Tin Ceiling Tile Pocket Works So Well
- Pick Your Tile: Real Tin, Aluminum, or Faux
- Tools and Materials
- Design Choices: Pocket Shape That Looks Good and Holds Flowers
- Step-by-Step: Build the Tin Ceiling Tile Flower Pocket
- Step 1: Prep the Tile (Clean, Flatten, and Plan)
- Step 2: Mark Your Cuts
- Step 3: Cut the Shape Safely
- Step 4: Deburr (Your Future Hands Will Thank You)
- Step 5: Make Crisp Bends Without Fancy Equipment
- Step 6: Assemble the Pocket (Fasten, Don’t Just Hope)
- Step 7: Add a Backing (Optional but Highly Recommended)
- Finishing: Paint, Clear Coat, and Rust-Proofing
- The Secret to Fresh Flowers: Add a Water Insert
- Mounting Your Wall Pocket Safely (No “Gravity Experiments”)
- Flower Styling Ideas (Three “Recipes” That Always Look Good)
- Keeping Fresh Flowers Fresh in a Wall Pocket
- Troubleshooting (Because DIY Is Basically Creative Problem-Solving)
- Experience Notes: What Makers Learn After a Few Tin Tile Flower Pockets
- Conclusion
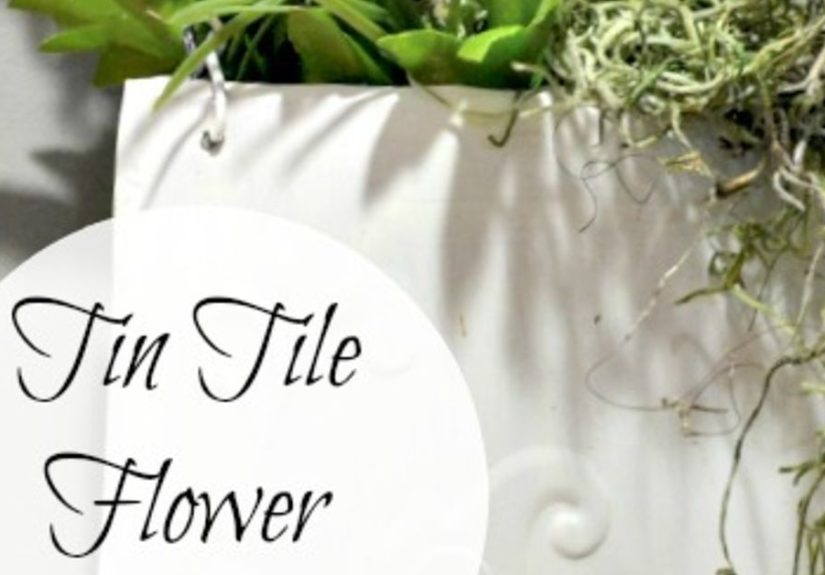
If your walls could talk, they’d probably ask for more flowers. And if your decor could text, it would absolutely send you a link to vintage tin ceiling tiles at 2:00 a.m. This project is the happy middle: a DIY tin ceiling tile pocket for flowers that looks like you rescued it from a charming old general store… without needing to actually own a general store (or a time machine).
Tin ceiling tiles (and the modern “tin” look-alikes) are packed with character: embossed patterns, crisp lines, and that “I have my life together” vibe. Turn one into a wall pocket and you’ve got a wall-mounted flower holder that works in entryways, kitchens, bathrooms, patios, and anywhere you need a little beauty… or a distraction from that one scuff mark.
Why a Tin Ceiling Tile Pocket Works So Well
A flower pocket is basically a tiny stage for blooms. Tin ceiling tile is the perfect backdrop because the texture does the decorating for you. It brings instant vintage style (even if your home is more “modern chaos with snacks” than “historic farmhouse”).
- High-impact texture: Embossed metal makes even a simple bouquet look intentional.
- Small footprint: A pocket sticks close to the wallgreat for narrow halls and tight corners.
- Easy seasonal swaps: Tulips in spring, sunflowers in summer, dried grasses in fall, evergreen sprigs in winter.
- Upcycling friendly: Salvaged panels, leftovers from a ceiling project, or a single decorative tile can all work.
Pick Your Tile: Real Tin, Aluminum, or Faux
Here’s the deal with “tin” ceiling tiles: historically they were tinplate, and many modern products are still metaloften steel coated with tin, or aluminum options that won’t rust. You’ll also find faux tiles made from PVC or lightweight composites that mimic the look. All three can make a great tin ceiling tile wall pocket, but they behave differently.
Option A: Tin-Plated Steel (Authentic Look, Needs Protection)
Tin-plated steel gives you that classic crisp embossing, but it can rust if water sits on it (fresh flowers = water is involved). If you choose this, plan to seal or paint it, especially inside the pocket and along cut edges.
Option B: Aluminum (Rust-Resistant, Great for Real Flowers)
Aluminum is lighter and naturally rust-resistant. If your pocket will regularly hold fresh flowers, aluminum makes the “less stress, more petals” choice. You can still paint or clear coat it for the finish you want, but it’s more forgiving.
Option C: Faux Tin Tile (Easy Cutting, Indoor-Only Vibes)
Faux tiles are easy to cut and don’t have razor-sharp edges like metal. They’re awesome for dried flowers or faux blooms, and they’re a smart pick if you want the look without metal tools. For fresh flowers, you’ll still need a watertight insert so the tile never gets wet.
Tools and Materials
You can make this project as simple or as “I own a workshop and label my drawers” as you like. Below is the practical shopping list.
Materials
- 1 tin ceiling tile panel (metal or faux), any embossed pattern you love
- Small flower water tube(s) / floral water picks or a slim bud vase/test tube insert
- Optional: 1 thin wood backing board (1/4″ plywood) or a simple frame to cover sharp edges
- Fasteners: small screws + nuts, pop rivets, or short sheet-metal screws
- Hanging hardware: D-rings, keyhole hangers, sawtooth hanger, or a small French cleat
- Finish: primer + paint, or clear coat/polyurethane suitable for metal
- Optional: decorative trim, ribbon, label plate, or a small hook for shears
Tools
- Tin snips (straight-cut is enough; left/right-cut helps with curves)
- Marker + ruler/tape measure
- Drill with small metal bit (for pilot holes and rivets/screws)
- Metal file or sandpaper (for deburring sharp edges)
- Clamps and two straight wood scraps (for making clean bends)
- Work gloves and eye protection (non-negotiablemetal edges are spicy)
Design Choices: Pocket Shape That Looks Good and Holds Flowers
The easiest pocket is an “envelope” shape: tall back, shorter front, and two side flaps that fold inward. The pocket gets its strength from folded edges (like metal origami, but with more safety gear).
A Simple Template (Adjustable)
- Finished pocket size: about 10–12″ tall and 6–8″ wide
- Back height: 12″
- Front height: 6–7″
- Side flaps: 1–1.5″ each
- Bottom flap: 1–1.5″ (optional, but helps the pocket keep shape)
Tip: If your tile has a dramatic repeating pattern, decide where you want the “hero motif” to sitcentered and uprightbefore you cut.
Step-by-Step: Build the Tin Ceiling Tile Flower Pocket
Step 1: Prep the Tile (Clean, Flatten, and Plan)
Wipe down the tile to remove dust and oils. If it’s salvage with patina, keep what you lovebut remove loose rust or flaking paint. Lay the tile flat and choose the prettiest section for the front face.
Step 2: Mark Your Cuts
Use a ruler and marker to draw your pocket outline. Keep your lines bold and clear, because “eyeballing” sheet metal is a comedy genre you don’t need. Mark fold lines too (dashed lines help you remember what bends where).
Step 3: Cut the Shape Safely
Put on gloves and eye protection. Cut along your outline with tin snips. For inside corners or small cutouts, drill a small starter hole and cut outwardthis keeps you from mangling the embossing.
- Clean cuts: Cut slowly and avoid twisting the snips mid-cut.
- Better curves: Left- and right-cut snips make rounded cuts less frustrating.
- Mind the offcuts: The scrap piece will be sharp and eager to fall dramatically at your feet.
Step 4: Deburr (Your Future Hands Will Thank You)
Run a metal file or sandpaper along every cut edge. This is not optional if you enjoy having fingertips. Focus especially on the top rim and the inside edges where you’ll reach in to place flowers.
Step 5: Make Crisp Bends Without Fancy Equipment
To bend neatly, sandwich the tile along the fold line between two straight wood scraps, clamp it, and fold the exposed section upward. Use a rubber mallet (or a block of wood) to tap the bend crisp.
- Fold the side flaps inward first.
- Fold the bottom flap up (if using) to add stiffness.
- Check symmetry before fasteningcrooked pockets are charming only in cartoons.
Step 6: Assemble the Pocket (Fasten, Don’t Just Hope)
Overlap the side flaps behind the front panel to form a tapered pocket. Drill small holes through the overlap points and secure with: pop rivets (quick), small screws + nuts (strong and removable), or short sheet-metal screws (simple).
If you’re adding a wood backing board, you can also fasten the pocket to the board and let the board do most of the structural work. Bonus: the board hides sharp edges and makes hanging easier.
Step 7: Add a Backing (Optional but Highly Recommended)
Cut a thin board slightly larger than the pocket footprint. Sand the edges and paint or stain it if you want contrast. Then screw the pocket to the board through the back panel (use washers if needed). This creates a sturdy, hang-ready unit.
Finishing: Paint, Clear Coat, and Rust-Proofing
Fresh flowers plus bare metal can lead to rust or water marksespecially on steel-based “tin” panels. The safest approach is to seal the tile inside and out, including cut edges.
Finish Option 1: Keep the Metal Look (Clear Coat)
If you love the silvery vibe, use a clear protective finish suitable for metal. Apply thin coats, letting each coat dry fully. Clear finishes often deepen the tone slightlytest on a scrap first.
Finish Option 2: Paint It (Classic Farmhouse, Modern, or Maximalist)
For painted finishes, start with a rust-inhibiting primer appropriate for metal, then topcoat with your paint of choice. Want a vintage look? Dry-brush a contrasting color over raised embossing to make the pattern pop.
Finish Option 3: Embrace Patina (But Seal It)
Patina is gorgeousuntil it stains your wall. If you’re keeping a rusted or aged look, use a product designed to seal metal patina so it doesn’t shed or drip. The goal: “vintage charm,” not “mystery streaks.”
The Secret to Fresh Flowers: Add a Water Insert
A wall pocket is not a watertight vase (unless you’ve invented a miracle pocket). To use fresh blooms, add a hidden water source: floral water tubes (also called water picks) or a slim bud vase insert.
Option A: Floral Water Tubes (Best for Single Stems)
Water tubes are made for exactly this: keeping stems hydrated when they can’t sit in a vase. Fill the tube, cap it, and insert the stem through the cap. You can tuck one or several tubes inside the pocket, or zip-tie them to a hidden support on the back.
- Best for: roses, ranunculus, tulips, eucalyptus sprigs, single statement stems
- Pro tip: Place tubes in a small cluster and hide them behind greenery so the pocket looks full.
- Spill control: Tubes reduce slosh risk compared to an open container.
Option B: Slim Bud Vase Insert (Best for Small Bouquets)
If you want a mini bouquet instead of single stems, use a narrow bud vase, test tube, or small jar insert. Secure it inside the pocket with a simple bracket, heavy-duty zip ties, or wire wrapped around the vase neck and anchored through drilled holes in the back panel.
Option C: Floral Foam (Use Thoughtfully)
Wet floral foam can hold multiple stems, but it needs proper soaking and careful handling. If you use it, keep it contained in a plastic liner so water never contacts the metal. Many makers now prefer reusable mechanics (frog pins, chicken wire, or tubes) to reduce wastechoose what fits your values and setup.
Mounting Your Wall Pocket Safely (No “Gravity Experiments”)
Even a small pocket gets heavier with water and flowers. Hang it like you mean it. If you can hit a stud, do it. If not, use anchors rated for more than the fully-loaded weight.
Hardware Options
- D-rings + screws: Great with a wood backing board.
- Keyhole hangers: Clean look, sits flat, easier with a backing board.
- Small French cleat: Most secure and easy to level, especially for heavier builds.
Drywall Anchor Basics
If you’re mounting into drywall without a stud, choose an anchor designed for the load (toggle bolts, molly bolts, or self-drilling anchors), and follow the manufacturer’s instructions. Avoid adhesive-only hooks for anything you’d cry about if it fell.
Flower Styling Ideas (Three “Recipes” That Always Look Good)
1) The Grocery Store Glow-Up
Grab one bunch of flowers and one bunch of greenery. Use 3–5 stems in water tubes, then tuck greenery around them to hide the mechanics. Result: looks custom, costs regular.
2) The Garden Snip (Wild and Relaxed)
Mix herbs (rosemary, mint), small blooms, and viney greens. This style is forgivingif a stem is slightly wonky, it’s suddenly “organic movement.”
3) The Dried Forever Bouquet
Dried lavender, pampas grass, bunny tails, and preserved eucalyptus turn the pocket into a long-term wall accent. No water, no fuss, no “why does my bouquet look sad on day three?” drama.
Keeping Fresh Flowers Fresh in a Wall Pocket
Fresh flowers last longer with the same basics: clean water sources, trimmed stems, and cooler temperatures. Recut stems at an angle with clean tools, remove leaves that would sit in water, and refresh water regularly. Keep arrangements away from direct sun and away from ripening fruit (ethylene gas can shorten bloom life).
Troubleshooting (Because DIY Is Basically Creative Problem-Solving)
My pocket looks flimsy.
Add a wood backing board, widen the side flaps, and use fasteners at multiple points. Folded edges add stiffnessthink “paper airplane rules,” but metal.
I’m worried about rust.
Seal it thoroughly and keep water contained in tubes or an insert. If you’re using steel-based tin, coat cut edges especially well.
The tile edges are too sharp.
File the edges, then cover the rim with a folded trim strip, a narrow wood frame, or a decorative metal edging. Safety can be stylish.
Experience Notes: What Makers Learn After a Few Tin Tile Flower Pockets
After people make one of these, they almost always make a secondpartly because it’s genuinely fun, and partly because the first one teaches you a few “aha” lessons. The good news: the learning curve is gentle. The better news: the mistakes are usually fixable with a drill, a file, and a tiny bit of humility.
One of the most common discoveries is that the cut edges matter more than you think. Even if you file them once, a quick second pass (especially on the inside rim) makes the pocket feel professional. Makers who skip this step tend to “remember” it the next time they reach inside to swap flowers. If you’re adding a wood backing, it does double-duty: it hides sharp edges and gives the pocket a rigid structure that keeps it from flexing when you handle it.
Another frequent lesson: finish first, arrange later. It’s tempting to build the pocket, hang it, and immediately stuff it with flowers like a victory parade. But if you’re painting or clear-coating, curing time matters. People who wait for finishes to cure fully end up with fewer fingerprints, fewer tacky spots, and fewer “why does my wall smell like fresh paint?” moments. A light sanding between coats can also make a budget-friendly spray finish look surprisingly high-endespecially on raised embossing where highlights naturally catch the light.
Fresh flowers add their own set of real-world notes. The most successful setups usually rely on contained water sourceswater tubes, vials, or a narrow insertbecause open water and metal are not best friends. Makers who try to “just put a little water in the bottom” tend to end up with water marks at best, rust at worst, and a sudden interest in patching drywall. Tubes also make it easier to swap stems one by one, which means you can keep the arrangement looking fresh without rebuilding it from scratch every time a bloom fades.
Hanging is another place where experience shows up. Once the pocket has water and flowers, it’s heavier than it looks. People who mount into a stud (or use properly rated anchors) don’t think about it againbecause nothing moves. People who “wing it” with light-duty hardware learn a thrilling new sound: the tiny creak of regret. If you’re unsure, a small French cleat system is a confidence booster: it levels easily, spreads the load, and lets you lift the pocket off the wall when you want to refresh flowers at the sink.
Finally, there’s the style evolution. The first pocket is often classicneutral paint, simple greenery, safe choices. The second one gets bolder: a contrasting color rubbed over embossing, a label holder, a little hook for snips, maybe even a set of three pockets in a vertical row. Makers often find that tin tile patterns look best when the flowers “echo” themsoft, airy blooms for ornate designs, and structured stems for geometric patterns. Once you see that pairing click, you start looking at every vintage tile like it’s secretly a flower accessory. (It is.)
Conclusion
A DIY tin ceiling tile pocket for flowers is one of those rare projects that’s big on impact but manageable in a weekend. With the right finish and a smart water insert, it can hold fresh blooms without dramaor dried arrangements with zero maintenance. Make one for your entryway, your patio, or that one blank wall that’s been silently judging you. Your space will look more collected, and you’ll get to say the best DIY sentence of all: “Yeah, I made that.”