Table of Contents >> Show >> Hide
- Why Upcycled Easter Crafts Are the Smart Kind of Cute
- Before You Start: The 10-Minute “Use What You Have” Audit
- The Hero Project: Egg-Carton Bunny “Treat Tuck” Basket
- Five More DIY Upcycled Easy Easter Crafts (Fast, Cute, and Actually Doable)
- Make Your Upcycled Crafts Look “Polished” Without Trying Too Hard
- Common Mistakes (and Quick Fixes)
- Kid- and Teen-Friendly Crafting Tips (Safety + Sanity)
- Real-World Crafting Experiences & Lessons Learned (500+ Words)
- Conclusion: A Hoppy Holiday That Doesn’t Create a Heap
Easter decorating has a funny habit of turning into a shopping trip you didn’t plan for: you buy a “quick little bunny,” then somehow end up adopting a whole
pastel petting zoo of décor. This year, let’s do the opposite. We’re going to make something cheerful, giftable, and actually easyusing things you probably
already have: an egg carton, scrap paper, a jar, a paper roll, and whatever ribbon is currently living a double life as a “drawer squatter.”
The goal here isn’t perfection. The goal is charmthat “I made this with my own two hands (and one slightly sticky thumb)” energy. You’ll get one
hero project you can finish in an afternoon, plus a handful of quick upcycled Easter crafts you can knock out when you realize guests are coming and your home
needs to look “springy” in under 30 minutes.
Why Upcycled Easter Crafts Are the Smart Kind of Cute
Upcycling is the sweet spot between “saving money” and “saving stuff from the trash.” Instead of tossing materials (paper rolls, cartons, jars), you give them
a second job as décor, baskets, garlands, or little gift containers. It’s also a sneaky way to make Easter crafting more meaningful: kids (and adults) start to
see everyday packaging as raw material, not just “stuff that appears after snacks.”
Upcycling vs. recycling (the quick, non-boring version)
Recycling usually means sending materials away to be processed into something new. Upcycling keeps the item in your home and transforms it with minimal extra
resources. Translation: fewer steps, less waste, more “look what I made!”
Before You Start: The 10-Minute “Use What You Have” Audit
Take 10 minutes to gather supplies from around the house. This is the secret sauce for truly easy DIY upcycled Easter craftsbecause “easy” stops being easy
if you have to buy nine specialty items.
Upcycle-friendly supplies to hunt for
- Egg cartons (paper cartons paint best; foam can work but needs different glue)
- Empty jars (mason jars, sauce jars, jelly jarsanything clean with a lid is fair game)
- Toilet paper rolls or paper towel tubes
- Cardboard (cereal boxes are the MVP of craft cardboard)
- Scrap paper (old gift bags, magazine pages, leftover wrapping paper)
- Ribbon, twine, or yarn
- Buttons, bottle caps, fabric scraps (aka the “I’ll use it someday” collection)
- Basic adhesives (white glue, glue stick, double-sided tape; hot glue for adults)
- Paint/markers (non-toxic if crafting with kids)
If you’re crafting with kids or teens: keep sharp blades and hot glue as “adult-only.” Scissors, tape, and white glue can take you surprisingly far without
turning your dining table into a hazard zone.
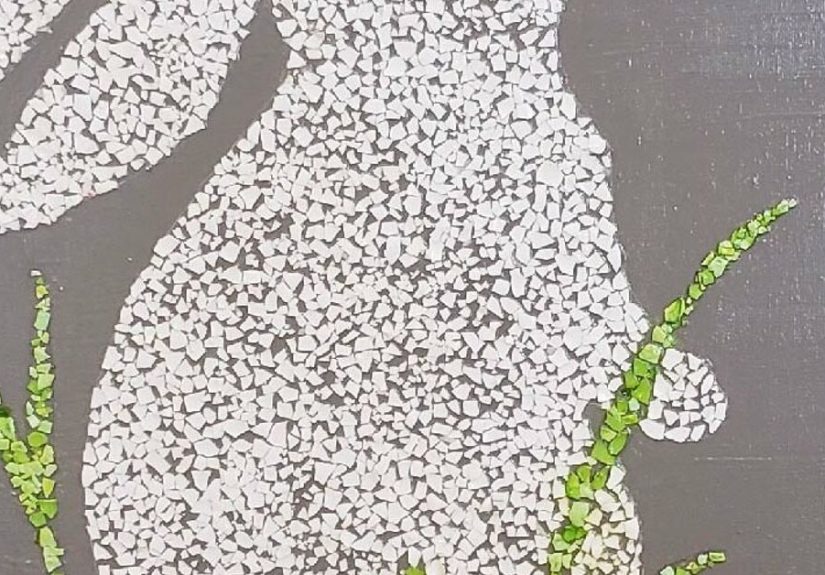
The Hero Project: Egg-Carton Bunny “Treat Tuck” Basket
This is the main DIY upcycled easy Easter craft idea: a bunny-shaped mini basket made from egg-carton cups. It works as table décor, a place card holder, a
small gift container, or a cute way to hand out candy without buying disposable plastic baskets.
What you’ll need
- 1 paper egg carton (6- or 12-count)
- Scissors
- White glue (or tacky glue)
- Paint (acrylic or washable tempera) or markers
- Scrap paper or thin cardboard (for ears and feet)
- Twine/ribbon/yarn (for handles and bows)
- Optional: cotton ball or scrap fabric (tail), buttons (nose), marker (whiskers)
- Optional: shredded paper (from junk mail) for “nest filler”
Step-by-step instructions
-
Cut your “basket base.” Cut out two connected egg cups from the carton (like a little two-seat couch). Trim rough edges so it
sits flat and looks neat. -
Paint first, assemble second. It’s easier to paint the carton before you add small details. Paint the outside a bunny color (white, gray,
tan, or pastel). Let it dry completely. -
Make bunny ears. Cut two ear shapes from scrap paper or thin cardboard. For extra cuteness, glue a smaller “inner ear” piece (pink or
pastel) on top. Fold the bottom of each ear slightly so it can stand up. -
Glue ears inside the back cup. Put glue along the folded ear tabs and press them into the inside rim of the back cup. This makes
the bunny look like it’s peeking out of the basket. -
Add feet (optional but adorable). Cut two oval feet and draw little toe lines. Glue them to the front bottom edge of the front
cup so they stick out a bit. -
Create the face. Use a marker to draw eyes and whiskers. Add a tiny triangle nose from paper (or a small button). Keep features simple
minimal lines look more modern and less “haunted cartoon bunny.” -
Tail time. Glue a cotton ball or a scrap-fabric puff to the back. If you don’t have either, crumple a small piece of paper into a ball,
wrap it with yarn, and call it “textured design.” -
Make the handle. Punch (or carefully poke) a small hole on each side of the two-cup base. Thread twine or ribbon through and knot inside.
Now it’s a real mini basket. -
Fill it. Add shredded paper “grass,” a couple of wrapped candies, mini eggs, stickers, or a sweet note. You can also use it to hold a
place card or a tiny spring flower.
Why this craft works (a little design analysis)
Egg cartons already have the structure you need: cup shapes for containment and thick paper for stability. Painting unifies the material so it looks like
“intentional décor” rather than “hey, I found trash.” The ears add height (visual interest), while the face keeps it friendly. It’s simple construction with
high payoffwhich is exactly what an easy Easter craft should be.
Variations that still count as “easy”
- Chick version: Skip ears, paint yellow, add an orange paper beak and tiny wings.
- “Fancy brunch” version: Paint white, add a neutral twine bow, and draw minimalist closed eyes (little curved lines).
- “Kid chaos” version: Let kids choose colors, then unify by adding the same ribbon bow to each basket.
Five More DIY Upcycled Easy Easter Crafts (Fast, Cute, and Actually Doable)
If you want a full Easter momentwithout buying a full Easter aislethese mini projects reuse common household items and layer nicely with the hero basket.
Pick one or two, and suddenly your home looks like it owns a glue gun (in a good way).
1) Toilet Paper Roll Bunny Gift Boxes
Turn a paper roll into a tiny “pillow box” for candy, notes, or small toys. Gently press the top of the roll inward on both sides to form a curved flap, then
do the same on the bottom. Decorate the outside with a bunny face, then glue or tape on paper ears. Add a little yarn bow and you’ve got a recycled Easter
favor that looks like it came from a boutiqueif that boutique had a strong commitment to not wasting cardboard.
2) Plastic Egg Garland (Because Those Eggs Multiply Like Gremlins)
If you have plastic eggs from past egg hunts, reuse them as décor instead of buying new garlands. Open the eggs, poke a small hole near the top edge of each
half (adults should handle the poking), and string halves onto twine like colorful little lanterns. Mix in paper bunny silhouettes cut from cereal boxes to add
variety. Hang it on a mantel, across a window, or over a snack tablebecause snacks deserve ambiance.
3) Upcycled Jar Bunny Vase or Treat Jar
Clean an empty jar (pasta sauce, jam, salsano one needs to know your culinary history). Paint the outside in a pastel shade or leave it clear for a modern
look. Cut bunny ears from scrap felt or paper and tape them to the lid or rim. Tie twine around the neck with a tag that says “Hop to it” or “Somebunny loves
you.” Use it as a vase for grocery-store tulips or as a gift jar filled with wrapped candy and mini notes.
4) Egg-Carton “Peep-Inspired” Flowerpot Picks
Cut single cups from an egg carton and paint them bright spring colors. Glue a wooden skewer or a sturdy rolled-paper stick to the back. Nest a plastic egg
inside each cup so it looks like a little chick peeking out. Add a paper beak and tiny feather (or paper feather) on the side. Stick them into potted plants
or herb pots for instant Easter decor that doesn’t require storing a giant inflatable bunny in your closet until next year.
5) Mess-Light Egg Decorating with Scrap Materials
If dye kits stress you out (or you just don’t want blue fingers for three business days), decorate with what you already have: washi tape, stickers, rubber
bands, scrap ribbon, old wrapping paper cut into shapes, or even bits of tissue paper. You can apply these to real hard-boiled eggs, blown-out eggs, or
reusable wooden/plastic eggs. Bonus: it’s easier for younger kids to succeed without the “I dropped my egg in the dye cup” tragedy.
Make Your Upcycled Crafts Look “Polished” Without Trying Too Hard
Pick a palette, not a rainbow
The fastest way to make upcycled Easter decor look cohesive is limiting colors. Choose two pastels plus one neutral (like white, kraft brown, or light gray).
Even if the materials vary (carton + jar + paper roll), the palette ties everything together.
Repeat one detail across projects
Reuse the same twine bow, the same style of drawn eyes, or the same paper flower shape. Repetition reads as “designed,” even if you made it while standing in
the kitchen waiting for toast.
Texture does the heavy lifting
Egg cartons have natural texture. Twine adds rustic texture. Tissue paper adds soft texture. Combine two textures per craft and stop theretoo many textures
can make it look cluttered instead of curated.
Common Mistakes (and Quick Fixes)
- Paint looks streaky: Use two thin coats instead of one thick coat. If you’re using washable paint, let it dry fully before the second coat.
- Ears won’t stand up: Use thin cardboard (cereal box) instead of paper, or fold a small tab at the bottom of each ear before gluing.
- Glue isn’t holding: Roughen glossy surfaces (like some plastic eggs) with gentle sanding (adults only) or switch to double-sided foam tape.
- It looks “too homemade”: Add one clean finishing touch: a simple bow, a crisp outline with a marker, or a single sticker accent.
Kid- and Teen-Friendly Crafting Tips (Safety + Sanity)
Keep it fun and low-pressure. Set up a “materials buffet” (scraps, tape, markers, paper shapes) and let everyone personalize. If an adult can pre-cut ears,
feet, and small shapes, younger crafters can focus on decorating and assembling. Use non-toxic supplies, protect the table, and consider doing painting on
cardboard boxes or newspaper. Also: have wet wipes nearby. This is not pessimism; this is wisdom.
Real-World Crafting Experiences & Lessons Learned (500+ Words)
If you’ve ever hosted a craft sessionat home, in a classroom, or at a community eventyou learn quickly that “easy” is less about the steps and more about
the flow. The most successful DIY upcycled Easter craft ideas share one trait: they let people start fast and finish with something recognizable.
That’s why projects like egg-carton bunnies and paper-roll gift boxes work so well. The base shape is already there, so the crafter isn’t fighting physics.
One common experience: people underestimate drying time. Paint is optimistic; it always looks dry five minutes before it actually is. In group settings, the
best workaround is to build crafts in phases: paint first, then switch to a no-dry activity (cutting paper ears, drawing faces on scrap cardboard, making
little name tags), then return to assembly once surfaces are truly dry. This keeps momentum going and prevents the classic “I touched it and now it has a
fingerprint forever” moment.
Another real-world pattern is “the supply scramble.” Someone always forgets scissors. Someone always wants a color you don’t have. Someone always discovers
glitter. The fix is surprisingly simple: plan for flexible substitutes. No googly eyes? Draw eyes. No ribbon? Use yarn. No cotton balls? Crumple paper and
wrap it with thread. Upcycling is naturally resilient because it’s built on improvisationso the craft stays fun instead of turning into a supply crisis.
In family settings, personalization becomes the whole point. Kids (and plenty of teens) love giving each bunny a different expressionsleepy eyes, surprised
eyes, happy eyes. When that happens, the project turns into storytelling. The “bunny basket” becomes a character: the shy one, the silly one, the one who
“guards the jelly beans.” That imaginative layer is part of why Easter crafting feels like a tradition instead of a chore. The craft is the activity, but the
jokes and the little creative decisions are what people remember.
Crafters also notice that upcycled materials carry nostalgia. Jars from a favorite jam, cardboard from a cereal everyone eats, egg cartons from weekend
breakfaststhese are tiny snapshots of daily life. When they become décor, the final product feels more personal than a store-bought decoration. This is also
why gifting upcycled crafts can land surprisingly well: the gift looks thoughtful, and it’s not “one more thing” someone has to store forever. Many of these
projects are practical (treat jars, place card holders, mini baskets), so they earn their keep.
Finally, one of the best lessons people learn from upcycled Easter crafts is that “cute” isn’t expensiveit’s intentional. A simple palette, a repeated
detail, and a clean finish will make recycled materials look purposeful. In other words: if your bunny’s ears are symmetrical and your bow is tied neatly,
nobody is going to stare at the egg carton and judge your life choices. They’re going to say, “Wait… you made that from what?” and then immediately
start rummaging through their own recycling bin like it’s a craft supply store. That’s when you know your Easter DIY did its job.
Conclusion: A Hoppy Holiday That Doesn’t Create a Heap
The best DIY upcycled easy Easter craft idea is the one you’ll actually makewithout a supply run, without stress, and without turning your home into a glitter
crime scene. Start with the egg-carton bunny “treat tuck” basket, then add one quick extra project like a jar bunny vase or a plastic egg garland. You’ll get
charming Easter décor that’s budget-friendly, kid-approved, and surprisingly stylish for something that began as packaging.