Table of Contents >> Show >> Hide
- Why a Planked Table Top Cover Is Such a Smart DIY
- Before You Start: Pick Your Build Style
- Materials and Tools
- How to Choose the Right Boards (This Matters More Than the Stain Color)
- Safety First (Because Splinters Are Not a Design Feature)
- Step-by-Step: Easy DIY Planked Table Top Over Existing Table
- Step 1: Inspect and Measure the Existing Table
- Step 2: Clean the Existing Table Surface
- Step 3: Dry-Fit and Plan the Plank Layout
- Step 4: Cut Planks to Length
- Step 5: Join the Planks Into a Panel
- Step 6: Add End Pieces or Perimeter Trim (Optional but Popular)
- Step 7: Sand the Whole Top (Yes, All of It)
- Step 8: Stain or Paint the Top
- Step 9: Apply a Protective Topcoat
- Step 10: Let It Cure Before Heavy Use
- Step 11: Install the Top Over the Existing Table
- Common Mistakes to Avoid
- How Much Does This DIY Cost?
- FAQ: Easy DIY Planked Table Top Over Existing Table
- DIYer Experience Notes (Extended Real-World Lessons) 500+ Words
- Conclusion
If your table has seen better days (mystery stains, scratches, and that one dent nobody admits to), you don’t need to replace it. A DIY planked table top over an existing table is one of the easiest ways to get a fresh farmhouse-style or rustic-modern look without buying a whole new piece of furniture. It’s budget-friendly, beginner-friendly, and very satisfyinglike giving your old table a glow-up without the drama.
In this guide, I’ll show you how to build a planked tabletop surface over an existing table using practical, real-world woodworking basics: choosing straight boards, building a clean panel, handling wood movement, sanding and finishing correctly, and avoiding the classic mistakes that turn a weekend project into a “learning experience.” (We’re aiming for “wow, you made that?” not “what happened here?”)
Why a Planked Table Top Cover Is Such a Smart DIY
Building a planked top over an existing table works especially well when the base is still sturdy but the top is ugly, damaged, or outdated. Instead of rebuilding the whole table, you’re basically upgrading the visible surface.
It also gives you flexibility:
- Removable cover style: A “cap” that sits over the original top and can be lifted off later.
- Permanent upgrade style: A planked top attached to the base for a more furniture-like finish.
- Design freedom: Stained wood, painted wood, clear coat, distressed look, smooth modern finish, and more.
The key is choosing the right approach for your table and understanding one important woodworking truth: wood moves. Solid wood expands and contracts with changes in humidity, so your construction method needs to allow for thatespecially on wider tops.
Before You Start: Pick Your Build Style
Option 1: Removable Planked Top Cover (Easiest for Beginners)
This is the easiest method and a great fit for families, renters, or anyone covering a damaged top. You build a planked panel sized to the tabletop and add a perimeter frame or rim underneath so it nests over the existing top. No major surgery on the original table.
Option 2: Permanent Planked Top Upgrade (Best Long-Term Finish)
This looks more like a custom-built table, but you need to attach it properly. If you’re attaching a solid-wood top to a base, use movement-friendly hardware (like figure-8 fasteners or Z-clips) or slotted holes/cleats. Avoid locking the top down in a way that prevents expansion and contraction.
Materials and Tools
Common Materials
- Select pine or other appearance boards (1x boards are popular for this project)
- Wood glue (for bare wood-to-bare wood joints)
- Pocket-hole screws (if using pocket-hole joinery)
- 1×2 or similar boards for perimeter trim/rim (optional but common)
- Wood filler (stainable or paintable, depending on finish)
- Sandpaper (coarse, medium, fine; plus 220–320 for between finish coats)
- Stain or paint
- Topcoat (polyurethane or other furniture finish)
Tools
- Tape measure and square
- Clamp(s)
- Sander (orbital preferred)
- Drill/driver
- Pocket-hole jig (optional but very helpful)
- Saw (miter saw, circular saw with guide, or table saw depending on your setup)
- Tack cloth or clean lint-free cloth
- Brushes/foam applicators for stain and finish
Pro tip: If you’re shopping at a big-box store, inspect boards in person when possible. Straight, flatter boards with fewer knots make this project dramatically easier.
How to Choose the Right Boards (This Matters More Than the Stain Color)
Many DIYers use pine appearance boards because they’re affordable, easy to cut, and easy to stain or paint. “Select” or appearance-grade boards are usually a better fit than rougher construction lumber when the wood will be visible.
Also remember the “nominal vs. actual size” issue: a board sold as a 1×3 is typically not actually 1 inch by 3 inches. That affects your math when planning the width of your tabletop. Measure your actual boards before finalizing cuts so you don’t end up with a last plank that’s 3/8 inch too wide and a stare of regret.
Safety First (Because Splinters Are Not a Design Feature)
Sanding and cutting create wood dust. Work in a well-ventilated area, use dust collection or a shop vac when you can, and wear appropriate eye protection and a respirator/dust mask rated for fine particles. Secure your workpieces before drilling or cutting, and clamp your pocket-hole jig/workpiece rather than trying to hold everything by hand.
If you use chemical strippers (not always needed for this project), follow label directions, wear gloves/eye protection, and work in a well-ventilated space.
Step-by-Step: Easy DIY Planked Table Top Over Existing Table
Step 1: Inspect and Measure the Existing Table
Start by confirming the base is solid. If the legs wobble, fix that first. A beautiful new top on a shaky base is like putting racing stripes on a shopping cart.
Measure and write down:
- Overall tabletop length and width
- Overhang (if any)
- Thickness of the existing top
- Apron placement (important for removable covers and permanent fasteners)
For a removable cover, also measure the exact dimensions needed for the underside rim so it fits snugly over the existing top without binding.
Step 2: Clean the Existing Table Surface
Even if you’re covering it, clean the table so your work surface is free of grease, crumbs, and sticky residue. Basic soap-and-water cleaning and a thorough dry-down are usually enough. You want a clean, flat assembly surface while building the new top.
Step 3: Dry-Fit and Plan the Plank Layout
Lay your boards side by side on the table and decide the order. Flip and rotate boards to balance grain patterns, color variation, and minor crown/cup. This is where the project starts to look real.
Look for:
- Best-looking boards near the center/front edge
- Similar grain direction for easier finishing
- Minimal gaps between planks
Mark the order with painter’s tape or pencil on the underside so you can reassemble quickly after cutting.
Step 4: Cut Planks to Length
Cut all top planks to the same finished length. If you’re adding end caps or breadboard-style ends for appearance, account for those in your measurements. For many beginner-friendly builds, a simple straight plank panel plus perimeter trim is easier and more forgiving than true breadboard joinery.
If you want a removable cover, you can also build a framed “cap” style edge around the top. Just be careful not to create a fit so tight that seasonal swelling makes the cover hard to remove.
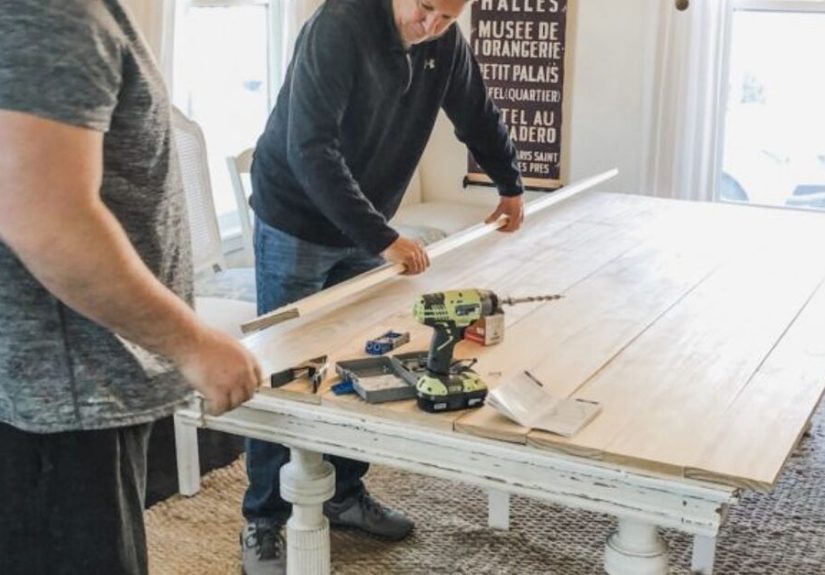
Step 5: Join the Planks Into a Panel
There are a few ways to join planks, but pocket-hole joinery is a common DIY favorite because it’s fast and keeps screws hidden on the underside. A pocket-hole jig helps you drill angled holes, then you pull the boards tight with screws while clamping the seams.
Apply wood glue to bare wood edges only (not painted/sealed surfaces). Clamp the boards so the faces stay flush while driving screws. Wipe excess glue while it’s still wet.
Work one plank at a time and keep checking for flatness. It’s easier to correct a slight misalignment now than to sand a mountain range later.
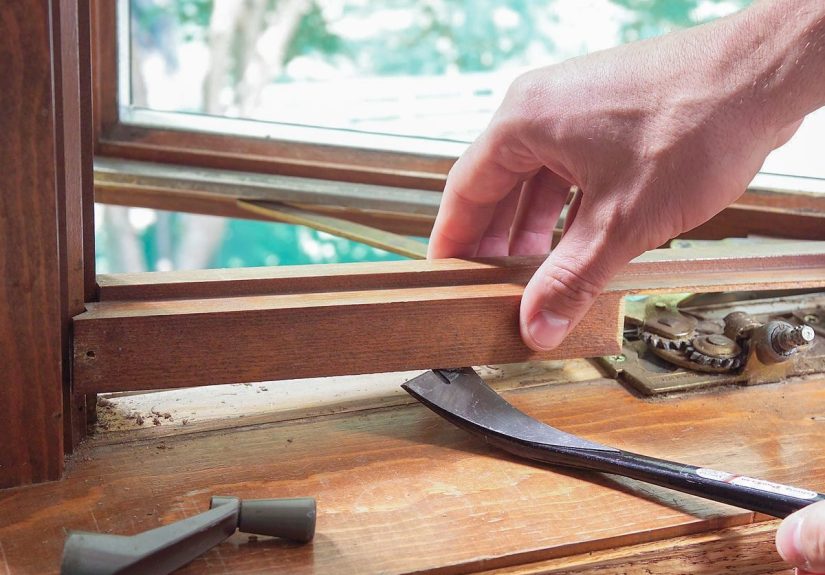
Step 6: Add End Pieces or Perimeter Trim (Optional but Popular)
Many DIY planked tops use trim around the edges to create a finished look and hide the plank ends. This can be purely decorative or part of a removable cover design.
If you’re making a removable cover, add an underside rim or cleats sized to the original top so the cover doesn’t slide around. Test fit before final fastening.
If you’re making a permanent top, avoid gluing a cross-grain end cap in a way that traps movement. Decorative edge trim is fine, but large cross-grain attachments on a solid panel need proper joinery or movement allowance.
Step 7: Sand the Whole Top (Yes, All of It)
Sanding is where a decent project becomes a “wait, you made this?” project. Start with a grit appropriate for your surface (especially if seams are slightly uneven), then work up through medium and fine grits.
Focus on:
- Flattening small height differences at seams
- Softening sharp edges (lightly)
- Removing glue residue before stain (glue spots can block stain)
- Creating a uniform surface so finish looks even
Vacuum thoroughly and wipe with a tack cloth or clean cloth before finishing.
Step 8: Stain or Paint the Top
Choose stain if you want visible wood grain, or paint if you want a cleaner/cottage look. Test your finish on a scrap cut from the same board first. Pine can absorb stain unevenly, so a pre-stain conditioner may help depending on the product and look you want.
Apply finish in thin, even coats and follow the manufacturer’s directions for dry time. Don’t rush this part. The fastest way to ruin a pretty top is to say, “Eh, it’s probably dry.”
Step 9: Apply a Protective Topcoat
A dining or work table needs protection. Polyurethane is a common choice for durability. Apply thin coats, let them dry fully, and sand lightly between coats (many products call for 220 grit; some finishing guidance recommends very light sanding with 320 grit between coats depending on the system and dry stage).
For most family-use tables, multiple thin coats beat one heavy coat every time. Heavy coats are more likely to drip, stay soft longer, and show brush marks.
Step 10: Let It Cure Before Heavy Use
“Dry” and “fully cured” are not the same thing. A topcoat may feel dry enough to touch or lightly use within a day, but it can take much longer to reach full hardness. Treat the table gently at first, avoid dragging heavy objects across it, and give the finish time to toughen up.
Step 11: Install the Top Over the Existing Table
For a removable cover, simply set it in place and confirm the fit. Add felt pads where needed to prevent rubbing and to make removal easier.
For a permanent top, attach it using methods that allow movementfigure-8 fasteners, Z-clips, or slotted holes/cleats. Solid wood should not be rigidly trapped to the base across its width.
Common Mistakes to Avoid
1) Using Crooked Boards Because They Were “Cheap”
You’ll spend more time wrestling warped boards than the money you saved. Pick the straightest boards available.
2) Ignoring Actual Board Dimensions
Nominal sizing is a classic gotcha. Measure actual widths and recalculate your layout before cutting.
3) Gluing Over Painted or Sealed Surfaces
Wood glue bonds best to bare wood. If the edge has finish on it, sand back to clean wood first.
4) Skipping Clamps
Pocket screws help, but clamps keep faces flush and reduce seam mismatch while you drive the screws.
5) Rushing Finish Coats
Sticky topcoats, fingerprints, and cloudiness usually come from impatience. Thin coats + proper dry time = a much nicer result.
6) Forgetting Wood Movement on a Permanent Install
Wood expands and contracts with humidity. If you hard-fix a solid top with no movement allowance, you’re inviting cracks, warping, or split joints later.
How Much Does This DIY Cost?
Cost depends on size, wood species, and finish products, but a basic pine planked tabletop upgrade is often much cheaper than replacing a dining table. A small to medium project can range from “very reasonable weekend DIY” to “still cheaper than that table you liked online.”
Typical cost factors include:
- Board quality (select pine vs. hardwood)
- Whether you already own tools (sander, saw, drill, pocket-hole jig)
- Finish system (stain + topcoat, paint + sealer, etc.)
- Hardware (fasteners, screws, pads)
FAQ: Easy DIY Planked Table Top Over Existing Table
Can I build the top directly on my existing table?
Yesmany DIYers use the existing table as a sizing/assembly surface (with protection underneath). Just be careful not to glue or scratch the original top accidentally.
Is pine good enough for a table top?
Yes, especially for DIY and budget builds. Pine is easy to work with and takes paint/stain well, but it dents more easily than harder woods. A good topcoat helps.
Do I need a pocket-hole jig?
No, but it makes this project faster and cleaner for beginners. You can also use biscuits/dowels/dominoes (if you have the tools) or other joinery methods.
How many coats of polyurethane should I use?
It depends on the product and usage, but multiple thin coats are standard for tabletops. Follow the can directions and allow proper dry time between coats.
Can I make it removable and still sturdy?
Absolutely. A properly sized cover with an underside rim/cleats and a snug (not tight) fit can feel very stable while remaining removable.
DIYer Experience Notes (Extended Real-World Lessons) 500+ Words
One of the most common experiences people have with a planked table top project is realizing that the “easy” part is not the cuttingit’s the planning. On paper, it looks simple: buy boards, screw them together, stain, done. In practice, the boards have opinions. One is a little bowed. One is slightly cupped. One is beautiful but just a hair wider than expected. And suddenly your perfect math becomes “close enough, then trim it flush.” The good news is that this is normal. In fact, the DIYers who end up happiest with the final result are usually the ones who spend extra time dry-fitting boards and rearranging them before making the first hole.
Another real-world lesson is how much difference board selection makes to stress levels. People who grab the first stack of lumber often spend the weekend fighting gaps and twist. People who sort through boards and choose flatter, straighter pieces usually finish faster and with cleaner seams. This is especially true for a planked top over an existing table because the project looks deceptively forgiving. Yes, trim can hide some issuesbut only so much. If the panel itself is fighting you, the whole build feels harder than it should.
Finishing is another area where expectations and reality like to wrestle. A lot of DIYers expect stain to “even everything out,” but stain is more like a spotlightit highlights grain, sanding scratches, glue spots, and uneven prep. The first time someone wipes stain across a panel and sees pale blotches where glue squeezed out, they instantly understand why experienced woodworkers talk so much about cleanup and sanding discipline. The upside? Once you’ve made that mistake once, you almost never make it again. Future-you becomes the person who checks every seam before finishing.
There’s also the very relatable “it looks amazing, can we use it tonight?” moment. Families love to crowd around a newly refinished table, which is sweet and completely unhelpful for curing time. A finish can feel dry and still be soft underneath, and that’s when you get the legendary first scratch from a cereal bowl, toy car, or laptop edge. Many DIYers say the best thing they did was build in a buffer: finish on Friday, admire it on Saturday, use it gently later. Patience here protects all the work you just did.
For removable table-top covers, the most frequent experience note is fit. If the underside rim is too loose, the top shifts. If it’s too tight, seasonal humidity can turn removal into a wrestling match. The sweet spot is snug, centered, and easy to lift with two hands. Many people end up adding felt pads or small bumpers after the first test fit, and that tiny tweak makes the project feel much more custom.
Finally, the biggest emotional payoff of this project is how dramatically it changes a room. DIYers often start because the original table is scratched or outdated, but they finish with something that makes the whole space feel refreshed. The table suddenly becomes a focal point againdinners feel nicer, homework feels less chaotic, and even a messy craft session somehow looks more intentional. That’s the magic of this project: it’s practical, affordable, and surprisingly transformational. Plus, every time someone compliments it, you get to casually say, “Thanks, I built the top myself,” which is objectively one of life’s better sentences.
Conclusion
An easy DIY planked table top over an existing table is one of the best high-impact furniture upgrades for beginners and confident DIYers alike. You can cover damage, improve the look of your space, and create a custom piece without rebuilding an entire table from scratch.
The secret to great results is simple: choose better boards, plan the layout, clamp well, sand carefully, finish patiently, and respect wood movement if the top will be permanently attached. Do that, and your “quick table fix” can end up looking like a custom furniture project.