Table of Contents >> Show >> Hide
- What Is Gelato Gel Stain Art?
- Why Gel Stain Is Perfect for Fall Patio Decor
- Supplies You’ll Need for Gelato Gel Stain Fall Art
- Step-by-Step: How to Create a Fall Patio Decor Piece with Gelato Gel Stain
- Styling Your Gel Stain Art on the Fall Patio
- Common Mistakes and How to Fix Them
- Gelato Gel Stain Art vs. Painted Fall Signs
- 500+ Words of Real-World Experience with Gelato Gel Stain Fall Patio Art
- Conclusion: Your Fall Patio, Only More Artful
If fall had a signature look, it would probably be sunflowers, pumpkins, and something made out of wood. Gelato gel stain art checks all three boxes. It’s rich and cozy like a pumpkin spice latte, but instead of ending up in your stomach, it ends up on your patio wall as a gorgeous DIY fall decor piece you can reuse year after year.
This guide walks you through how to create a Gelato gel stain art panel on wood inspired by popular Hometalk projects: think sunflowers, pumpkins, and rustic lettering stainednot paintedonto a wood board. We’ll cover what Gelato gel stain is, how to work with it, step-by-step instructions, sealing for outdoor use, styling ideas for your fall patio, and real-life tips from DIYers who’ve fallen in love with this technique.
What Is Gelato Gel Stain Art?
Gel stain is a thick, pudding-like wood stain that sits more on the surface rather than soaking deeply into the wood fibers. Popular brands like General Finishes describe their gel stains as “heavy-bodied” products that provide rich, even color and help tame tricky woods like pine or aspen.
Gelato gel stain is a line of colorful gel stains (often associated with Shabby Paints and similar boutique brands) that are designed for creative projects: furniture refinishing, monochromatic art, and detailed designs on wood. DIY bloggers show how a simple plank, a pencil sketch, and Gelato gel stain can turn into sunflower or floral art with subtle shading and depth.
Gelato gel stain art is basically “painting” with stain. Instead of brushing on one flat color, you layer light and dark tones of gel stain to create outlines, shadows, and highlightsalmost like using watercolors, but on wood and with more drama. When you combine this technique with classic fall motifssunflowers, pumpkins, leavesyou get a unique, weather-friendly fall patio decor piece that looks custom and high-end.
Why Gel Stain Is Perfect for Fall Patio Decor
There are plenty of reasons gel stain is a go-to for fall wood decor pieces:
- Rich, cozy color: Gel stains naturally produce deeper, more opaque color than many thin liquid stains, which fits perfectly with fall’s warm, saturated palette.
- More control: Because the stain is thick, it’s less likely to run or drip, so you can create crisp edges around petals, leaves, or letters.
- User-friendly: Many formulas are wipe-on, wipe-off and don’t require sprayers or complex setups, making them ideal for DIYers who want pro results with basic tools.
- Versatile surfaces: Gel stain can help even out blotchy woods like pine and give budget-friendly boards a more expensive look.
- Outdoor-friendly when sealed: Paired with an appropriate exterior topcoat, your artwork can stand up to sun and moisture on a covered patio.
The result is a piece of art that feels like it belongs outside in crisp air, surrounded by mums, plaid blankets, and string lights.
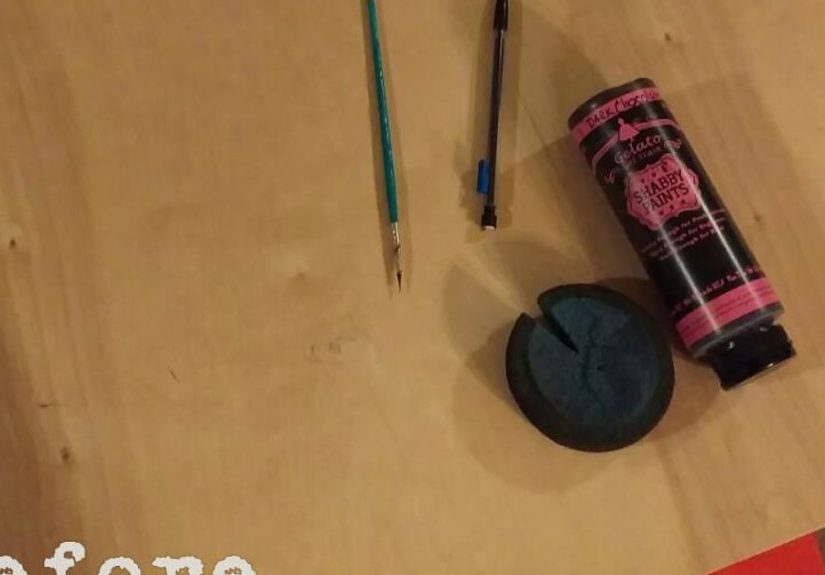
Supplies You’ll Need for Gelato Gel Stain Fall Art
You can customize the exact colors, but here’s a solid starter list:
- One smooth wood board or panel (pine, poplar, or plywood, cut to your desired size)
- Sandpaper (120 and 220 grit)
- Gelato gel stain in several shades (for example: golden/yellow for sunflowers, warm brown for stems, orange for pumpkins, deep espresso or walnut for background shadows)
- Disposable gloves and lint-free rags
- Small artist brushes or foam brushes for detail work
- Pencil and eraser (or transfer paper) for sketching your design
- Painter’s tape or stencils for lettering (optional)
- Exterior-grade clear topcoat (spar urethane or an exterior water-based topcoat rated for vertical outdoor surfaces)
- Drop cloth or plastic to protect your workspace
Many creators use inspiration photos of sunflowers, pumpkins, or fall porch signs when sketching. Pinterest boards featuring the original “Gelato Gel Stain Art – A Fall Patio Decor Piece on Wood” show tall sunflowers and pumpkins arranged in a rustic, vertical layout that suits porch or patio spaces.
Step-by-Step: How to Create a Fall Patio Decor Piece with Gelato Gel Stain
1. Prep and Sand Your Wood
Start with the unglamorous but essential part: surface prep. Lightly sand your board with 120-grit sandpaper to remove rough spots, then follow with 220-grit for a smooth finish. DIY stain artists often recommend a fine final sanding before applying stain to help it glide on and reduce scratch marks.
Wipe away dust with a tack cloth or a damp rag and let the board dry fully.
2. Plan and Sketch Your Design
Fall designs that work especially well for gel stain art include:
- A row of sunflowers along the bottom edge, with tall stems reaching up
- A cluster of pumpkins in the foreground with leaves and vines trailing out
- Hand-lettered phrases like “Hello Fall,” “Gather,” or “Pumpkin Patch” arched across the top
Lightly draw your design with pencil directly on the wood. Don’t worry if it’s not perfectgel stain is forgiving, and you can deepen or soften lines as you go.
3. Base Layer: Light Tones First
Gel stain behaves differently from paint. Instead of brushing on a thick, opaque coat, you’ll often apply a small amount and blend it out. Many pros suggest starting with your lightest tones and gradually building darker shades, just like in stencil or shading tutorials.
Use a soft cloth or foam brush to apply light golden or tan stain to the sunflower petals and pumpkin shapes. Work in small sections, wiping and blending quickly. If things look too dark, immediately soften them with a clean rag.
4. Add Shadows and Details with Darker Gel Stain
Once your base layer is dry to the touch, you can add darker shades to create depth:
- Use a small artist brush dipped in espresso or walnut gel stain to trace petal edges, sunflower centers, and the ridges of pumpkins.
- Dab a tiny amount of stain on the brush, then offload extra onto a paper towela classic “dry brush” move that prevents bleed-under and gives you control.
- Blend shadows outward with a rag to soften harsh lines.
Think of this as “stain sketching.” You’re building up layers of translucent color, and each pass adds richness.
5. Create a Background Wash
To make your design pop, you can add a thin wash of neutral stain behind the art:
- Choose a medium brown or gray tone.
- Apply in long, horizontal strokes, working around your floral and pumpkin shapes.
- Wipe off excess quickly so the background remains subtle and your main design stays front-and-center.
This creates the look of aged barn wood or a rustic porch sign without hiding the natural grain.
6. Add Lettering (Optional)
If you want words on your piece, there are two main approaches:
- Stencil + Gel Stain: Tape down a stencil and use a small foam brush or stencil brush with a minimal amount of gel stain. Offload most of it first, then dab gently over the stencil. This method is recommended in recent gel stain stenciling guides to avoid bleed-through.
- Freehand Lettering: Lightly sketch letters with pencil and follow the lines with a small brush and darker stain.
Simple block or vintage serif fonts complement rustic fall themes especially well.
7. Let It Cure and Seal for Outdoor Use
Follow the dry times on your specific gel stain label. Many oil-based gels need several hoursor even overnightbefore you apply a topcoat. Once completely dry, seal your artwork with an exterior-rated clear finish designed for vertical surfaces, such as a water-based exterior wood stain topcoat or spar urethane.
Apply two to three thin coats, lightly sanding between coats if recommended. This helps your fall patio piece resist moisture, UV rays, and general outdoor wear.
Styling Your Gel Stain Art on the Fall Patio
Now for the fun partdecorating.
DIY fall sign roundups show that mixing materialswood, metal, fabric, and greenerycreates the most welcoming porch or patio displays. Here are a few ways to style your Gelato gel stain art:
- Layer it: Lean the panel behind a cluster of pumpkins, lanterns, and a crate or two. The stained art becomes the “backdrop” of your vignette.
- Frame your door: Hang the piece beside your patio or back door, then add a wreath and a coir doormat for a full entryway look.
- Mix in plants: Pair the warm wood tones with potted mums, ornamental cabbage, or dried wheat for a rich, layered fall look.
- Add lighting: String fairy lights or place LED candles around the display so your sunflower and pumpkin art glows at dusk.
The beauty of gel stain art is that it reads as customno one else will have the exact same grain, shading, or layout as your piece.
Common Mistakes and How to Fix Them
Blotchy or Uneven Stain
Blotchiness often comes from too much stain in one pass or uneven sanding. To rescue it:
- Let the stain dry completely.
- Lightly sand the blotchy areas with a fine grit, then apply a thin, blended layer of stain to even it out.
- In extreme cases, lightly restain the whole area with a slightly darker tone to make the variation look intentional.
Bleed-Under at the Edges
If stain creeps under a stencil or along a pencil line, don’t panic. You can:
- Sharpen edges with a darker outline using a fine brush.
- Blend small mistakes outward into a shadow.
- Lean into the organic, painterly lookstain art rarely looks like crisp vinyl and that’s part of the charm.
Outdoor Wear and Fading
Even the best topcoat will eventually show wear outside. To keep your Gelato gel stain art looking fresh:
- Display it on a covered or partially shaded patio when possible.
- Wipe down dust and dirt before storing at the end of the season.
- Plan on adding a fresh clear coat every year or two if your climate is harsh.
Gelato Gel Stain Art vs. Painted Fall Signs
Should you just paint your fall sign instead? You couldbut gel stain art has a unique personality:
- Depth of grain: Gel stain enhances the wood grain rather than covering it completely, which gives your sunflowers and pumpkins a warmer, more natural look.
- Subtle imperfections: Slight variations in color, small streaks, and knots become features instead of flaws.
- Upscale vibe: Many upcycled furniture pieces use gel stain to mimic high-end wood finishes, and that same richness translates beautifully to wall art and signs.
Paint is still great for bright pops of color or super-graphic designs, but for cozy fall elegance, gel stain is hard to beat.
500+ Words of Real-World Experience with Gelato Gel Stain Fall Patio Art
Reading instructions is helpful, but what really builds confidence is hearing how this kind of project actually feels in real life. DIYers who have worked with Gelato gel stain art on wood often share similar experiencesfull of small surprises, happy accidents, and “oh wow” moments when the clear coat goes on and everything suddenly looks finished.
One common theme is how different gel stain feels from regular paint. At first, many people instinctively want to slather it on like acrylics. After a few minutes of battling drips and heavy patches, they realize the secret is using less product. A tiny dab on a rag or brush goes a long way. Once you adjust to that, the process becomes almost meditative: dip, offload, glide, blend, repeat.
Another frequently mentioned experience is the “grain surprise moment.” When you first start staining, especially with a lighter color, you might not see much happening. The wood looks damp and a bit muddy. But as the stain settles and you wipe away the excess, the grain starts to pop through. On fall patio pieces with sunflower designs, that grain can add unexpected movementpetals look like they’re catching the light, and pumpkin ridges feel more dimensional than they did in pencil.
Many crafters also talk about the emotional payoff of layering. The first pass with a light golden or tan stain can look flat; you might even think, “Well, that’s underwhelming.” But when you come back with a deeper espresso or walnut stain and start feathering in shadows around the flower centers, leaf veins, and pumpkin curves, the design suddenly takes on depth. The project goes from “cute” to “Oh, this could actually hang in a shop window.”
There’s typically at least one moment of minor panic: a smear of dark stain where it doesn’t belong, a stencil edge that bled, or a sunflower center that turned almost black. Fortunately, gel stain art is surprisingly forgiving. Because you’re working in layers, you can often rescue mistakes by lightly sanding, softening the area with a rag, or turning a blob into a shadow. A stray smudge at the base of a sunflower stem might become a darker soil patch. A too-dark pumpkin line may turn into a shaded groove that makes the pumpkin look more realistic.
People who have tried Gelato gel stain for fall patio decor also mention the satisfaction of the final sealing step. After hours of staining and waiting for everything to dry, brushing on that first coat of clear finish can feel magical. Colors deepen, the grain sharpens, and the artwork suddenly looks professionally done. On sunflowers and pumpkins, the glow can be especially dramatic, making the yellows and oranges look almost lit from within when the afternoon sun hits the panel on the patio.
On the practical side, a lot of DIYers report that planning for outdoor durability changes how they work. Knowing the piece will live outside convinces many to keep the design slightly bolder than they would for indoor art. Petals are a bit larger, lettering is thicker, and colors are a shade richer so the design still reads clearly from a distance and in changing light. For fall patio use, that extra contrast pays offneighbors can admire your handiwork from the sidewalk without squinting.
There’s also a lifestyle angle: once people complete one Gelato gel stain patio piece, they often start seeing possibilities everywhere. A scrap of fence board becomes a vertical “Welcome Fall” sign. An old cabinet door becomes a sunflower and pumpkin panel for the deck. A leftover piece of plywood transforms into a rustic sign that leans against a planter by the front steps. The technique is addicting because the investment is lowmostly time and a few shades of stainand the payoff is a custom, high-impact piece of seasonal decor.
Finally, many creators mention the simple joy of bringing art outdoors. A fall patio decorated with plants and pillows is lovely on its own, but adding a handmade gel stain art panel introduces a personal signature. When guests walk in and ask, “Where did you buy that sign?” there’s nothing more satisfying than replying, “Actually, I made itwith gel stain.”
Conclusion: Your Fall Patio, Only More Artful
Gelato gel stain art lets you combine the warmth of wood, the richness of stain, and the coziness of fall imagery into one standout patio decor piece. With some basic supplies, a bit of practice in layering light and dark tones, and a good exterior sealer, you can create a sunflower-and-pumpkin masterpiece that returns to your patio every autumn.
Whether you’re customizing a small sign for a balcony or a tall panel for a spacious porch, the process is approachable, creative, and seriously fun. And once you’ve finished one Gelato gel stain fall patio piece, don’t be surprised if your scrap wood stash starts looking like a gallery waiting to happen.