Table of Contents >> Show >> Hide
- 1) Know Your Grill: Gas vs. Charcoal vs. Pellet (and Why It Matters)
- 2) The Must-Have Tools (Skip the Gadget Drawer of Regret)
- 3) The Big Idea: Direct Heat vs. Indirect Heat (aka “Sear” vs. “Roast”)
- 4) Preheat, Clean, Oil: The 3-Step Ritual for Better Grilling
- 5) Heat Control Without Panic: Lids, Vents, and the “Don’t Chase the Flames” Rule
- 6) Food Safety Basics (Because “Probably Fine” Is Not a Temperature)
- 7) Flavor 101: Salt, Smoke, Marinades, and Why Your Food Shouldn’t Taste Like “Heat”
- 8) Practical Examples: How to Grill Common Foods Without Stress
- 9) Troubleshooting: Fix the Most Common Grilling Problems
- 10) Safe Setup and Shutdown (Quick, Important, and Not Buzzkill)
- Grilling Experiences: Real-World Lessons That Make You Better (Extra Notes)
- Conclusion: Your Simple Grilling Blueprint
Grilling is one part cooking, one part science, and one part “why is my eyebrow missing?” (Kidding. Mostly.)
The good news: you don’t need a culinary degree or a backyard the size of Texas to grill well. You just need a
few fundamentalsheat control, smart prep, and a tiny bit of patienceso your food comes off juicy, flavorful,
and not mysteriously charcoal-adjacent.
This guide walks you through the real-world basics: choosing a grill style, setting up direct vs. indirect heat,
nailing doneness with a thermometer, avoiding common mistakes, and building confidence with simple examples
(burgers, chicken, steak, veggies). Let’s turn “I hope this is cooked” into “I meant to do that.”
1) Know Your Grill: Gas vs. Charcoal vs. Pellet (and Why It Matters)
Gas grills: fast, convenient, and great for weeknights
Gas is the “press-button, dinner happens” option. It preheats quickly, makes heat adjustments easy, and is ideal
for frequent grilling. The trade-off is flavor complexity: you’ll still get that grilled taste, but less of the
smoky character you’d get from charcoal or wood.
Charcoal grills: maximum flavor, slightly more effort
Charcoal delivers a deeper, smoky flavor and that classic high-heat sear. It also teaches you heat management
fasterbecause charcoal doesn’t respond to knob-turning. You control heat by arranging coals, managing airflow,
and using zones. Once you learn it, you’ll feel like you can grill on a desert island with two rocks and sheer
determination.
Pellet grills: steady heat and gentle smoke
Pellet grills excel at steady temperature control with a mild, consistent smoke profile. They’re fantastic for
longer cooks and “set-it-and-check-it” grilling, though they may not sear as aggressively as charcoal unless they
have a dedicated sear feature.
Bottom line: all of them can cook great food. Your results depend more on technique than on grill price tags.
2) The Must-Have Tools (Skip the Gadget Drawer of Regret)
You can grill with very little, but a few tools make it safer, easier, and tastier:
- Instant-read thermometer: The fastest path to consistent doneness.
- Long tongs: Your hands should not be “close enough to feel the heat.”
- Stiff grill brush or scraper: Clean grates = less sticking and better flavor.
- Chimney starter (for charcoal): Lights coals efficiently without relying on lighter fluid.
- Sheet pan + bowl setup: One for raw food, one for cookedavoids cross-contamination mistakes.
- Heat-resistant gloves: Optional, but very helpful when adjusting grates or moving hot items.
3) The Big Idea: Direct Heat vs. Indirect Heat (aka “Sear” vs. “Roast”)
Direct heat
Direct grilling means cooking right over the heat source. It’s best for quick-cooking foods: burgers, hot dogs,
thin steaks, skewers, vegetables, shrimp. Think: fast, hot, and delicious.
Indirect heat
Indirect grilling means the food sits away from the flames/coals, cooking with circulating hot airlike an outdoor
oven. It’s best for thicker or bone-in cuts (chicken pieces, pork chops, ribs, roasts) that need time to cook
through without burning on the outside.
Two-zone grilling: the skill that fixes 80% of beginner problems
Two-zone grilling gives you a hot “sear zone” and a cooler “finish zone.” You sear for color and flavor, then move
food to indirect heat to finish gently. It’s like having a gas pedal and a brakesuddenly everything feels under
control.
How to set up two-zone grilling on a gas grill:
- Preheat with all burners on high.
- Turn one side to medium/high (direct zone) and the other side to low or off (indirect zone).
- Cook thicker items mostly on indirect; use direct only for searing and crisping.
How to set up two-zone grilling on a charcoal grill:
- Bank lit coals on one side of the grill (direct zone).
- Leave the other side coal-free (indirect zone).
- Sear over coals, then slide food to the cool side and cover with the lid to finish.
4) Preheat, Clean, Oil: The 3-Step Ritual for Better Grilling
If grilling had a secret handshake, this would be it. Most sticking, tearing, and “why is it glued?” moments are
solved here.
Step 1: Preheat properly
Give the grill time to heat up. A properly heated grate helps food release more easily and cooks more evenly.
Rushing preheat is like trying to toast bread with a flashlight.
Step 2: Clean the grate (while it’s hot)
Brush or scrape off debris after preheating. Hot grates clean more easily, and old residue can make new food taste
bitter.
Step 3: Oil the grate (lightly)
Instead of dumping oil onto food like a waterfall, lightly oil the grate. Use a folded paper towel dipped in a
little oil and hold it with tongs. “A little goes a long way” is not just life advicehere it prevents flare-ups.
5) Heat Control Without Panic: Lids, Vents, and the “Don’t Chase the Flames” Rule
Use the lid like a tool, not a decoration
Lid open = more oxygen and less trapped heat (good for quick sears). Lid closed = more even heat and convection
(great for thicker cuts and indirect cooking). If you’re cooking something that needs time, closing the lid makes
the grill behave more like an oven.
Charcoal vents: your temperature steering wheel
More airflow = hotter fire. Less airflow = cooler fire. Adjust in small increments and give changes a few minutes
to show results. Constantly fiddling with vents every 12 seconds is how you turn grilling into a dramatic mini-series.
Flare-ups happenyour job is to manage them
Flare-ups usually come from fat dripping onto flames. Don’t spray everything with water like it’s a kitchen fire
drill. Instead:
- Move the food to the indirect zone for a moment.
- Close the lid briefly to reduce oxygen (on many grills, this calms flames).
- Trim excess fat and avoid over-oiling.
6) Food Safety Basics (Because “Probably Fine” Is Not a Temperature)
Keep food out of the “danger zone”
Bacteria grow quickly between 40°F and 140°F. Don’t leave perishable foods sitting out for more than
2 hoursor 1 hour if it’s very hot outside (above 90°F). That includes trays of raw
burgers, creamy salads, and the “I’ll just leave it on the counter” marinade situation.
Separate raw and cooked like it’s a rule of nature
Use separate plates and utensils for raw and cooked meats. If you put cooked chicken back on the plate that held
raw chicken, you just invited the wrong guests to dinner.
Use a thermometerand aim for safe minimum internal temperatures
Color and “juices run clear” are not reliable. A thermometer removes the guesswork. Insert it into the thickest
part of the meat, avoiding bone and big fat pockets.
| Food | Safe Minimum Internal Temp | Notes |
|---|---|---|
| Chicken & turkey (all parts) | 165°F | Measure in the thickest part; don’t rely on color. |
| Ground beef (burgers) | 160°F | Especially important for thicker burgers. |
| Steaks, chops, roasts (beef/pork/lamb) | 145°F | Let rest at least 3 minutes before slicing. |
| Fish | 145°F | Fish should be opaque and flake easily. |
7) Flavor 101: Salt, Smoke, Marinades, and Why Your Food Shouldn’t Taste Like “Heat”
Salt early (when it makes sense)
For steaks and thicker cuts, salting ahead of time (even 40 minutes to overnight) can improve seasoning and texture.
For quick cooks like burgers, salting right before grilling is often best so you don’t draw out moisture too early.
Marinades vs. dry rubs
- Marinades add surface flavor and can help with browning, but don’t “soak flavor to the center” in a short time.
- Dry rubs build a flavorful crustespecially on chicken, pork, and thicker steaks.
- Sauces with sugar burn easily. Apply near the end, not at the beginning.
Smoke flavor: simple wins
On charcoal, add a small chunk of hardwood (like oak or hickory) near the coals. On gas grills, a smoker box or foil
packet can add gentle smoke. Keep it modesttoo much smoke can taste harsh and overwhelm the food.
8) Practical Examples: How to Grill Common Foods Without Stress
Burgers: juicy, browned, and not squished
- Preheat grill and set up a two-zone fire.
- Form patties gently; press a small dimple in the center to reduce puffing.
- Season just before grilling.
- Sear over direct heat, flip once when the first side releases easily.
- Move to indirect if needed to finish; cook to 160°F for ground beef.
- Resist the urge to smash them flat “to speed things up.” That’s how you speed-run dryness.
Chicken thighs (beginner-friendly and forgiving)
- Pat dry; season with salt, pepper, and a rub (paprika + garlic powder works nicely).
- Sear skin-side down over direct heat until browned.
- Move to indirect heat, close the lid, and cook until 165°F.
- Rest a few minutes before serving.
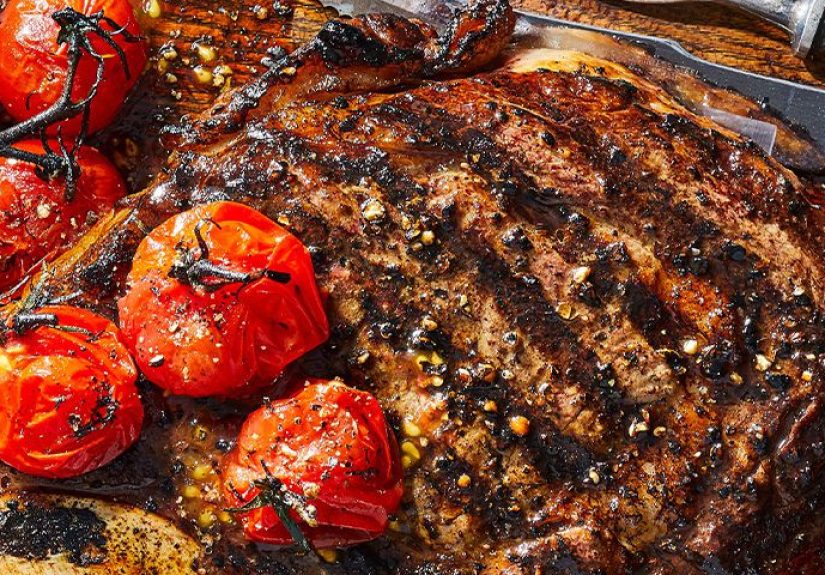
Steak: the two-zone “sear then finish” method
- Preheat grill; create a hot direct zone and a cooler indirect zone.
- Sear the steak over direct heat for a flavorful crust.
- Move to indirect heat to reach your target temperature (145°F is the safe minimum for whole cuts).
- Rest at least 3 minutes before slicing so juices redistribute.
Vegetables: quick char, big flavor
Toss sturdy vegetables (peppers, zucchini, onions, asparagus) with a little oil, salt, and pepper. Grill over direct
heat until lightly charred and tender-crisp. If pieces are small, use skewers or a grill basket so they don’t take a
dramatic trip into the fire.
Fish: keep it simple and don’t fight it
Use thicker fillets when possible and oil the grate well. Grill over medium heat. Flip carefully when it releases,
and cook to 145°F. If you’re nervous, grill fish in a basket or on a piece of foil with vents poked for airflow.
9) Troubleshooting: Fix the Most Common Grilling Problems
“My food sticks to the grill!”
- Preheat longer.
- Clean and lightly oil the grate.
- Don’t flip too earlyfood often releases when it’s properly seared.
“Outside burned, inside raw.”
- Use indirect heat to finish thick foods.
- Lower the direct heat slightly and cook with the lid closed.
- Rely on a thermometer, not vibes.
“Everything tastes dry.”
- Stop overcooking: check temperature earlier than you think.
- Rest meats before slicing.
- Choose forgiving cuts (chicken thighs) while learning.
10) Safe Setup and Shutdown (Quick, Important, and Not Buzzkill)
- Place grills a safe distance from structures and anything flammable (decks, siding, overhangs).
- Keep kids and pets well away from the grilling zone.
- Open the gas grill lid before lighting.
- After cooking, turn off burners (gas) or close vents to reduce airflow (charcoal) and let coals cool fully.
If you’re under 18, grill with a responsible adult. Fire is a great teacher, but it’s a terrible babysitter.
Grilling Experiences: Real-World Lessons That Make You Better (Extra Notes)
People usually learn grilling in the most honest way possible: by doing it, messing up one thing, and then never
forgetting that one thing again. One common early experience is the “too-hot honeymoon,” where you crank the heat
to maximum because you want a great searthen you realize the outside is sprinting toward blackened while the inside
is still filing paperwork. The fix is almost always the same: two-zone grilling. Once you’ve moved a piece of chicken
to the indirect side and watched it calmly finish cooking without drama, your whole approach changes. Suddenly,
grilling feels less like an emergency and more like a plan.
Another rite of passage is the “sticky tragedy.” You put a beautiful piece of food on the grate, flip too soon, and
half the crust stays behind like it’s paying rent. Most grillers remember that moment foreverand it’s exactly why
preheating, cleaning, and lightly oiling the grate becomes a ritual. The other half of that lesson is patience:
properly seared food often releases on its own. When it’s ready, it lets go. When it’s not ready, it clings to the
grate like a toddler at daycare drop-off.
Then there’s the great thermometer awakening. Many people start out “checking doneness” by cutting into meat,
pressing it, or staring at it intensely like it owes them answers. Eventually, someone serves a chicken breast that
is both dry and somehow still suspicious, and the thermometer enters the story as the hero. The first time you nail a
burger’s doneness or pull chicken at the right moment, you realize grilling isn’t a guessing gameit’s a measurement
game. The confidence boost is real: you stop hovering, stop panic-flipping, and start cooking with intent. Your food
improves, and your stress level drops about 40% overnight.
Flare-ups are another classic experience. At first, a sudden flame feels like failure. Later, it feels like feedback:
“Hey, that’s a lot of fat dripping right now.” Grillers learn to keep a cooler zone ready, to trim excess fat, and to
avoid over-oiling. They also learn that water isn’t always the solutionmoving the food and controlling oxygen is
often smarter than turning your cookout into a steam situation. Over time, flare-ups become less scary and more like a
momentary plot twist you know how to handle.
Finally, there’s the social side of grilling: timing food so everyone eats together. Beginners often finish items at
random, resulting in one person eating hot food while everyone else eats “soon.” Experienced grillers stage the cook:
start thick, slow items first on indirect heat, then grill quick items later on direct heat. They rest meats while
vegetables finish. They keep food safe and out of the temperature danger zone. And they learn that the best “secret
sauce” is usually not a sauce at allit’s a calm plan, a thermometer, and the humility to give food a minute to rest
before slicing. Grilling becomes less about showing off and more about sharing something that tastes greatwithout
anyone needing to ask, “Is this done?”
Conclusion: Your Simple Grilling Blueprint
Grilling basics come down to a few repeatable habits: preheat, clean, and oil the grate; cook with two heat zones;
use the lid for thicker foods; check doneness with a thermometer; and follow smart food safety practices. Start with
forgiving foods (burgers and thighs), then level up to steaks, fish, and bigger cuts as you get comfortable. The goal
isn’t perfectionit’s consistency. And once you have consistency, you can get fancy on purpose.