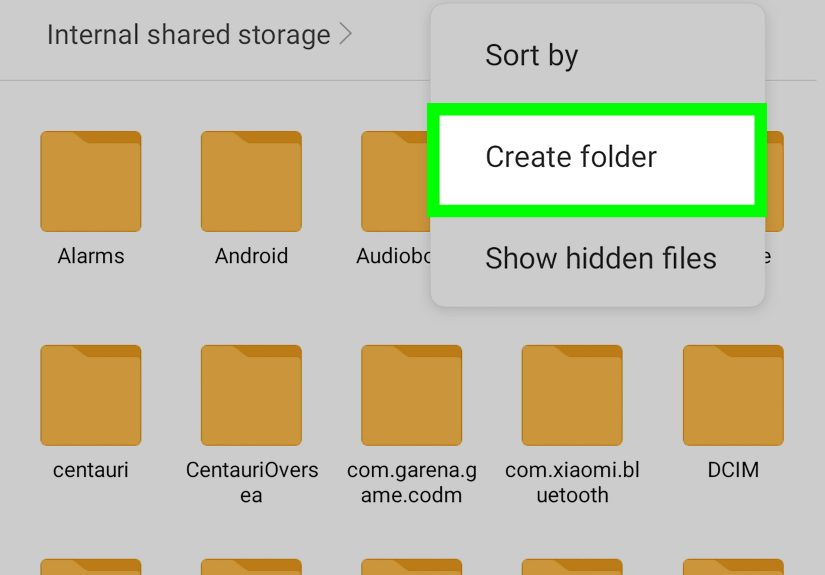
Table of Contents >> Show >> Hide
- Why Nursery Closet Shelving Is Worth Building
- Start With a Plan, Not a Power Tool
- Choose the Best Nursery Closet Shelving Style
- Best Materials for Nursery Closet Shelves
- How To Build Nursery Closet Shelving Step by Step
- A Smart Nursery Closet Layout Example
- Nursery Closet Safety Tips You Should Not Ignore
- Common Mistakes To Avoid
- Budget-Friendly Ways To Make It Look Custom
- Conclusion
- Real-Life Experiences and Lessons From Building Nursery Closet Shelving at Home
- SEO Tags
A nursery closet starts out looking innocent enough. A few tiny onesies, a pack of swaddles, maybe one adorable hat that your baby will wear exactly once before launching it into another dimension. Then, somehow, the space fills with diapers, backup diapers, next-size-up outfits, blankets, wipes, books, shoes the size of sandwich crackers, and enough baby gear to make you wonder whether you accidentally opened a very small department store.
That is exactly why building nursery closet shelving is one of the smartest home projects you can take on. It helps you use every inch of space, keeps daily essentials easy to reach, and gives your nursery a clean, custom look without the price tag of a high-end closet company. Better yet, a well-planned shelving setup can adapt as your child grows. Today it holds burp cloths and sleepers. Tomorrow it handles toys, bins, school clothes, and the mysterious mountain of tiny socks that never seem to match.
This guide will walk you through how to build nursery closet shelving in your home with a practical layout, realistic materials, beginner-friendly steps, and design ideas that actually make family life easier. No fluff. No fake perfection. Just a useful project that looks great and works hard.
Why Nursery Closet Shelving Is Worth Building
Standard closets are usually not designed for baby storage. A single rod and one lonely shelf might work for a college student with three hoodies and a dream, but it is rarely enough for a nursery. Babies need categories, not chaos. You need zones for clothing, diapers, bedding, seasonal gear, and the next size up. Otherwise, everything ends up in random piles, and you spend precious time digging around for a clean sleep sack at 2 a.m. while negotiating with your own sanity.
Custom nursery closet shelving fixes that problem by turning vertical wall space into usable storage. Open shelves let you see what you have. Adjustable shelves let you rework the layout when baby clothes get longer and toy bins get bigger. A mix of hanging rods, shelves, and baskets keeps the closet flexible instead of forcing one rigid setup forever.
In short, this project does not just make a nursery prettier. It makes the room function better every single day.
Start With a Plan, Not a Power Tool
Before you cut a single board, figure out what the closet needs to hold. This is the step people skip right before they end up building shelves that are beautiful, sturdy, and completely wrong for real life.
Take Inventory of What You Actually Need to Store
Make a quick list of the things that belong in the nursery closet. In most homes, that includes:
- Everyday baby clothes
- Clothes in the next size up
- Blankets, sheets, and swaddles
- Diapers and wipes
- Shoes and accessories
- Toys and books
- Seasonal items like jackets, hats, or sleep sacks
- Bulk supplies you do not need every hour of every day
Now think one step ahead. Babies grow quickly, and nursery storage should grow with them. Shelving that works only for newborn clothes will feel outdated faster than a banana on the dashboard in July.
Measure the Closet Carefully
Measure the width, depth, and floor-to-ceiling height of the closet. Then measure it again, because optimism is not a measuring tool. Also note baseboards, door trim, and anything else that can affect the fit of your shelves.
If you are building around closet rods, remember that hanging clothes need enough depth to clear the back wall. In many reach-in closets, around 24 inches of depth is the practical minimum for hanging garments comfortably. If your closet is deeper, great. If it is shallower, your design may need to rely more on shelves, bins, and narrower storage zones.
Think About the Door Swing and Daily Access
It is easy to design a beautiful shelving plan on paper and then realize the closet doors block half of it in real life. Make sure your layout allows you to open bins, slide baskets, and reach shelves without wrestling the door every morning.
Choose the Best Nursery Closet Shelving Style
There is more than one good way to build nursery closet shelving. The right option depends on your budget, skill level, and whether you want the space to stay flexible.
Option 1: Wood Shelves on Cleats
This is a classic DIY method. You attach wood cleats to the side and back walls, then rest shelf boards on top. It is affordable, sturdy, and straightforward for beginners. It also gives you that clean built-in look that makes people say, “Wow, did you hire someone?” which is always fun when the answer is “Nope, just me and a drill.”
Wood cleat shelving is a great choice if you want fixed shelves for folded clothes, baskets, and decor.
Option 2: Adjustable Track Shelving
A track system uses vertical standards and adjustable brackets. This style is smart for nurseries because your storage needs will change. Today you may want lower shelves for diapers. Later, you may want taller openings for toy bins or books. Adjustable systems are especially helpful if you like the freedom to rearrange without rebuilding the whole closet.
Option 3: A Hybrid Layout
For many homes, the best answer is a hybrid design: one or two fixed wood shelves for structure and visual polish, plus adjustable shelves or a hanging rod below. This gives you the custom look of a built-in with the flexibility of a more modular system.
Best Materials for Nursery Closet Shelves
You do not need exotic materials or a contractor-grade workshop to build a great closet. You just need to match the material to the job.
Good Material Choices
- 3/4-inch cabinet-grade plywood: strong, reliable, and ideal for a built-in look
- Pine boards: affordable and easy to work with
- Melamine: smooth and easy to clean, though heavier and trickier to cut cleanly
- MDF: budget-friendly for lighter-duty shelving, but not the best choice for heavy loads
If you plan to store mostly baby clothes, blankets, baskets, and diapers, you do not need industrial-grade lumber. But if you are loading shelves with bulk boxes, heavy storage bins, or large keepsake containers, step up to sturdier materials.
Common Tools You May Need
- Tape measure
- Stud finder
- Level
- Drill/driver
- Circular saw or miter saw
- Screws and wall anchors
- Shelf brackets or wood cleats
- Sandpaper
- Primer and paint
- Safety glasses and dust mask
How To Build Nursery Closet Shelving Step by Step
Step 1: Empty and Prep the Closet
Remove the old rod, existing shelf, and any hardware you are not keeping. Patch holes, sand rough spots, and paint the walls before the new shelving goes in. Painting afterward is possible, but it is about as enjoyable as putting together a stroller with no instructions.
Use a stud finder and mark every wall stud. This matters. Shelves loaded with bins and supplies need real support, not hopeful vibes and drywall alone.
Step 2: Mark Your Layout on the Wall
Use painter’s tape or pencil lines to mock up the design directly on the wall. This helps you see the layout before you commit.
For a practical nursery setup, many homeowners do well with:
- One full-width top shelf for less-used items
- One section with double hanging rods for baby clothes
- One section with adjustable shelves for bins, folded clothes, and supplies
- A lower zone for baskets or a hamper
Shelves for folded clothing often work well when spaced about 12 inches apart vertically. That spacing keeps stacks neat without wasting height. If you are adding shoe shelves later, those can be closer together.
Step 3: Cut the Cleats or Install the Vertical Standards
If you are building fixed wood shelves, cut your cleats to length and attach them to the marked lines. Use a level every time. Crooked nursery shelves will not technically ruin your life, but they will annoy you forever.
Drive screws into studs wherever possible. If you are using an adjustable track system, install the hang track and standards according to the manufacturer’s directions, keeping the vertical components properly aligned and securely fastened. For many light- to medium-duty shelf systems, brackets or standards are commonly spaced no more than about 24 inches apart, with closer spacing for heavier loads.
Step 4: Cut the Shelf Boards
Cut your shelf boards to match the closet width and chosen shelf depth. In many standard reach-in closets, shelves around 12 inches deep are a strong, practical starting point. Deeper shelves can work too, especially in larger closets, but be careful not to create a dark cave where the things in back vanish for six months.
Dry-fit each shelf before painting or finishing. Walls are famous for pretending to be square until you try to install something.
Step 5: Sand, Prime, and Paint
Sand every exposed edge. Prime raw wood or MDF. Then paint the shelves and supports in a durable finish that is easy to wipe clean. White is popular because it makes a small nursery closet look bigger and brighter, but soft greige, pale sage, or warm ivory can look more custom if they fit your nursery style.
If you use plywood, consider edge banding or trim for a more finished appearance.
Step 6: Install the Shelves
Once the supports are secure and the finish is dry, place the shelves on the cleats or brackets. Check for level one last time. If you want extra security, screw the shelf boards into the cleats or brackets from the top or underside, depending on your design.
For longer shelves, add a center support or additional bracket if needed to prevent sagging. A beautiful shelf that bows in the middle is not a design statement. It is a warning.
Step 7: Add Rods, Bins, and Labels
Now comes the satisfying part. Add hanging rods, storage bins, shelf dividers, baskets, and labels. This is where nursery closet shelving stops being lumber and starts becoming useful.
Try organizing by category, not by cuteness. Tiny knit bear hats are adorable, but when you need a clean swaddle in ten seconds, function should win.
A Smart Nursery Closet Layout Example
Let’s say you have a standard 5-foot reach-in closet. A practical nursery shelving layout might look like this:
- Top shelf across the full width: extra diapers, keepsake boxes, backup bedding, and out-of-season items
- Left side: double hanging rods for newborn through 24-month clothing
- Right side: three to five adjustable shelves for folded clothes, towels, and labeled bins
- Bottom area: one large basket for blankets and one bin for clothes that no longer fit
This kind of setup works because it mixes visible storage with flexible storage. It also makes it easier to rotate clothes by size without tearing the whole closet apart every eight weeks.
Nursery Closet Safety Tips You Should Not Ignore
Because this shelving will live in a child’s room, safety matters just as much as style. A nursery closet should not just look organized. It should behave itself.
- Attach shelves, tracks, and rods securely to wall studs whenever possible.
- Use the correct anchors for your wall type if a stud is not available.
- Keep heavier items on lower shelves.
- Avoid storing tempting toys up high where a child may want to climb to reach them.
- Anchor nearby top-heavy furniture such as dressers or bookcases to the wall.
- Do not overload shelves beyond the hardware’s capacity.
- Check screws, brackets, and anchors periodically as the closet gets used.
That last one matters more than people think. Nursery storage is not static. You will add things, remove things, and probably shove a mystery bin somewhere during a hectic week. A quick seasonal check keeps the setup safe and solid.
Common Mistakes To Avoid
Building for the Newborn Stage Only
Newborn clothes are short. Toddler clothes are not. Build the closet with change in mind. Adjustable shelves and movable rods make life much easier later.
Using Shelves That Are Too Deep
Deep shelves sound useful until everything in the back disappears into storage purgatory. For most nursery closets, moderate shelf depth is more functional than giant catch-all shelves.
Ignoring Vertical Space
The upper part of the closet is valuable real estate. Use a top shelf for backup supplies, memory boxes, and items you do not need every day.
Skipping Labels
You think you will remember which bin holds swaddles and which bin holds crib sheets. Sleep deprivation disagrees.
Choosing Looks Over Access
A photo-worthy closet is nice. A closet that lets you grab pajamas with one hand while holding a baby with the other is nicer.
Budget-Friendly Ways To Make It Look Custom
You do not need a luxury closet budget to get a polished result. A few simple upgrades make a basic build look more expensive:
- Add trim to the front edge of shelves
- Use matching baskets or bins for a cleaner look
- Paint the entire closet one color for a built-in feel
- Swap plain wire shelves for wood-topped shelves if you want warmth
- Use wall-hung systems instead of floor-based units to save money and visual space
- Mix open shelves with a few closed bins to reduce visual clutter
Even a simple closet can look high-end when the layout is intentional and the finish details are consistent.
Conclusion
Building nursery closet shelving in your home is one of those projects that pays you back immediately. It gives you better storage, better routines, and a room that feels calmer from day one. The secret is not making the closet fancy. The secret is making it useful. Measure well, choose the right shelving style, secure everything properly, and design around the way your family actually lives.
If you do that, your nursery closet will not just hold baby things. It will quietly save your mornings, simplify the nightly scramble, and make the whole room feel more put together. And in a nursery, that kind of win deserves a standing ovation, or at least a coffee you get to drink while it is still hot.
Real-Life Experiences and Lessons From Building Nursery Closet Shelving at Home
One of the most common experiences homeowners share after building nursery closet shelving is that they wish they had done it before the baby arrived. On paper, the project seems like a style upgrade. In real life, it becomes a daily sanity upgrade. A well-built closet reduces visual clutter, makes laundry easier to sort, and gives every tiny item a home. The first big lesson is that babies may be small, but their stuff behaves like it signed a lease for the entire room.
Another experience many people have is discovering that adjustable storage beats “perfect” storage. Fixed shelves can look clean and custom, but a nursery changes fast. What works for newborn gowns and swaddles may not work for footed pajamas, board books, baskets of toys, or diapers bought in larger bulk boxes. Parents often realize that flexibility matters more than a showroom look. A shelf that can move later is often more valuable than a shelf that photographs beautifully today.
Many DIYers also learn that the most important design decisions are not the exciting ones. Paint color is fun. Bin labels are fun. Tiny wooden hangers are absurdly cute. But the real difference comes from boring choices like measuring carefully, finding studs, and deciding which items deserve eye-level placement. When the everyday essentials are the easiest things to reach, the whole nursery runs more smoothly. That is not glamorous, but it is powerful.
There is also a practical lesson about shelf depth. People often assume deeper shelves are better because they hold more. Then they start stacking blankets, burp cloths, extra sheets, backup diapers, and “I’ll deal with this later” items. Suddenly, the back half of every shelf becomes an archaeological dig. In actual use, slightly shallower shelves often feel more efficient because you can see what you own and grab it fast.
Another real-life takeaway is that the bottom of the closet matters just as much as the top. Families often focus on upper shelves and rods, then forget to plan the floor area. But that lower section is prime space for a hamper, diaper backstock, larger baskets, or clothing that no longer fits. Some parents keep a donation bin there. Others keep a “next size up” bin. Either way, that bottom zone does a lot of hidden work.
Finally, people who build nursery closet shelving often say the project changes how they feel about the room. The nursery starts to look calmer, more intentional, and more complete. Instead of feeling like a place where things pile up, it feels like a space that supports the rhythm of family life. That is the real reward. Not the shelves themselves, but the way those shelves make the room easier to live in.