Table of Contents >> Show >> Hide
- Why MacBook Keyboards Get Dirty So Fast
- What You Need Before You Start
- Before You Clean: Do These Safety Steps First
- How to Clean a MacBook or MacBook Pro Keyboard Step by Step
- What Not to Use on a MacBook Keyboard
- How to Clean Sticky MacBook Keys
- How Often Should You Clean a MacBook Keyboard?
- When Cleaning Will Not Fix the Problem
- Extra Tips to Keep Your MacBook Keyboard Cleaner Longer
- Real-World Experiences Cleaning a MacBook or MacBook Pro Keyboard
- Final Thoughts
Your MacBook keyboard does a lot. It writes emails, survives rushed deadlines, catches cracker crumbs like it is being paid by the crumb, and somehow ends up wearing a shiny fingerprint sweater by the end of the week. The good news is that cleaning a MacBook or MacBook Pro keyboard is not complicated. The better news is that you do not need a chemistry degree, a toolbox from a spy movie, or the courage to pry off random keys and hope for the best.
If you want to know how to clean a MacBook or MacBook Pro keyboard safely, the smartest approach is simple: power the laptop down, remove loose debris, wipe the keys with the right materials, and avoid the kind of “helpful shortcuts” that turn a five-minute cleanup into an expensive repair. This guide walks through the safest method, explains what products are actually worth using, and covers what to do when your problem is more than a little dust and oil.
Why MacBook Keyboards Get Dirty So Fast
MacBook keyboards are magnets for everyday grime. Dust settles between keys. Skin oils build up on the tops of high-use letters. Lint sneaks in from backpacks, sleeves, and couch cushions. And if you occasionally snack while working, your keyboard may be quietly preserving the archaeological record of your lunch.
That grime is not just cosmetic. A dirty MacBook keyboard can feel sticky, look greasy, and, in some cases, cause keys to feel less responsive. While cleaning will not fix every hardware issue, regular maintenance can absolutely help your keyboard stay more comfortable to type on and easier to keep in good shape.
What You Need Before You Start
Before cleaning your MacBook or MacBook Pro keyboard, gather a few safe basics:
- A soft, lint-free microfiber cloth
- Compressed air with a straw attachment
- A dry cotton swab for tight edges if needed
- A 70% isopropyl alcohol wipe, 75% ethyl alcohol wipe, or a bleach-free disinfecting wipe approved for electronics
- A clean, dry workspace with good lighting
You do not need paper towels, glass cleaner, bleach, abrasive scrubbing pads, or the confidence of someone on video who says, “Trust me, I do this all the time.” That is how keyboards end up in inspirational repair stories.
Before You Clean: Do These Safety Steps First
1. Shut down your MacBook completely
Do not just close the lid and hope for the best. Power it off fully so you are not triggering keys, typing gibberish into a document, or waking the machine every three seconds while you clean.
2. Unplug the power adapter and accessories
Disconnect the charger, external drives, USB accessories, dongles, and anything else attached to the laptop. Cleaning electronics is much less exciting when electricity is not part of the plot.
3. Move to a flat, well-lit surface
A clean table is ideal. A bed, blanket, or your lap is not. You want enough light to see dust around the keys and enough space to angle the MacBook safely.
How to Clean a MacBook or MacBook Pro Keyboard Step by Step
Step 1: Shake loose debris out gently
Open the MacBook and hold it at an angle so loose crumbs and lint can fall away from the keyboard. You do not need to flap it like a pizza box. A gentle tilt and a light tap are enough to help obvious debris move out from between the keys.
If you carry your laptop in a backpack every day, this step alone can reveal a tiny lint civilization around the spacebar, arrow keys, and return key.
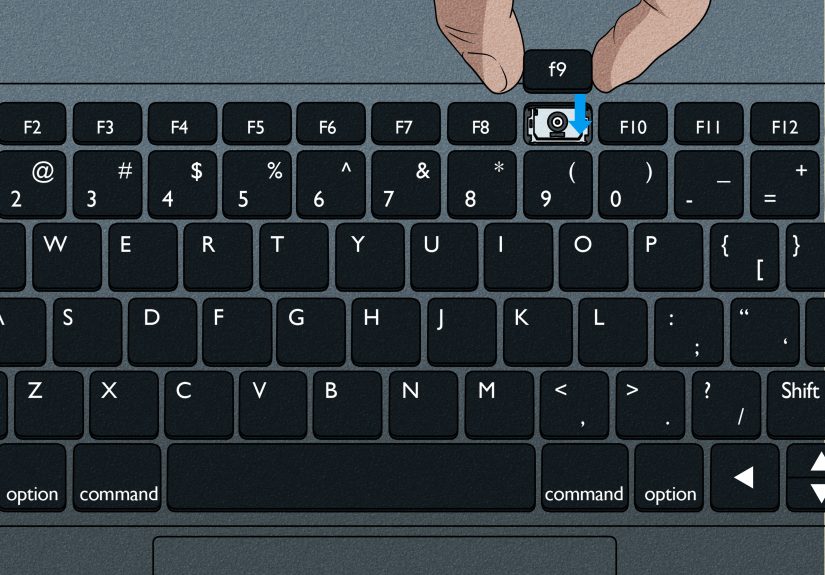
Step 2: Use compressed air the smart way
For stubborn dust or an unresponsive key, compressed air is the go-to method. On affected MacBook and MacBook Pro models, Apple’s well-known approach is to hold the notebook at about a 75-degree angle, spray the keyboard from left to right, rotate the computer to one side, spray again, then rotate to the other side and repeat.
Keep the straw about half an inch from the keyboard. Use short bursts, not a dramatic wind tunnel. Most importantly, keep the can upright. If you tilt or invert it, you risk releasing propellant instead of clean air, which is not the kind of surprise your keyboard wants.
This step is especially helpful if one or two keys feel different from the others, hesitate, or seem to have a tiny crumb hiding underneath like it owes rent.
Step 3: Wipe the key tops and keyboard deck
Once loose debris is gone, take a soft microfiber cloth and wipe the surface of the keys, the areas around them, and the palm rest. For routine cleaning, a slightly damp cloth is enough. The cloth should feel barely damp, not wet. If it can leave droplets, it is too wet.
Wipe each row methodically instead of randomly polishing whichever key looks the shiniest. This keeps you from missing corners where oil and dust like to settle.
Step 4: Disinfect without soaking the keyboard
If your goal is not just cleaning but disinfecting, use an approved alcohol-based wipe or a bleach-free disinfecting wipe that is safe for electronics. Gently wipe the hard, nonporous surface of the keys. Focus on the tops of the keys and the surrounding aluminum deck rather than pushing moisture into the gaps.
Never spray cleaner directly onto the keyboard. Spray-on cleaning looks efficient right up until liquid slips into openings where it absolutely does not belong. The cloth or wipe should do the work, not a puddle.
Step 5: Clean around sticky spots carefully
If a key feels grimy from skin oil, dried residue, or mystery gunk from a previous snack emergency, wrap your fingertip in a microfiber cloth or use a lightly damp cotton swab to clean around the edges. The keyword here is lightly. You are cleaning a premium laptop, not marinating it.
For oily shine on frequently used keys such as the spacebar, command key, and letters in your password, a gentle wipe with the correct cleaning cloth usually improves both look and feel.
Step 6: Let everything dry fully before powering back on
Give the keyboard a few minutes to air-dry. Alcohol-based wipes usually evaporate quickly, but patience is still the smarter move. When the keyboard is fully dry, power the MacBook back on and test the keys.
What Not to Use on a MacBook Keyboard
This is where many well-meaning people go off-script. If you want to clean a MacBook keyboard without damaging it, avoid these common mistakes:
- Do not spray liquid directly onto the keys
- Do not use bleach, hydrogen peroxide, ammonia, acetone, or harsh household cleaners
- Do not use abrasive pads, rough towels, or anything that can scratch surfaces
- Do not soak cotton swabs and push moisture under the keys
- Do not pry off MacBook keycaps unless you know the mechanism and are doing a repair
- Do not blast the keyboard with high-pressure air from questionable equipment
A MacBook keyboard is sturdy enough for daily use, but not sturdy enough for experimental cleaning methods inspired by stubborn confidence and a garage compressor.
How to Clean Sticky MacBook Keys
Sticky MacBook keys are one of the most common complaints, and the cause matters. If the stickiness comes from dust or light residue, compressed air plus a careful wipe often helps. If the key became sticky after a sugary spill, the problem may be deeper than surface grime.
In that situation, surface cleaning can improve the feel temporarily, but it may not fully solve the issue. Sugar dries into residue, and residue loves to hide under moving parts. If a key still sticks, repeats characters, or does not register after careful cleaning, it is time to stop scrubbing and consider professional service.
That is particularly true if the affected key is the spacebar, return key, or shift key, where the mechanism is larger and more sensitive to damage during amateur “just let me pop this off real quick” adventures.
How Often Should You Clean a MacBook Keyboard?
For most people, a quick weekly wipe and a deeper cleaning once or twice a month is enough. If you travel often, work in dusty environments, eat at your desk, or share your laptop, you may need to clean it more often.
A simple routine works best:
- Weekly: wipe the keyboard and palm rest with a microfiber cloth
- Every few weeks: use compressed air to remove hidden debris
- As needed: disinfect key surfaces with an approved wipe
Small, regular cleaning sessions are easier on the keyboard than waiting until it looks like it has been through finals week, allergy season, and a snack conference all at once.
When Cleaning Will Not Fix the Problem
Cleaning helps with dust, smudges, oils, and light debris. It does not fix every keyboard problem. If your MacBook or MacBook Pro keyboard is still misbehaving after a careful cleaning, watch for these signs:
- Keys repeat characters or miss presses consistently
- A key feels physically loose or uneven
- One area stays sticky after drying and repeated surface cleaning
- The keyboard stopped working after a liquid spill
- Several keys fail at the same time
Those issues can point to hardware damage or residue trapped where basic cleaning cannot reach safely. At that point, professional repair is the smarter option. Cleaning is maintenance, not magic.
Extra Tips to Keep Your MacBook Keyboard Cleaner Longer
Wash your hands before long typing sessions
It sounds obvious, but clean hands reduce oil transfer dramatically. Less oil means fewer shiny keycaps and less frequent deep cleaning.
Close the lid before tossing it in a bag
An open or partially open laptop in a backpack is basically inviting lint to move in.
Avoid eating directly over the keyboard
You can ignore this advice, of course. Just know that your keyboard will remember every buttery cracker decision you ever made.
Store a microfiber cloth nearby
If the cloth is easy to reach, you are much more likely to do quick maintenance before grime builds up.
Real-World Experiences Cleaning a MacBook or MacBook Pro Keyboard
In real life, cleaning a MacBook keyboard usually starts the same way: you notice one key looks shinier than the others, then suddenly you cannot unsee the entire keyboard. Maybe the spacebar has a greasy glow. Maybe the “E” key feels slightly tacky. Maybe the arrow keys are carrying enough dust to qualify as a tiny habitat. What makes the experience interesting is that most people do not realize how fast the mess builds up until they stop and look closely under good lighting.
A common experience is the commuter laptop. If you carry your MacBook in a backpack, tote bag, or sleeve every day, you are also carrying lint, fabric fibers, and dust to work and back. Over time, that debris settles around the edges of keys, especially the spacebar and corner keys. Many people assume something is wrong with the keyboard when a key starts to feel slightly different, but after one careful round of compressed air, the key often springs back to normal. It is one of those rare tech moments where the fix is simple and the relief is immediate.
Then there is the work-from-home keyboard, which has a different personality. This one tends to collect oils, hand lotion residue, and snack particles. The keys may still work perfectly, but the surface starts to look polished in all the wrong places. A careful wipe with a microfiber cloth and an approved alcohol-based wipe can make the keyboard look dramatically better in under five minutes. The most surprising part for many people is not the amount of dirt removed. It is how much nicer the keyboard feels afterward. Clean keys feel less draggy, less sticky, and more pleasant to type on.
Another very real experience is the near-spill panic. Someone sets coffee too close, tea sloshes, or sparkling water lands one inch from disaster. Even without a full spill, tiny droplets can leave marks and attract grime around the keyboard deck. People often respond by scrubbing too hard or reaching for the nearest household cleaner, which is exactly the wrong move. The better experience is the boring one: power down, blot if needed, clean gently, let it dry, and avoid turning a near miss into real damage.
There is also the “I thought one wipe would fix everything” experience. Sometimes a sticky key is not just dusty. If sugar or residue got under a key, the top can look clean while the mechanism underneath still feels off. That is usually the point where users learn an important lesson: surface cleaning is great maintenance, but it is not a miracle cure. Knowing when to stop is part of cleaning well.
Perhaps the most useful real-world lesson is that regular light cleaning feels easier than rescue cleaning. A one-minute wipe every week is painless. Waiting until your MacBook keyboard looks like it has survived airport security, a granola bar explosion, and three deadline sprints makes the task feel bigger than it is. The best experience, honestly, is preventing the gross stage in the first place.
Final Thoughts
If you have been wondering how to clean a MacBook or MacBook Pro keyboard safely, the answer is refreshingly practical. Shut it down, unplug it, remove loose debris with care, wipe it with a soft lint-free cloth, and use approved wipes or compressed air the right way. That is the routine. No drama, no mystery, and definitely no need to attack the keyboard like you are defusing a bomb.
A clean MacBook keyboard looks better, feels better, and is simply more pleasant to use every day. Better still, regular maintenance can help you catch small issues early before they turn into annoying typing problems. Treat your keyboard kindly, and it will return the favor one clean keystroke at a time.