Table of Contents >> Show >> Hide
- Before You Start: Is Vinegar Safe for Your Tile?
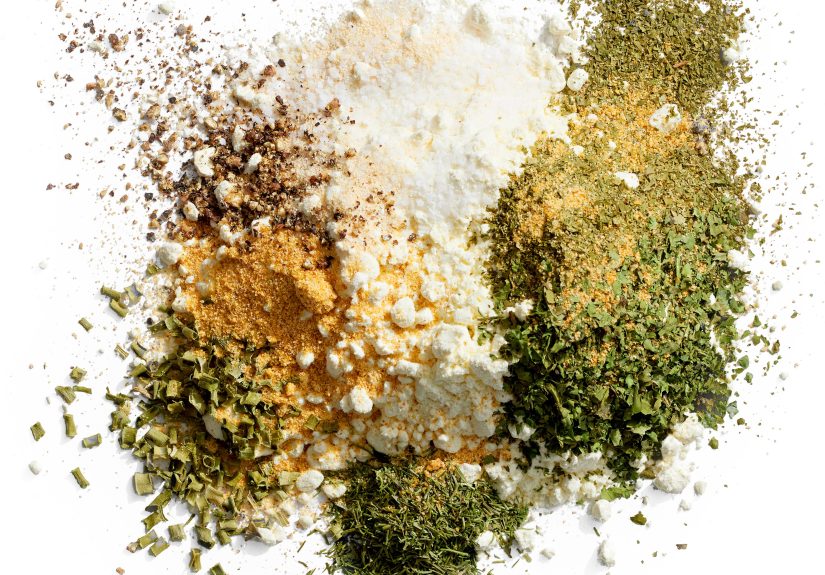
- What You’ll Need
- How to Clean Tile Floors with Vinegar: 11 Steps
- Step 1: Confirm Your Tile Type
- Step 2: Clear and Sweep the Floor
- Step 3: Spot-Treat Sticky Spills and Gunk
- Step 4: Mix Your Vinegar Cleaning Solution
- Step 5: Ventilate and Protect Yourself
- Step 6: Dip the Mop and Wring It Out Thoroughly
- Step 7: Mop in Small Sections
- Step 8: Tackle the Grout (Carefully)
- Step 9: Rinse with Clean Water
- Step 10: Dry the Floor
- Step 11: Keep Up a Simple Maintenance Routine
- Safety Tips and Common Mistakes to Avoid
- Vinegar vs. Store-Bought Tile Cleaners
- Real-Life Experiences & Extra Tips for Using Vinegar on Tile Floors
If your tile floors look more “grimy subway station” than “spa bathroom,” it’s probably time for a deep clean.
The good news? You don’t need a cabinet full of fancy products. A simple bottle of white vinegar, some warm water,
and a little elbow grease can leave ceramic and porcelain tiles looking fresh and shiny again.
Vinegar is a popular natural cleaner because it cuts through grease, soap scum, and mineral deposits without the
harsh fumes of many commercial products. But it also has a downside: it’s acidic. That means you must use it correctly
and avoid certain surfaces (looking at you, marble and other natural stone). This guide walks you through
11 practical steps to clean tile floors with vinegar safely and effectively, plus a bonus section of
real-life tips and experiences to help you avoid the most common mistakes.
Before You Start: Is Vinegar Safe for Your Tile?
Before you grab the mop, take a minute to figure out what kind of tile you have. Vinegar works well on many
ceramic and porcelain tile floors when diluted properly. However, it’s a no-go for
natural stone tiles like marble, travertine, limestone, and granite. The acid in vinegar can etch and
dull stone surfaces and may wear down certain sealers over time.
- Good candidates for vinegar: Glazed ceramic tile, most porcelain tile, vinyl, some linoleum.
- Bad candidates for vinegar: Marble, travertine, limestone, granite, onyx, other natural stone.
- Use caution: Old or damaged grout, or floors with unknown sealers. Always test first.
Not sure what you have? Check your home records, product packaging (if recently installed), or contact the installer.
When in doubt, test a small, hidden area with your vinegar solution and wait for it to dry. If the tile
looks hazy, etched, or dull afterward, switch to a pH-neutral tile cleaner instead.
What You’ll Need
Gather your cleaning supplies before you start so you’re not tiptoeing across a wet floor mid-project.
- White distilled vinegar
- Warm (not boiling) water
- A bucket (or two if you plan to rinse)
- Microfiber mop or soft sponge mop
- Broom, dust mop, or vacuum for hard floors
- Microfiber cloths or old towels for drying
- Optional: a few drops of mild dish soap for greasy floors
- Optional: baking soda and a soft brush for grout stains
- Rubber gloves if you have sensitive skin
A common and safe vinegar dilution for tile floors is
½ cup of white vinegar per 1 gallon of warm water. For very dirty floors, some people go up to
about ¾ cup per gallonbut don’t go straight vinegar, unless you’re intentionally trying to bully your grout.
How to Clean Tile Floors with Vinegar: 11 Steps
Step 1: Confirm Your Tile Type
(Picture idea: a close-up of different tile types labeled “ceramic,” “porcelain,” and “stone.”)
Take a close look at your floor. If it’s ceramic or porcelain, you’re usually safe to continue with a diluted vinegar
solution. If it’s a natural stone or you’re unsure and can’t easily confirm, skip vinegar and use a stone-safe,
pH-neutral cleaner instead. This one step can save you from an expensive refinishing job later.
Step 2: Clear and Sweep the Floor
(Picture idea: a broom sweeping crumbs and pet hair away from tile.)
Move lightweight furniture, rugs, trash cans, and anything else that might get in the way. Then:
- Sweep with a soft-bristle broom, or
- Use a dust mop or a vacuum designed for hard floors.
Removing loose dirt and grit is essential. If you skip this step, your mop will just push debris around and
tiny particles can scratch the tile or dull the finish over time.
Step 3: Spot-Treat Sticky Spills and Gunk
(Picture idea: a hand using a cloth to wipe a sticky spill on tile.)
Before you do a full mop, quickly treat any stubborn spots:
- Dampen a cloth with warm water and a drop of dish soap.
- Gently scrub sticky food, dried spills, or greasy spots.
- Rinse with a clean, damp cloth.
This light pre-clean keeps your mop water from turning into a murky soup five minutes into the job.
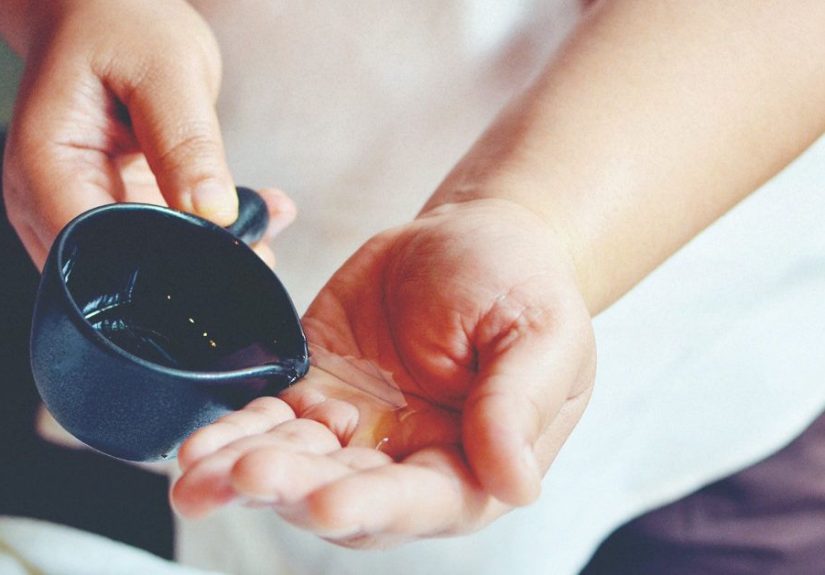
Step 4: Mix Your Vinegar Cleaning Solution
(Picture idea: a measuring cup pouring vinegar into a bucket of warm water.)
Fill your bucket with about 1 gallon of warm (not hot) water. Add:
- ½ cup white vinegar for regular cleaning, or
- ¾ cup white vinegar for extra grimy floors.
If the floor is greasylike a kitchen that’s seen one too many stir-fry nightsadd
just a few drops of mild dish soap. Don’t overdo the soap; too much will leave streaks and residue.
Step 5: Ventilate and Protect Yourself
Vinegar doesn’t produce harsh chemical fumes like bleach or ammonia, but it does have a strong smell that
can be overwhelming in a closed space.
- Open windows and doors if you can.
- Turn on fans to help with airflow and drying.
- Wear gloves if you have sensitive skin.
Step 6: Dip the Mop and Wring It Out Thoroughly
(Picture idea: a mop being wrung out over a bucket.)
Dunk your microfiber or sponge mop into the vinegar solution, then wring it out until it’s just dampnot
dripping. A soaked mop sends too much liquid into the grout lines and can lead to:
- Water seeping below tiles
- Weakened grout over time
- Longer drying times and possible mildew in damp rooms
Think “slightly damp cloth,” not “mop straight out of a swimming pool.”
Step 7: Mop in Small Sections
(Picture idea: a person mopping half a kitchen floor, leaving a clean side and a dirty side.)
Start in the farthest corner of the room and work your way toward the exit. Mop in overlapping strokes,
focusing on small sections at a time. If your solution starts looking cloudy or gray, dump it and mix a
fresh batch. Dirty water is just mud with better PR.
Step 8: Tackle the Grout (Carefully)
(Picture idea: a toothbrush scrubbing grout lines.)
Grout is more delicate than tile. While occasional vinegar use on sealed grout is generally fine, repeated
heavy use can wear it down over time. If your grout looks dingy:
- Sprinkle a little baking soda along the grout lines.
- Lightly spray or dab a 1:1 vinegar and water mix onto the baking soda to create a gentle foam.
- Use a soft brush (like an old toothbrush) to scrub in small circles.
- Wipe up the residue with clean water and a cloth.
Save this for occasional deep-cleaning, not your everyday routine, and avoid it entirely on cracked or
crumbling grout.
Step 9: Rinse with Clean Water
(Picture idea: a second bucket labeled “rinse water.”)
Some people skip rinsing, but if your floor looks dull or you used extra soap, rinsing can make a big difference:
- Fill a clean bucket with warm water (no vinegar).
- Dip and wring out a clean mop.
- Go over the floor again quickly to lift away residue.
This step is especially helpful if you notice a cloudy film after cleaning or if someone in your home has
sensitive skin or allergies.
Step 10: Dry the Floor
(Picture idea: towels or a dry mop being used on tile.)
Letting the floor air-dry is fine in many cases, but drying by hand has a few perks:
- Prevents water spots on shiny tiles
- Reduces streaks
- Helps protect grout and subfloor in older homes
Use clean microfiber cloths or an old towel to buff the floor dry, or run a dry microfiber mop over the
surface. If you’re in a hurry, turn on ceiling fans or place a box fan at one end of the room.
Step 11: Keep Up a Simple Maintenance Routine
The best way to avoid scrubbing on hands and knees every weekend is to maintain your tile floors with small,
consistent habits:
- Sweep or vacuum high-traffic areas daily or every few days.
- Use the vinegar solution once a week or every two weeksnot three times a day.
- Place mats at entrances to catch dirt before it hits the tile.
- Wipe up spills as soon as they happen; dried orange juice is basically floor glue.
With regular maintenance, each cleaning session becomes quicker and a lot less dramatic.
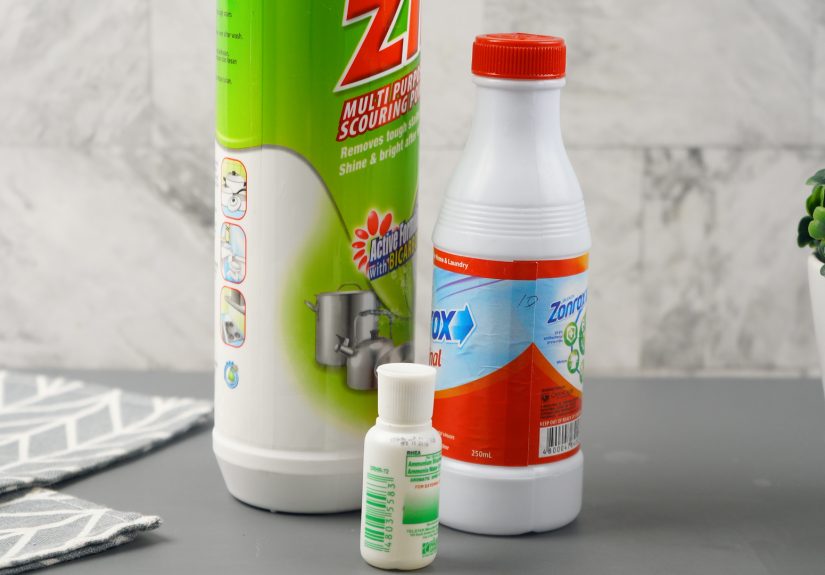
Safety Tips and Common Mistakes to Avoid
-
Don’t mix vinegar with bleach or other cleaners. Combining vinegar with bleach,
ammonia, or certain other products can release dangerous gases. Always use vinegar-based cleaners by themselves. -
Avoid vinegar on natural stone. Marble, granite, and other stones can be permanently
etched by acidic cleaners. -
Don’t overdo the vinegar or use it undiluted on tile floors. Strong solutions can be
hard on grout and certain finishes. -
Remember: vinegar cleans but does not fully disinfect. It can reduce some germs but is
not an EPA-registered disinfectant. Use an appropriate product if you need true disinfection, especially
in homes with sick or immunocompromised people. -
Test first. Anytime you’re trying a new dilution or working on older tile, test a small,
inconspicuous area and let it dry completely before doing the whole floor.
Vinegar vs. Store-Bought Tile Cleaners
So why use vinegar at all when there are entire aisles dedicated to floor cleaners?
Advantages of Cleaning Tile Floors with Vinegar
- Budget-friendly: A large jug of white vinegar costs far less than many specialty cleaners.
- Widely available: You can grab it at any grocery store.
- Fewer mystery ingredients: Many people like knowing exactly what’s in their cleaning solution.
- Effective on common messes: Cuts through hard water spots, light grease, and everyday dirt on suitable surfaces.
When a Commercial Cleaner Might Be Better
- If you have natural stone, use a cleaner specifically labeled as safe for that material.
-
If you need disinfection (for example after illness), use an EPA-registered disinfectant and
follow the label instructions for contact time and safety. - If your grout is delicate, crumbling, or unsealed, a gentler pH-neutral floor cleaner may be safer for frequent use.
For many households with ceramic or porcelain tile, a balanced approach works best: regular mopping with a gentle
vinegar solution for everyday cleaning, plus occasional use of specialty products when you need targeted stain removal
or disinfection.
Real-Life Experiences & Extra Tips for Using Vinegar on Tile Floors
Once you’ve cleaned tile floors with vinegar a few times, you start picking up little tricks that make the job
faster, easier, and far less annoying. Here are some experience-based tips and scenarios to help you dial in
your own routine.
1. The Busy Kitchen Scenario
Imagine a small kitchen that sees constant traffic: morning coffee drips, crumbs from kids’ snacks, oil splatters
from pan-frying. In this case, dry cleaning is your best friend:
- Do a quick sweep or vacuum once a day (takes two minutes).
- Spot wipe sticky spills right away with a damp cloth and a drop of dish soap.
- Mop with the vinegar solution once a week.
Most people are surprised to find that when they stay on top of crumbs and spills, mopping becomes a much lighter task.
Your vinegar solution doesn’t turn brown after three passes because you’ve already removed most of the debris.
2. Dealing with Cloudy or Streaky Floors
If your tile floors look cloudier after cleaning, don’t panicit doesn’t always mean the tile is damaged.
Often, there’s just a build-up of soap or too much vinegar solution left on the surface.
Try this:
- Mop once with plain warm water to rinse off residue.
- Use less vinegar next time (stick to ½ cup per gallon).
- Make sure your mop is thoroughly wrung out and not leaving puddles.
A final buff with a dry microfiber cloth can also dramatically improve the shine and remove streaks.
3. Households with Pets and Kids
If you have pets and small children, you probably worry about what’s on your floorsand what’s ending up on
paws, socks, and hands. Vinegar can be appealing because it’s a straightforward, food-related ingredient rather
than a mystery chemical cocktail.
However, remember that vinegar isn’t a hospital-grade disinfectant. If someone in the home has been sick, you might:
- Clean first with mild soap and water or your vinegar solution.
- Then use an EPA-registered disinfectant according to the label in high-risk areas.
On regular days, though, a diluted vinegar solution can be a practical choice for routine cleaning when your main
goals are removing dirt and reducing sticky spots, not sterilizing the entire house.
4. How Often Should You Use Vinegar on Tile Floors?
For ceramic or porcelain tile in good condition, using a vinegar solution once a week in high-traffic areas is
typically reasonable. In lower-traffic rooms (like a guest bathroom), once every two weeks or even monthly might
be plenty.
If you’re concerned about long-term grout wear but love vinegar’s cleaning power, alternate:
- Week 1: Vinegar and water solution
- Week 2: pH-neutral tile cleaner
That way, you still enjoy the benefits of both approaches without overexposing your grout to acids.
5. Adding a Personal Touch (Without Ruining the Formula)
Some people don’t love the smell of vinegarfair. Thankfully, the scent usually fades as the floor dries. If you
want to make the experience more pleasant:
- Add a couple of drops of a mild, floor-safe essential oil (like lemon or lavender) to the bucket.
- Open windows so the smell dissipates quickly.
- Finish with a quick dry buff, which also helps remove that last hint of vinegar scent.
Just don’t drown your bucket in oils or soap. The more extras you add, the higher your chances of streaks and residue.
6. Knowing When to Call in Reinforcements
Vinegar is fantastic for regular maintenance, but it can’t fix everything. If your grout is severely stained,
crumbling, or moldy, a professional cleaning or even regrouting may be necessary. Similarly, if your tile has
deep scratches, dull patches, or other signs of wear, talk to a flooring specialist about whether refinishing or
replacement is needed.
Think of vinegar as your everyday helper, not a miracle worker. Used correctly and consistently, it keeps
your ceramic and porcelain tile floors looking clean, bright, and ready for bare feet and dropped snacks
but it’s okay to bring in backup when the situation calls for it.
With these 11 steps and practical tips, you’re ready to clean tile floors with vinegar safely and confidently.
Your floors will thank you, your mop will retire its martyr act, and you’ll have a simple routine you can stick
to all year long.