Table of Contents >> Show >> Hide
- Quick Checklist Before You Start
- Step 1: Turn On Bluetooth on Your Mac
- How to Connect an Apple Magic Mouse
- How to Connect a Bluetooth Mouse (Logitech, Microsoft, Razer, and Friends)
- How to Connect a Wireless Mouse With a USB Receiver (2.4GHz Dongle)
- How to Connect a Wired USB Mouse
- Fixes When Your Mouse Won’t Connect (or Keeps Disconnecting)
- 1) Power and battery: the boring fix that works a lot
- 2) Make sure Bluetooth is on (yes, again)
- 3) Put the mouse back into pairing mode
- 4) Forget the device and reconnect
- 5) Restart your Mac (classic for a reason)
- 6) Reduce wireless interference
- 7) Update macOS (and mouse software if you use it)
- 8) When you have no mouse at all: keyboard-only rescue
- Picking the Best Connection Type: Bluetooth vs Receiver vs Wired
- Common Scenarios (With Specific Examples)
- Real-World Experiences & Lessons Learned (Extra 500+ Words)
- The “new Mac” moment: everything pairs instantly… until it doesn’t
- Travel setups: Bluetooth is convenient, but dongles are dependable
- The bottom-charging surprise: “Why is the port there?”
- Multi-device life: Easy-Switch buttons and “Why won’t you reconnect?”
- Desk chaos: hubs, USB 3 gadgets, and interference gremlins
- Wrap-Up
Plug it in, flip a switch, click a button, and boomyour cursor is alive. Unless it isn’t. Then it’s time for the ancient ritual of
“Why won’t you pair?” (Don’t worry, your Mac speaks mouse. Sometimes it just needs you to say it louder.)
This guide covers how to connect Apple’s Magic Mouse (including newer USB-C versions), third-party Bluetooth mice, USB receiver mice,
and wired USB miceplus practical troubleshooting when your pointer decides to take the day off.
Quick Checklist Before You Start
- Know what kind of mouse you have: Magic Mouse, Bluetooth mouse, 2.4GHz receiver mouse, or wired USB mouse.
- Charge it or feed it batteries: a “dead mouse” has the same vibe as a “sleeping rock.”
- Get close: keep the mouse within a few feet of your Mac for pairing.
- Unplug the clutter: if Bluetooth is acting weird, temporarily disconnect extra USB devices and hubs.
- Have a backup input: built-in trackpad, another mouse, or your keyboard for navigation.
Step 1: Turn On Bluetooth on Your Mac
Most wireless mice connect over Bluetooth, so let’s make sure your Mac’s Bluetooth is awake and caffeinated:
- Click the Apple menu in the top-left corner.
- Open System Settings.
- Click Bluetooth in the sidebar.
- Toggle Bluetooth On if it isn’t already.
If you don’t see Bluetooth, use the search bar inside System Settings and type Bluetooth.
How to Connect an Apple Magic Mouse
Apple’s Magic Mouse usually connects in the least dramatic way possibleby briefly using a cable to pair.
(Yes, even a wireless mouse sometimes needs a wire. It’s like a “nice to meet you” handshake.)
Option A: Pair a Magic Mouse by plugging it in (recommended)
- Turn the Magic Mouse on. You should see a green indicator near the power switch.
-
Connect the charging/pairing cable from the mouse to your Mac.
- Newer Magic Mouse models use USB-C.
- Some older versions may use a different charging connectoruse the cable that came with your mouse.
- Wait a few seconds while your Mac recognizes and pairs it automatically.
- Unplug the cable and use the mouse wirelessly.
Option B: Pair from Bluetooth settings (if it doesn’t auto-pair)
- Go to System Settings > Bluetooth.
- Make sure the Magic Mouse is On.
- Look for it under “Nearby Devices” or the device list and click Connect.
Bonus: Check battery and tweak the feel
Once connected, head to System Settings > Mouse to adjust tracking speed, scrolling speed,
and any gesture options your macOS version supports.
How to Connect a Bluetooth Mouse (Logitech, Microsoft, Razer, and Friends)
Bluetooth mice from most brands follow the same three-part plan:
pairing mode on the mouse → Bluetooth settings on the Mac → Connect.
Step 1: Put the mouse in pairing mode
- Turn the mouse on, then look for a pair button on the bottom.
-
If it has a multi-device switch (like many Logitech models), press and hold the device channel button
until the LED blinks. - Blinking light = “I’m discoverable.” No blinking? It’s not ready yet.
Step 2: Connect on your Mac
- Open System Settings > Bluetooth.
- Wait for your mouse name to appear in the device list.
- Click Connect.
-
If prompted to confirm a code:
- Some devices ask you to click or press buttons to confirm pairing.
- Follow the on-screen prompt (it’s your Mac saying, “Prove you’re not a toaster.”).
Step 3: Confirm it’s working (and make it nicer)
Move the mouse. If the cursor moves, celebrate responsibly. Then go to System Settings > Mouse
to adjust speed and scrolling so it feels right for your hands, your desk, and your patience level.
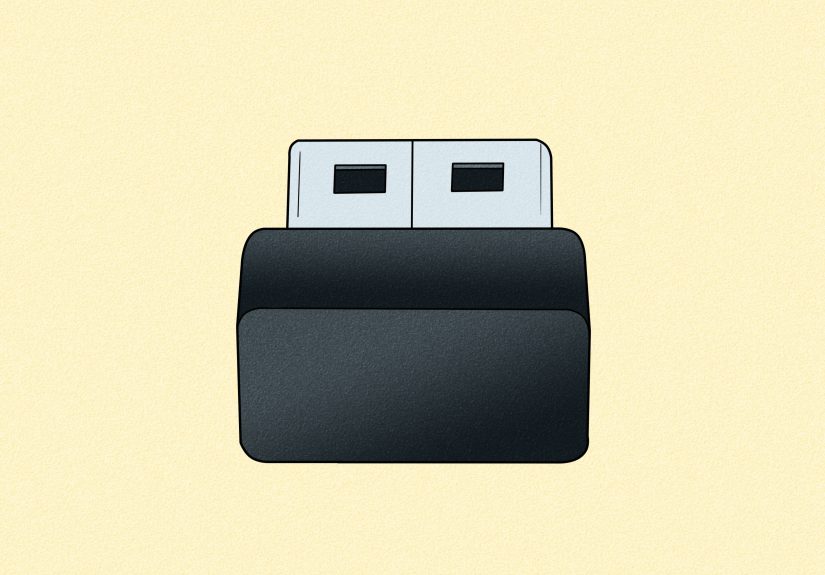
How to Connect a Wireless Mouse With a USB Receiver (2.4GHz Dongle)
These mice don’t pair through Bluetooth. They use a tiny USB receiver (aka “the dongle that disappears the moment you need it”).
The good news: they’re usually plug-and-play on a Mac.
What you’ll need
- The mouse
- The USB receiver
-
Possibly a USB-C to USB-A adapter (many newer Macs only have USB-C ports)
or a USB-C hub/dock.
Connect it
- Plug the USB receiver into your Mac (or into your adapter/hub).
- Turn the mouse On.
- Wait a few secondsmacOS typically recognizes it automatically.
If it doesn’t work right away
- Try a different USB port (or a different hub, if you’re using one).
- Replace the mouse batteries or charge it.
- Move the receiver closer using a short USB extension (great for desktops under a metal desk).
- Some brands need their software for extra features (buttons, side-scroll, gesture wheels).
How to Connect a Wired USB Mouse
The wired mouse is the “I don’t want drama” optionunless your Mac has only USB-C ports, and your mouse has USB-A.
Then you’ll need an adapter. (Still less drama than Bluetooth on a bad day.)
- Plug the mouse into your Mac (or into a USB-C adapter/hub).
- Wait a momentmacOS should detect it automatically.
- Go to System Settings > Mouse to adjust tracking/scroll speed.
If your wired mouse includes a “driver download,” you can usually skip it for basic movement and clicks.
You only need extra software for advanced features (macros, RGB lighting, custom buttons, etc.).
Fixes When Your Mouse Won’t Connect (or Keeps Disconnecting)
If your mouse isn’t showing up, won’t connect, or randomly disconnects, work through these fixes in order.
Start simple. Save the dramatic solutions for your group chat.
1) Power and battery: the boring fix that works a lot
- Turn the mouse Off, wait 5 seconds, then turn it On again.
- Charge it for at least 10–15 minutes (or replace batteries).
- On Magic Mouse, connect it by cable briefly to re-pair and confirm charging.
2) Make sure Bluetooth is on (yes, again)
- Go to System Settings > Bluetooth and confirm Bluetooth is enabled.
- If Bluetooth is on but “acts off,” toggle it off, wait 10 seconds, then toggle it on again.
3) Put the mouse back into pairing mode
- Pairing mode often times out after 30–60 seconds.
- Re-enter pairing mode (hold the pairing button until the LED blinks).
4) Forget the device and reconnect
- Open System Settings > Bluetooth.
- Find the mouse in the device list.
- Choose Forget (or remove) the device.
- Restart pairing mode on the mouse and click Connect again.
5) Restart your Mac (classic for a reason)
A restart clears a surprising number of “my cursor has vanished into the void” moments, especially after updates
or long uptime.
6) Reduce wireless interference
- Move closer to the Mac and away from crowded USB hubs.
- Try turning off nearby Bluetooth devices temporarily to test.
- If you’re on 2.4GHz Wi-Fi, switching to 5GHz can sometimes help in busy areas.
- USB 3 devices and some hubs can cause interferencetry unplugging them as a test.
7) Update macOS (and mouse software if you use it)
- Go to System Settings > General > Software Update and install available updates.
- If your mouse uses companion software (Logitech, Razer, etc.), update that too.
8) When you have no mouse at all: keyboard-only rescue
If you’re stuck without any pointing device, you can still navigate:
- Use Command + Space to open Spotlight and search “Bluetooth.”
- Open Bluetooth settings and use Tab and Arrow keys to move between options.
- Press Space or Return to toggle or select.
Picking the Best Connection Type: Bluetooth vs Receiver vs Wired
Bluetooth
- Pros: no dongle needed, clean setup, great for travel.
- Cons: can be affected by interference; pairing can be finicky if you switch devices often.
USB Receiver (2.4GHz)
- Pros: typically very stable; often lower latency; simple plug-and-play.
- Cons: uses a USB port; receiver is easy to lose; may need an adapter on USB-C Macs.
Wired
- Pros: most reliable; no battery worries; zero pairing steps.
- Cons: cable management; may need an adapter depending on ports.
Common Scenarios (With Specific Examples)
Scenario 1: “My Magic Mouse won’t connect after I used it with another Mac”
This is common when you bounce between Macs. Fix: connect the Magic Mouse to the target Mac with its cable for a few seconds,
then unplug and use it wirelessly.
Scenario 2: “My mouse shows up in Bluetooth, but clicking Connect does nothing”
- Restart pairing mode on the mouse (the LED should blink).
- Forget the device in Bluetooth settings and pair again.
- Try charging the mouselow battery can cause half-pairing weirdness.
Scenario 3: “I have a USB-A receiver but my Mac only has USB-C ports”
You’ll need a USB-C to USB-A adapter or a USB-C hub. Plug the receiver in, turn on the mouse, and you should be set.
Scenario 4: “My cursor lags or skips”
This can happen with low battery, interference, or a crowded desk setup. Charge the mouse, move the receiver closer (for dongle mice),
and temporarily unplug USB 3 devices/hubs to test interference.
Real-World Experiences & Lessons Learned (Extra 500+ Words)
Here’s what connecting a mouse to a Mac tends to feel like in real lifenot the clean “Step 1, Step 2” world, but the
“I’m late for a meeting and my cursor is missing” world.
The “new Mac” moment: everything pairs instantly… until it doesn’t
Many people unbox a new iMac or MacBook, flip on a Magic Mouse, and it “just works.” That’s the best-case scenario.
The more realistic version is: it works, then a week later you connect it to a different Mac (work laptop, home desktop),
and suddenly your original Mac stares at it like it’s never met the thing before. The easiest fix is also the least exciting:
plug the Magic Mouse in for a few seconds. That cable handshake is like reintroducing two friends who absolutely know each other
but need to be reminded at the party.
Travel setups: Bluetooth is convenient, but dongles are dependable
If you use your Mac in coffee shops, libraries, or classrooms, Bluetooth is usually the cleanest: no adapter, no tiny receiver
to lose in the bottom of a backpack. But busy environments can be noisylots of devices, lots of Wi-Fi, lots of “why is my cursor
stuttering like it just drank three espressos?” In those moments, a receiver-based mouse can feel more stable, especially if the
receiver is close to the Mac (or plugged into a small hub right beside it). The tradeoff is obvious: the dongle is small enough
to vanish into another dimension if you’re not careful. A simple habit helps: keep the receiver in the same pocket of your bag
every time, or leave it permanently in a small USB-C hub so it becomes one “thing” instead of three tiny “things.”
The bottom-charging surprise: “Why is the port there?”
If you’ve never owned a Magic Mouse, the first time it needs charging can be mildly hilarious: you plug it in andsurpriseit can’t
be used while charging because the port is on the bottom. The practical takeaway isn’t to rage at design decisions (tempting, though).
It’s to charge proactively: plug it in during lunch, while you’re in a meeting, or whenever you’re using the trackpad anyway.
Even short charging sessions can prevent the dreaded “dead mouse at the worst possible time.”
Multi-device life: Easy-Switch buttons and “Why won’t you reconnect?”
Switching one mouse between a Mac and another computer sounds magicaluntil you realize you have to put the mouse into the correct
device channel. Many multi-device mice have a button on the bottom that cycles between 1/2/3. The common experience is forgetting
which channel is the Mac, then opening Bluetooth settings like it’s going to solve a problem that is, in fact, located on the underside
of the mouse. Once you get used to it, it’s fine. But in the beginning, labeling channels (even mentally) saves time: “1 is MacBook,
2 is desktop,” and suddenly your mouse stops acting like it’s ignoring you on purpose.
Desk chaos: hubs, USB 3 gadgets, and interference gremlins
A lot of Mac setups include a hub, an external SSD, maybe a webcam, maybe a microphone, and a charging cable spaghetti situation.
Sometimes Bluetooth performance gets worse in exactly these setups, which feels unfair because you did nothing wrong except own
modern accessories. The most useful “experience-based” trick is testing in a clean state: unplug extra USB devices briefly and see
if the mouse becomes stable. If it does, you’ve learned something valuable: it’s not the mouse, it’s the environment. At that point,
you can rearrange: move the receiver closer, switch hub ports, use a short extension, or separate high-speed USB devices from the receiver.
It’s not glamorous, but it’s the difference between smooth tracking and a cursor that looks like it’s teleporting.
Bottom line: connecting a mouse to a Mac is usually quick. And when it isn’t, the fix is often simplepower, pairing mode, re-pair,
reduce interferencerather than anything scary or complicated. Your cursor will come back. It always does. (Eventually.)