Table of Contents >> Show >> Hide
- Why Wall Cracks Come Back (Even After a “Good” Patch)
- Step One: Identify What Kind of Crack You’re Fixing
- What You’ll Need (And Why Each Thing Matters)
- The “Doesn’t Come Back” Method for Drywall Cracks
- 1) Test for Movement (This Takes 10 Seconds and Saves 10 Years)
- 2) Stabilize the Drywall (Screws Beat Déjà Vu)
- 3) Open the Crack Into a V-Groove (Yes, You’re “Making It Worse” on Purpose)
- 4) Apply Compound and Embed Tape (Reinforcement Is the Secret Sauce)
- 5) Feather Additional Coats (Wide and Thin Beats Thick and Lumpy)
- 6) Sand Smooth, Clean, Prime, Paint
- Special Cases (Where Cracks Love to Return)
- How to Prevent Cracks from Returning (The Boring Stuff That Works)
- FAQ: Quick Answers for Common Crack Questions
- of Real-World Experience: My Ongoing Relationship With Wall Cracks
- Conclusion
You can “fix” a wall crack in about 90 seconds. Squeeze some spackle in it, swipe it smooth, paint over it, and boomproblem solved.
Until next month, when the crack reappears like a horror-movie villain who “definitely died.”
If you want a wall crack repair that actually lasts, the goal isn’t just to hide the crack. It’s to remove the weak stuff, stabilize the movement, reinforce the area, and rebuild the surface so the wall isn’t forced to crack again in the exact same spot.
Why Wall Cracks Come Back (Even After a “Good” Patch)
Most recurring cracks aren’t a “bad mud” problemthey’re a movement problem. Walls move for a bunch of very un-dramatic reasons:
- Seasonal expansion and contraction: wood framing and trusses change slightly with temperature and humidity.
- Settling: homes shift a bit over time; sometimes it’s normal, sometimes it’s not.
- Vibration: doors slamming, foot traffic, and even nearby construction can stress joints.
- Weak joints: drywall seams that weren’t taped well (or at all) crack right on the seam line.
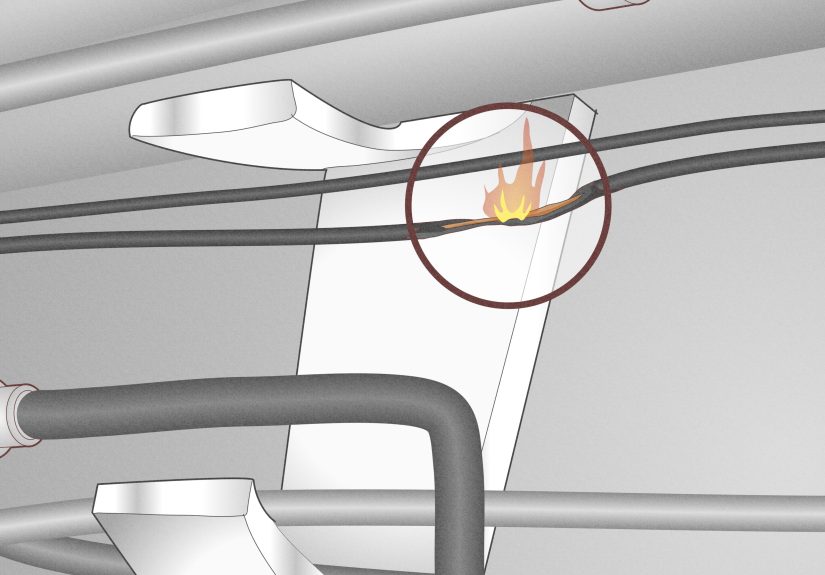
- Loose drywall: nail pops or missed studs let panels flex, and flexing creates cracks.
The long-lasting fix is basically: stop the flex, then reinforce.
Cosmetic Crack or “Call Someone” Crack?
Before you grab the mud knife like you’re about to win a home-improvement medal, do a quick safety check. Many cracks are cosmetic, especially hairline drywall cracks. But you should pause and get a professional opinion if you notice:
- Cracks wider than about 1/4 inch, or cracks that keep widening.
- Horizontal cracks (often more concerning than vertical ones).
- Stair-step cracks in brick/block or around windows and doors.
- Doors/windows sticking plus new or worsening cracks.
- Bulging/bowing walls, or moisture intrusion near the crack.
If none of that applies, greatthis is likely a repair you can handle with basic tools and patience (and possibly snacks).
Step One: Identify What Kind of Crack You’re Fixing
“Wall crack” is like “car noise.” It’s not specific enough to diagnose anything. The best repair depends on what the wall is made of and where the crack lives.
Common crack types you can repair
- Drywall seam cracks: long, straight cracks that follow a joint line.
- Inside corner cracks: where two walls meet, or where wall meets ceiling.
- Nail/screw pops: little bumps or cracks around fasteners.
- Plaster cracks: older homes; cracks may happen because plaster separates from lath.
- Non-structural masonry cracks: small cracks in stucco or interior masonry surfaces (not major foundation issues).
What You’ll Need (And Why Each Thing Matters)
Here’s the truth: you can’t “no-comeback” a crack with only spackle and hope. The durability comes from reinforcement and the right compound.
Tools
- Utility knife (fresh blade)
- Putty knife (4–6 inch) and a wider taping knife (8–12 inch) for feathering
- Sanding sponge (fine) or 220-grit sandpaper
- Dust mask and eye protection (drywall dust is not a food group)
- Vacuum or tack cloth
Materials
- Drywall screws (if the wall flexes or the crack is on a seam)
- Drywall tape: paper tape or fiberglass mesh tape
- Joint compound: either pre-mixed (all-purpose) or setting-type compound (“hot mud”)
- Primer (PVA primer is common for new drywall compound)
- Matching paint
Spackle vs. Joint Compound vs. Setting-Type (“Hot Mud”)
Spackle is fine for tiny dings and pinholes. For cracksespecially cracks that movedjoint compound (mud) is usually the better choice because it’s meant for taping and feathering.
Setting-type joint compound hardens by chemical reaction (rather than air-drying). It’s tougher, shrinks less, and is often the best choice when you want a repair that resists cracking. It’s also what many pros prefer for reinforcing repairs, especially when using mesh tape.
Paper Tape vs. Mesh Tape (The Quick, Non-Religious Version)
Paper tape is strong and creates a smooth finish, especially for inside corners. Mesh tape is fast and sticks to the wall, but it typically performs best with setting-type compound for strength. If you use mesh tape with lightweight pre-mixed mud in a high-stress area, the crack may come back to haunt you.
The “Doesn’t Come Back” Method for Drywall Cracks
This is the core process for most interior drywall cracksespecially seam cracks. Don’t skip steps unless you enjoy doing the same project twice.
1) Test for Movement (This Takes 10 Seconds and Saves 10 Years)
Press gently on both sides of the crack. If the wall flexes in and out, your crack is basically a symptom of loose drywall. If you just fill it, it’ll crack again.
If it moves: you must stabilize it with screws.
2) Stabilize the Drywall (Screws Beat Déjà Vu)
If the crack is on a seam or you feel movement:
- Locate the stud (a stud finder helps, but tapping and logic also work).
- Drive drywall screws into the stud near the cracktypically a few inches above and below the crack line, and slightly to each side if needed.
- Sink each screw just below the paper surface (dimple it), but don’t tear the paper.
This step is a big reason your repair won’t come back: fewer wiggles, fewer cracks.
3) Open the Crack Into a V-Groove (Yes, You’re “Making It Worse” on Purpose)
Use a utility knife to remove loose paint, crumbly compound, and any failing tape. Slightly widen the crack into a shallow V shape. This does three helpful things:
- Removes weak material that can’t hold a repair
- Creates space for compound to bond
- Stops you from simply “capping” a moving crack with a thin skin
Vacuum the dust. A clean surface is the difference between “nice patch” and “why is it flaking.”
4) Apply Compound and Embed Tape (Reinforcement Is the Secret Sauce)
For a lasting crack repair, tape is non-negotiable on anything beyond a hairline surface crack.
Option A: Paper tape (great for seams and corners)
- Apply a thin coat of joint compound over the crack, extending a few inches on both sides.
- Press paper tape into the wet compound, centered over the crack.
- Use your knife to embed the tape firmly and squeeze out excess mud (you want a strong bond, not a thick ridge).
Option B: Mesh tape (fast, but pair it with setting-type compound for best strength)
- Stick mesh tape centered over the crack.
- Cover it with a thin coat of compound, pressing mud through the mesh so it bonds to the wall.
Pro tip: Whether paper or mesh, keep the first coat fairly thin. The goal is bond and reinforcement, not building a speed bump on your wall.
5) Feather Additional Coats (Wide and Thin Beats Thick and Lumpy)
Once the first coat dries/hardens:
- Lightly sand or knock down any ridges.
- Apply a second coat, wider than the first (think 8–12 inches wide), feathering the edges.
- Apply a third coat if needed, even wider, to blend the repair into the wall.
The trick is feathering: wide, thin coats disappear after paint. Thick, narrow coats look like you repaired the wall with a slice of cake frosting.
6) Sand Smooth, Clean, Prime, Paint
Sand lightly with fine grit. Wipe off dust. Then prime the repair area before painting. Primer seals the porous compound so your topcoat matches the surrounding sheen and color (otherwise you may see “flashing” where the patch drinks paint differently).
Special Cases (Where Cracks Love to Return)
Nail Pops and Screw Pops
If you have a bump or a small crack around a fastener, the drywall has loosened from the framing. The best fix is not “tap it back in and pray.” Instead:
- Reset the popped fastener (or remove it if needed).
- Add two drywall screws into the stud: one above and one below the pop area.
- Cover dimples with joint compound, sand, prime, paint.
Securing the drywall is what prevents the pop (and its crack friend) from returning.
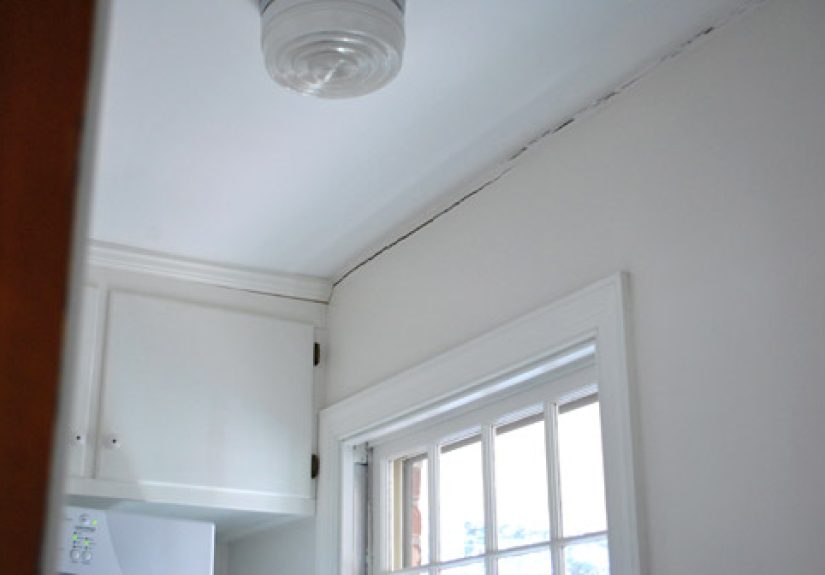
Inside Corner Cracks (Wall-to-Wall or Wall-to-Ceiling)
Corners are movement magnets. If a crack keeps returning at the wall-to-ceiling line, seasonal framing movement or truss uplift may be involved. A durable approach depends on what’s happening:
- If corner tape failed: cut out loose tape, re-tape with paper tape, and finish with multiple coats.
- If it’s a hairline seasonal gap: in some cases, a paintable flexible caulk can perform better than a rigid mud-only repair (especially where movement repeats seasonally).
Translation: if the crack is acting like a tiny expansion joint, sometimes you need a tiny expansion-joint strategy.
Plaster Wall Cracks (Older Homes)
Plaster is different from drywall. If plaster cracks because it’s separating from the lath behind it, filling the crack alone is like putting a bandage on a loose tooth.
A longer-lasting plaster crack repair often includes:
- Stabilizing loose plaster with plaster washers/screws or a plaster adhesive system (so the plaster re-bonds to lath).
- Applying mesh over the crack (for reinforcement) if the crack is more than minor.
- Skim coating with appropriate compound/plaster product and feathering it smooth.
- Priming and painting.
If your plaster walls have widespread cracking, you may be looking at a larger skim-coat approach (or professional plaster repair), not a single-crack spot fix.
Small, Non-Structural Masonry or Stucco Cracks
For small cracks in stucco or masonry surfaces, you’ll generally want a product designed for that material (not standard drywall mud). But the same “no comeback” principle applies:
- Clean out loose material
- Use the right filler/patch for masonry
- Reinforce if needed (mesh for stucco repairs)
- Finish and seal properly
If it’s a foundation or structural masonry crack, don’t treat this as a cosmetic patch jobdiagnose the cause first.
How to Prevent Cracks from Returning (The Boring Stuff That Works)
Some movement is normal. But you can reduce crack déjà vu with a few habits and checks:
- Control indoor humidity (extreme swings can stress wood framing and finishes).
- Fix moisture issues (leaks weaken materials and can worsen movement).
- Don’t skip primer on fresh compound.
- Use tape on real cracksmud-only repairs are often temporary on seams.
- Stabilize loose drywall with screws before you patch.
FAQ: Quick Answers for Common Crack Questions
Can I just caulk a wall crack?
For tiny, moving hairline cracks at trim lines or wall-to-ceiling joints, flexible paintable caulk can work well. For drywall seam cracks, caulk alone usually won’t hold up like tape and compound.
Do I have to use tape?
If the crack is on a seam or keeps returning, yestape is what bridges and reinforces. Think of mud as the “finish,” and tape as the “structure.”
Why does my patch show through paint?
Usually because the patch wasn’t feathered wide enough, wasn’t sanded smoothly, or wasn’t primed (so the paint absorbs differently and flashes).
of Real-World Experience: My Ongoing Relationship With Wall Cracks
I once believed wall cracks were like typos: you dab them, smooth them, and move on with your life. Then I bought (or lived in, or helped someone with) a house that treated drywall seams like a seasonal subscription service. Every winter: new crack. Every spring: the crack’s “limited edition” sequel.
The first time, I did what most people do: spackle, sand, paint. It looked fantasticuntil the temperature shifted and the crack reappeared in the exact same place, like it had left a forwarding address. That’s when I learned the difference between a cover-up and a repair. If the wall moves and you apply a rigid skim of filler, the wall wins. The crack doesn’t “come back,” because it never left; you just painted over its secret headquarters.
My second attempt was the “I watched two videos, so I’m basically a contractor now” phase. I widened the crack a little, slapped on mesh tape, covered it with pre-mixed lightweight compound, and feathered it out… sort of. It lasted longer, but not forever. When I pressed the wall near the crack, it flexed. That was the “aha” moment: the drywall itself wasn’t solid. I’d reinforced the surface, but the board was still doing a tiny trampoline impression.
The third time was the charm: I added drywall screws into the stud near the seam, just enough to snug the panel back to the framing. Then I cut out the loose tape, cleaned the dusty mess (vacuuming is underrated), and used setting-type compound for the first coat. I embedded tape properly, feathered wider than I thought was necessary, and primed before paint. The final patch didn’t just look betterit felt stronger. The wall didn’t flex the same way. And months later, when the seasons did their usual dramatic temperature routine, the crack didn’t reintroduce itself.
Since then, I’ve become that person who gently presses around a crack like I’m checking a melon at the grocery store. Movement? Screws first. No movement? Still tape if it’s a seam. And corners? Corners get respect, because corners crack for sport. If a wall-to-ceiling joint keeps opening seasonally, I don’t get into an ego battle with physicsI use the strategy that matches the movement, sometimes including flexible caulk where appropriate.
The biggest lesson: a lasting repair is rarely about one magic product. It’s about a simple order of operationsstabilize, reinforce, finishand doing each step like you’d rather be done once than become best friends with your sanding sponge.
Conclusion
To fill a wall crack so it doesn’t come back, you have to treat the cause, not just the symptom. Stabilize any loose drywall, remove weak material, reinforce the area with tape, and rebuild the surface with the right compound in thin, feathered coats. Prime before paint, and you’ll get a repair that blends in todayand stays that way after the next season changes its mind.