Table of Contents >> Show >> Hide
- What Gmail Auto-Forwarding Can (and Can’t) Do
- Before You Start: A 60-Second Prep Checklist
- How to Forward All New Gmail Emails Automatically (Step-by-Step)
- How to Forward Only Certain Emails Automatically (Using Filters)
- Google Workspace Accounts: What If the Forwarding Option Is Missing?
- Troubleshooting: When Gmail Forwarding Doesn’t Work
- Security & Privacy: Use Forwarding Without Regretting It
- How to Stop Automatic Forwarding (and Clean Up After Yourself)
- FAQ: Quick Answers to Common Forwarding Questions
- Real-World Experiences: What Forwarding Looks Like After the Tutorial Ends (About )
- Conclusion
If your inbox is starting to feel like a crowded airport terminal (arrivals every 30 seconds, nobody knows where to stand), automatic forwarding can be your traffic control tower. With a few settings in Gmail, you can send incoming messages to another email address automaticallyso your work mail can follow you on vacation, your old account can “move” to a new one, or your side-hustle can stop living in the same place as your aunt’s chain emails.
This guide walks you through forwarding all new Gmail messages, forwarding only certain messages with filters, and fixing the common hiccups (like “Why is the forwarding tab hiding from me?”). We’ll keep it practical, specific, and just funny enough that your eyes don’t glaze over like a donut.
What Gmail Auto-Forwarding Can (and Can’t) Do
Gmail’s automatic forwarding is designed for one main job: send copies of your new incoming emails to another address automatically. It’s simple, reliable, and built right into Gmail settings.
- It forwards new incoming messages after you turn it on (not the entire history of your inbox).
- It does not forward spam (so if an email lands in Spam, it typically won’t get forwarded).
- You can choose what happens to the Gmail copy (for most accounts, the key options include keeping it in the inbox or archiving it).
- You can forward only certain emails by using filters (great for receipts, alerts, or VIP senders).
One more important reality check: the easiest forwarding setup happens on a computer browser. The Gmail mobile apps don’t always expose the full forwarding controls, but you can often use a mobile browser in “desktop site” mode if you’re in a pinch.
Before You Start: A 60-Second Prep Checklist
- Use a desktop browser if possible: Gmail’s full settings are easiest to access there.
- Have access to the destination inbox: Gmail will send a verification link to confirm you own (or control) the forwarding address.
- Know your goal: Forward everything, or only specific messages? (Your future self will thank you for deciding now.)
- If this is a work/school account: Your organization might restrict forwarding for security. We’ll cover that later.
How to Forward All New Gmail Emails Automatically (Step-by-Step)
This method forwards all new incoming mail from one Gmail account to another email address. Think of it as setting up a mail butler who silently carries every new message to a second inbox.
Step 1: Add the forwarding address
- Open Gmail on a computer browser and sign in to the account you want to forward from.
- Click the gear icon (Settings) in the top-right corner, then choose See all settings.
- Open the Forwarding and POP/IMAP tab (or a tab labeled Forwarding, depending on your layout).
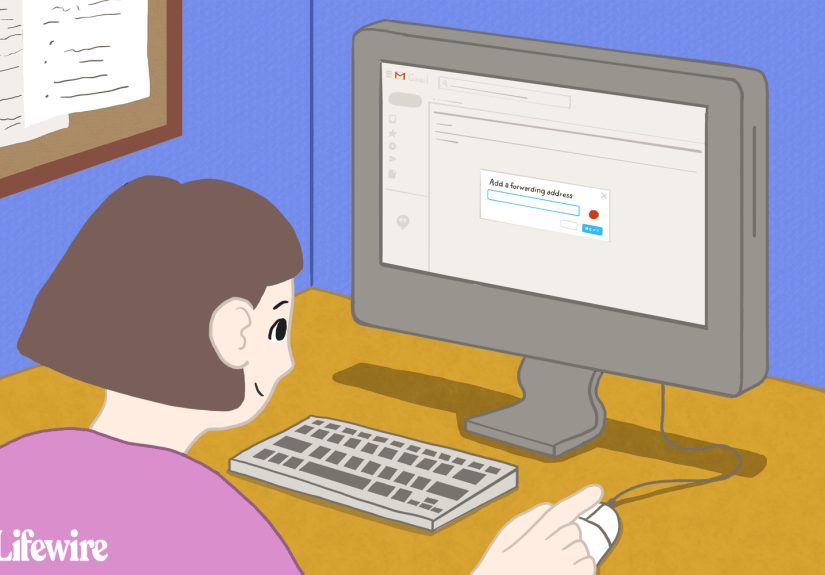
- In the “Forwarding” section, click Add a forwarding address.
- Enter the email address you want to forward to, then click through the prompts (Next/Proceed/OK).
Step 2: Verify the forwarding address
Gmail will send a verification message to the destination email address. Open that inbox, find the verification email, and click the verification link. This step is Gmail’s way of confirming you’re not secretly forwarding your roommate’s email to yourself (which is both rude and a fast track to consequences).
Step 3: Turn on forwarding and choose what happens to the Gmail copy
- Go back to Gmail settings in the original account.
- Refresh the browser (this matters more than it should, but here we are).
- Return to the Forwarding and POP/IMAP (or Forwarding) tab.
- Under “Forwarding,” select Forward a copy of incoming mail to and choose the verified address.
- Choose what happens to the Gmail copy of forwarded emails. In many setups, the most common choices are:
- Keep Gmail’s copy in the inbox (recommended for most people)
- Archive Gmail’s copy (keeps your inbox cleaner but still searchable in “All Mail”)
- Scroll down and click Save Changes.
Step 4: Test it (so you don’t find out later in a panic)
Send a test email to the Gmail address you’re forwarding from (use another account or ask a friend). Then confirm:
- The message arrives in the destination inbox.
- The message behaves the way you expect in the original Gmail inbox (stays visible, or gets archived, depending on your choice).
How to Forward Only Certain Emails Automatically (Using Filters)
Forwarding everything is great for migrations and “one inbox to rule them all.” But if you only want certain messages forwarded (like invoices, support requests, or anything from your boss that includes the word “urgent”), Gmail filters are the move.
Important detail: if you create a forwarding filter, it generally applies to new incoming messages going forward, not old emails already sitting in your inbox.
Option A: Forward only specific emails (recommended for targeted forwarding)
- In Gmail (desktop browser), click the search options icon in the search bar (it often looks like sliders).
- Enter your criteria. Examples:
- From: [email protected] (invoices and receipts)
- Subject includes: “Order confirmation”
- Has the words: “ticket” OR “case #” (support emails)
- To: [email protected] (messages sent to a shared address)
- Click Search to make sure the results match what you intended (this step prevents accidental chaos).
- In the search window, click Create filter.
- Check Forward it to and choose the forwarding address.
- (Optional but useful) Also apply a label like Forwarded or Receipts.
- Click Create filter to save it.
Option B: Forward to multiple email addresses (yes, it’s possible)
Gmail’s main auto-forwarding usually points to one destination. But if you want messages forwarded to multiple addresses, the practical approach is to create separate filtersone per forwarding address. Each destination address must be added and verified first.
Example: A small business owner forwards website leads to a shared team inbox and also forwards payment confirmations to an accounting address. Two filters, two destinations, no drama.
Smart filter ideas that work in real life
- Travel mode: Forward anything with “reservation,” “boarding,” or “itinerary” in the subject to the email you check on your phone.
- Job search: Forward emails from recruiters (or from a list of company domains) to a dedicated inbox for tracking.
- Family admin: Forward school alerts to both parents, but keep everything else in one main inbox.
- Receipts only: Forward “Your receipt” / “Invoice” emails to a finance address and label them for easy audits later.
Google Workspace Accounts: What If the Forwarding Option Is Missing?
If you’re using Gmail through work or school, your admin may have disabled automatic forwarding for security reasons. In that case, you might not see the forwarding option in settings at all. This isn’t Gmail being quirkythis is policy.
What you can do:
- Check with IT/admin: They can choose whether users are allowed to set up forwarding.
- Ask about safer alternatives: Gmail delegation or a shared inbox may be approved when forwarding is not.
- Admin-level routing: In some organizations, admins can redirect/route mail centrally (useful for role-based addresses like support@ or hr@).
Troubleshooting: When Gmail Forwarding Doesn’t Work
Problem: The verification email never arrives
- Check the destination inbox’s Spam/Junk folders.
- Wait a few minutes and resend the verification (sometimes email is just… email).
- Make sure you typed the forwarding address correctly (one missed character = forwarding to a stranger).
- If the destination is a corporate email, ask IT if external verification messages are blocked or quarantined.
Problem: Forwarding is on, but emails aren’t showing up in the destination inbox
- Confirm you clicked Save Changes after enabling forwarding.
- Remember: spam generally doesn’t forward.
- If you’re using filters, confirm the filter criteria actually match the incoming emails (test by searching Gmail with the same criteria).
- Check whether the destination mailbox is full (some providers stop accepting mail when storage is maxed out).
Problem: You’re only seeing some emails forwarded
If you set up filter-based forwarding, only the messages that match your filter criteria will forward. Also, filters apply to new incoming mail going forward. Replies to an email thread won’t automatically forward unless the reply matches the same criteria.
Problem: Gmail says you’re forwarding, but you didn’t set it up
Treat this like a “check engine” light for account security. If you see a forwarding notice you don’t recognize:
- Change your Gmail password immediately.
- Go to Gmail settings and disable forwarding.
- Review your filters (malicious forwarding is often implemented through filters, too).
- Review recent security activity in your Google Account settings.
Security & Privacy: Use Forwarding Without Regretting It
Forwarding is powerful because it quietly copies email elsewhere. That also means you should treat it like a keydon’t hand it out casually. A few best practices:
- Forward to accounts you control: Sounds obvious, but “it’s my old email from 2013” can still be a security risk if it’s abandoned.
- Keep a Gmail copy (at least at first): During transitions, keeping a copy helps you confirm nothing is missing.
- Use filters for sensitive workflows: If only invoices need forwarding, don’t forward your entire digital life.
- Revisit forwarding monthly: Especially for temporary setups like vacations or short-term projects.
How to Stop Automatic Forwarding (and Clean Up After Yourself)
When you’re done forwardinglike after you’ve migrated to a new inbox or returned from vacationturn it off so you’re not accidentally leaking mail into the future.
- Open Gmail on a computer browser.
- Go to Settings → See all settings.
- Open the Forwarding and POP/IMAP (or Forwarding) tab.
- Select Disable forwarding.
- Click Save Changes.
If you set up filter-based forwarding, also go to Settings → Filters and Blocked Addresses and edit or delete the forwarding filters you created. Otherwise, you may “disable forwarding” and still have filters happily shipping your emails off like they’re paid by the mile.
FAQ: Quick Answers to Common Forwarding Questions
Can I forward emails automatically from the Gmail mobile app?
The Gmail mobile apps don’t always include the full forwarding controls. The most consistent method is using a desktop browser. If you only have a phone, try using your mobile browser and enabling “Desktop site.”
Will forwarding move my old emails to the new account?
Noforwarding handles new incoming emails after you enable it. For old mail, you’d need to manually forward select messages or use a separate migration/import method.
Can I reply from the new inbox using my old Gmail address?
Forwarding alone doesn’t automatically make replies come “from” the original address. If that’s your goal, you’ll want to explore Gmail’s “Send mail as” options (separate from forwarding) so replies can be sent using the original identity.
Why doesn’t Gmail forward spam?
Because spam is the email equivalent of leaving your front door unlocked. Gmail generally blocks auto-forwarding for spam to reduce risk and prevent abuse.
Real-World Experiences: What Forwarding Looks Like After the Tutorial Ends (About )
Here’s the part nobody tells you: the “hard” part of Gmail forwarding isn’t clicking the buttons. It’s deciding what kind of person you want to be on the other side of forwarding. The calm, organized person with clean filters and labeled receipts? Or the person who forwards everything to a shiny new inbox and then wonders why they can’t find their kid’s school email under 73 promotional messages about socks.
In real life, forwarding tends to start with good intentions. Maybe you’re switching jobs and want your old Gmail to keep feeding your new address for a few months. Or you’re traveling and want itinerary emails to land in the inbox you actually check while you’re on airport Wi-Fi pretending you’re fine. The first week usually feels magical: everything shows up where you want, and you think, “Wow, I am unstoppable.” This is commonly followed by week two: “Why am I getting forwarded emails at 2 a.m. about a discount on storage bins?” (Answer: you forwarded everything.)
The best forwarding setups I’ve seen behave more like a smart concierge than a moving truck. Instead of forwarding the entire internet, people forward only the categories that matter: invoices to accounting, support requests to a shared team inbox, bank alerts to a secure mailbox they check daily, and time-sensitive travel messages to a mobile-friendly account. Filters make this feel effortless, especially when you pair them with labels like “Forwarded,” “Receipts,” or “VIP.” That label becomes your paper trailproof that the system is working and a quick way to audit what’s being shared.
The most common “oops” moment is forgetting that filters (and forwarding) mostly apply to new messages. People set up forwarding, then immediately expect last year’s messages to appear in the new inbox like a migrating flock of emails. Forwarding isn’t a time machine; it’s a conveyor belt. If you need historical mail, plan a separate migration strategy rather than relying on forwarding alone.
Another surprisingly common experience: someone turns on forwarding for vacation coverage, comes back, and forgets to turn it off. Weeks later, they realize a colleague has been quietly receiving every emailincluding calendar invites, password reset attempts, and that overly personal message from a family member. So the best habit you can adopt is a simple one: if forwarding is temporary, set a reminder to disable it. Your inbox deserves closure.
Finally, forwarding can be an early warning system for account security. Gmail’s “you are forwarding” notice is annoying in the same way a smoke detector is annoyinguntil the day it saves you. If you ever see forwarding behavior you didn’t set up, treat it as urgent. Check forwarding settings, review filters, secure your password, and audit account access. Forwarding should be a tool you control, not a mystery plot twist.
Conclusion
Automatically forwarding Gmail is one of the simplest ways to keep up with important messages across accountswhether you’re migrating to a new inbox, covering work while you’re away, or routing specific emails like receipts and alerts to the right place. Set up forwarding on a desktop browser, verify the destination address, choose what happens to the Gmail copy, and use filters when you only want certain messages forwarded. Most importantly: review your setup occasionally and turn forwarding off when it’s no longer needed. Your future inbox will be quieter, safer, and dramatically less likely to surprise you at midnight.