Table of Contents >> Show >> Hide
- 1) Decide What You Want (And What You’re Ready to Heal)
- 2) Choose a Reputable Place (This Is Not the Time for “Convenient”)
- 3) Needle vs. Piercing Gun: What’s the Difference?
- 4) Pick the Right Starter Jewelry (Your Ear Will Have Opinions)
- 5) What Happens During the Appointment (A Play-by-Play)
- 6) Aftercare That Actually Helps (Not the “Old Wives’ Cabinet”)
- 7) Healing Timeline: What’s Normal vs. What’s Not
- 8) Special Considerations for Kids and Teens
- 9) Preventing Common Problems (Because You’d Like to Keep Your Cool)
- 10) When Can You Change Earrings?
- Quick “Do This, Not That” Cheat Sheet
- Conclusion
- Real-Life Experiences: What It Actually Feels Like (And What People Wish They Knew)
Getting your ears pierced is one of those tiny life upgrades that somehow feels like a personality update.
One minute you’re “just existing,” and the next you’re dramatically tilting your head in the mirror like a
jewelry influencer with a day job. But before you let anyone near your ear with anything sharper than a
compliment, it’s worth doing it the smart way: safer studio, better jewelry, calmer healing, fewer “why is
my ear mad at me?” moments.
This guide walks you through the whole processchoosing a piercing type, finding a reputable piercer,
what to expect during the appointment, and how to care for your new piercing so it heals cleanly. Expect
practical tips, a few laughs, and zero “just vibe with it” medical advice.
1) Decide What You Want (And What You’re Ready to Heal)
Start with the two biggest choices: placement and healing commitment.
Your ear lobe is basically the easygoing friend of the ear world. Cartilage is the high-maintenance friend
who will absolutely notice if you sleep on it wrong.
Common ear piercing placements
- Lobe: Classic, generally easiest to heal, good “first piercing” territory.
- Upper lobe: Similar to lobe, but can be slightly fussier depending on anatomy.
- Helix (outer rim cartilage): Popular, stylish, longer healing time.
- Conch (middle cartilage): Looks amazing, can feel tender with over-ear headphones.
- Tragus/Daith/Rook: Cool factor high, anatomy-dependent, usually more advanced healing.
Healing time reality check
Healing is not just “it doesn’t hurt anymore.” Healing means the channel inside your ear has matured and
isn’t easily irritated or infected. As a general rule:
- Lobe: often around 6–8 weeks to heal enough for jewelry changes (full settling can take longer).
- Cartilage: often monthsand for some people, closer to 6–12 months for full healing.
If you want a low-stress introduction to piercings, pick a lobe. If you want cartilage, that’s totally fine
just know you’re signing up for a longer relationship with saline spray and patience.
2) Choose a Reputable Place (This Is Not the Time for “Convenient”)
A good piercing is part art, part hygiene, part anatomy, and part “the piercer gently talks you out of bad
ideas.” Your best bet is a professional piercing studio with strong safety practices and a portfolio of
healed work.
What “reputable” looks like
- Clean and organized: not just “looks tidy,” but clearly set up for sterile procedures.
- Single-use needles and sterile instruments (ask how they sterilizepros won’t be offended).
- Gloves and hand hygiene: before, during, and whenever they touch anything important.
- Quality jewelry: implant-grade materials and proper sizing for swelling.
- Clear aftercare instructions: printed or written, not “uh… rinse it sometimes.”
Look for APP-aligned standards
In the U.S., training and regulation can vary by city and state. Many people use professional standards
promoted by organizations like the Association of Professional Piercers (APP) as a helpful
benchmark when choosing a studio and initial jewelry.
3) Needle vs. Piercing Gun: What’s the Difference?
Here’s the short version: many professional studios use a sterile, single-use needle because it
creates a clean opening and is easier to control for precise placement. Piercing guns are more common in
retail settings, and concerns often include higher trauma to tissue and harder-to-sterilize components.
If you’re choosing between the two, a reputable needle-based studio is the usual “safer bet” for both lobes
and cartilage. And just to be crystal clear: cartilage with a gun is widely discouraged.
4) Pick the Right Starter Jewelry (Your Ear Will Have Opinions)
Starter jewelry matters more than most people think. The wrong metal can trigger irritation or allergic
reactions; the wrong size can pinch, swell, or embed. You want jewelry that’s smooth, properly fitted, and
made from materials known for biocompatibility.
Great starter materials
- Implant-grade titanium: a top choice for many first piercings, especially if you’re sensitive.
- Solid 14k+ gold (nickel-free and quality-made): elegant, but quality control matters.
- Niobium or platinum: also common in higher-quality piercing jewelry.
If you’ve ever reacted to cheap earrings, snaps, belt buckles, or watch backs, you might be prone to
nickel allergy. In that case, choosing nickel-free, implant-grade jewelry from the start can save
you from a very annoying “why is my ear itchy and angry?” chapter.
5) What Happens During the Appointment (A Play-by-Play)
Knowing what to expect makes the whole thing easier. A professional ear piercing appointment usually
follows a predictable flow:
Step-by-step
- Consultation: You discuss placement, anatomy, jewelry options, and any concerns (allergies, sports, headphones, etc.).
- Paperwork and ID: Many studios require ID; minors often need a parent/legal guardian and consent (rules vary by state).
- Marking: The piercer marks placement. You check it in a mirror. Take your timethis is the “measure twice” part.
- Prep: Cleaning the skin and setting up sterile tools and jewelry.
- The piercing: A quick pinch/pressure moment. Most people say the anticipation is worse than the actual poke.
- Jewelry insertion: The jewelry goes in immediately. Expect warmth, mild throbbing, and a “wait, that’s it?” feeling.
- Aftercare review: You leave with instructions and the confidence of someone who just did a brave tiny thing.
How much does it hurt?
Pain is subjective, but generally: lobes are quick and mild-to-moderate; cartilage tends to be sharper and
can ache longer. The biggest “pain multiplier” is anxietyso breathe, unclench your shoulders, and please
don’t hold your breath like you’re defusing a bomb.
6) Aftercare That Actually Helps (Not the “Old Wives’ Cabinet”)
A new piercing is basically a tiny wound with jewelry as a houseguest. Your job is to keep it clean, calm,
and unbothered while your body builds a healthy healing channel around it.
The daily routine
- Wash your hands before touching your ear. Every time. No exceptions.
- Clean gently once or twice daily with sterile saline spray or a mild, fragrance-free cleanser and water.
- Rinse well if you use soapleftover cleanser can irritate.
- Dry carefully with clean, disposable materials (avoid fluffy towels that snag).
What to avoid (your piercing’s enemy list)
- Hydrogen peroxide and harsh antiseptics: they can damage healing tissue and slow recovery.
- Heavy ointments unless a clinician tells you to use them: they can trap moisture and gunk.
- Twisting/rotating the jewelry “just because”: modern guidance often discourages it because it can irritate the healing channel.
- Sleeping on it: pressure and friction can cause swelling and bumps, especially on cartilage.
- Pools, hot tubs, lakes, and oceans early on: soak at your own riskwater exposure can raise infection risk.
You might hear older advice that suggests rotating earrings or using rubbing alcohol for a few days.
Some pediatric resources still mention it, but many dermatology and professional piercing sources now
emphasize gentle cleaning, saline, and minimal disturbance because irritation can delay healing.
If you’re unsure, follow the instructions from your piercer and your healthcare providerand default to
“don’t traumatize the tiny wound.”
7) Healing Timeline: What’s Normal vs. What’s Not
Normal early healing can include mild swelling, warmth, tenderness, and a small amount of clear fluid that
dries into light crust. That’s your body doing its job.
Normal-ish signs
- Mild redness close to the piercing site
- Some soreness when bumped (especially the first week)
- Clear or pale fluid that dries and forms a small crust
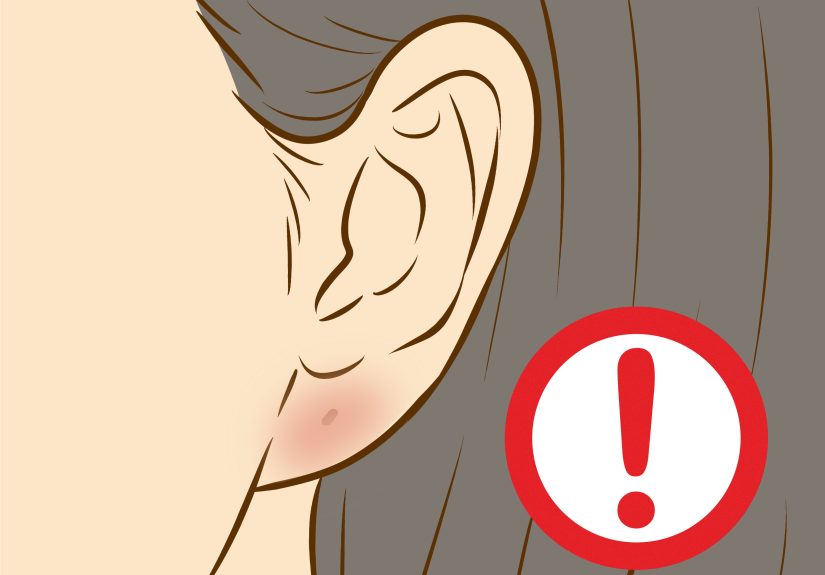
Red flags (get help)
- Spreading redness, worsening swelling, increasing pain
- Thick yellow/green discharge, foul smell, or pus
- Fever or feeling sick
- Jewelry embedding into the skin
- Cartilage piercings that are very painful, hot, and intensely redcartilage infections can become serious faster
If something feels “off” and it’s not improving, trust your instincts. Mild lobe irritation may settle with
gentle care, but cartilage problems deserve faster medical attention.
8) Special Considerations for Kids and Teens
Ear piercing for kids is common, but timing and care matter. Many pediatric sources suggest waiting until a
child is mature enough to help care for the piercing, because consistent aftercare is what prevents most
complications. If you’re piercing an infant, talk to a pediatrician first, especially about timing and what’s
considered safest for your child’s age and health.
Tips if you’re piercing a child’s ears
- Choose a highly reputable professional (or a medical setting if recommended by your child’s clinician).
- Stick to simple studs (avoid hoops/dangly styles early on).
- Be serious about aftercarekids touch everything, including their ears.
- Plan around swimming and sports so healing is easier.
9) Preventing Common Problems (Because You’d Like to Keep Your Cool)
Irritation bumps
These often happen when a piercing is repeatedly disturbedsleeping on it, snagging it with hair, over-cleaning,
or changing jewelry too early. The fix is usually boring: reduce irritation, keep cleaning gentle, and let it calm down.
Allergic reactions
Itching, rashy redness, or persistent irritation can be an allergyoften to nickel. Upgrading to implant-grade titanium
or another high-quality, nickel-free option can make a huge difference. Don’t “power through” a reaction; your ear will win.
Keloids and raised scars
Some people are more prone to keloids (raised scars) than others. If you’ve had keloids before, or you have a family history,
consider talking to a dermatologist before piercingespecially cartilage or higher-risk placements. If a bump is growing, painful,
or changing quickly, get it checked rather than guessing.
Embedded earrings
This can happen when jewelry is too tight or swelling is significantcommon in kids and with butterfly backs. If the backing or
post is sinking into the skin, don’t try to “DIY surgery.” Seek medical care.
10) When Can You Change Earrings?
Changing jewelry too early is one of the easiest ways to restart irritation and invite infection. For lobe piercings,
many people can switch after the initial healing window (often around 6–8 weeks), but only if there’s no tenderness,
swelling, or discharge. Cartilage is slowerwaiting longer is usually safer.
If you’re unsure, ask your piercer to do the first jewelry change. They can also downsize jewelry (switching to a shorter post)
once swelling is down, which can improve comfort and reduce snagging.
Quick “Do This, Not That” Cheat Sheet
- Do: pick a professional studio with strong sterilization practices.
- Don’t: choose based only on price or “it’s right next to the food court.”
- Do: start with implant-grade, nickel-free jewelry if you’re sensitive.
- Don’t: start with mystery metal from the bargain spinner rack.
- Do: clean gently and consistently.
- Don’t: over-clean, twist constantly, or use harsh chemicals “to be extra safe.”
- Do: get medical help for worsening symptomsespecially cartilage issues.
- Don’t: remove jewelry in a panic unless a clinician advises it (removing can trap infection inside).
Conclusion
The best ear piercing experience is the one where you leave with cute jewelry and never have to Google
“is my ear supposed to be this color.” Choose a reputable piercer, start with quality jewelry, keep aftercare
simple, and treat healing like the small-but-real body project it is. Your future selfwearing earrings with zero drama
will thank you.
Real-Life Experiences: What It Actually Feels Like (And What People Wish They Knew)
Most first-timers say the biggest surprise is how fast the piercing itself happens. They walk in expecting a long,
dramatic ordealmaybe a spotlight, a soundtrack, a single tear rolling down the cheekand then it’s over in seconds.
The moment is usually described as a sharp pinch followed by warm throbbing that fades into “tender but fine” within
the hour. Lobes often feel like they got flicked hard. Cartilage, meanwhile, has a reputation for feeling more intense
and staying sore longerespecially if you accidentally bump it while changing shirts or brushing your hair (a classic).
A common “I wish I knew” is how much little habits affect healing. People who sleep on their side often realize (too late)
that their favorite sleep position is basically a nightly wrestling match with their new piercing. Many end up using a travel
pillow or adjusting pillows so the ear isn’t pressed into the mattress. Another repeat lesson: headphones. Over-ear headphones
can squeeze certain cartilage piercings, and earbuds can irritate piercings like tragus placements. Folks who rely on headphones
for work or the gym often wish they planned their piercing around a low-headphone seasonor at least tested what’s comfortable
before committing.
Then there’s the emotional roller coaster of “Is this infected?” Mild redness, warmth, and crusties can look alarming if you’ve
never healed a piercing before. Many people say the best reassurance was learning what’s normal (a little tenderness, a bit of clear
fluid that dries) versus what’s not (spreading redness, significant swelling, pus, fever). People also mention that over-cleaning is a
real trap. When you’re nervous, it’s tempting to attack the area with every product in your bathroom like you’re trying to disinfect a
crime scene. But the most successful healers usually stick with a simple routinesaline or gentle cleansing, clean hands, and leaving the
jewelry alone.
Jewelry choice shows up in “experience stories” all the time. Many people who started with low-quality metal describe itching or persistent
irritation that mysteriously disappeared after switching to implant-grade titanium. Others wish they’d avoided tiny, tight backs that pressed
into swelling tissue, because discomfort can spiral into irritation and prolonged healing. Parents of kids often note that the hardest part isn’t
the piercingit’s preventing the child from absentmindedly twisting the earrings while watching TV or tugging them during hair brushing. The best
experiences tend to include a plan: short hair tied back, studs that don’t snag, and a quick daily routine that becomes as automatic as brushing
teeth.
Finally, people who loved their experience often mention the confidence boostsmall, but real. It’s a controlled, intentional change that feels
personal. The secret is that the “best piercing day” isn’t just about bravery in the chair; it’s about smart choices before and after. When you
choose a professional piercer, pick quality jewelry, and treat healing like a process (not a vibe), you usually get the story you want: “It went
great,” not “So… funny thing happened.”