Table of Contents >> Show >> Hide
- Before You Start: The Two Most Common Subwoofer Setups
- Safety First (Because Car Batteries Don’t Play)
- What You’ll Need (Parts and Tools)
- Step 1: Plan the System Like a Grown-Up (Even If You Don’t Feel Like One)
- Step 2: Run Power the Safe Way (The Fuse Is Not Optional)
- Step 3: Get a Signal to the Amp (Aftermarket vs. Factory Radio)
- Step 4: Connect the Subwoofer (And Don’t Accidentally Build a Rattle Machine)
- Step 5: Set Gains and Crossovers (This Is Tuning, Not “Turn Everything Up”)
- Step 6: Troubleshooting Like a Calm, Reasonable Human
- When It’s Smarter to Pay a Pro
- Quick Checklist: A Clean Sub Install in 60 Seconds
- Real-World Install Experiences (What I Wish I Knew)
If your music feels like it’s missing a heartbeat, you’re not imagining itmost factory systems play bass like it’s
afraid of commitment. A subwoofer fixes that. Not the “shake-the-license-plate-off” kind of bass (unless you want
that), but clean, deep low-end that makes kicks punchy, bass guitars actually sound like bass guitars, and podcasts
feel weirdly cinematic for no reason.
This guide walks you through a smart, safe, beginner-friendly way to install a subwoofer in your carwhether you’re
using a powered sub (amp built in) or a traditional setup (separate amp + sub + box). We’ll cover planning, parts,
wiring basics, factory-radio integration, tuning, and the classic “why is it humming?” troubleshooting. Let’s build
bass the right way.
Before You Start: The Two Most Common Subwoofer Setups
Option A: Powered Subwoofer (Easiest, Least Space)
A powered sub is a subwoofer and amplifier in one compact unitoften designed to fit under a seat or against a trunk
wall. This is the simplest path if you want noticeably better bass without a full trunk build.
Option B: Amp + Subwoofer + Enclosure (Most Custom, Most Output)
This is the “classic” setup: a separate amplifier drives a subwoofer mounted in a sealed or ported enclosure.
It’s more flexible and can hit harder, but it takes more planning and wiring.
Safety First (Because Car Batteries Don’t Play)
Installing a sub involves working around your car’s electrical system. If you’re not comfortable with that, or if
you’re under 18, have a trusted adult helpespecially with battery connections, fuse installation, and wire routing.
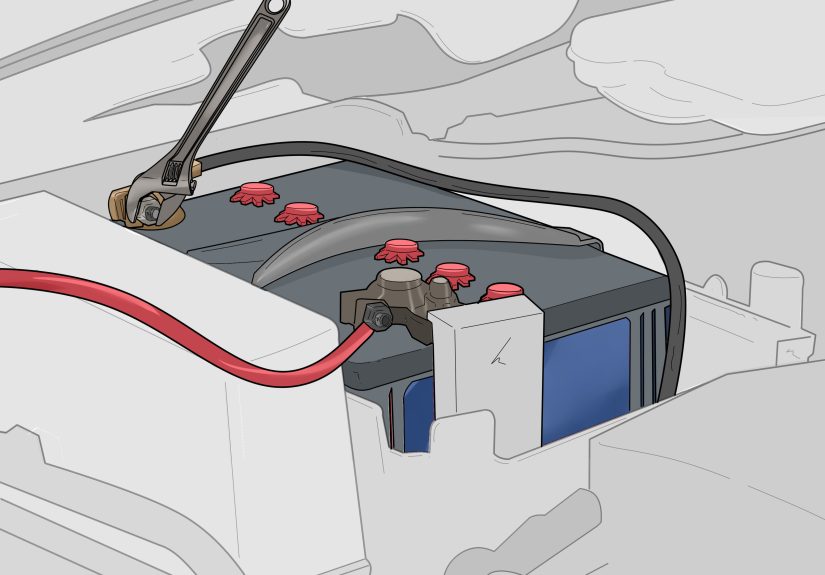
Always disconnect the negative battery terminal before doing any electrical work. Take your time. Rushing is how
people invent new swear words.
What You’ll Need (Parts and Tools)
Core Components
- Subwoofer (single or dual voice coil, sized for your goals)
- Enclosure (sealed, ported, or a preloaded box) unless using a powered sub
- Amplifier (mono amp for subs, or a multi-channel amp if you’re powering speakers too)
- Amp wiring kit (power wire, ground wire, fuse holder, remote wire, terminals)
- Signal connection (RCA cables, or speaker-wire inputs, or a line output converter)
If You’re Keeping the Factory Radio
- Line Output Converter (LOC) or an amp with speaker-level inputs
- Optional: vehicle-specific integration modules (helps on newer cars with complex audio systems)
Tools That Make Life Easier
- Socket set and screwdrivers
- Wire stripper/crimper, heat shrink or electrical tape
- Panel removal tools (so you don’t pry plastic like a raccoon)
- Zip ties and split loom (for clean, protected wire runs)
- Multimeter (highly recommended for troubleshooting and verifying power/ground)
Step 1: Plan the System Like a Grown-Up (Even If You Don’t Feel Like One)
Pick the Location
Most subs go in the trunk or cargo area. Powered subs often go under a seat. Whichever you choose, check:
- Will it block seat folding, spare tire access, or cargo use?
- Will the enclosure slide around? (It will, unless you secure it.)
- Is there ventilation for the amplifier (amps dislike being wrapped like a burrito)?
Match the Amp to the Sub (Don’t GuessMatch)
Look at your subwoofer’s recommended power range (RMS, not “MAX!!!” marketing watts). Then choose an amplifier that
can deliver appropriate RMS power at the sub’s final impedance (ohms). If this part feels confusing, you’re normal.
The most common beginner win is a mono amp stable at 2 ohms paired with a sub wired to 2 ohms.
Choose Sealed vs. Ported (Quick and Practical)
- Sealed box: usually smaller, tighter bass, easier to place, more forgiving.
- Ported box: usually louder and deeper, but bigger and more sensitive to tuning and space.
Step 2: Run Power the Safe Way (The Fuse Is Not Optional)
Power wiring is where you either do it right… or you create a future “why does my car smell like hot pennies?”
situation. The basics:
- Disconnect the negative battery terminal before starting.
- Use the correct wire gauge for your amplifier’s current draw (your wiring kit should match your build).
- Install an inline fuse near the battery to protect the power wire in case of a short.
Routing the Power Wire
You’ll route the power wire from the battery, through the firewall, and back to the amp location. Use existing
grommets when possible. If a wire passes through metal, it must be protected (grommet + loom) so vibration doesn’t
slowly saw through the insulation. That’s not “paranoia,” that’s “not burning your car down.”
Ground Wire: Short, Solid, Bare Metal
A good ground is the difference between “clean bass” and “why is my system possessed?” Choose a chassis ground near
the amplifier. Sand/clean to bare metal, use a solid bolt point, and keep the ground wire short (typically under
18 inches when possible). Power and ground should usually be the same gauge.
Step 3: Get a Signal to the Amp (Aftermarket vs. Factory Radio)
If You Have an Aftermarket Head Unit
This is the easiest path. Most aftermarket radios have RCA sub outputs (or rear outputs you can use). You’ll run RCA
cables from the head unit to the amp, plus a remote turn-on wire that tells the amp to power on when
the radio turns on.
If You Have a Factory Head Unit
You usually have two clean options:
-
Use an amp with speaker-level inputs: tap into the factory speaker wires and feed that signal into
the amp directly. -
Use a Line Output Converter (LOC): it converts speaker-level signal into RCA-level signal for an amp
that needs RCAs.
Example: You’ve got a 2018 Honda Civic with the factory radio and you want one 12-inch sub in the trunk.
A common approach is tapping rear speaker wires, feeding a quality LOC (or using speaker-level input on the amp), then
running RCAs to a mono amp. You keep the factory look, steering wheel controls, and still get real bass.
Step 4: Connect the Subwoofer (And Don’t Accidentally Build a Rattle Machine)
Subwoofer Wiring Basics
Your sub may be single voice coil (SVC) or dual voice coil (DVC). DVC subs can be wired in series or parallel to change
total impedance. Follow the sub and amp recommendations so you don’t end up below the amp’s safe impedance.
Secure Everything
- Secure the enclosure so it doesn’t slide during braking (your sub box should not become a passenger).
- Use firm, clean speaker wire connections.
- Keep wires tidy and protectedzip ties are cheap, and your future self will be grateful.
Step 5: Set Gains and Crossovers (This Is Tuning, Not “Turn Everything Up”)
The amp gain is not a “bass volume” knobit’s input sensitivity. Setting it too high can cause distortion, overheating,
and damage. A safe beginner approach:
- Turn bass boost off to start.
- Set the low-pass filter (LPF) around 80–100 Hz as a starting point.
- Play a familiar song and raise volume to a loud but clean level.
- Increase gain slowly until bass blends well, then stop before it sounds strained or distorted.
Phase: The “Why Did My Bass Disappear?” Switch
Many amps or powered subs have a 0/180 phase switch. If your bass sounds weak at the driver’s seat (even though the
sub is working), try flipping phase. You’re aiming for the strongest, smoothest bass where you actually sit.
Step 6: Troubleshooting Like a Calm, Reasonable Human
No Power
- Check the inline fuse and the amp’s fuse.
- Verify ground is bare metal and tight.
- Confirm remote turn-on wire gets voltage when the radio turns on.
Sub Turns On, But No Sound
- Confirm signal source (RCAs or speaker-level) is connected correctly.
- Double-check LOC wiring if using factory radio.
- Check that LPF isn’t set too low and gain isn’t all the way down.
Humming/Whining (Alternator Noise)
- Re-check ground quality and length.
- Route RCAs/signal wires away from power wire when possible.
- Make sure wires aren’t pinched or damaged under trim panels.
When It’s Smarter to Pay a Pro
If your vehicle has an advanced factory audio system (premium amps, ANC, heavy integration, CAN-bus complexity), a pro
install can save you time, frustration, and accidental dashboard warning lights. Also: if you need to drill the firewall
and you’re not confidentplease don’t make that your first DIY “surprise metal shavings” experience.
Quick Checklist: A Clean Sub Install in 60 Seconds
- Battery disconnected before wiring
- Correct wire gauge for amp power
- Inline fuse installed near battery
- Power wire protected through firewall (grommet/loom)
- Short, solid, bare-metal ground
- Signal method chosen (RCA, speaker-level, or LOC)
- Box and amp securely mounted
- Gain set conservatively, LPF around 80–100 Hz to start
- Rattle check (license plate, trunk trim, loose items)
Real-World Install Experiences (What I Wish I Knew)
The first time you install a subwoofer, you expect the “big moment” to be the bass drop. In real life, the big moment
is usually you discovering that your trunk contains seventeen mystery objects that all buzz at 47 Hz. That’s normal.
In fact, one of the most useful lessons from real installs is that adding bass doesn’t just add soundit reveals
everything that’s loose in your car’s interior like a truth serum for plastic clips.
One common experience: you finish wiring, everything turns on, and the bass is… underwhelming. The sub is moving, the
amp light is on, and yet it feels like the music is still on a low-fat diet. Nine times out of ten, it’s tuning or
integrationnot “bad equipment.” Factory systems sometimes roll off bass as volume rises, and a basic LOC or a smarter
integration solution can make the difference between “meh” and “wow.” Another easy win is checking phase. Flipping
0/180 can instantly bring bass back at the driver’s seat, especially if the sub is far behind you in the trunk.
Another real-world lesson is that grounds matter more than people think. A ground that looks tight but isn’t bare metal
can cause humming, random shutdowns, or bass that fades when you hit bumpsbecause the connection is basically doing
cardio. The fix is usually simple: choose a better chassis point, clean to bare metal, tighten properly, and keep the
ground short. It’s not glamorous, but neither is chasing electrical gremlins at midnight.
Then there’s the “gain temptation.” It’s incredibly easy to treat the gain knob like a bass volume knob. The result is
bass that sounds loud for five minutes, then turns harsh, muddy, or starts smelling like regret. The best installs I’ve
seen keep the gain lower than you expect and rely on proper crossover settings and a clean signal path. The bass feels
tighter, integrates better with door speakers, and stays enjoyable longerespecially on long drives where “too much”
turns into “please make it stop.”
Finally: secure everything. The coolest subwoofer setup in the world becomes uncool when the enclosure slides into a
turn and thumps your trunk wall like a bad percussionist. A couple brackets, straps, or a non-slip mounting solution
can prevent damage, rattles, and the awkward moment when a friend asks, “Is your bass… falling over?”
The best part of all these experiences is that they’re predictable. If you plan the system, protect wiring, choose a
solid ground, integrate the signal correctly, and tune with patience, you end up with bass that sounds expensiveeven
if your budget wasn’t.