Table of Contents >> Show >> Hide
- What Are KSP Mods, Exactly?
- Before You Start: Prep Your Game for Modding
- Method 1: How to Install KSP 1 Mods Manually
- Method 2: Use CKAN to Auto-Install and Manage Mods
- How to Install Mods for Kerbal Space Program 2
- Troubleshooting Common KSP Mod Problems
- Real-World Experiences Installing KSP Mods
- Final Thoughts
Kerbal Space Program is already a fantastic way to explode rockets in the name of science.
But once you discover mods, it goes from “wobbly rocket simulator” to “miniature space agency
sandbox” with better graphics, smarter autopilots, and wildly overpowered engines. If you’re
staring at a .zip file thinking, “Now what?”, this guide will walk you through exactly how to
install KSP mods safely and keep your game running smoothly.
What Are KSP Mods, Exactly?
Mods (short for “modifications”) are community-made add-ons that change or expand Kerbal Space
Program (KSP). They can:
- Add new parts and engines (think SpaceX-style boosters or sci-fi drives).
- Improve graphics with clouds, lighting, and high-res textures.
- Automate complex tasks (like MechJeb’s autopilot or kOS scripting).
- Overhaul entire game systems: life support, realism, tech trees, and more.
The catch: KSP is picky about where files go. Put things in the wrong folder and your game
may crash, hang on the loading screen, or simply ignore the mod. The good news is that once
you understand the basic structure, installing KSP mods becomes almost automatic.
Before You Start: Prep Your Game for Modding
1. Know Which KSP You’re Playing
First, figure out whether you’re playing:
- KSP 1 (Kerbal Space Program) – the classic game with a huge, mature modding scene.
- KSP 2 – currently in early access, with a growing but more experimental mod ecosystem.
The installation steps are different for KSP 1 and KSP 2, so we’ll cover both separately later.
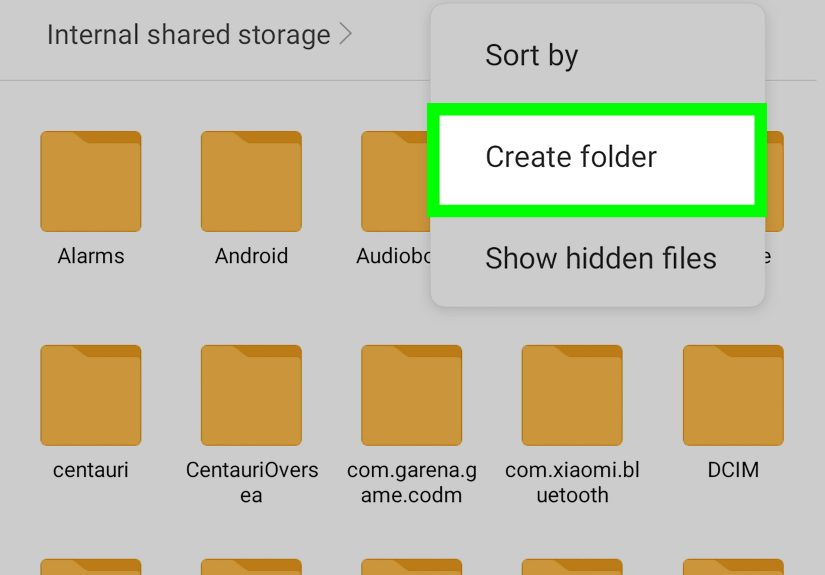
2. Find Your Game Folder and GameData
Almost every KSP 1 mod ends up in a folder called GameData. Your job is to get the
mod’s files into that folder, in the correct structure.
-
On Steam (Windows):
Open Steam > your Library > right-click Kerbal Space Program >
Properties > Installed Files > Browse…
This opens the KSP installation folder. Inside it, you’ll seeGameData. -
Non-Steam or other platforms:
Look for a folder likeC:GamesKerbal Space Programon Windows, or under
/Applicationsor your user directory on macOS and Linux. Inside that, again, you want the
GameDatafolder.
3. Make a Backup (Future You Will Be Grateful)
Before installing a pile of mods, make a copy of:
- The whole KSP folder (for a clean, mod-free version), or
- At least your
savesfolder and yourGameDatafolder.
If a mod goes rogue and breaks your game, you can restore this backup instead of rebuilding
everything from scratch.
Method 1: How to Install KSP 1 Mods Manually
Manual installation gives you maximum control and helps you understand how KSP’s file structure
works. It’s also the best way to troubleshoot odd issues later.
Step 1: Download Mods from Trusted Sources
For KSP 1, stick to well-known sites and official listings to avoid broken or malicious files.
Common places players use include:
- The official Kerbal Space Program forums’ Add-on Releases sections.
- Major mod hosting sites (often linked directly from mod authors).
- Curated download hubs recommended by the community.
Make sure each mod is compatible with your version of KSP. Using a 1.12 mod on a
much older or heavily modified copy of the game can cause issues.
Step 2: Unzip the Mod File
Most mods are downloaded as a .zip, .rar, or .7z archive. Extract it using
your favorite tool (Windows built-in extractor, 7-Zip, WinRAR, etc.).
Inside the archive you’ll usually find:
- A folder with the mod’s name (for example,
EnvironmentalVisualEnhancements). - Sometimes a
GameDatafolder with the mod inside. - Readme files or installation instructions don’t ignore these.
Step 3: Copy the Mod into GameData (Without Double GameData)
The most common rule for KSP 1 mod installation is:
Mod folder → your KSP GameData folder.
For example, if the extracted folder looks like this:
You don’t want GameData/GameData/EnvironmentalVisualEnhancements inside your game. Instead:
- Open the extracted mod folder.
- Keep drilling down until you see the actual mod folder (like
EnvironmentalVisualEnhancements,MechJeb2, etc.). - Drag that folder directly into your KSP
GameDatafolder.
When you’re done, your KSP GameData folder will look something like:
Step 4: Check for Dependencies
Many mods rely on shared libraries such as ModuleManager or specific plugin frameworks. If a
mod’s description mentions a required dependency, download and install that too using the same
process.
Step 5: Launch KSP and Verify
Start the game. On the loading screen, watch the messages at the bottom: you should see your
new mod’s name flash by as assets are loaded. Once in the main menu:
- Check for new menus (like a MechJeb icon or custom difficulty settings).
- Start a sandbox save and open the Vehicle Assembly Building (VAB) to look for new parts.
If something is missing, it’s usually due to files being in the wrong place or an outdated mod.
Method 2: Use CKAN to Auto-Install and Manage Mods
If you plan to run more than a handful of mods, doing everything by hand gets old fast. That’s
where CKAN (the Comprehensive Kerbal Archive Network) comes in.
What Is CKAN?
CKAN is a dedicated KSP mod manager that:
- Lists thousands of mods in a searchable interface.
- Downloads and installs mods automatically.
- Tracks dependencies and version compatibility for you.
- Lets you update or remove mods with just a few clicks.
Think of it as an “app store” for KSP mods: you choose what you want, and CKAN handles the file
shuffling so you don’t have to.
Step 1: Download and Run CKAN
CKAN is typically distributed as a single executable (for example, ckan.exe) that you can
place anywhere. To keep things tidy, many players put it directly in their KSP installation folder
or in a separate “Tools” folder.
On Windows, double-click ckan.exe to run it. On macOS or Linux, you may need to mark it as
executable and run it via your Mono/.NET runtime, depending on your setup.
Step 2: Point CKAN at Your KSP Installation
The first time CKAN launches, it may ask you to select your KSP install. Use the same folder you
located earlier (the one containing GameData). CKAN will then scan the directory and build a
list of mods appropriate for your version of the game.
Step 3: Choose Mods and Apply Changes
Once CKAN has loaded the mod list:
- Use the search box to find a mod (for example, “MechJeb,” “Astronomer’s Visual Pack,” or “kOS”).
- Check the box next to each mod you want to install.
- CKAN will automatically mark required dependencies.
- Click Apply changes (or similar) to start installation.
CKAN will download the files, place them correctly in GameData, and keep track of what it
installed. Later, you can return to CKAN and uninstall or update those mods without touching the
file system manually.
Step 4: Keeping Mods Updated
One big advantage of CKAN is painless updates. When a mod author releases a new version:
- Open CKAN.
- Refresh the mod list.
- Apply updates CKAN suggests for your installed mods.
This helps you avoid mixing outdated files with newer versions of KSP, which is one of the most
common causes of bugs.
How to Install Mods for Kerbal Space Program 2
KSP 2 is still evolving, and so is its modding ecosystem. Unlike KSP 1, most KSP 2 mods rely on
a mod loader such as SpaceWarp plus a plugin framework. The general flow looks like this:
Step 1: Install the Mod Loader (Usually SpaceWarp + a Plugin Framework)
Most KSP 2 mod guides start by having you:
- Download a mod loader like SpaceWarp from a trusted host.
- Follow the included instructions to copy its files into the KSP 2 installation folder.
- Confirm the game launches correctly with the loader installed before adding additional mods.
Step 2: Install Individual KSP 2 Mods
Once the loader is in place:
- Download KSP 2 mods compatible with the loader and your game version.
- Unzip each mod and follow its specific instructions. Many ask you to:
- Place the mod folder into a Loader-managed folder (for example, a
SpaceWarp/Modsor plugin directory), or - Drop files into a dedicated
BepInEx/pluginsor similar folder inside the KSP 2 installation.
- Place the mod folder into a Loader-managed folder (for example, a
- Launch the game and look for confirmation in the main menu or in-game UI that the mod is loaded.
Because KSP 2 is still in flux, always read the mod’s page carefully; instructions can change
as the game is updated.
Troubleshooting Common KSP Mod Problems
Even if you follow every step perfectly, mods can still misbehave. Here are some common issues
and how to fix them.
1. Game Hangs on the Loading Screen
This often happens when:
- A mod isn’t compatible with your KSP version.
- You installed the mod inside a nested
GameData/GameDatastructure. - A dependency is missing.
Start by:
- Checking your
GameDatafolder for duplicate or nestedGameDatadirectories. - Removing the last mod you installed and trying again.
- Verifying game files (on Steam) to repair any altered stock files.
2. Parts or Features Don’t Show Up
If a mod “installs” but nothing appears in the VAB:
- Confirm that the mod’s folder is directly inside
GameData(not buried inside extra levels). - Make sure it’s designed for your KSP version.
- Check the mod’s documentation for required DLC or other mods.
3. Random Crashes or Poor Performance
High-resolution graphics mods, complex planet packs, or big part collections can eat RAM and
VRAM. If your game crashes mid-flight:
- Try removing one or two heavy visual mods and see if stability improves.
- Lower your in-game graphics settings.
- Check whether there are known conflicts between the mods you’re using.
4. CKAN Won’t Install or Remove Mods Correctly
If CKAN is giving permission errors or refusing to apply changes:
- Make sure CKAN has write access to your KSP directory (avoid installing Steam games in system-protected folders when possible).
- Close KSP while CKAN is running.
- Check the CKAN logs or error messages for clues about specific files or folders.
In stubborn cases, you can temporarily remove a troublesome mod manually by deleting its folder
from GameData, then refreshing CKAN’s mod list.
Real-World Experiences Installing KSP Mods
Modding KSP is part science, part art, and part “why does it work now when I changed nothing?”
Here are some experiences and patterns many players run into when learning how to install KSP
mods.
The “I Installed Everything” Phase
A common story goes like this: a player discovers the KSP mod scene, grabs every shiny part pack
and visual overhaul they can find, throws it all into GameData, and then wonders why the
game crashes on load.
The lesson: start with a small, curated set of mods. For example:
- One visual mod (clouds + skybox).
- One autopilot/assistance mod.
- One or two part packs.
Once you’ve confirmed that combination is stable, add more slowly. It’s much easier to figure
out which mod broke your game when you only added one or two since your last good backup.
Discovering the Power of CKAN
Many players start with manual installations and eventually switch to CKAN after a few “I broke
everything and don’t know why” moments. CKAN’s ability to:
- Track which mods are installed,
- Check dependencies, and
- Update everything in one place
turns what used to be a tedious file-juggling exercise into a quick, almost routine task. Once
you’re running 20+ mods, a manager like CKAN becomes less of a luxury and more of a survival tool.
The “Double GameData” Trap
If there’s one installation mistake that shows up again and again, it’s the dreaded
GameData/GameData nesting. Players extract a mod, see a GameData folder in it, and drag
that whole thing into their existing GameData. The result: the mod’s files end up in the wrong
place and KSP pretends they don’t exist.
The easy fix is to always open the mod’s GameData folder first, then drag its contents into
your KSP GameData, rather than copying the folder as-is. If you’re ever unsure, compare the
folder structure to that of a working mod.
Experimenting with KSP 2 Mods
Because KSP 2 is still evolving, modding it feels more experimental. Players report more frequent
changes in installation methods as mod loaders and frameworks update to keep up with the game.
That makes reading each mod’s instructions absolutely essential.
A practical approach many players take is:
- Keep a “vanilla” KSP 2 install with no mods.
- Make a separate copy purely for modding.
- Test new mods one at a time, especially those that overhaul performance or graphics.
This way, if a loader update or experimental mod breaks your game, you still have a completely
clean version to fall back on.
Building Your Own “Perfect” Mod List
Over time, most players end up with a personal mod collection that matches how they like to play.
Some favor realism overhauls, others build cinematic screenshot machines with gorgeous visuals,
and some keep things lightweight with just a few quality-of-life tweaks.
As you install and test mods, it helps to:
- Keep a simple text document listing your mod names and versions.
- Note which ones are “must-have” versus “nice-to-have.”
- Record any known conflicts or performance issues you’ve hit before.
The goal isn’t to collect every modit’s to build a stable, enjoyable setup that makes your
space program feel uniquely yours.
Final Thoughts
Installing KSP mods looks intimidating when you first open that mysterious GameData folder, but
the core ideas are simple: download from trustworthy sources, put the right files in the right
place, and add mods gradually so you can spot problems early. For KSP 1, that usually means
copying folders into GameData or letting CKAN do the heavy lifting. For KSP 2, it means installing
a mod loader first and following each mod’s instructions closely.
Once you get the hang of it, modding becomes part of the fun. You can turn Kerbin into a
high-definition marble, script elaborate rocket launches, or build a hardcore, near-realistic
space programall without touching a line of KSP’s source code. Take it slow, keep backups, and
enjoy watching your Kerbals ride your newly modded creations into the (occasionally explosive)
unknown.