Table of Contents >> Show >> Hide
- Understand How Cardboard Carries Weight
- Choose Good Cardboard (Yes, It Matters)
- Core Techniques to Make Cardboard Stronger
- Step-by-Step: Build a Strong Cardboard Storage Cube
- Safety Tips for Working With Cardboard
- Troubleshooting Common Cardboard Structure Problems
- Real-World Cardboard-Building Experiences and Lessons Learned
- Conclusion
Cardboard has serious main-character energy. One minute it’s holding paper towels; the next, it’s a kid’s play fort, a cosplay suit of armor, or a surprisingly sturdy side table. The trick is knowing how to turn floppy boxes into real load-bearing structures that don’t collapse the first time someone sets a stack of books (or their cat) on them.
In this guide, we’ll walk through how cardboard actually carries weight, how to choose the right type, and the key techniques engineers, makers, and crafty people use to make cardboard structures stronger, stiffer, and more durable. Think of it as a mini structural engineering class, but with hot glue strings and duct tape instead of concrete and rebar.
Understand How Cardboard Carries Weight
Corrugated vs. “Plain” Cardboard
First, not all “cardboard” is the same. Most structural projects use corrugated cardboardthe stuff used in shipping boxes. It’s made of three layers: a wavy inner layer (the flute) sandwiched between two flat liners. Those flutes act like tiny arches, which is why corrugated board can handle surprising compression when it’s used correctly.
Packaging and box manufacturers explain that different flute sizes (A, B, C, E, etc.) give you different combos of cushioning and strength: larger flutes cushion better, while smaller, tighter flutes resist crushing and make stiffer walls. Heavy-duty boxes often use double-wall or even triple-wall board, which is basically multiple corrugated layers laminated together for serious load-bearing capacity.
Why Grain Direction Matters
Corrugated cardboard has a “grain”the direction the flutes run. If you stand a piece up so the flutes are vertical, it performs like a little column. If the flutes run horizontally under a load, the board bends and crushes more easily. Craft and DIY sources all agree that if a piece must carry weight (like the sides of a shelf), you should keep the flutes vertical wherever possible.
Rule of thumb: flutes vertical for legs and walls, flutes perpendicular to the span for shelves and beams. If in doubt, test: stand on a scrap with flutes in different directions and you’ll immediately feel the difference.
Choose Good Cardboard (Yes, It Matters)
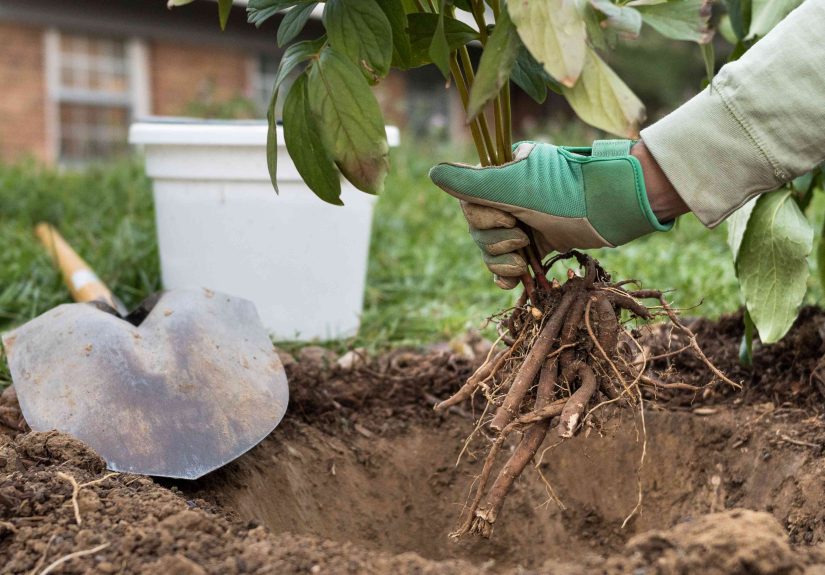
The classic eHow advice starts with something people skip: use good-quality cardboard. That doesn’t mean “new and expensive”it means clean, dry, and not crushed or heavily creased. Creases are weak points where the flute has already collapsed, so avoid panels with deep fold lines in critical load areas.
Look for:
- Heavy-duty shipping boxes (appliance, electronics, or bulk grocery boxes).
- Double-wall corrugated for furniture or seating projects.
- Large, unbroken panels so you can design pieces without patching together lots of small scraps.
Save thinner single-wall cardboard for non-structural parts like skins, decorative panels, or internal honeycomb filler, not the main load-bearing frame.
Core Techniques to Make Cardboard Stronger
1. Use the Grain, Don’t Fight It
Cardboard bends easily with the grain and resists bending across it. When you’re building arches, curves, or cylinders, you can score or roll the board along the flutes to get smooth bends without cracking the outer paper. Several cardboard-working tutorials show how a light score (or repeatedly running the board over the edge of a table) lets you curl cardboard into stable arches that carry load more efficiently than flat slabs.
For flat structural parts:
- Place flutes perpendicular to the direction of bending you want to resist.
- Keep flutes vertical in posts, legs, and walls.
- For curved pieces that still need strength, use multiple layers (more on that next).
2. Laminate Layers for Serious Stiffness
Want a cardboard panel that feels more like a wooden board? Lamination is your best friend. DIY makers, furniture tutorials, and even hobby engineering blogs all recommend gluing multiple layers of cardboard together to create a thicker composite panel. Key moves:
- Rotate the grain 90° between layers. Alternate flute directions so each layer supports the other’s weak axis, like plywood.
- Use PVA (white) glue or wood glue spread in a thin, even coat. Too much glue causes warping.
- Apply even pressure while it driesbooks, weights, or clamps with boards on both sides.
- For extremely strong blocks, you can stack many layers into a solid “cardboard timber” and carve or cut it to shape after it cures.
Some makers also use homemade wheat paste or thin epoxy to soak into the fibers before laminating. This can dramatically boost hardness and moisture resistance but adds mess and curing time.
3. Add Internal Ribs, Struts, and Honeycomb
Big, flat panels sag; framed panels don’t. Cardboard furniture builders often hide a surprisingly sophisticated skeleton inside what looks like a simple box.
You can:
- Create a grid of interlocking ribs (like egg-crate dividers) inside tables, benches, or shelves.
- Add vertical struts every 4–6 inches under shelves so the surface acts as a skin over a miniature frame.
- Roll or tape cardboard into tubes and use them as columnscardboard chairs often rely on tubes to carry the bulk of the weight.
- Use triangular gussets at corners to reduce racking (side-to-side wobble).
Think like an airplane wing: thin skins, strong ribs. Cardboard is light enough that you can “overbuild” the interior without making the object too heavy.
4. Use Strong Joints (Not Just Tape on the Outside)
Tape alone is great for temporary builds, but for long-lasting strength you want mechanical joints plus glue.
The original eHow guide recommends a tab-and-glue joint: when you cut a panel, leave a flap (tab) along the edge, score the fold, bend it back, glue it to the next piece, then tape over the seam. This increases the glued area so the joint behaves like a continuous surface, not just edge-to-edge contact.
Other great joint types:
- Slot joints: Cut matching slots in two pieces and slide them together in an X or T shape.
- Wrap joints: Wrap a strip of cardboard around a corner like a collar, gluing it to both sides.
- Bridged joints: Glue a small “bridge” piece across a seam on the inside, like a splint.
Glue tips from makers who basically live in a sea of cardboard:
- Hot glue grabs fast and fills gapsgreat for quick assembly and corner joints.
- PVA/wood glue is stronger long-term, especially for laminations and large surfaces.
- A combination (tack with hot glue, then reinforce with PVA) gives both speed and strength.
5. Reinforce With Hidden Non-Cardboard Supports
There’s no shame in adding a little “cheating strength.” The eHow article suggests taping or gluing stiff items like wooden dowels, chopsticks, rulers, or craft sticks behind or inside flat cardboard walls to keep them from bowing.
Other reinforcement options from prop builders and DIY furniture projects:
- Thin plywood or MDF strips hidden at long spans.
- Foam board laminated to cardboard for a lighter but stiffer composite panel.
- Fiberglass cloth plus epoxy over high-stress areas to create a cardboard-fiberglass shell (overkill for kids’ forts, great for long-term props).
6. Protect Against Moisture and Daily Wear
Cardboard’s kryptonite is moisture. Even a beautifully engineered structure can sag if it absorbs humidity. That’s why crafters often seal and finish their projects:
- Brush on PVA glue thinned slightly with water to stiffen and seal the surface.
- Use shellac or varnish for a harder, more water-resistant coating, as suggested in the eHow method.
- Top with acrylic paint or a clear water-based polyurethane for a smooth, wipeable surface.
Avoid soaking the cardboardseveral thin coats are better than one big drippy one. Always let each layer dry fully before adding the next.
Step-by-Step: Build a Strong Cardboard Storage Cube
To put these ideas into practice, let’s build a simple but sturdy storage cube that can hold books, craft supplies, or a plant (fake or realjust don’t water directly on the cardboard).
Materials
- Heavy-duty corrugated cardboard (double-wall if possible)
- PVA or wood glue
- Hot glue gun and sticks
- Duct tape or strong packing tape
- Box cutter/utility knife and cutting mat
- Metal ruler or straightedge
- Pencil and measuring tape
- Optional: wooden dowels or chopsticks for internal supports
- Optional: white glue + water, acrylic paint, or clear sealer for finishing
Step 1: Design and Measure
Decide on the cube size. For example, a 12-inch (30 cm) cube is easy to handle and fits standard storage bins. Sketch all faces (top, bottom, sides, back) and plan where ribs and supports will go. Mark your cut pieces so you keep grain direction straightdraw arrows showing flute direction on each panel before assembly.
Step 2: Cut Panels With the Grain in Mind
Cut:
- Two side panels, 12 x 12 inches, with flutes vertical.
- Top and bottom panels, 12 x 12 inches, with flutes front-to-back.
- Back panel, 12 x 12 inches, flutes vertical.
- Optional internal shelf panel if you want two levels.
Use a sharp knife and multiple light passes for clean edgescardboard educators emphasize that dull blades tear and weaken the edges.
Step 3: Laminate Key Panels
For the top, bottom, and sides, cut duplicate pieces and laminate them to the originals with glue, rotating the flute direction 90° between layers. Stack them between flat boards and weight them while they dry. You’ll end up with thicker, stiffer panels that resist sagging much better.
Step 4: Add Internal Ribs
Cut three or four narrow strips (say 12 x 2 inches) to use as ribs under the bottom panel and along the back. Glue them inside so they run front-to-back under the floor and vertically along the back wall. If you’re adding a center shelf, support it with small vertical struts or tubes underneath.
Step 5: Use Tab-and-Glue Joints
On the side panels, add 1–2 inch-wide tabs along the edges where they will meet the top, bottom, and back. Score and fold the tabs inward. Apply PVA or wood glue to the tabs and attach them to the inside faces of the adjoining panels. Hold with tape while the glue sets, then add a strip of duct or packing tape over each seam to lock it in.
Step 6: Reinforce Corners and Edges
Cut small right triangles of cardboard and glue them into the inside corners as gussets. Wrap the outside edges with strips of cardboard or tape to prevent delamination. This step alone can be the difference between “cute but wobbly” and “surprisingly solid.”
Step 7: Seal and Finish
Brush on a thin coat of diluted white glue or a clear sealer over the exterior, especially the edges and corners. Once dry, paint or leave the natural cardboard look if you like the industrial vibe.
Step 8: Test the Load Gradually
Start by loading lighter items. If everything feels stableno bowing, no creaksyou can slowly increase the load. If you see sagging, note where it occurs and add ribs or supports there on your next build. Cardboard is cheap, so iteration is part of the fun.
Safety Tips for Working With Cardboard
- Cutting tools: Use a cutting mat and keep fingers away from the blade path. Sharp knives are safer than dull ones because they don’t skip and tear.
- Adhesives: Work in a ventilated space when using varnish, epoxy, or spray finishes. Follow manufacturer safety instructions.
- Kids’ projects: Let children handle low-risk steps like decorating and simple slot assembly; adults should handle heavy cutting and power tools.
- Fire safety: Cardboard is flammable. Keep finished pieces away from heaters, candles, or hot lights.
Troubleshooting Common Cardboard Structure Problems
“My Shelf Is Sagging in the Middle”
Add one or more vertical supports under the sagging area, or glue a rib along the underside. You can also laminate an extra layer to the shelf with flutes running perpendicular to the existing ones for added stiffness.
“The Whole Thing Wobbles Side to Side”
You’re dealing with racking. Install a diagonal brace or a solid back panel that spans the full width and height of the piece. Even thin cardboard across the back can dramatically improve lateral stability.
“Corners Are Peeling or Splitting”
Wrap corners with tape or glued-on cardboard strips. Add inside corner gussets to reduce stress on the seams. If glue wasn’t used originally, reassemble the corner with glue plus tape for a stronger bond.
“It Warped While Drying”
Too much wet glue on one side can cause curling. Next time, apply thinner coats to both sides or press the piece flat between boards until fully dry. If it’s already warped, try misting the concave side lightly and pressing flat under weight.
Real-World Cardboard-Building Experiences and Lessons Learned
If you talk to people who build with cardboard a lotteachers running STEM projects, makers building furniture, parents crafting fortsyou’ll hear the same thing: the first build is usually a little wobbly, and that’s okay.
Imagine you’re helping a child build a reading nook out of moving boxes. The first version is basically four boxes stacked together with a blanket thrown over the top. It looks adorable… until the kid climbs in with half the household’s picture books and one very confident cat. The roof dips, the side bows out, and suddenly you’re catching collapsing cardboard before tears happen.
The second version is different. This time, you:
- Cut big, clean panels from your best boxes instead of stacking random shapes.
- Flip pieces so the flutes are vertical in the walls and oriented wisely in the roof panel.
- Glue struts and tubes inside the roof like rafters and tape over every inside joint.
- Laminate a second layer on the entry arch so it won’t crumple the first time someone leans on it.
Now when the same stack of books and the same cat arrive, the roof barely flexes. The kid notices toosuddenly the “cardboard fort” feels like a tiny room. That experience is powerful, especially for children: it connects cause (“we added ribs and braces”) with effect (“it doesn’t collapse anymore”). It’s hands-on engineering disguised as play.
Makers who build cardboard furniture tell similar stories. The first table might survive a light laptop but not a heavy stack of textbooks. After a failure or two, they start thinking in terms of load paths: where is the weight actually going? That leads them to add vertical tubes where legs meet the top, cross-bracing under the surface, and laminated edges that act like I-beams. The material hasn’t changedit’s still reclaimed boxesbut the design has evolved.
Over time, you also get a feel for where you can relax. Do you need triple-layer laminated sides for a kids’ toy bin? Probably not. Do you need extra ribs under a desk that will hold a monitor and keyboard every day? Definitely yes. The more you experiment, the more you realize cardboard is less of a “junk” material and more of a legitimate building mediumwith the bonus that mistakes are cheap and easy to recycle.
So when a project idea pops into your headan organizer, a display stand, a nightstand for a guest roomtry asking yourself: Where will this carry weight? Where will it bend? Then use the techniques above: align the flutes, laminate panels, add ribs and gussets, seal the surface. Before long, you’ll have your own list of favorite tricks and a home full of structures that quietly prove just how strong “just cardboard” can be.
Conclusion
Making a cardboard structure strong isn’t magic; it’s a combination of smart material choices, understanding how corrugated board works, and using a few proven engineering tricks. Choose clean, sturdy cardboard, respect the grain, laminate and brace where it counts, and protect your creation from moisture and wear. Whether you’re building a kid’s fort, a craft fair display, or an experimental piece of cardboard furniture, these techniques will help you go from “flimsy box” to “wait, that’s made of cardboard?” in no time.