Table of Contents >> Show >> Hide
- What Is a Dreamcatcher (and Why Do Kids Love Them)?
- A Quick, Respectful Note on Origins (Worth Doing With Kids)
- Supplies: Pick Your “Kid Mode”
- Method 1: Classic Hoop Dreamcatcher (Best for Ages 7+)
- Method 2: Paper Plate Dreamcatcher (Best for Ages 3–7)
- Method 3: “No-Weave” Dreamcatcher (Best for Mixed Ages)
- Decorating Ideas Kids Actually Get Excited About
- Weaving Without Whining: The Best Kid-Friendly Tricks
- Turn the Craft Into a Sweet Conversation About Sleep
- Where to Hang It (and How to Keep It Looking Good)
- A Simple “Craft Night” Plan (So You Don’t End Up Doing It All)
- Conclusion: A Craft That Becomes a Keepsake
- Extra: of Real-World(ish) Dreamcatcher Moments (So You Know What to Expect)
If you’re looking for a kids’ craft that checks all the boxeshands-on, colorful, slightly magical, and secretly great for fine-motor practicemaking a
dreamcatcher is a total win. It’s also one of those projects where “perfect” is not the goal. The goal is: your child is proud, your carpet survives, and
bedtime gets a little more peaceful (or at least prettier).
This guide walks you through kid-friendly ways to make a dreamcatcher (from “I can totally do this with a preschooler” to “my tween wants it to look
Pinterest-worthy”), plus tips for weaving without tears, decorating ideas, and a short, respectful note about cultural originsbecause crafting is more fun
when it comes with a little understanding, too.
What Is a Dreamcatcher (and Why Do Kids Love Them)?
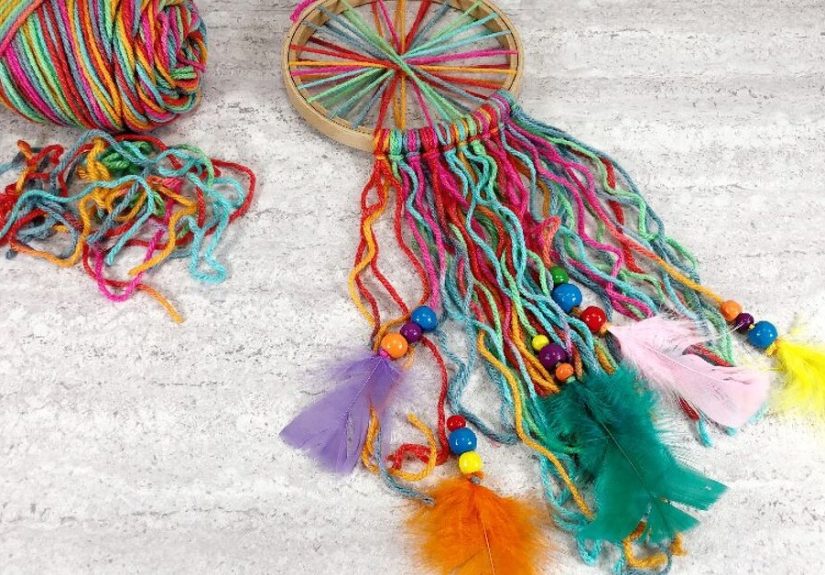
A dreamcatcher is typically a hoop with a woven web inside, often decorated with hanging strands, beads, and feathers. In many homes today it’s used as
décor, but it has deeper cultural roots (more on that in a moment). For kids, the appeal is simple: it looks like a spiderweb you’re allowed to touch, it
uses fun textures (yarn! beads!), and it becomes “their thing” to hang by a bed or in a cozy corner.
A Quick, Respectful Note on Origins (Worth Doing With Kids)
Dreamcatchers originate in Ojibwe/Anishinaabe traditions and later became more widely shared and commercialized. That history mattersespecially when we’re
doing this with children who are naturally curious and still building their “how do we treat other people’s cultures?” muscles.
- Do: talk about origins in a simple, respectful way (“This design comes from Ojibwe traditions.”).
- Do: treat the project as learning + art, not a costume or a joke.
- Do: consider buying authentic dreamcatchers from Native makers if you want one as a cultural item in your home.
- Don’t: sell the ones your kids make as “Native” crafts or claim cultural authority you don’t have.
You don’t need a long lecturejust a kind, accurate sentence or two. Kids can absolutely handle “We can appreciate something and still respect where it
comes from.” Honestly, adults could use that refresher, too.
Supplies: Pick Your “Kid Mode”
Here’s the good news: you probably have most of what you need already. Choose your base (hoop or paper plate), then add weaving material, then add
decorations. That’s it. Crafting doesn’t have to require a second mortgage.
Base Options
- Embroidery hoop (6–10 inches): sturdy, classic, easy to hang.
- Paper plate: perfect for younger kids; easy to punch holes.
- Cardboard ring: cut from a cereal box for a “use what you have” win.
- Pipe cleaner circle: great for tiny hands and quick results.
Weaving + Decorating Supplies
- Yarn, twine, embroidery floss, or craft thread (mix textures for extra “wow”)
- Beads (pony beads for younger kids; smaller beads for older kids)
- Feathers (or paper “feathers” if you want a no-mess alternative)
- Ribbon, lace, fabric strips, tassels, pom-pom trim, washi tape
- Scissors, glue (tacky glue works; hot glue for adults only), tape
- Hole punch (for paper plate version)
- Optional “helper tools”: a toothpick, a plastic needle, or a bent pipe cleaner for threading
Safety Notes (Because Kids Are Creative and Also Chaos Wizards)
- For kids under 3, skip beads and long stringsuse paper shapes and short ribbons instead.
- If using hot glue, an adult should handle it (and keep a bowl of cool water nearby for “oops” moments).
- Don’t hang dreamcatchers within reach of babies or inside cribsuse wall placement well out of grabbing range.
Method 1: Classic Hoop Dreamcatcher (Best for Ages 7+)
This is the “traditional-looking” version: wrap the hoop, weave a web, then decorate. It takes longer, but older kids love the sense of accomplishment.
If you want a project that feels like an event (in a good way), start here.
Step A: Wrap the Hoop
- Tie yarn or twine around the hoop with a firm knot.
- Wrap tightly all the way around, pushing wraps snugly together as you go.
- Secure the end with a knot and a dab of glue (or tuck it under wraps and tape it on the back).
Kid tip: If the yarn keeps sliding, use a tiny piece of tape to “park” it while they adjust their grip.
Step B: Weave the Web (The “Spiderweb” Part)
You’re basically making a repeating loop pattern around the hoop, then repeating again closer to the center. If your child says “This is impossible,”
calmly respond, “That’s interesting, because I believe in snacks and we can take a break.” Works every time.
- Tie your weaving string to the hoop at the top.
- Move 1–2 inches along the hoop, loop around the hoop, and pull snug to form your first anchor point.
- Repeat around the hoop until you return to the start (you’ll see a ring of loops forming).
- For the next round, loop through the middle of each previous loop instead of around the hoop.
- Continue until you reach the center, then tie off securely. Add a bead in the center if you’d like.
Step C: Add Hanging Strands
- Cut 3–5 lengths of yarn or ribbon (varying lengths looks great).
- Tie them to the bottom of the hoop with double knots.
- Add beads by threading them onto strands. Tie a knot under each bead to keep it from sliding.
- Attach feathers at the ends (or paper feathers for a classroom-friendly version).
Step D: Add a Hanger
Cut a short piece of yarn, thread it through the top of the hoop, and tie a loop. Congratulations: you now have functional wall art made by a tiny
person with big opinions.
Method 2: Paper Plate Dreamcatcher (Best for Ages 3–7)
This version is fast, forgiving, and ideal for younger kids. The paper plate acts like a hoop and the punched holes do the “hard thinking” for them.
Also, decorating the plate first is half the fun.
Step A: Prep the Plate
- Cut out the center of a paper plate to make a ring (adult help recommended).
- Punch 6–10 holes evenly spaced around the inner ring.
- Punch 2 holes at the top for hanging and 3 holes at the bottom for dangling decorations.
Step B: Decorate First (Because Kids Will Do It Anyway)
- Markers, paint, stickers, glitter glue (use with caution), or washi tape all work.
- Try a “night sky” theme: dark blue, star stickers, and a moon cutout.
- Try a “rainbow calm-down” theme: each color = one thing that helps you relax.
Step C: Weave the “Web”
- Cut a long piece of yarn (around 50–60 inches is usually plenty).
- Tie it to one of the inner holes, then pass it across to another hole to create a crisscross web.
- Add beads as you weave if your child is ready for it.
- When the web looks full, tie off the yarn on the back and tape the knot down.
Step D: Add the “Feathers”
Feathers can be real, store-bought, or made from cardstock. If you’re crafting in a classroom or you want a zero-shed option, paper feathers are your new
best friend.
- Cut three short strands of yarn for the bottom holes.
- Thread beads onto each strand (optional), then tie on a feather or paper feather.
- Tape or knot the strands on the back of the plate ring.
Method 3: “No-Weave” Dreamcatcher (Best for Mixed Ages)
If you’re working with kids who don’t have the dexterity for weaving yet (or you’re making a bunch for a party), use a simple “stretched loop” method.
You still get that web look without the tiny-knot struggle.
- Paint or wrap an embroidery hoop and let it dry.
- Stretch cotton loops (or soft elastic loops) across the inner ring in crisscross patterns.
- Clamp the second hoop ring on top (if using a standard embroidery hoop) to hold the loops in place.
- Add decorations to the bottom as usual.
Decorating Ideas Kids Actually Get Excited About
Let your child lead the design. You can suggest “themes,” but remember: kids hear “theme” and often choose “everything at once.” That’s not wrong. That’s
childhood.
- Name + initial: felt letters or a painted monogram on the hoop.
- Color stories: “Pick 3 colors that feel calm” or “Pick 3 colors that feel brave.”
- Memory beads: each bead stands for a favorite day, pet, or family member.
- Nature style: neutral twine, wooden beads, and soft fabric strips.
- Glow night: glow beads or glow paint dots (instant bedtime excitement).
- Doily shortcut: glue or clamp a doily into a hoop for a lacey “web” look.
Weaving Without Whining: The Best Kid-Friendly Tricks
1) Pre-mark your anchor points
On a hoop, you can lightly mark 8–10 evenly spaced dots with a pencil. This gives kids a path to follow so they don’t end up accidentally inventing a new
form of modern art called “string panic.”
2) Use tape like a third hand
A tiny piece of tape can hold the string in place while your child pulls the next loop snug. It’s basically crafting with training wheelsand that’s a
compliment.
3) Keep tension “snug, not strangled”
Too loose and the web droops. Too tight and the hoop bends or knots fight back. Tell kids to pull until it feels “like tying a sneaker,” not “like
wrestling a garden hose.”
4) Thread beads with a pipe cleaner
Fold a pipe cleaner in half, poke yarn through the fold, then slide beads on the pipe cleaner like a stiff needle. This is especially helpful for younger
kids whose fine-motor skills are still loading.
Turn the Craft Into a Sweet Conversation About Sleep
One reason this is such a great “with your kids” project is that it naturally opens the door to talking about nighttime fears, worries, and routineswithout
forcing it.
- “If you could catch one worry and toss it out, what would it be?”
- “What helps your body feel safe at bedtime?”
- “What’s one good thing you want to remember from today?”
- “If your dreamcatcher had a ‘calm power,’ what would it be?”
You’re not trying to solve their whole inner world with yarn. You’re just giving them a gentle moment to sharewhile their hands stay busy.
Where to Hang It (and How to Keep It Looking Good)
- Above a bed (out of reach): classic placement for bedtime vibes.
- Near a reading nook: makes a cozy corner feel special.
- By a window: catches light, especially if you used shiny beads.
- On a wall hook: easier than tape, kinder to paint, less “thud” at 2 a.m.
If the web loosens over time, you can tighten by gently pulling slack toward the knot and re-tying, or by adding a tiny dab of glue to the knot on the
back.
A Simple “Craft Night” Plan (So You Don’t End Up Doing It All)
If you’re making dreamcatchers with multiple kids (siblings, a playdate, a class, a party), split it into stations so everyone stays moving and no one
forms a yarn-based union.
- Station 1: decorate the hoop/plate (markers, tape, stickers)
- Station 2: web time (adult support; pre-mark holes/dots)
- Station 3: bead + feather decorating
- Station 4: hanging loop + name tag + quick photo
Pro tip: set out only a few bead colors at a time. Otherwise kids will attempt to use every bead you own “because it’s a sunset galaxy unicorn theme,” and
you will not have the heart to say no.
Conclusion: A Craft That Becomes a Keepsake
Making a dreamcatcher with your kids is more than a cute DIY. It’s a chance to slow down, share a story, practice patience, and create something your child
can point to and say, “I made that.” Whether you go full hoop-and-web or keep it simple with a paper plate, the best dreamcatcher is the one that feels
personaland the best crafting moment is the one that feels connected.
Extra: of Real-World(ish) Dreamcatcher Moments (So You Know What to Expect)
If you’ve ever crafted with kids, you already know the secret: you’re not just making a dreamcatcher. You’re making a memory with occasional background
noise that sounds like a tiny committee meeting.
The “Web Moment” usually starts optimistic. Your child pulls the yarn across the hoop, and for the first two loops they’re basically a
fiber-arts prodigy. Then the string slips, the knot migrates, and suddenly you’re hearing, “It hates me.” This is when the magic phrase helps:
“It doesn’t hate you. It’s just string. String has big feelings.” You take a breath, you tape one spot, and the mood swings back toward hope.
The Bead Debate is next. Beads are thrilling because they’re tiny treasures… which is also why kids want to add seventeen of them in one
inch. Some families turn this into a game: “Each bead is one good thought.” Then your child announces, “I have 47 good thoughts,” and honestly, that’s a
flex. If you need fewer beads for structural reasons (and for not stepping on them later), suggest a pattern: “One bead after every two loops,” or “Only
the colors that match your theme.”
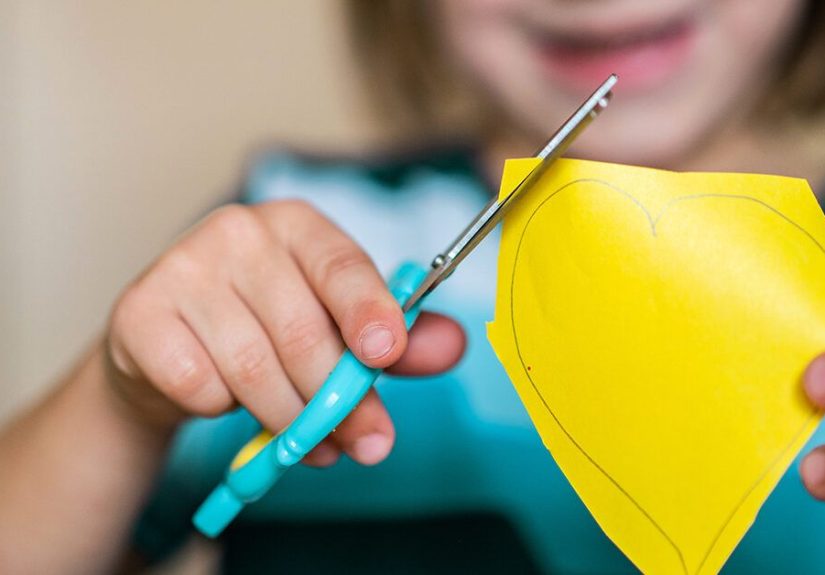
The Feather Situation is where things get dramatic. Real feathers are beautiful, but they also have a talent for shedding at exactly the
wrong time. If your household is the “we will find glitter until 2039” type, feathers may be your glitter’s cousin. Paper feathers are the peaceful
optionand kids still love making fringes with scissors because it feels like safe rebellion. Older kids might want ribbon tassels or lace strips instead,
especially if they’re aiming for a more “room décor” look.
The Bedtime Aftermath is the sweetest part. Kids love hanging their dreamcatcher where they can see it. Some will request a “ceremony”
(which may involve a flashlight and a stuffed animal audience). Others will test it immediately: “Okay, I’m going to sleep. Tell the dreamcatcher to do
its job.” You’ll smile, they’ll smile, and you’ll quietly appreciate that a craft project just turned into a calm bedtime ritual without you forcing a
speech about feelings.
And the best surprise? A week later, you’ll catch your kid explaining their dreamcatcher to someone else: how they picked the colors, what
the beads mean, why they chose a certain pattern. That’s not just decorationthat’s storytelling, pride, and confidence hanging on the wall. The dream
isn’t “perfect craft results.” The dream is your kid feeling capable. And if the web is a little lopsided? Congratulations. It’s authentic.