Table of Contents >> Show >> Hide
- What Exactly Is a Wall or Arch Swag?
- Pick Your Swag Style (Because Materials Change Everything)
- Tools & Supplies Checklist
- Step 1: Measure Like You Mean It (Simple Swag Math)
- Step 2: Choose Anchor Points (And Don’t Skip Wall Prep)
- Step 3: Build the Swag Base (So It Holds Shape)
- Step 4: Hang It Without the Panic (The “Two-Person” Method)
- How to Make a Balloon Swag (Wall or Arch)
- How to Drape a Fabric Swag on a Wall or Arch
- Pro Tips & Tricks (The Stuff People Learn After the First Failure)
- Troubleshooting: Fix the Most Common Swag Problems
- FAQ
- Final Check: The 60-Second “Does This Look Professional?” Test
- Extra: Real-World Experiences & Lessons People Learn the Hard Way (About )
A good swag is basically “effortless elegance” with a tiny bit of math and a not-so-tiny bit of
“why is this zip tie fused to my thumb?” Whether you’re dressing up a wedding arch, making a balloon moment
for a birthday wall, or giving your living room a seasonal glow-up, this guide walks you through the
how and the how-to-not-cry.
What Exactly Is a Wall or Arch Swag?
A swag is a decorative drapeusually greenery, florals, balloons, ribbon, fabric, or a mixhung so it
dips in the middle (or swoops asymmetrically) across a wall, doorway, mantel, or arch. The goal is simple:
it should look like it naturally fell into place… even though you absolutely engineered it like a tiny
decor bridge.
Swag vs. Garland vs. Arch Decor
- Garland = a long strand (greenery, beads, balloons) that can be laid flat or draped.
- Swag = a draped style of garland with intentional “dip” and shaped curves.
- Arch decor = any treatment on an arch (swag, clusters, full coverage, asymmetrical blooms).
Pick Your Swag Style (Because Materials Change Everything)
Before you buy supplies, choose the “species” of swag you’re making. Each has different building rules.
1) Greenery & Floral Swag
Best for: weddings, holidays, photo backdrops, “I saw this on Pinterest and now it’s my personality.”
Works with faux stems or fresh materials (fresh just needs water-friendly mechanics).
2) Balloon Swag (Balloon Garland on a Wall or Arch)
Best for: birthdays, baby showers, graduations, brand events, and anyone who likes compliments from strangers.
It’s lightweight but can be bulkyso anchoring and shaping matter.
3) Fabric Swag (Chiffon, Voile, Tulle, Velvet)
Best for: ceremony arches, dramatic wall draping, soft romantic entrances. Fabric hides sins beautifully,
like the world’s most polite cover-up.
4) Mixed-Media Swag (Greenery + Fabric, Balloons + Florals, Etc.)
Best for: “I want it to look expensive.” Mixing textures makes a swag feel fuller and more intentional.
Tools & Supplies Checklist
Universal basics (works for most swags)
- Measuring tape
- Painter’s tape (for marking anchor points)
- Scissors + wire cutters
- Zip ties (various sizes) and/or floral wire
- Monofilament/fishing line (nearly invisible support)
- Step stool or ladder (please don’t use a swivel chairyour future self will thank you)
Hanging hardware options (choose based on surface)
- Removable adhesive hooks (great for smooth walls; follow weight ratings and prep steps)
- Small nails/screw-in hooks (best for heavier swags or textured walls)
- Backdrop stands/pipe-and-drape (for events where walls are off-limits)
- Arch clamps, floral cages, zip ties (for arbors and wedding arches)
Material-specific add-ons
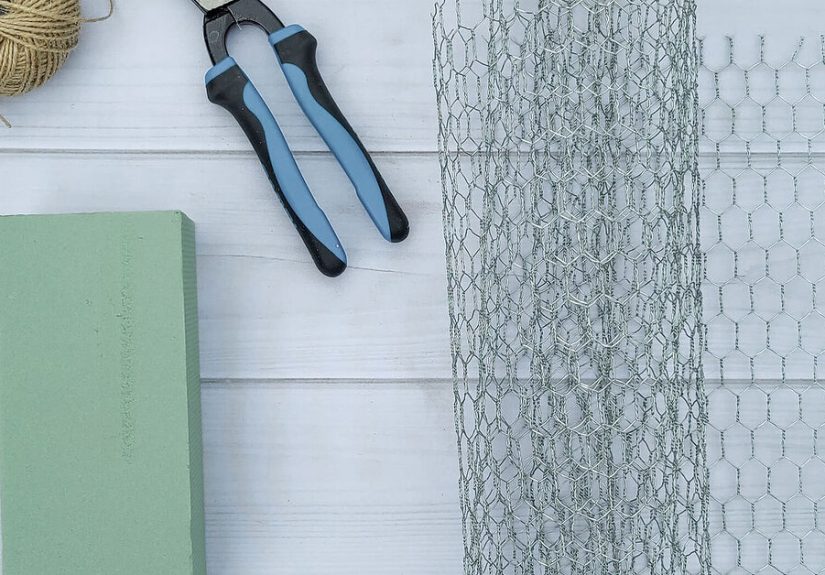
- Floral swags: floral foam cages (fresh), chicken wire or floral netting (fresh/faux), floral tape, waterproof tape
- Balloon swags: balloon decorating strip, glue dots, hand pump or electric inflator
- Fabric swags: clamps (spring clamps or backdrop clamps), safety pins, sturdy cord or ribbon
Step 1: Measure Like You Mean It (Simple Swag Math)
If you’ve ever hung a swag and it looked like a tightrope instead of a dreamy swoop, you probably didn’t
buy enough length. A swag needs extra material to create that dip.
The easy formula
Total length ≈ span + (2 × drop) + 10–25% extra for shaping
- Span = the straight distance across (wall width or arch width).
- Drop = how low you want the lowest point of the swag to dip.
- Extra = the “fluff factor” for thicker materials and nicer curves.
Example
You want a swag across a 6-foot span, with a 1.5-foot dip in the center:
6 + (2 × 1.5) = 9 feet. Add ~15% shaping room = about 10.5 feet total.
Quick rule of thumb for fuller looks
- Light, thin swags (beads, ribbon): add ~10–15% extra length.
- Chunky swags (greenery, balloons): add ~15–25% extra length.
- Deep swoops (dramatic draping): plan extra fabric so you can “gather” without pulling tight.
Step 2: Choose Anchor Points (And Don’t Skip Wall Prep)
A swag is only as strong as its anchors. Think of your hooks as the supporting cast; your garland is the
dramatic lead.
Where to place anchors
- Classic swag: one anchor at each end + 1–2 “helper” anchors hidden behind the greenery.
- Long or heavy swag: anchors every 18–30 inches (or wherever weight starts pulling down).
- Asymmetrical arch swag: 2–4 anchors clustered where the arrangement is densest.
Prep hacks for removable hooks
-
Clean the surface properly: wipe with isopropyl (rubbing) alcohol and let it dry.
Avoid household cleaners that leave residue. -
Press firmly & wait: many removable hook systems recommend pressing and then waiting
(often about an hour) before loading weight. - Avoid wallpaper and fresh paint: wallpaper can tear, and fresh paint needs curing time.
Rental-friendly hack: Use clear hooks and fishing line so the support practically disappears.
Your guests see the magic, not the engineering.
Step 3: Build the Swag Base (So It Holds Shape)
For greenery/florals (faux)
- Lay out your base garland on a table or clean floor. Decide where the “fullest” area will be (center or one corner).
- Add structure: twist floral wire around the garland in a few places to stiffen it, especially near anchor points.
- Layer greenery first: add extra stems to create volume before you add flowers. Think “foundation before frosting.”
- Secure with zip ties where stems meet the garland. Clip tie tails close so nothing pokes out later.
For greenery/florals (fresh)
Fresh florals need a water source and a secure mechanic. Common event-pro methods include floral foam cages,
bind wire, waterproof tape, and cable ties/zip ties to secure mechanics to an arbor or arch.
- Soak floral foam (if using) per product directionslet it absorb water naturally.
- Attach foam cages or netting to the arch using zip ties and/or bind wire. Make it tight enough that it won’t slide.
- Start with greenery to cover mechanics, then add focal blooms, then filler flowers.
- Balance weight: keep the base thicker and taper outward for a natural look.
Mechanics hack: if you’re building a floral cluster for a corner or one side of an arch, create a “backing”
with chicken wire or netting so stems have something to grip. It’s like rebar for flowers, but prettier.
Step 4: Hang It Without the Panic (The “Two-Person” Method)
If you can recruit help, do it. One person holds and adjusts; the other secures. If you’re solo, no worries
you’ll just develop a new appreciation for gravity’s confidence.
Hanging sequence
- Mark anchor spots with painter’s tape before installing hooks.
- Hang the center point first (or the heaviest cluster first for asymmetrical designs).
- Attach ends next, checking the dip and overall symmetry.
- Add hidden support points behind thick greenery to prevent sagging.
- Step back every few minutes to check shape from 6–10 feet away.
Invisible support hack
Tie short loops of fishing line to the back of the garland in a few places. Then loop those lines onto hooks.
The swag appears to “float,” and your secret remains safe with the fish.
How to Make a Balloon Swag (Wall or Arch)
Balloon swags (aka balloon garlands) look complicated, but the secret is just controlled chaos:
different sizes, a solid strip/base, and filling gaps like you’re playing balloon Tetris.
Balloon swag steps
- Pick 3–5 balloon sizes (or at least two sizes) for dimension. Uniform balloons look flat.
- Inflate with variety: intentionally vary balloon sizes within each balloon type for a more organic shape.
- Build the base using a balloon decorating strip (thread balloon knots through the holes).
- Shape it on the floor first: gently twist and bend the garland so it “curves” instead of staying straight.
- Hang with hooks + line: tie the strip ends to removable hooks using ribbon or fishing line.
- Fill gaps with mini balloons using glue dots (this is the glow-up step).
Balloon hacks that save your sanity
- Heavy side goes toward the anchor: keep your densest balloon cluster closer to a hook or arch joint.
- Use glue dots strategically: attach small balloons where holes show, not everywhere.
- Build in sections: for big installs, make 2–3 smaller garlands, then connect them onsite.
- Temperature tip: balloons expand in heat and contract in colddon’t overinflate if it’ll be warm.
How to Drape a Fabric Swag on a Wall or Arch
Fabric is the fastest way to make a space feel “event-ready.” It also hides clamps, hooks, and the fact that
you’re improvising.
Fabric swag steps
- Choose fabric weight: chiffon/voile for airy; velvet/satin for drama; tulle for volume.
- Decide your drape style: one swoop, double swoop, or wrapped with tails.
- Create anchor points: hooks on walls, clamps on arches, or ties on a pipe-and-drape frame.
- Gather fabric at anchors: pinch into soft folds, then secure with clamp/zip tie/safety pin.
- Hide the hardware: add a small floral cluster or ribbon bow right over the anchor point.
Fabric hacks for a cleaner look
- Steam it first (wrinkles read “last-minute,” even if you did it on purpose).
- Use a “twist” technique: lightly twist fabric before draping for more texture and fewer obvious creases.
- Safety pin from behind: pin folds on the back side so the front stays clean.
Pro Tips & Tricks (The Stuff People Learn After the First Failure)
1) Add fullness where eyes naturally go
People look at the center of a wall swag and the “top corner” of an asymmetrical arch swag. Put your
boldest flowers/balloons there, and let the ends taper.
2) Use zip ties like a pro
Zip ties are strong, fast, and adjustable. Use them to attach bundles of stems, secure foam cages to an arch,
or stabilize heavy sections. Clip tails close and rotate the “buckle” to the back so it disappears.
3) Reinforce anchor points (especially on arches)
For arbors, don’t rely on one tie. Use multiple zip ties, bind wire, or waterproof tape around mechanics so
nothing shifts mid-event. The goal is “survives wind and enthusiastic relatives.”
4) Make it look expensive with one small upgrade
- Add one type of “special texture” (seeded eucalyptus, pampas grass, velvet ribbon, metallic balloons).
- Repeat it 3–5 times across the swag so it looks intentional, not accidental.
5) Don’t trust eyeballingmark it
Use painter’s tape to mark anchor points and dip depth. Symmetry is easier when your wall has temporary
“decor GPS.”
Troubleshooting: Fix the Most Common Swag Problems
“My swag keeps sagging.”
- Add more anchors (support points) and distribute weight more evenly.
- Use fishing line “lift” points hidden behind greenery to raise the droop.
- For heavy swags, upgrade from adhesive hooks to screw-in hooks or nails where allowed.
“The hooks won’t stick.”
- Re-clean with isopropyl alcohol and let the surface fully dry before reapplying.
- Avoid textured walls, dusty paint, wallpaper, or damp areas for adhesive hooks.
- Consider a freestanding backdrop frame if the wall surface is stubborn.
“My balloon garland looks gappy.”
- Add mini balloons with glue dots (focus on the holes, not every inch).
- Twist the garland slightly so balloons rotate into gaps.
- Mix sizes moreuniform sizes create empty-looking grid patterns.
“Fabric keeps slipping or looks flat.”
- Use clamps with grip pads or add a small rubber band around the gathered fabric before clamping.
- Twist fabric gently before draping to add dimension.
- Add a floral cluster at the anchor to hide hardware and hold folds in place.
FAQ
Can I make a wall swag without damaging paint?
Often, yesespecially if you’re working with lightweight materials and smooth walls. Use removable hooks
rated for the weight, prep the surface correctly, and add multiple support points so no single hook is overloaded.
What’s the easiest swag for beginners?
A faux greenery swag with a few floral picks is the easiest to control and reuse. Balloon swags are beginner-friendly
too, as long as you’re willing to inflate approximately one million balloons (give or take).
How do I make an arch swag look “balanced” if it’s asymmetrical?
Balance doesn’t always mean symmetry. Repeat colors on both sides, taper your greenery, and place one small “echo”
cluster on the lighter side so the design feels intentional.
Final Check: The 60-Second “Does This Look Professional?” Test
- Step back 10 feet and take a photo. Photos reveal weird dips and lopsided clusters instantly.
- Check that anchor points are hidden (or decorated).
- Make sure nothing sharp is sticking out (wire ends, zip tie tails, foam edges).
- Gently tug-test the swag at 2–3 points. If it moves a lot, reinforce nowfuture you will be busy later.
Extra: Real-World Experiences & Lessons People Learn the Hard Way (About )
If you ask a group of DIY decorators about making a wall or arch swag, you’ll hear the same theme:
“It was easier than I expected… right after the part where it wasn’t.” Here are the most common
experiences (and what they teach) so your first attempt feels less like a reality show challenge.
Experience 1: The “One Hook Is Enough” Myth
Many first-time swag makers start with two anchorsone on each endthen wonder why the center slowly
creeps toward the floor like it’s trying to escape. The fix is almost always the same: add one or two
hidden support points behind the thickest greenery (or behind balloon clusters). People are often surprised
how much better the swag looks when weight is distributed. The curve becomes smoother, and the overall
line reads intentional instead of “gravity won.”
Experience 2: Wall Prep Feels Optional (Until It Isn’t)
A super common story: someone slaps up removable hooks on a wall that was wiped with a scented kitchen
spray, hangs a swag immediately, and then hears the dreaded thunk. Prep matters. The experience
lesson is: clean properly, press firmly, and allow adhesives time to set before loading weight. It feels
slow in the moment, but it’s faster than rehanging everything twice.
Experience 3: Balloon Garlands Look Weird… Then Suddenly Amazing
Balloon swags often have an awkward phase. Early on, they look like a lumpy caterpillar and inspire
serious doubt. Then the “gap-fill” step happensmini balloons go into empty spots, the garland gets gently
twisted to face forward, and suddenly it looks styled. People who’ve done this a few times learn to save
extra mini balloons on purpose. That last 10% is what makes it look professional in photos.
Experience 4: Fresh Florals Require “Back-End” Planning
With fresh florals, the most reported surprise is logistics: water source, mechanics, and timing. DIYers
learn to build sturdy mechanics first (foam cages, bind wire, zip ties, netting) and cover those mechanics
with greenery before adding blooms. Another learned trick: place delicate flowers in more protected spots
(inside curves or deeper into the arrangement) and use sturdier greenery as the outer shell. It helps the
design survive heat, wind, and enthusiastic hugs.
Experience 5: The Best Hack Is Taking a Photo Midway
People consistently say the fastest “fix tool” isn’t a new supplyit’s a phone camera. Midway photos reveal
if the dip is too low, if color is clumped in one area, or if one side looks heavier. The experience lesson:
stop, step back, and check your work like a designer would. A swag is a visual line across a space; one
small adjustment can turn “fine” into “wow.”
The takeaway from all these experiences is reassuring: most swag problems are predictable and fixable.
If you measure for extra length, distribute weight with multiple anchors, and finish with intentional
“gap-filling” and hardware-hiding, your swag will look polishedwithout requiring professional-level stress.