Table of Contents >> Show >> Hide
- What Alcohol Wipes Are (and What They’re Not)
- Safety First (Because Alcohol Is Helpful… and Flammable)
- Before You Start: Supplies You’ll Need
- Why 70% Alcohol Is the Sweet Spot
- How to Make Alcohol Wipes: 13 Steps
- Step 1: Pick the right alcohol (and avoid the wrong ones)
- Step 2: Decide your target strength (aim for at least 70%)
- Step 3: Choose wipe material that won’t disintegrate
- Step 4: Mix a 70% solution if needed (simple dilution)
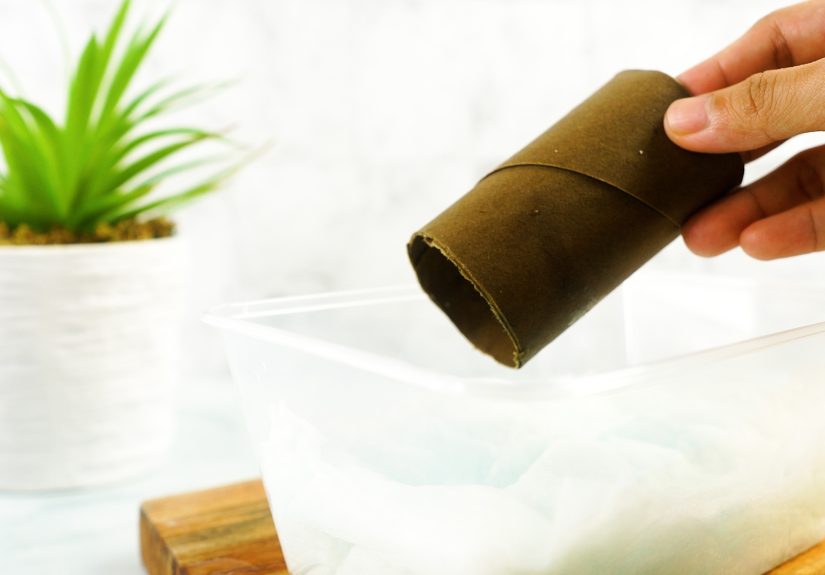
- Step 5: Clean your container
- Step 6: Cut or fold your wipes to fit
- Step 7: Optionallabel now (future-you will thank you)
- Step 8: Pour your alcohol solution over the wipes
- Step 9: Let the stack absorb and redistribute
- Step 10: Test the “dampness” and adjust
- Step 11: Use wipes the right way: clean first, then disinfect
- Step 12: Keep the surface wet long enough
- Step 13: Store smart and replace as needed
- Where DIY Alcohol Wipes Shine (and Where They Don’t)
- Common Mistakes (A.K.A. How Good Wipes Become Bad Wipes)
- FAQ
- Extra : Real-World Experiences and Practical Lessons
- Conclusion
Alcohol wipes are one of those “small things, big impact” supplies: quick for wiping down high-touch surfaces, handy for travel, and oddly satisfying when you finally get that sticky mystery spot off your phone case. The catch? They only work well when you get the details right especially the alcohol concentration, the container seal (evaporation is sneaky), and the way you use them (spoiler: wiping dirt around is not disinfecting).
This guide walks you through a safe, practical way to make DIY alcohol wipes using commonly available supplies. You’ll also learn when alcohol wipes make sense, when they don’t, and the most common mistakes that turn “disinfecting” into “lightly perfuming the germs.”
What Alcohol Wipes Are (and What They’re Not)
What they do well
- Disinfect hard, non-porous surfaces when used correctly (clean first, keep the surface wet long enough).
- Evaporate quickly, which can be helpful for electronics (when used carefully and sparingly).
- Travel-friendly for quick wipe-downs of handles, trays, and other high-touch areas.
What they don’t do
- They are not a substitute for soap and water for routine handwashing.
- They don’t work well on visibly dirty/greasy surfaces unless you clean first.
- They’re not ideal for porous surfaces (unfinished wood, fabric, carpet) where liquid can’t stay on the surface evenly.
- They are not sterile medical prep pads. If you need sterile, single-use prep pads for medical care, buy them.
Safety First (Because Alcohol Is Helpful… and Flammable)
- Ventilation matters: make and use wipes in a well-ventilated area.
- Keep away from heat, sparks, and flames: alcohol vapors ignite easily.
- Do not mix cleaning chemicals: never combine alcohol with bleach or other cleaners.
- Keep out of reach of kids and pets: store your container securely and label it clearly.
- Avoid skin and eye exposure: alcohol can irritate eyes and dry out skin; wear gloves if you have sensitive skin.
Before You Start: Supplies You’ll Need
- Alcohol: isopropyl alcohol (IPA) or ethyl alcohol (ethanol). For disinfecting, you generally want a final solution of at least 70%.
- Clean water: distilled or boiled-and-cooled water is best (helps reduce contamination and minerals).
- Wipe material: thick paper towels, shop towels, or lint-free nonwoven wipes.
- Airtight container: wide-mouth jar, resealable wipe canister, or a food-safe container with a tight lid.
- Measuring tools: measuring cup/spoons or a small kitchen scale.
- Gloves (optional but smart) and a marker for labeling.
Why 70% Alcohol Is the Sweet Spot
It’s tempting to think “higher percentage = stronger,” but disinfection is not a flex contest. Many guidance documents note that alcohol solutions in the 70–85% range are useful for surface disinfection, and very high concentrations can be less effective in some situations because they evaporate too fast and don’t penetrate as well. In normal human terms: a little water helps alcohol do its job before it vanishes into thin air like your motivation on Monday morning.
How to Make Alcohol Wipes: 13 Steps
Step 1: Pick the right alcohol (and avoid the wrong ones)
Choose isopropyl alcohol (commonly sold as 70% or 91%) or ethanol. Avoid methanol products and avoid industrial/unknown alcohols not intended for consumer use.
Step 2: Decide your target strength (aim for at least 70%)
If you buy 70% isopropyl alcohol, you can usually use it as-is. If you buy 91%, you’ll dilute it to reach ~70%. (More on the quick math in Step 4.)
Step 3: Choose wipe material that won’t disintegrate
Cheap paper towels can turn into a sad, pulpy confetti. Look for thick paper towels, shop towels, or nonwoven wipes that stay intact when wet. If you plan to use wipes on electronics, choose lint-free material.
Step 4: Mix a 70% solution if needed (simple dilution)
Use the dilution idea C1 × V1 = C2 × V2, where:
C1 = starting concentration (e.g., 91%), C2 = desired (70%), V2 = final total volume you want.
- Example: Make 1 cup (240 mL) of ~70% from 91%:
V1 = (70 ÷ 91) × 240 ≈ 185 mL of 91% alcohol. Add water to reach 240 mL total (about 55 mL water). - Easy shortcut: For small batches, think “about 3 parts 91% alcohol to 1 part water” to land near ~70–75%. For accuracy, measure.
Step 5: Clean your container
Wash the container with dish soap and water, rinse well, and let it dry. A clean container helps your wipes stay fresher and reduces funk.
Step 6: Cut or fold your wipes to fit
Fold wipes in a “pop-up” stack if you want easy dispensing, or roll them into a spiral if your container is round. Trim to size so the lid closes easily (a tight seal is everything).
Step 7: Optionallabel now (future-you will thank you)
Write: “Alcohol Wipes – Flammable – Do Not Mix With Cleaners – Date.” You’re not being dramatic; you’re being competent.
Step 8: Pour your alcohol solution over the wipes
Slowly pour the solution into the container, aiming to saturate the stack evenly. You want wipes fully damp, not swimming. If you overfill, the wipes can drip and the alcohol evaporates faster when the container is opened.
Step 9: Let the stack absorb and redistribute
Close the lid and let the wipes sit for 5–10 minutes. Then flip the container upside down briefly (still closed!) so the top wipes don’t hog all the liquid like they own the place.
Step 10: Test the “dampness” and adjust
Open the lid and pull one wipe. It should feel evenly damp and cool, but not dripping. If it’s dry, add a little more solution. If it’s soggy, add more dry wipes.
Step 11: Use wipes the right way: clean first, then disinfect
If a surface is visibly dirty, clean it first (soap and water or a general cleaner). Disinfecting works best on a surface that isn’t coated in grease, crumbs, or mystery sauce from last night’s takeout.
Step 12: Keep the surface wet long enough
Disinfectants need time to work. With alcohol wipes, the big challenge is that alcohol evaporates fast. Wipe thoroughly and make sure the surface stays visibly wet for a short period. If it dries instantly, use a second wipe or re-wet the area. (Different germs and products have different “contact times,” which is why registered disinfectants list exact times on their labels.)
Step 13: Store smart and replace as needed
Keep your container tightly sealed, away from heat and direct sun. Make smaller batches so the solution stays effective and doesn’t evaporate away. If the wipes start drying out or smell “off,” toss and remake.
Where DIY Alcohol Wipes Shine (and Where They Don’t)
Great uses
- High-touch spots: doorknobs, light switches, remote controls, faucet handles.
- Travel moments: airplane tray tables, hotel room touchpoints, gym equipment handles.
- Phone cases and accessories: use a lightly damp wipe; avoid soaking openings and ports.
Use caution
- Electronics screens: alcohol can affect coatings on some screensuse sparingly and follow manufacturer guidance.
- Finished wood and painted surfaces: test a small hidden spot first; alcohol can dull or lift some finishes.
Skip it
- Open flames / near heat sources: just don’t.
- Porous surfaces: fabric, carpet, unfinished wood (poor coverage and contact).
- Hands as a routine strategy: soap and water is still the gold standard for everyday grime and many germs.
Common Mistakes (A.K.A. How Good Wipes Become Bad Wipes)
- Using the wrong concentration: too low won’t disinfect well; too high may evaporate too fast.
- Leaving the lid loose: evaporation turns wipes into “vaguely alcohol-scented tissues.”
- Trying to disinfect dirt: clean first, then disinfect.
- Mixing chemicals: never mix alcohol with bleach or other products.
- Assuming one quick swipe is enough: surfaces need to stay wet briefly for disinfection to work.
FAQ
Can I add essential oils or soap?
It’s not recommended. Oils can reduce wetting and leave residue; soap can change how the solution behaves. If you want fragrance, keep it separateyour germs don’t care about lavender, and your surfaces may not like it.
How long do homemade alcohol wipes last?
The biggest issue is evaporation and contamination from repeated opening. Make smaller batches and keep the lid tightly sealed. If wipes dry out, remake them.
Are DIY alcohol wipes “EPA approved”?
No. EPA registration applies to specific tested products with labeled instructions and contact times. DIY wipes can be useful for general hygiene, but they won’t have a verified label claim like registered disinfectants.
Extra : Real-World Experiences and Practical Lessons
People usually start making alcohol wipes for one of three reasons: convenience, cost, or “I went to grab a wipe and discovered the container was emptyagain.” And once you begin, you learn a few things that don’t show up in the simple recipe version.
Lesson #1: The container is the whole game. In real homes, the lid gets left cracked, the container tips over, or someone (often innocent-looking) forgets to seal it. That’s why the “tight lid” advice isn’t fussyit’s the difference between wipes that work and wipes that cosplay as wipes. Many people switch to a wide-mouth jar with a screw-on lid because it seals more reliably than a flimsy flip-top.
Lesson #2: Thick wipes feel more “expensive,” but they’re cheaper in the long run. A thin paper towel that shreds means you use two or three wipes for one job. People who wipe down gym equipment or high-touch household surfaces tend to prefer shop towels or nonwoven wipes because they don’t pill, they don’t leave fuzz behind, and they hold moisture longerso the surface stays wet long enough to matter.
Lesson #3: Alcohol wipes are best for “quick disinfect,” not “deep clean.” The most satisfied DIY wipe users treat alcohol wipes like the final step, not the only step. For example: wiping a kitchen counter that has visible crumbs and a thin film of cooking oil with an alcohol wipe alone is frustratingyou just smear everything into a glossy sadness. But if you clean first with soap and water, then follow with an alcohol wipe, you get that crisp, “actually clean” finish.
Lesson #4: Electronics are a special kind of drama. Many people make alcohol wipes for phones, earbuds cases, and keyboards. The smart move is using a wipe that’s dampnot drippingand avoiding ports and openings. Folks also learn quickly that screens may have coatings that don’t love aggressive wiping. A gentle approach and a test spot save a lot of regret (and a lot of angry polishing).
Lesson #5: “More alcohol” isn’t always better in day-to-day use. In practice, very high concentrations can flash off so fast that you barely get coverage, especially in warm rooms. People who live in hot climates notice wipes drying quicker the moment the container opens. That’s one reason many institutions and safety manuals point to mid-range alcohol solutions for surface disinfectionreal life has airflow, warm countertops, and the laws of evaporation.
Lesson #6: Labeling prevents awkward conversations. DIY wipes look suspiciously like baby wipes to anyone not paying attention. Labeling avoids accidental use on faces, hands, and other places where “surprise alcohol” is not a fun plot twist. A label also reminds everyone: flammable, keep closed, don’t mix with other cleaners.
In short, making alcohol wipes is easy. Making alcohol wipes you actually enjoy usingand that stay effectivecomes down to the boring details: concentration, wipe material, sealing, and using them as part of a clean-then-disinfect routine. Nail those, and you’ll have a container of wipes that earns its spot on the counter instead of becoming a dried-out monument to good intentions.
Conclusion
DIY alcohol wipes can be a practical tool for wiping down hard surfaces, especially when you keep the alcohol concentration in the right range, use a container that seals tightly, and remember that disinfection works best on a surface that’s already clean. Make small batches, store them safely, and use them thoughtfullybecause the goal isn’t just to wipe; it’s to wipe in a way that actually helps.