Table of Contents >> Show >> Hide
- What Makes Sewing Thread Bracelets Different?
- Supplies You’ll Need
- Before You Start: Thread Length (So You Don’t Cry Later)
- How to Bundle Sewing Thread (The “Make It Bracelet-Worthy” Step)
- Basic Knots You’ll Use (Without Turning This Into Knot College)
- Project 1: The Classic Braided Sewing Thread Bracelet
- Project 2: Candy Stripe Bracelet (Diagonal Stripes)
- Project 3: Spiral Staircase Bracelet (One Knot, Big Payoff)
- Project 4: Chevron Bracelet (The Classic V Pattern)
- Closures That Work Best With Sewing Thread
- Add Beads Without Losing Your Mind
- Troubleshooting: Fix the 6 Most Common Problems
- Care Tips (So Your Bracelet Doesn’t Give Up on Life)
- of Real-Life Bracelet Experience (The Part Where We Get Honest)
- Conclusion
Raise your hand if you’ve ever looked at a spool of sewing thread and thought, “Could this become jewelry?” (If your hand is down, I’m still proud of you.) The answer is yes: you can absolutely make bracelets with sewing threadcute, colorful, surprisingly sturdy onesusing the same knot-and-braid basics behind classic friendship bracelets.
The twist: sewing thread is thinner than embroidery floss, so your strategy changes a little. You’ll bundle strands, adjust tension, and pick patterns that look great at a smaller scale. The result? Delicate, stackable bracelets that look like you bought them at a boutique… or at least at a boutique that also sells snacks and vibes.
What Makes Sewing Thread Bracelets Different?
Most “friendship bracelet” tutorials assume embroidery floss (that thicker, 6-strand cotton). Sewing thread is finer, smoother, and more likely to slip if you treat it like floss. The secret is building thickness on purpose and controlling tension.
- Bundle it: Use 4–10 strands of sewing thread per “working string,” depending on how bold you want the bracelet.
- Wax it (optional but magical): A quick pass over beeswax (or a wax block) reduces tangles and helps knots grip.
- Choose smart closures: Sewing thread is great with adjustable sliding knots so sizing isn’t a guessing game.
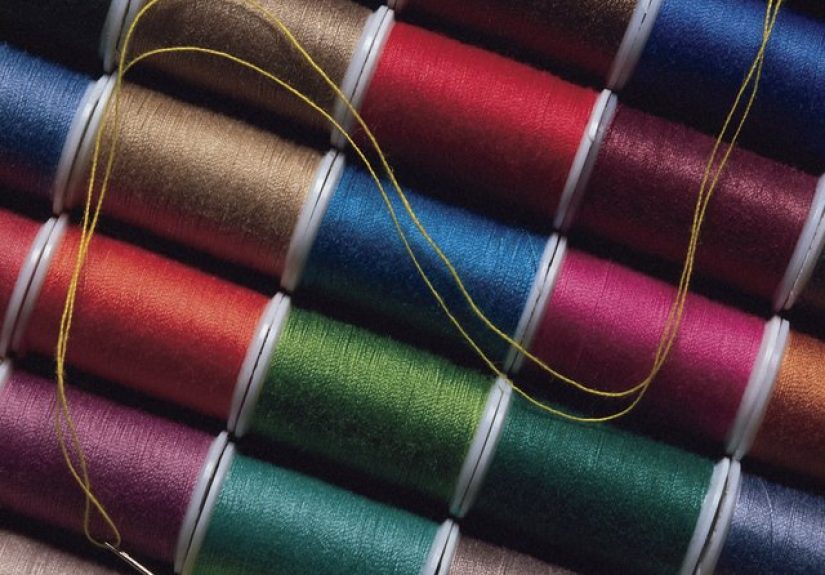
Supplies You’ll Need
Thread + Core Materials
- All-purpose sewing thread (polyester or cotton). Polyester is usually stronger and more abrasion-resistant.
- Optional “core” cord (thin cotton cord, a single strand of embroidery floss, or even strong string) for sturdier designs.
- Beeswax (optional) to reduce fraying and tangles.
Tools That Make Life Easier
- Scissors
- Clipboard, masking tape, or a safety pin (to anchor your work)
- Ruler or measuring tape
- Needle or beading needle (if adding beads)
- Small binder clip (optional “third hand”)
- Clear nail polish or fabric glue (optional for sealing ends)
Before You Start: Thread Length (So You Don’t Cry Later)
Bracelet-making has one universal truth: running out of thread at the end is the craft equivalent of dropping your ice cream cone face-down. Here are safe starting lengths:
- Simple braid: 24–30 inches per strand (depends on wrist size and braid thickness).
- Candy stripe / diagonal knots: 36–48 inches per strand.
- Chevron: 40–60 inches per strand (chevrons are thread-hungry).
- Using bundled sewing thread: cut longer than you think, because fine thread “disappears” into knots.
Pro tip: If you’re bundling, cut multiple strands at once by wrapping thread around a book or piece of cardboard, then cutting one edge. Fast, neat, and oddly satisfying.
How to Bundle Sewing Thread (The “Make It Bracelet-Worthy” Step)
If you try to knot with a single strand of sewing thread, your bracelet will look like a fashionable hair from a doll. Instead, create “working strings”:
- Decide your thickness: start with 6 strands per working string (adjust later).
- Cut strands to your needed length (example: 6 strands × 45 inches each).
- Align ends and lightly twist or finger-roll the bundle so it behaves like one string.
- Wax the bundle (optional): pull it across beeswax once or twice.
- Repeat for each color/working string your pattern needs.
Want ultra-dainty bracelets? Use 3–4 strands per working string. Want bold? Use 8–10 strands (or double up bundles).
Basic Knots You’ll Use (Without Turning This Into Knot College)
Most classic thread bracelets rely on a few knot “moves.” With sewing thread bundles, keep tension steadynot Hulk-smash tight.
- Overhand knot: Your basic starting/ending knot.
- Forward knot: Moves left-to-right (common in candy stripes).
- Backward knot: Moves right-to-left (used in chevrons).
- Square knot: Great for macramé-style bracelets and sliding closures.
Project 1: The Classic Braided Sewing Thread Bracelet
This is the easiest way to turn sewing thread into a wearable win.
Steps
- Create 3 working strings (each a bundle of 6 strands) in your chosen colors.
- Line them up, tie a big overhand knot at the top, leaving a 2–3 inch tail.
- Anchor the knot to a clipboard with tape (or safety pin it to jeansiconic).
- Braid normally: left over middle, right over middle, repeat.
- Check length by wrapping around your wrist (leave room for ties or a closure).
- Tie an overhand knot at the end. Trim tails evenly.
Style Upgrades
- Two-tone twist: Make one working string from two colors twisted together.
- Charm moment: Slide a charm onto the middle working string before braiding.
- Micro-bracelet stack: Make 3 thin ones and wear them together like you have your life together.
Project 2: Candy Stripe Bracelet (Diagonal Stripes)
This is the “I know what I’m doing” bracelet, even if you’re still Googling what a knot is.
What You’ll Need
- 4–8 working strings (bundled sewing thread)
- 48 inches per working string (safe length)
Steps
- Arrange strings in the color order you want the stripes to appear.
- Tie an overhand knot at the top and anchor it.
- Take the leftmost string as your “working” string.
- Tie two forward knots around each string to the right, one-by-one, moving across the row.
- When you reach the far right, that working string becomes the last string.
- Repeat with the new leftmost string. Stripes will start forming automatically.
- Continue until it fits your wrist. Finish with a knot and chosen closure.
Beginner-friendly color example: Navy, white, light blue, white (repeat). It looks crisp and intentional, like a tiny nautical sweater.
Project 3: Spiral Staircase Bracelet (One Knot, Big Payoff)
If you like patterns that look fancy but are secretly simple, welcome home.
Steps
- Use 2–6 working strings (bundles). Two strings makes a clean spiral; more strings gives a thicker rope look.
- Pick one string as the working string (usually the leftmost).
- Tie two forward knots around the next string, then the next, moving across.
- Repeat the exact same motion again and againno switching directions.
- Because you always knot the same way, the bracelet naturally twists into a spiral.
Tip: If the spiral twists too hard, reduce tension slightly and let the bracelet “relax” as you work. Yes, your bracelet deserves self-care.
Project 4: Chevron Bracelet (The Classic V Pattern)
Chevrons are the poster child of friendship bracelets. With sewing thread, they look delicate and detailedlike tiny textile architecture.
Setup
- Use 8 working strings (or 10–12 for a wider bracelet).
- Arrange in a mirrored color order, like: A B C D D C B A.
Steps
- Anchor your knot at the top.
- From the left side, take the outermost left string and tie two forward knots around each string until you reach the center.
- From the right side, take the outermost right string and tie two backward knots around each string until you reach the center.
- When the two “center” strings meet, tie them together (often with a forward knot or a knot that keeps the center tidy).
- Repeat row after row. The V pattern grows like it’s printing itself.
Tension warning: If your chevron looks wavy, your knots are uneven. Slow down, pull each knot snug the same amount, and keep your strings untangled.
Closures That Work Best With Sewing Thread
Because sewing thread is fine, closures matter. Here are three reliable options.
Option 1: Tie-On (Classic Camp Style)
Leave 2–3 inches of braided tail on each end and tie it on your wrist. Works well for casual bracelets and low-drama lifestyles.
Option 2: Button Loop Closure
- At the start, create a small loop (by folding strings and knotting below the fold) sized to fit a button.
- Make the bracelet as usual.
- At the end, sew or tie a small button securely to the tail.
This is great if you want a bracelet you can put on without asking a friend to become your personal bracelet valet.
Option 3: Adjustable Sliding Knot (Best for Gifts)
Sliding knots are popular because they’re adjustable and tidyespecially helpful if you don’t know the exact wrist size.
- Overlap the bracelet ends so they cross by about 1–1.5 inches.
- Cut a separate short bundle of thread (8–12 inches total, thicker bundle works best).
- Wrap it around both overlapped ends and tie a series of square knots (usually 4–8 knots) to form a “slider.”
- Trim and seal the slider knot ends with a tiny dab of fabric glue if needed.
- Pull the bracelet ends to tighten or loosen.
Note: With very slick polyester thread, a tiny dab of glue on the finished slider knots can help prevent slipping (use sparinglynobody wants crunchy knots).
Add Beads Without Losing Your Mind
Beads + sewing thread = a very good idea, as long as you plan for it.
Best Beads for Sewing Thread
- Seed beads with larger holes (or “pony bead” style if you want bold)
- Letter beads (for names, inside jokes, or dramatic statements like “SNACKS”)
- Small metal spacers (if you want a grown-up look)
How to String Beads
- Use a needle (or a beading needle) with your sewing thread.
- If your thread frays, stiffen the end with a tiny bit of clear nail polish and let it dry.
- String beads in your pattern.
- Lock beads in place with small knots between beads, or incorporate them into the center of a braided section.
Example pattern: 3 seed beads, 1 letter bead, 3 seed beads, repeat. It reads clean and looks intentional (like you definitely didn’t redo it three times).
Troubleshooting: Fix the 6 Most Common Problems
1) My thread keeps tangling
Use shorter working lengths, wax your thread, and separate strands often. Also: breathe. Thread senses fear.
2) My knots are slipping
Bundle more strands per working string, keep tension steady, and consider cotton thread (more grip than slick poly). A tiny dab of fabric glue at the end knot can help.
3) My bracelet looks wavy
That’s uneven tension. Anchor your work, tighten each knot the same amount, and don’t yank some knots like you’re starting a lawn mower.
4) The bracelet is too thin
Increase bundle size (more strands) or add a core cord and knot around it for extra body.
5) The ends fray
Seal ends with fabric glue, clear nail polish, or carefully melt only if the thread is synthetic (and only with adult supervision and lots of caution).
6) Colors look “muddy” together
Pick one dark, one light, one pop color. Example: black + white + neon green. Your bracelet will look crisp instead of like a confused rainbow.
Care Tips (So Your Bracelet Doesn’t Give Up on Life)
- Avoid soaking (especially if you used glue).
- Take it off for heavy water activities if possible.
- If it fuzzes, trim stray fibers carefully instead of pulling them.
- Store flat to avoid weird kinks (bracelets get wrinkles too).
of Real-Life Bracelet Experience (The Part Where We Get Honest)
The first time I made a bracelet with sewing thread, I was feeling bold. Confident. Unreasonably optimistic. I looked at that tiny spool and thought, “This will be faster than embroidery floss because it’s smaller.” That logic is adorableand incorrect. Sewing thread is like the chihuahua of craft supplies: small, energetic, and fully capable of causing chaos if you underestimate it.
My earliest attempt was a simple braid using single strands. The result was so thin it was basically a wearable suggestion. It also snapped the moment I tried to tie it on, which taught me a valuable lesson: if you want sewing thread to behave like bracelet string, you have to bulk it up. Bundling multiple strands instantly changed everything. Suddenly I had thickness, structure, and knots that didn’t slide around like they were late to an appointment.
The next discovery was tension. With embroidery floss, you can pull knots snug and they’ll usually stay put. Sewing thread, especially polyester, can be slick. Too loose and the pattern looks messy; too tight and the bracelet curls like it’s trying to become pasta. The sweet spot is “firm but polite.” I started pulling each knot to the same level, then pausing every few rows to straighten the bracelet and untwist the bundles. That one habit made my stripes cleaner and my chevrons less wavy.
My favorite “aha” moment was adding wax. I didn’t expect a craft supply to feel like a cheat code, but beeswax really helps. The thread stops tangling as badly, the bundles feel more cooperative, and the knots grip better. It’s not mandatory, but once you try it, you’ll wonder why wax isn’t included in every starter kit like a tiny bar of happiness.
Closures were another learning curve. Tie-on ends are fineunless you’re making bracelets for someone who lives alone, has long nails, or simply refuses to ask for help (respect). Sliding knots solved the problem. After a few clumsy tries, I realized the slider needs to be thicker than the bracelet ends so it holds its shape. Using a slightly larger bundle for the slider cord made it look neat and feel secure. A microscopic dab of fabric glue on the finished slider knots also saved me from the dreaded “mysteriously loosening bracelet” issue.
And finally, the best part: sewing thread makes bracelets that stack beautifully. Because they’re naturally lighter and finer, you can wear three or five without feeling like you strapped a craft store to your wrist. Once I started making them in mini color themeslike neutrals plus one bright accentI understood why people get hooked. It’s quick, it’s personal, and it’s the kind of craft that turns leftover supplies into something you actually want to wear. Plus, if you mess up, you can always claim it’s “organic texture.”
Conclusion
Making bracelets with sewing thread is equal parts craft, patience, and tiny-knot determination. Bundle your thread, pick a beginner-friendly pattern, and use an adjustable closure for an easy win. Once you’ve nailed the basics, you can experiment with beads, color gradients, and micro-macramé detailswithout buying anything fancy. Your sewing kit just got promoted to “jewelry department.”