Table of Contents >> Show >> Hide
- What “Perfect Cupcakes” Actually Means (So You Know What to Aim For)
- Ingredients That Matter (And Why They Matter)
- Tools You Need (And the One Tool You’ll Wish You Had)
- The Step-by-Step Method for Perfect Cupcakes
- Step 1: Get organized before you mix
- Step 2: Bring key ingredients to room temperature
- Step 3: Preheat your oven (for real)
- Step 4: Mix dry ingredients separately
- Step 5: Cream butter and sugar until light
- Step 6: Add eggs one at a time, then vanilla
- Step 7: Alternate dry ingredients and milk
- Step 8: Portion batter evenly
- Step 9: Bake and don’t poke them too early
- Step 10: Cool correctly (this is not optional)
- A Reliable Vanilla Cupcake Base Recipe (12 cupcakes)
- Frosting That Behaves (Plus How to Make It Look Fancy)
- Troubleshooting: Fix the Usual Cupcake Drama
- Easy Flavor Upgrades (Without Breaking the Recipe)
- How to Store Cupcakes So They Stay Moist
- A Final “Perfect Cupcake” Checklist
- of Real-Life Cupcake Experience (Stuff You Learn After a Few Batches)
- Conclusion
Cupcakes are the friendliest little cakes on Earthuntil they’re not. One minute you’re dreaming of fluffy vanilla clouds with
swirls of frosting. The next, you’ve got cupcakes that sank like a bad group project, or tops so crunchy they could double as
roof shingles.
The good news: perfect cupcakes aren’t about secret ingredients or bakery magic. They’re about a handful of reliable rules:
measure well, mix smart, bake at the right temperature, and don’t treat your batter like it owes you money.
This step-by-step guide will show you exactly how to make cupcakes with consistent, bakery-style resultsmoist crumb,
even rise, tender texture, and tops that actually want to be frosted.
What “Perfect Cupcakes” Actually Means (So You Know What to Aim For)
A perfect cupcake is basically a tiny cake with big expectations. Here’s what you’re shooting for:
- Tender, moist crumb: Soft, not gummy, not dry, not “why is this squeaking?”
- Even rise: No craters, no volcanoes, no mysterious one-sided slant.
- Fine texture: Small, even air bubbles (not big tunnels that look like cupcake subway stations).
- Clean flavor: Vanilla that tastes like vanilla, chocolate that tastes like chocolatenot “sweet beige.”
- Frosting-friendly top: Slight dome is great. A jagged mountain range is… harder to decorate.
Ingredients That Matter (And Why They Matter)
Cupcakes are simple, but each ingredient has a job. When one ingredient doesn’t do its job, everything gets awkward.
Flour
All-purpose flour is the standard for most home cupcake recipes. Cake flour can make a finer, softer crumb, but it’s not required.
The bigger deal is how you measuretoo much flour is a fast track to dry, dense cupcakes.
Sugar
Sugar sweetens, yesbut it also helps hold onto moisture and tenderizes the crumb. Cutting sugar too aggressively can make cupcakes
drier and less tender.
Fat (Butter or Oil)
Butter brings flavor and helps with structure when you cream it with sugar. Oil often makes cupcakes feel moister for longer.
Many “best of both worlds” recipes use mostly butter (for flavor) and add a little oil or sour cream (for moisture).
Eggs
Eggs add structure, richness, and help the batter emulsify (so it bakes evenly instead of separating into “sad layers”).
Dairy (Milk, Buttermilk, Sour Cream, Yogurt)
Milk adds moisture and helps thin the batter so it rises nicely. Buttermilk adds tang and acidity (helpful when baking soda is involved).
Sour cream or Greek yogurt can make cupcakes extra plush and tender.
Leavening (Baking Powder and/or Baking Soda)
Baking powder typically gives a lighter, fluffier rise because it’s designed to create lift during mixing and baking.
Baking soda needs an acidic partner (like buttermilk, brown sugar, cocoa, or sour cream) to work properly.
Use what the recipe calls forthis is not the moment for chaotic experimentation.
Salt + Vanilla
Salt makes sweetness taste more like “dessert” and less like “sugar cube.” Vanilla is the main character in classic cupcakesuse a good extract
if you can.
Tools You Need (And the One Tool You’ll Wish You Had)
- Muffin/cupcake pan: Standard 12-cup pan is perfect.
- Paper liners: Helps release + makes cleanup easy.
- Mixing bowls + whisk: One for dry, one for wet (or mixer bowl).
- Hand mixer or stand mixer: Helpful for creaming butter and sugar, but not mandatory for every recipe.
- Cookie scoop or spoon: For evenly portioned cupcakes.
- Wire rack: So cupcakes cool properly (no soggy bottoms).
- Nice-to-have: An oven thermometer. Ovens lie more than people who say “I’m five minutes away.”
The Step-by-Step Method for Perfect Cupcakes
This method works for most butter-based cupcake recipes (especially vanilla cupcakes). Follow it once, and you’ll feel like you’ve unlocked a
baking cheat code.
Step 1: Get organized before you mix
Line your pan with paper liners. Set out your ingredients. Measure everything. When batter is ready, it should go into the oven promptlyleavening
starts working as soon as it meets liquid.
Step 2: Bring key ingredients to room temperature
Room-temperature butter, eggs, and milk blend more smoothly, trap air better during mixing, and create a more even batter. Cold ingredients can cause
curdling, lumpy batter, and uneven texture.
Step 3: Preheat your oven (for real)
Most cupcakes bake beautifully at 350°F. Let the oven fully preheat. If you bake in a not-quite-hot oven, your cupcakes can rise poorly,
bake unevenly, or sink later.
Step 4: Mix dry ingredients separately
Whisk flour, baking powder (and/or baking soda), and salt together. This spreads the leavening evenly so you don’t get “one cupcake that rose like a hero”
next to “one cupcake that gave up immediately.”
Step 5: Cream butter and sugar until light
Beat softened butter and sugar until lighter in color and fluffy. This step traps tiny air pockets that help cupcakes rise and stay tender.
Don’t rush it, but also don’t beat until the mixture looks broken.
Step 6: Add eggs one at a time, then vanilla
Add each egg and mix until combined before adding the next. Scrape the bowl as needed. Then mix in vanilla.
This helps the batter emulsifysmooth batter, better texture.
Step 7: Alternate dry ingredients and milk
Add dry ingredients in 2–3 additions, alternating with milk (or buttermilk). Mix on low and stop as soon as everything is combined.
Overmixing develops gluten, which can make cupcakes dense and chewy.
Step 8: Portion batter evenly
Fill liners about 2/3 full. A cookie scoop (about 3 tablespoons for standard cupcakes) makes portioning neat and consistent.
Too much batter can overflow; too little can lead to short, flat cupcakes.
Step 9: Bake and don’t poke them too early
Bake at 350°F until the centers spring back lightly and a toothpick comes out clean or with a few moist crumbs (not wet batter).
Typical bake time is 16–22 minutes depending on recipe and pan.
If your oven bakes unevenly, rotate the pan once about halfway through.
Step 10: Cool correctly (this is not optional)
Cool cupcakes in the pan for about 10 minutes, then move them to a wire rack to cool completely.
Frosting warm cupcakes leads to melted frosting, sliding swirls, and regret.
A Reliable Vanilla Cupcake Base Recipe (12 cupcakes)
Use this as your go-to “classic cupcake” foundation. It’s balanced, not too sweet, and sturdy enough for frosting without being heavy.
Ingredients
- 1 1/4 cups (about 155g) all-purpose flour
- 1 1/4 teaspoons baking powder
- 1/4 teaspoon fine salt
- 1/2 cup (1 stick / 113g) unsalted butter, softened
- 3/4 cup (150g) granulated sugar
- 2 large eggs, room temperature
- 2 teaspoons vanilla extract
- 1/2 cup (120ml) milk, room temperature
Instructions
- Preheat oven to 350°F. Line a 12-cup pan with liners.
- Whisk flour, baking powder, and salt in a bowl.
- Cream butter and sugar until light and fluffy, about 2–4 minutes.
- Add eggs one at a time, mixing until combined. Mix in vanilla.
- Add dry ingredients in two additions, alternating with milk. Mix just until combined.
- Fill liners 2/3 full.
- Bake 16–20 minutes, until a toothpick comes out clean or with a few crumbs.
- Cool 10 minutes in pan, then cool completely on a rack before frosting.
Frosting That Behaves (Plus How to Make It Look Fancy)
You can put frosting on cupcakes with a butter knife and still be a good person. But if you want that bakery swirl, a piping bag and tip help a lot.
Quick American Buttercream
- 1 cup (2 sticks / 226g) unsalted butter, softened
- 3–4 cups powdered sugar (start with 3, add more for stiffness)
- 1–2 teaspoons vanilla extract
- 1–3 tablespoons milk or cream
- Pinch of salt
Beat butter until smooth. Add powdered sugar gradually, then vanilla and salt. Add milk a little at a time until it’s spreadable or pipeable.
If it’s too soft, add more powdered sugar. If it’s too stiff, add a tiny splash of milk.
How to pipe a clean swirl
- Make sure cupcakes are completely cool.
- Hold the piping tip about 1/2 inch above the cupcake center.
- Squeeze with steady pressure, then swirl outward and up.
- Stop pressure before lifting the tip for a cleaner finish.
Troubleshooting: Fix the Usual Cupcake Drama
1) Cupcakes are dense or tough
Likely cause: Overmixing after flour was added, or too much flour. Fix: Mix just until combined; measure flour carefully.
2) Cupcakes sank in the middle
Likely cause: Underbaking, opening the oven too early, or batter that was overmixed and collapsed.
Fix: Verify oven temp, bake until centers spring back, avoid early door-opening.
3) Big tunnels in the crumb
Likely cause: Overmixing or mixing at too high a speed. Fix: Lower speed and stop earlier; scrape bowl instead of extra mixing.
4) Dry cupcakes
Likely cause: Overbaking or too much flour. Fix: Start checking a few minutes early; measure flour properly; consider adding sour cream/yogurt next time.
5) Greasy-looking liners
Likely cause: Very buttery/oily batter + certain liners, or cupcakes cooled in the pan too long.
Fix: Cool on a rack; try higher-quality liners; don’t store cupcakes warm.
6) Cupcakes stick to liners
Likely cause: Underbaked cupcakes or cheap liners. Fix: Bake fully; cool completely; try different liners and let cupcakes rest.
7) Tops are too domed (hard to frost)
Likely cause: Oven too hot or too much batter. Fix: Confirm oven temperature; fill 2/3 full; avoid putting pan too close to top heat.
8) Tops cracked
Likely cause: Oven too hot or batter too thick. Fix: Verify temp; measure flour correctly; consider a tablespoon more milk next time.
9) Cupcakes browned too fast
Likely cause: Dark nonstick pan browns more aggressively.
Fix: Reduce bake time slightly and watch closely; consider a lighter-colored aluminum pan.
10) Frosting melts or slides
Likely cause: Cupcakes still warm or frosting too soft. Fix: Cool fully; chill frosting briefly; don’t frost near a hot oven.
Easy Flavor Upgrades (Without Breaking the Recipe)
Once you’ve nailed the base, flavors are the fun part. Here are dependable swaps that keep texture on your side.
Chocolate cupcakes
Replace 1/4 cup of flour with 1/4 cup unsweetened cocoa powder. If the batter seems thicker, add an extra tablespoon or two of milk.
Cocoa can dry things out, so don’t overbake.
Lemon cupcakes
Add 1–2 tablespoons lemon zest and 1–2 teaspoons lemon juice. For bigger lemon flavor without too much extra liquid, use zest + a little extract.
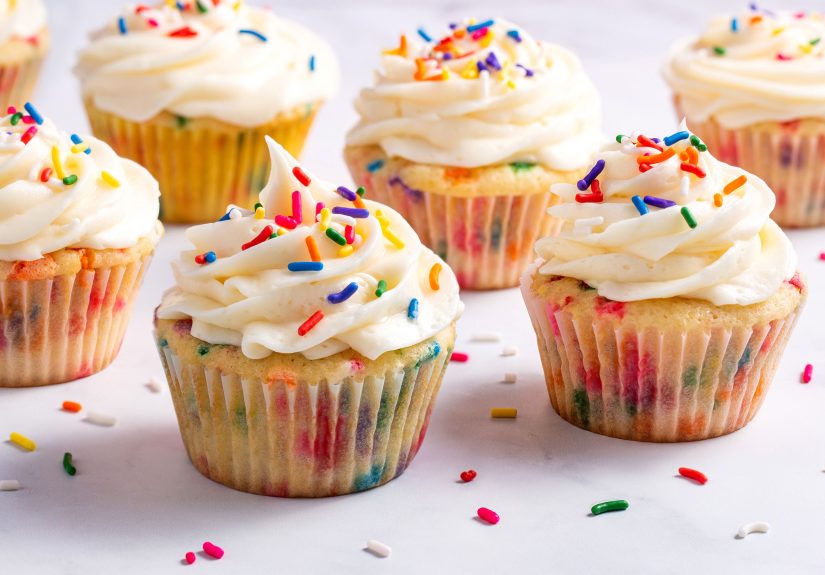
Funfetti cupcakes
Fold in 1/3 cup rainbow sprinkles at the very endgently. Overmixing can make colors bleed and texture tough.
Filled cupcakes
Use a small knife or cupcake corer to remove a plug from the center after cooling, spoon in jam/pastry cream, then replace the plug and frost.
(Bonus: no one sees your “filling technique,” only your delicious results.)
How to Store Cupcakes So They Stay Moist
- Unfrosted: Store airtight at room temp for 1–2 days, or refrigerate if your kitchen is very warm.
- Frosted with buttercream: Room temp is usually fine for a day; refrigerate longer storage and bring to room temp before serving.
- Freezing: Freeze unfrosted cupcakes wrapped well. Thaw at room temperature (still wrapped) to prevent condensation from making them sticky.
A Final “Perfect Cupcake” Checklist
- Oven fully preheated to 350°F
- Room-temperature butter, eggs, and milk
- Dry ingredients whisked separately
- Butter + sugar creamed until fluffy
- Flour mixed in gently and briefly
- Liners filled about 2/3 full
- Doneness tested (springy center + toothpick crumbs)
- Cool completely before frosting
of Real-Life Cupcake Experience (Stuff You Learn After a Few Batches)
People rarely mess up cupcakes because they’re “bad at baking.” They mess up cupcakes because cupcakes are tiny and therefore dramatic.
A full-size cake has the decency to take a while and warn you it’s going off the rails. Cupcakes? They’ll look perfect at minute 14, betray you at minute 16,
and then act innocent on the cooling rack.
One of the most common “wait, why?” moments is batter texture. New bakers often expect cupcake batter to look like pancake battersmooth, pourable, and polite.
But many butter-based cupcake batters are thicker, especially right after the flour goes in. That thickness isn’t a problem. The problem is what people do next:
they keep mixing because they think thicker batter means “not done yet.” That’s how overmixing happens. The fix is simple: stop mixing earlier than your instincts want.
Scrape the bowl instead of beating it into submission. If a couple tiny lumps remain, they usually bake out; tunnels from overmixing do not.
Then there’s the “my oven is a liar” erasomething almost every home baker goes through. Cupcakes that consistently brown too fast on the edges or sink in the middle
aren’t always recipe failures. Sometimes the oven runs hot, sometimes it runs cool, sometimes it’s uneven and bakes the back row like it’s trying to win a competition.
This is why experienced bakers rotate the pan once mid-bake and why an oven thermometer feels like a boring purchase until it saves an entire batch.
Another classic experience: the frosting disaster that wasn’t really a frosting disaster. It was a cooling disaster. Cupcakes can feel “cool enough” on top but still be warm
in the center. Frost them too soon and your buttercream will soften, slide, and start looking like it’s trying to escape. That’s not your frosting being badit’s your cupcakes
being sneaky. The simplest pro move is patience: cool in the pan briefly, then cool fully on a rack, then frost. If you’re in a rush, chill the cupcakes (or the frosting) briefly.
Portioning is another underrated lesson. Two cupcakes that bake in the same pan can come out totally different if one cup is filled halfway and the other is filled to the brim.
That’s why bakers love scoops: it turns “guessing” into “repeatable.” Consistency is what makes your cupcakes look bakery-made, even if you’re baking in pajamas.
Finally, the most comforting truth: even imperfect cupcakes are usually still delicious. Maybe they domed a little too much. Maybe the liners look a bit greasy.
Maybe your piping swirl looks like a soft-serve cone having an existential crisis. None of that changes the fact that you made cupcakes from scratch.
And if you keep the fundamentals tighttemperature, mixing, portioning, donenessyou’ll get better fast. Cupcakes reward practice quickly… once they realize you’re in charge.
Conclusion
If you want perfect cupcakes every time, focus on the process more than the “secret recipe.” Use room-temperature ingredients, cream butter and sugar properly,
mix gently once flour is added, fill liners about two-thirds full, bake at a truly preheated 350°F, and cool completely before frosting.
Do those things and you’ll get cupcakes that are consistently fluffy, tender, and ready for frostingno cupcake drama required.