Table of Contents >> Show >> Hide
- What Is a Gnome Paintbrush Ornament?
- Why This DIY Works So Well
- Supplies You’ll Need (With Smart Substitutions)
- Step-by-Step: How to Make a Paintbrush Gnome Ornament
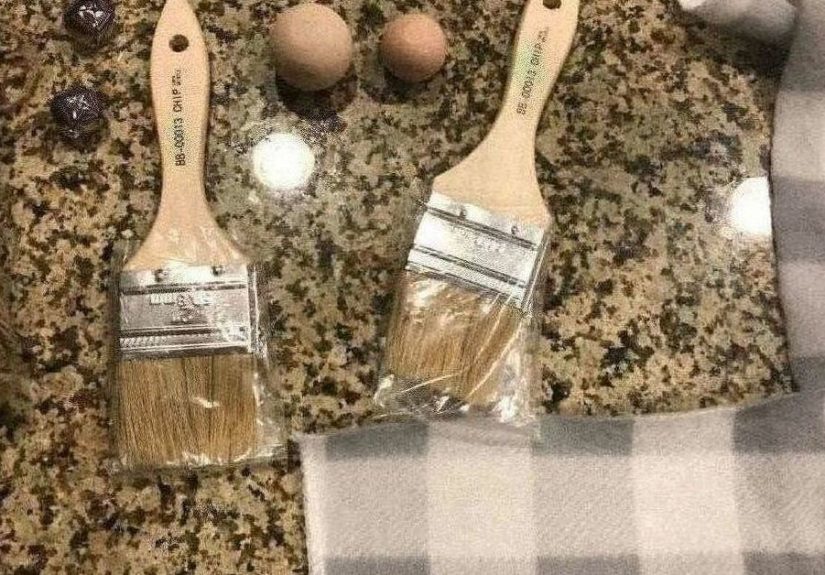
- Step 1: Pick the Right Paintbrush
- Step 2: Prep and Paint the Brush
- Step 3: Make the Hanger First (So You Don’t Forget Later)
- Step 4: Create the Beard (Faux Fur or Yarn)
- Step 5: Glue the Beard to the Brush
- Step 6: Add the Nose (Instant Gnome)
- Step 7: Make the Hat (Two Easy Styles)
- Step 8: Finish with Trim and Personality
- Style Ideas: Make Your Gnomes Match Your Holiday Decor
- Batch-Making Tips (Because One Is Never Enough)
- Troubleshooting: Fix the Most Common Craft Gremlins
- Optional: Seal for Durability (Especially If These Are Gifts)
- FAQ
- Maker Notes: of Real-World “Experience” Tips (So Yours Looks Great on the First Try)
- Conclusion
There are two kinds of holiday crafting: the kind that requires a trip to three stores, a glue that only exists on the moon, and a PhD in ribbon physics… and the kind that starts with a humble paintbrush and ends with a tiny gnome who looks like he’s ready to judge your tree-skirt choices.
Enter the gnome paintbrush ornament: a ridiculously cute, budget-friendly DIY that turns an ordinary chip brush into a whimsical holiday decoration. It’s quick enough for a weeknight, customizable enough for “just one more,” and charming enough that guests will ask where you bought it (and you can casually say, “Oh this? I made it,” like you’re starring in your own craft montage).
What Is a Gnome Paintbrush Ornament?
A paintbrush gnome ornament is exactly what it sounds like: the paintbrush becomes the gnome’s body, the bristles become his beard (or the base under a beard), and you add a simple hat and a round nose. Most versions use a triangle of fabric or felt for the hat, a strip of faux fur or yarn for the beard, and a wood bead (or pom-pom) for the nose. Add a hanger and a little bling, and you’ve got a handmade ornament that feels cozy, rustic, and delightfully quirky.
Why This DIY Works So Well
- Low cost, high “aww” factor: Paintbrushes are inexpensive and easy to find.
- Beginner-friendly: If you can cut a triangle and glue a bead, you’re in business.
- Endless variations: Classic Christmas, Scandinavian minimal, farmhouse, glam, witchy, Valentine, springgnomes don’t judge your aesthetic.
- Fast gratification: One ornament can come together in 15–30 minutes (dry time optional but recommended).
Supplies You’ll Need (With Smart Substitutions)
Base
- Paintbrush: 1–2 inch chip brushes are perfect. Older brushes work too (bonus: “upcycled” sounds fancy).
- Twine or ribbon: For the hanger and extra trim.
Face + Beard
- Wood bead (about 3/4 inch) or small wooden ball: Nose.
- Faux fur strip: The classic fluffy beard look.
- Substitutes: Yarn tassel, mop strings, felt fringe, or even a cotton “snow” strip for a softer vibe.
Hat + Details
- Felt, fabric, or a scrap of holiday textile: Hat triangle.
- Optional trim: Pom-pom, ribbon, jingle bell, mini pine pick, tiny button, bead “hands,” glitter, or paint pen details.
Adhesives + Finishes
- Hot glue gun + glue sticks: Fastest for assembly.
- Kid-friendlier option: Tacky glue or fabric glue (slower dry, but safer).
- Paint: Acrylic craft paint works great for bristles and the brush ferrule.
- Optional sealer: Mod Podge or a clear protective finish if you want durability and a polished look.
Step-by-Step: How to Make a Paintbrush Gnome Ornament
Step 1: Pick the Right Paintbrush
For ornaments, chip brushes are ideal because they’re lightweight and already have a hole or groove near the handle for hanging. A 1–2 inch brush gives you a gnome that looks proportional on a Christmas tree. Smaller brushes make cute mini-gnomes for gift toppers; larger brushes can become mantel gnomes (aka “gnomes with presence”).
Step 2: Prep and Paint the Brush
- Protect your surface with parchment paper or a craft mat.
- Paint the bristles if you want a clean beard base (white is classic, but tan, gray, or even pastel can be adorable).
- Paint the ferrule (the metal part) if it’s shiny and you want a cohesive look. White, black, gold, or “I found this cute sage-green and now everything is sage-green” all work.
- Let dry completely before gluing fabric so you don’t trap moisture under the hat.
If you’re making a bunch, you can “assembly line” paint first, then move to hats and beards while everything dries.
Step 3: Make the Hanger First (So You Don’t Forget Later)
Cut a 6–8 inch piece of twine or ribbon, fold into a loop, and tie or glue it near the top of the handle. You can thread it through an existing hole if your brush has one, or glue it flat on the back of the handle.
Step 4: Create the Beard (Faux Fur or Yarn)
Faux fur method: Cut a small rectangle (roughly 1.5–2 inches wide) and shape the bottom into a soft V or rounded point. When cutting faux fur, flip it backing-side up and cut only the backing so you don’t shear the fluffy fibers. This keeps the beard looking full instead of… recently buzzed.
Yarn method: Wrap yarn around your fingers 15–25 times, tie at the top, cut the bottom to make a tassel, then trim into a beard shape. A little trimming goes a long waylike a haircut, stop before you get “bangs regret.”
Step 5: Glue the Beard to the Brush
Glue the beard where the bristles meet the handle/ferrule area. Aim for a position that leaves room above for the hat brim and the nose.
Step 6: Add the Nose (Instant Gnome)
Place a dab of hot glue right above the beard and press on the wood bead. The nose should sit slightly over the beard so it looks like the gnome is peeking out from under the hat.
Step 7: Make the Hat (Two Easy Styles)
Option A: Classic Triangle Hat (Fast and Foolproof)
- Cut a triangle from felt or fabric (about 4–5 inches tall for a 2-inch brush).
- Wrap it around the top of the brush handle like a cone.
- Glue the seam in back, then glue the front edge just above the nose.
- Add a pom-pom, bell, or bead at the tip if you want extra personality.
Option B: Folded “Soft Cap” Hat (Cozy and Slightly Slouchy)
- Cut a rectangle of fabric (about 3 x 5 inches).
- Wrap it around the handle, overlapping in back.
- Gather the top with twine and tie it off, then glue the gathered section down.
- Fluff and adjust so it looks like a soft knit cap.
Step 8: Finish with Trim and Personality
This is where your gnome goes from “cute” to “I need twelve of these immediately.”
- Hat brim: Add a thin strip of faux fur, ribbon, or braided twine around the base of the hat.
- Arms: Glue mini wooden beads or felt mittens on each side, or wrap twine like little hands holding a tiny gift tag.
- Accents: Tiny pine sprig, snowflake charm, mini candy cane, or a button “badge.”
- Personalization: Write a name and year on the back with a paint pen for a keepsake.
Style Ideas: Make Your Gnomes Match Your Holiday Decor
1) Farmhouse Neutral
Cream hat, burlap ribbon trim, twine hanger, and a simple wood bead nose. Add a tiny pine sprig for a rustic finish.
2) Classic Christmas
Red felt hat, white faux fur beard, jingle bell tip, and a plaid ribbon scarf around the “neck.” It’s basically a Hallmark movie in ornament form.
3) Scandinavian Minimal
Solid gray or muted green hat, clean white beard, no extra sparkle. Understated. Calm. The gnome drinks black coffee and owns three matching sweaters.
4) Glam Sparkle
Metallic hat fabric, glitter trim, and a glossy sealer. Add rhinestone stickers if you want your ornament to look like it’s headed to a tiny gnome gala.
5) Theme Gnomes Beyond Christmas
Same technique, different accessories: pastel hats for spring, hearts for Valentine’s Day, spooky hats for Halloween, or red-white-blue for summer decor.
Batch-Making Tips (Because One Is Never Enough)
- Cut hats in stacks: Fold felt and cut multiple triangles at once.
- Make a “beard template”: Trace a simple beard shape onto cardstock for consistent results.
- Set up stations: Paint station → beard station → hat station → decoration station.
- Use a sealer only at the end: It’s faster and keeps your workspace less sticky.
Troubleshooting: Fix the Most Common Craft Gremlins
“My hat keeps sliding.”
Use a slightly wider hat piece, add a tiny glue dot at the front and back, and hold it in place for a few seconds. Felt grips better than slick fabric, so switch materials if needed.
“My beard looks sparse.”
Cut faux fur so the fibers stay long (backing-only cutting helps). For yarn beards, use thicker yarn or double the tassel.
“My glue strings are everywhere.”
Let glue cool for a second before pressing pieces together, and keep a toothpick nearby to “catch” strings. (Crafting’s version of lint rolling.)
“My ornament feels top-heavy.”
Keep embellishments light at the hat tip. If you add a bell, balance it with a slightly thicker twine hanger or a shorter hat.
Optional: Seal for Durability (Especially If These Are Gifts)
If you want your DIY gnome ornament to handle years of storage bins and curious pets, add a protective finish. For paper/fabric accents, a thin coat of Mod Podge can help secure edges. For painted wood, a clear protective finish can add durability and help prevent scuffs.
Keep coats thin, allow proper drying time, and avoid over-brushing for the smoothest finish. If you’re sealing something fuzzy (like faux fur), skip sealing the fur itselfnobody wants a crunchy beard.
FAQ
Do I need to paint the bristles?
Not always. If you’re covering the bristles fully with faux fur, you can skip paint. Paint helps when the bristles show through or when you want a bright, clean base.
Can I make these without hot glue?
Yes. Use tacky glue, strong craft glue, or fabric glue. Plan for longer drying time and consider using clothespins to hold pieces while they set.
What’s the best “nose” if I don’t have wood beads?
Pom-poms, felt balls, tiny foam balls, or even a rolled felt circle can work. Wood beads look classic, but gnomes are flexible creatures.
Maker Notes: of Real-World “Experience” Tips (So Yours Looks Great on the First Try)
If you scroll through enough craft photos, you’ll notice something comforting: even the cutest gnome ornaments usually have one small “tell” that they were handmadeslightly crooked hats, beards that look like they’re blowing in an imaginary breeze, noses that sit a tiny bit off-center like the gnome is mid-sassy comment. That’s not a flaw. That’s the charm. Still, if you want your paintbrush gnomes to look intentionally whimsical (not accidentally chaotic), here are the little lessons crafters tend to learn after making a few.
First: hat size solves most problems. A hat that’s too small makes the gnome look surprised, like he just remembered the oven is still on. A slightly larger triangle is more forgiving, covers the top neatly, and gives you room to angle the hat for personality. If you’re unsure, cut it bigger. You can always trim. Trimming is easy; trying to stretch felt is not.
Second: beard fluff matters. Faux fur looks best when you cut from the back and then gently brush or “finger-comb” the fibers downward. This instantly turns “craft supply” into “cozy beard.” If you use yarn, a quick trim into a rounded point makes the face look more polished. A blunt, straight-across cut can read more “paintbrush” and less “gnome,” which is not the vibe we’re chasing.
Third: place the nose like it’s doing a job. The nose isn’t just decorit’s the anchor that makes the face believable. Too high and the gnome looks like he’s wearing his beard as a scarf. Too low and the beard swallows it. The sweet spot is right where the hat brim would naturally cast a shadow. A good trick is to hold the bead in place before gluing and take one step back. If it looks right from “tree distance,” it’s right.
Fourth: choose embellishments with a plan. When everything is tiny, it’s tempting to add everything: bells, bows, pine picks, glitter, mini ornaments on the mini ornament… and suddenly your gnome looks like he lost a fight with a craft aisle. Pick one “star” detail (a bell tip, a plaid scarf, or a sprig) and let everything else support it. Your ornament will look intentional and camera-ready.
Finally: make one “test gnome” first. Even experienced crafters do a quick prototype to figure out proportions for that specific brush size. Then the rest go fasterand you’ll end up with a set that looks coordinated, not like distant cousins who only see each other at holidays. Which, honestly, is a whole different kind of festive.
Conclusion
Making gnome paintbrush ornaments DIY is the sweet spot of holiday crafting: simple materials, big payoff, and enough customization to keep it fun year after year. Whether you go classic red-and-white, minimalist and modern, or full-on glitter gnome glam, you’ll end up with ornaments that look handmade in the best wayand probably a strong desire to make “just one more.”