Table of Contents >> Show >> Hide
- Quick Door Reality Check (Before You Buy Anything)
- Tools & Materials (The Stuff That Makes This Go Smoothly)
- Step-by-Step: How to Paint an Exterior Door (Without Regret)
- Step 1: Pick the right day (weather matters more than motivation)
- Step 2: Decide: remove the door or paint it in place
- Step 3: Remove hardware (or mask it like a pro)
- Step 4: Clean thoroughly (paint hates grease)
- Step 5: Repair dings and rough spots
- Step 6: Sand (or at least scuff-sand) for adhesion
- Step 7: Prime the door (yes, even if the paint says “paint & primer”)
- Step 8: Paint in the right order (especially for paneled doors)
- Step 9: Don’t forget the edges (but paint them strategically)
- Step 10: Let it dryand then let it cure
- Material-Specific Tips (So You Don’t Fight Your Door’s Personality)
- Choosing the Right Paint & Sheen
- Common Mistakes (And How to Avoid Them)
- Maintenance: Keep the Finish Looking Fresh
- FAQ: Fast Answers to Common Exterior Door Painting Questions
- Real-World Experiences: Lessons People Learn the Hard Way (So You Don’t Have To)
- Conclusion
Your exterior door is basically your home’s handshake. If it’s chipped, faded, or sporting that mysterious “not quite beige” from 2009, a fresh coat of paint is one of the fastest ways to upgrade curb appeal without refinancing your soul. The trick is that an exterior door is also a drama queen: it lives outside, gets blasted by sun and rain, and is touched constantly. So if you want a finish that looks smooth (not “orange peel chic”) and actually lasts, prep matters more than pep talks.
Below is a step-by-step, real-world guide to painting an exterior doorwood, fiberglass, or metalplus practical tips on primer, sheen, weather timing, and how to avoid the classic mistake of closing the door too soon and welding it shut like a paint-based practical joke.
Quick Door Reality Check (Before You Buy Anything)
1) What is your door made of?
- Wood: Beautiful, but prone to swelling, cracking, and tannin bleed (hello, surprise stains).
- Fiberglass: Stable and easy to paint, but can be slickbonding primer helps.
- Steel/metal: Durable, but any rust or bare spots need the right primer so corrosion doesn’t return like a villain sequel.
2) How rough is the current finish?
If paint is peeling, chalky, or flaking, you’re not “painting,” you’re doing a small renovation with a brush. If it’s mostly intact but glossy, you can often scuff-sand and repaint for great adhesion.
3) Is your home older (pre-1978)?
In the U.S., lead-based paint was banned for residential use in 1978. Sanding or scraping older paint can create hazardous dust. If your home is from the disco era or earlier, treat paint disturbance seriouslycontain dust, keep kids/pets away, and consider lead-safe guidance.
Tools & Materials (The Stuff That Makes This Go Smoothly)
- Exterior-grade paint (door & trim enamel or premium exterior paint)
- Primer (bonding primer, stain-blocking primer, or rust-inhibiting primerbased on door material)
- Sandpaper / sanding sponge (common: 150, 180, 220; optional ultra-fine 320–400 for between coats)
- Degreasing cleaner + water, rags/microfiber cloths
- Tack cloth or a damp lint-free cloth for dust removal
- Painter’s tape + plastic or paper for glass and hardware masking
- Drop cloths (outside + inside threshold area)
- Quality angled sash brush (for panels/edges) + small foam or microfiber roller (for flats)
- Screwdriver set (to remove knobs, strike plates, hinges if taking door off)
- Wood filler or epoxy filler (for dents), putty knife
- Optional but awesome: sawhorses (if removing door), and a small fan for airflow
Step-by-Step: How to Paint an Exterior Door (Without Regret)
Step 1: Pick the right day (weather matters more than motivation)
Exterior paint performance is heavily affected by temperature, humidity, and direct sun. Aim for mild, dry conditions and enough time for each coat to dry before evening dew or a surprise sprinkle. Many paint makers recommend staying within a broad range (often roughly 35°F–100°F depending on product), but “safe” doesn’t always mean “pretty.” A common sweet spot is around 50°F–85°F with humidity on the lower sideespecially if you want a smoother finish. Also: direct sun can flash-dry paint too fast, so painting in early morning or late afternoon is often easier.
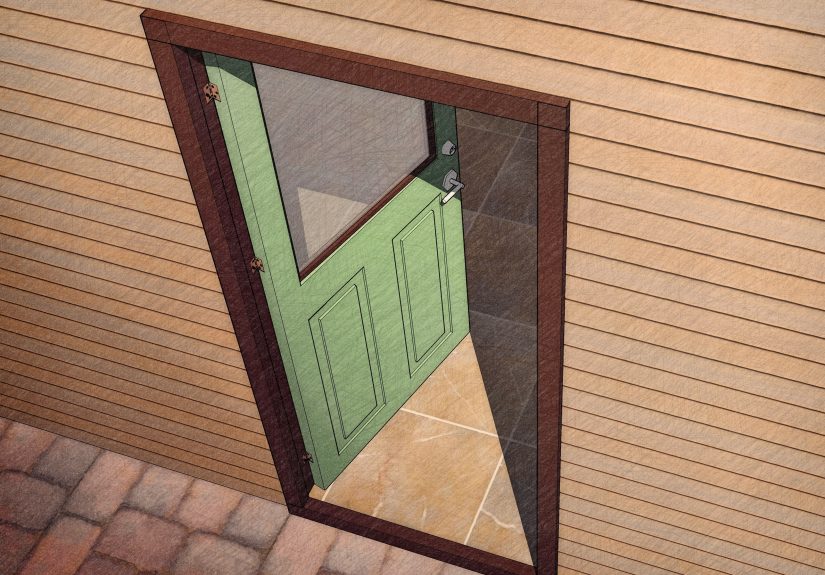
Step 2: Decide: remove the door or paint it in place
Remove the door if you want the easiest path to a furniture-smooth finish (especially for paneled doors), or if you’re using a sprayer. Lay it flat on sawhorses and you’ll reduce runs and control dust.
Paint in place if removing the door is a logistical circus (storm door, tricky hinges, security system, weather, pets, etc.). You can still get a great resultjust plan for dry time so you’re not forced to close it too soon.
Step 3: Remove hardware (or mask it like a pro)
Best practice: remove knobs, deadbolts, kick plates, and weather accessories. If you can’t, mask carefully. Take photos before disassembly so reassembly doesn’t become a three-hour puzzle with “extra screws” at the end.
Step 4: Clean thoroughly (paint hates grease)
Wash the door to remove grime, oils, and chalky residue. Rinse well and let it dry completely. Dirt you don’t remove becomes “texture,” and not the charming kind.
Step 5: Repair dings and rough spots
Fill dents, cracks, and nail holes. Let filler dry fully, then sand it flush. If you’re painting a door with panels, check corners where old paint likes to build up and create ridges.
Step 6: Sand (or at least scuff-sand) for adhesion
If the existing finish is glossy but stable, you usually don’t need to sand to bare materialjust scuff it so primer and paint can grip. A common approach is a light scuff with around 220-grit. For new wood doors or rougher surfaces, you may step through multiple grits to get everything consistent and smooth. Remove all sanding dust afterward with a tack cloth or lint-free wipe.
Step 7: Prime the door (yes, even if the paint says “paint & primer”)
Primer is your insurance policy. It improves adhesion, blocks stains, evens porosity, and helps your topcoat look uniform. Use the right primer for your situation:
- Bonding primer: Great for slick surfaces (fiberglass, previously glossy paint).
- Stain-blocking primer: For wood with tannins, knots, or previous stains.
- Rust-inhibiting metal primer: For steel doors with bare spots or rust.
Let primer dry per label before topcoating. If the surface feels gritty, lightly scuff-sand primer once it’s dry, then remove dust.
Step 8: Paint in the right order (especially for paneled doors)
For a paneled door, paint tends to look best when you work from the “inside details” outward:
- Panels/insets first: Use a brush to get into corners and profiles.
- Rails (horizontal parts): Smooth, controlled strokes.
- Stiles (vertical parts): Finish with long strokes for a consistent look.
- Flat areas: Use a small roller for an even finish, then “tip off” lightly with a brush if needed.
For a flat door, rolling is often fastest and smoothest. Don’t overload your brush or rollerthin, even coats beat thick coats every time. Plan for two coats in most cases. Lightly sand between coats if you feel dust nibs or texture, then wipe clean before the next coat.
Step 9: Don’t forget the edges (but paint them strategically)
The hinge edge and latch edge take abuse. Painting edges helps seal and protect, but you also need the door to close properly. If you’re changing colors dramatically, paint the edges for a clean “door open” look. If the door already fits tightly, keep coats thin on edges so you don’t create sticking.
Step 10: Let it dryand then let it cure
Dry-to-touch is not the same as cured. A door may feel dry in a few hours, but the coating can remain soft for longerespecially in humidity. If you close the door too early, weatherstripping can imprint into the paint, or the door can stick. When in doubt, wait longer and keep airflow moving. (This is the part where patience pays rent.)
Material-Specific Tips (So You Don’t Fight Your Door’s Personality)
Wood exterior doors
- Watch for tannin bleed on species like cedar/redwood; use stain-blocking primer if needed.
- Sand with the grain and repair checks/cracks before priming.
- Seal top, bottom, and edges if recommendedmoisture loves sneaking in through unprotected end grain.
Fiberglass exterior doors
- Clean thoroughly and scuff-sand; fiberglass can be smooth and resistant to adhesion without prep.
- Bonding primer helps prevent peeling, especially if the prior finish is glossy.
- Use thin coats to avoid texture buildup on faux wood grain patterns.
Metal/steel exterior doors
- Remove rust down to sound metal where possible; spot-prime exposed areas with a metal-appropriate primer.
- Consider paints formulated for doors/trim for durability and hardness.
- If the door is in intense sun and you choose a very dark color, heat buildup can be a concernfollow manufacturer guidance.
Choosing the Right Paint & Sheen
Paint type
For most homeowners, a premium exterior acrylic or a dedicated door-and-trim enamel (often water-based) offers a great balance: durable, easier cleanup, and excellent color retention. Oil-based options can be very hard and smooth, but they’re slower to dry, smellier, and cleanup is tougher. The best choice is often less about ideology (“oil forever!”) and more about matching the door’s surface, exposure, and the product’s label directions.
Sheen (finish)
Doors get touched, bumped, and wiped down, so satin, semi-gloss, or gloss are common picks for durability and cleanability. Higher gloss pops color and detail but highlights every little flaw (including that “tiny” dent you swore nobody would notice). Satin or semi-gloss is often the happy medium for exterior doors.
Common Mistakes (And How to Avoid Them)
- Painting in direct sun: can dry too fast, causing lap marks and brush drag. Choose shade or a better time of day.
- Skipping cleaning: paint doesn’t bond to invisible grime.
- No sanding/scuffing: glossy surfaces can lead to peeling later.
- Thick coats: runs, sags, and soft paint that sticks to weatherstripping.
- Closing too soon: sticking, imprinting, and heartbreak.
- Ignoring lead-safety in older homes: sanding dust can be hazardouscontain and clean properly.
Maintenance: Keep the Finish Looking Fresh
A painted exterior door lasts longer if you treat it like a high-touch surface (because it is). Wash it gently when it looks grimy, handle chips quickly to keep moisture out, and consider a new coat when fading or wear showsespecially on sun-baked exposures.
FAQ: Fast Answers to Common Exterior Door Painting Questions
Do I have to remove the door to paint it?
No. Removing it can make painting easier and reduce runs, but painting in place works well if you plan your dry time and keep coats thin.
Do I really need primer?
If you want the paint to stick and last, primer is often worth itespecially on bare areas, slick surfaces, major color changes, stains, or metal.
How many coats of paint should I apply?
Two coats is a common standard for durability and even color. Some premium paints cover well, but doors take abuse, so a second coat is rarely wasted.
How long before I can close the door?
Follow your product label, but remember: dry-to-touch isn’t fully cured. Give it enough time so weatherstripping won’t imprint and the finish won’t stick. Humidity slows everything down, so be patient.
Real-World Experiences: Lessons People Learn the Hard Way (So You Don’t Have To)
Painting an exterior door is one of those projects that looks simple on paperclean, sand, paint, ta-dauntil real life shows up with wind, bugs, surprise humidity, and a neighbor who chooses that exact moment to start leaf-blowing dust directly toward your wet paint. Here are common “field notes” from DIYers and pros that can save you hours.
1) The weather can change your finish more than your brush can. Many people discover that painting in strong sun makes the surface skin over fast, so brush strokes don’t level out nicely. The fix is not “brush harder” (that just makes it worse); it’s choosing shade, painting early/late, and keeping a wet edge. On humid days, the opposite happens: paint stays tacky longer, and the door becomes a magnet for lint, pollen, and curious fingerprints. A small fan (not pointed so hard it throws dust) can help airflow, and planning an extra day avoids the “I have to close this door tonight” panic.
2) High-gloss is gorgeous… and brutally honest. Homeowners often pick gloss because it looks fancy and wipes clean easily. Then they paint and suddenly see every ripple, old ding, and sanding swirl like the door is spotlighted on a stage. If your door has battle scars, satin or semi-gloss is more forgiving. If your heart is set on gloss, spend more time on repairs and sanding, and consider a light scuff-sand between coats to knock down dust nibs.
3) The “I’ll just paint around the hardware” strategy usually backfires. It seems efficientuntil you notice brush marks around the lockset, a ragged paint line, or paint sneaking under the edge of your tape. People who remove hardware first typically end up with a cleaner finish and fewer touch-ups. Bonus: it’s easier to clean the door properly without working around knobs and plates.
4) Thick coats feel productive, but they cure slower and stick longer. A very common experience: the door feels dry, you close it, and the weatherstripping leaves a textured imprint that looks like tire tracks. Or worse, the door sticks and pulls paint when you open it. Thin, even coats dry more predictably and harden better. If you need coverage, add a second coat instead of trying to make one coat do the job of two.
5) Dust control is half the battle. Even when you sand nicely, the finish can look gritty if dust isn’t removed well. People swear by a tack cloth (used lightly) or a lint-free damp wipe after sanding. If you’re painting the door off its hinges, choose a low-dust location and avoid sweeping nearby while paint is wet. If you’re painting in place, protect the threshold and nearby floors, and keep pets awaybecause fur has a supernatural ability to appear in fresh paint.
6) Dark colors look sharp, but heat is real. Many homeowners love deep navy, black, or bold modern shades. In hot sun, darker colors can get significantly warmer, which may stress some materials or finishes over time. The practical takeaway: use exterior-grade products, follow the label, and consider your exposure (south- and west-facing doors in many regions take a beating). When in doubt, ask the paint counter for a door-rated system designed for sun and high-touch durability.
These experiences all point to the same truth: the “painting” part is the shortest part. The long-lasting, smooth, curb-appeal finish comes from prep, thin coats, smart timing, and letting the coating cure before daily life starts slamming the door again.
Conclusion
If you clean thoroughly, scuff-sand properly, prime when it makes sense, and paint with thin, even coats in decent weather, you can get a smooth, durable exterior door finish that looks professionalwithout hiring a crew or developing a new personality trait called “paint rage.” Take your time on prep, follow dry times, and your front door will do its job: welcoming guests and quietly making your house look more expensive than it was.