Table of Contents >> Show >> Hide
- Can You Upload a .PPT or .PPTX Directly to Facebook?
- Method 1: Share Your PowerPoint as a Video (Best for Reach)
- Method 2: Share PowerPoint Slides as Images
- Method 3: Share a PowerPoint as a PDF on Facebook
- Method 4: Present Live with Facebook Live Screen Share
- Method 5: Share a Link to Your PowerPoint in the Cloud
- Tips to Make Your PowerPoint Facebook-Friendly
- Real-World Experiences: What Actually Works Best
Got a gorgeous PowerPoint sitting on your computer that you’d love to show off on Facebook? Maybe it’s a class presentation you’re weirdly proud of, a sales deck that finally makes sense, or a slideshow of vacation photos that deserves better than vanishing in your Downloads folder. The good news: you can share a PowerPoint on Facebook from both Windows and Mac. The slightly annoying news: you can’t usually just throw a .pptx file straight into a Facebook post and call it a day.
Instead, you’ll turn your presentation into something Facebook actually loveslike a video, set of images, PDF, or even a live screen share. Once you understand the options, it’s surprisingly easy, and you can pick the format that works best for how you want people to see (and interact with) your slides.
This guide walks you step by step through sharing a PowerPoint on Facebook from both Windows and Mac, with several different methods. We’ll also cover practical tips, little “gotchas” to avoid, and real-world experiences so you can pick the best workflow for your situation.
Can You Upload a .PPT or .PPTX Directly to Facebook?
Short answer: usually no, at least not in the way most people expect.
- Personal profiles: Regular Facebook posts don’t support uploading a PowerPoint file directly. You’ll see options for photos, videos, and sometimes documents, but .ppt or .pptx is not a common supported format here.
- Groups and some pages: In Facebook groups, you can upload “files” (with size limits) such as PDFs and other document formats. Depending on Facebook’s current rules, you might be able to attach a PowerPoint file there, but it won’t “play” as a slideshowit will be a downloadable file for group members.
- What most people really want: Not a download link, but a post that people can watch or swipe through right in their feed. For that, video, images, or PDF previews are the way to go.
That’s why the most reliable method is to convert your PowerPoint into a Facebook-friendly format and then post that instead.
Method 1: Share Your PowerPoint as a Video (Best for Reach)
Turning your PowerPoint into a video is usually the best option. Facebook prioritizes video content, people love hitting play, and your animations and slide timings can stay intact.
Step 1: Export Your PowerPoint as a Video on Windows
- Open your presentation in PowerPoint on Windows.
- Click File > Export > Create a Video.
- Choose a video quality:
- Full HD (1080p) is a great balance of quality and file size for Facebook.
- HD (720p) is fine for basic content or slower connections.
- Under slide timings, choose whether to:
- Use Recorded Timings and Narrations (if you’ve already recorded narration or rehearsed timings), or
- Set a default number of seconds per slide (e.g., 5–8 seconds).
- Click Create Video, pick MP4 as the format, choose where to save it, and click Save.
PowerPoint will render your video in the background. The more slides, animations, and media you have, the longer it takes. When it’s done, you’ll have a nice, Facebook-ready MP4 file.
Step 2: Export Your PowerPoint as a Video on Mac
- Open your presentation in PowerPoint for Mac.
- Go to File > Export.
- In the File Format or Format dropdown, select MP4 (or sometimes MOV, which Facebook also supports).
- Choose the video quality (e.g., Presentation, Internet, or Low). For Facebook, Internet or Presentation quality is usually ideal.
- If available, check Use Recorded Timings and Narrations if you’ve recorded audio or customized timings.
- Click Export and let PowerPoint create the video file.
When the export finishes, you’ll have an MP4 file on your Mac that Facebook can treat just like any other uploaded video.
Step 3: Upload the Video to Facebook
- Open Facebook in your browser or app and go to your profile, page, or group.
- Click in the “What’s on your mind?” box (or the post composer on your page).
- Select Photo/Video, then choose your exported MP4 file.
- Add a catchy caption. Think about keywords people might search for (for example, “marketing pitch,” “training slideshow,” or “lesson recap”).
- Optional: Tag people, add a location, or choose a thumbnail if Facebook gives you the option.
- Click Post.
Now your PowerPoint plays right in the Facebook feedno downloading, no “what app do I need?” questions from confused friends or coworkers.
Method 2: Share PowerPoint Slides as Images
If your presentation is more visual and less about animations or narration, posting slides as images can work beautifully. It’s also a great option when you want people to swipe through at their own pace.
Export Slides as Images in PowerPoint
- Open your PowerPoint on Windows or Mac.
- Go to File > Export (or Save As, depending on your version).
- Choose a format like JPEG or PNG.
- When asked whether to export All Slides or Just This One, select All Slides.
- PowerPoint will create a folder filled with image files, one for each slide.
Upload Slide Images to Facebook
- On Facebook, start a new Photo/Video post.
- Select multiple slide images in order (slide 1, slide 2, etc.).
- Add a caption explaining what the slideshow is about.
- Consider adding a call to action, like “Swipe to see all the steps” or “Flip through to view the full lesson.”
- Post the images. On mobile, people can swipe through them like a mini slideshow.
This method is especially effective for tutorials, checklists, quotes, or infographics where each slide can stand on its own.
Method 3: Share a PowerPoint as a PDF on Facebook
Sometimes you want people to be able to zoom in, read detailed text, or download something for later. In that case, turning your PowerPoint into a PDF and posting it is a smart moveespecially in Facebook groups or on business pages.
Step 1: Export PowerPoint to PDF
- Open your presentation on Windows or Mac.
- Click File > Export (or Save As).
- Choose PDF as the file format.
- Select any layout options (for example, full-page slides vs. multiple slides per page).
- Save the PDF somewhere you can find easily.
Step 2: Upload the PDF to Facebook
Your options vary slightly depending on where you’re posting:
- In a Facebook group: Go to your group, start a new post, click the attachment or “Add file” option (often under a three-dot menu), and upload the PDF. Add a description and post.
- On some business pages: You may have options to upload PDFs in specific sections or via tools integrated with your page.
- Via link: You can upload the PDF to cloud storage (OneDrive, Google Drive, Dropbox, etc.) and share the link in your post. Make sure the sharing permissions are set to “Anyone with the link can view.”
This is a good approach if your PowerPoint is more like a downloadable workbook, white paper, or detailed guide.
Method 4: Present Live with Facebook Live Screen Share
Want to walk people through your slides in real time, rather than just posting them? Facebook Live with screen sharing is your friend.
How to Present Your PowerPoint via Facebook Live
- Open your PowerPoint on Windows or Mac and get it ready in Slide Show view (or at least in full-screen mode).
- In your browser, go to Facebook and click Live Video on your profile, page, or group.
- Choose the option to Share Screen (this may appear as a button or icon depending on Facebook’s current interface).
- Select the PowerPoint window or your entire screen if you want to switch between apps.
- Click Go Live, then walk through your slides while talking, just as you would in a meeting or classroom.
- When you’re finished, click End Live Video. The recording can usually stay on your timeline or page as a replayable video.
This method is perfect for webinars, Q&A sessions, live training, and interactive lessons.
Method 5: Share a Link to Your PowerPoint in the Cloud
If you want people to have full controldownload the file, open it in PowerPoint, copy slides, etc.sharing a link is simple and flexible.
Upload and Share from OneDrive or Another Cloud Service
- Upload your PowerPoint file to a service like OneDrive, Google Drive, Dropbox, or iCloud Drive.
- Once uploaded, click the file and choose Share or Get Link.
- Set the permissions to something like Anyone with the link can view (you usually don’t want “edit” unless you trust everyone).
- Copy the share link.
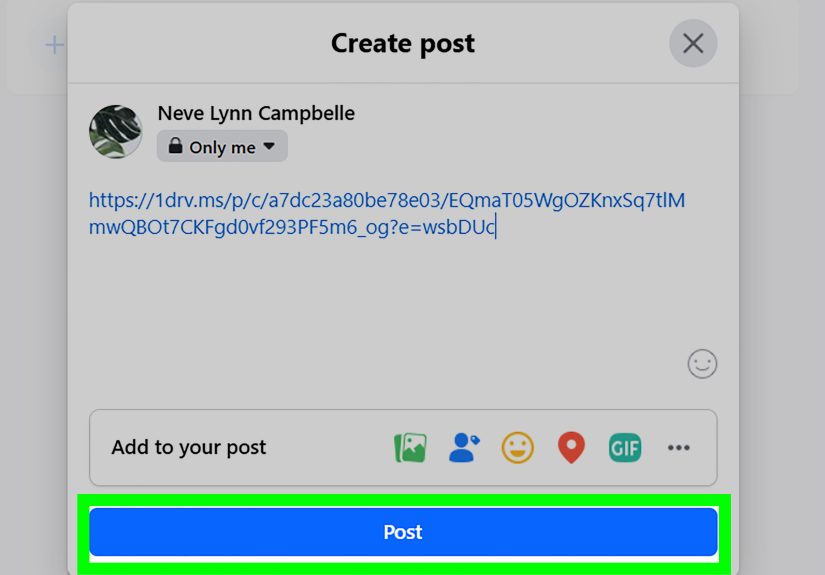
- On Facebook, start a post and paste the link into the text field. Add a short explanation of what the file contains and who it’s for.
- Post. Facebook often generates a preview, but even if it doesn’t, friends can click through to view or download the file.
This is a good choice for teams, classes, or clients who will actually open the file and work with it, not just passively watch it.
Tips to Make Your PowerPoint Facebook-Friendly
However you choose to share your PowerPoint on Facebook, a few tweaks can make a huge difference in how people respond.
- Use a 16:9 slide size: This widescreen ratio fits Facebook’s video player and most modern screens nicely.
- Keep text large and minimal: Remember that many people will be watching on phones, possibly while walking the dog and ignoring traffic signals.
- Add captions or on-slide text for key points: Many Facebook users watch with sound off, so don’t rely entirely on spoken narration.
- Front-load your value: Put your strongest visuals and most important information in the first few slides. If people get bored in the first five seconds, they scroll away.
- Keep videos reasonably short: Aim for 1–5 minutes for casual content. Longer is fine for trainings or webinars, but make sure the topic deserves the time.
- Test on mobile: After you post, check the video or images on your phone. If you can’t read it without zooming, your audience probably can’t either.
Real-World Experiences: What Actually Works Best
On paper, any of these methods will get your PowerPoint onto Facebook. In practice, people tend to gravitate toward a few workflows that feel smooth and get good engagement.
For example, many small business owners start out trying to upload their .pptx file directly. They spend ten minutes hunting for a “PowerPoint” button in the post composer, slowly realize it doesn’t exist, and then give up. The moment they switch to exporting as a short MP4 video, everything changes. Suddenly their carefully crafted slides autoplay in the feed, clients can watch without leaving Facebook, and engagement jumps because the content feels native to the platform instead of like “homework.”
Teachers and trainers often love the Facebook Live + screen share approach. One teacher might use PowerPoint to walk through a math review session, answering questions from the comments as she advances the slides. The replay becomes an on-demand tutorial for students who couldn’t attend live. For her, the combination of PowerPoint’s structure and Facebook’s live interaction is more powerful than just emailing a static deck.
Nonprofits and community organizers frequently prefer PDFs in groups. A board member might convert a PowerPoint into a PDF and upload it to a private Facebook group as a “meeting packet.” Volunteers can download, print, or view it on their phones. Nobody has to ask, “Can someone resend the slides?” because the document is pinned in the group and easy to find later.
Marketers and content creators often get the best results with hybrid strategies. For instance, they might:
- Export the full presentation as a video and post it as a Facebook video;
- Turn key slides into individual images or carousels for separate, bite-sized posts; and
- Provide a cloud link or PDF in the comments for those who want the full downloadable version.
This layered approach lets people engage at different depths: quick scrollers get the highlights, interested viewers watch the video, and power users grab the file for later.
On the technical side, users on both Windows and Mac report that the biggest pain point is usually file size and rendering time. High-resolution videos with lots of animations can take a while to export and upload. A practical trick is to test with a shorter copy of your slides first (maybe 5–10 slides) to make sure the timing, quality, and audio levels look good. Once you’re happy, export the full deck overnight or while you’re doing something else.
Another common lesson: don’t overdo transitions and animations just because they look cool in PowerPoint. On Facebook, rapid, flashy animations can come across as busy or distractingespecially on small screens. Clean slide design, clear text, and strong visuals usually outperform “every transition known to humankind” mode.
Finally, people who consistently succeed with sharing PowerPoints on Facebook treat each post like social content, not just a file dump. They write captions that explain why the slideshow matters, add a hook (“Slide 4 might change how you think about this”), and invite interaction (“Comment which slide hit you hardest”). The PowerPoint is the star of the show, but the Facebook post is the stageyou need both to make it work.
If you follow the methods abovevideo, images, PDF, live screen share, or cloud linksyou’ll be able to share your PowerPoint on Facebook from Windows or Mac without frustration. Pick the format that matches your goal, give it a good caption, and let your slides finally escape the “My Documents” folder.