Table of Contents >> Show >> Hide
- What Stomach Acid Really Is (And Why It’s Not Just “Vinegar With Confidence”)
- Why People Simulate Stomach Acid
- Safety First: What This Article Will NOT Tell You To Do
- How to Simulate Stomach Acid Safely: 8 Steps
- Step 1: Define Your Goal (pH Demo, “Digestion,” or Neutralization?)
- Step 2: Choose a Safe “Acid Stand-In”
- Step 3: Gather Simple Supplies (Think “Kitchen + Classroom,” Not “Breaking Bad”)
- Step 4: Mix Your “Gastric Simulation” and Measure pH
- Step 5: Warm It to “Body Temperature” (Optional, but It Makes the Simulation Better)
- Step 6: Add a “Food Model” to Observe Changes Over Time
- Step 7: Simulate “Stomach Churning” With Gentle Mixing
- Step 8: Track Results, Compare Trials, and Clean Up Safely
- What Your Simulation Can (and Can’t) Prove
- Troubleshooting (Because Science Loves Humbling Everyone)
- Health Note: Don’t Turn a Science Project Into Self-Treatment
- Experiences Related to “How to Simulate Stomach Acid: 8 Steps” (500+ Words)
- Conclusion
Educational note: Your stomach is basically a tiny chemistry lab that runs 24/7 (no lunch breaks, no weekends, wildly overqualified). But “stomach acid” isn’t just “something sour”it’s a carefully controlled mix of acid, enzymes, salts, and protective mucus. If you want to simulate stomach acid for a school demo, a science fair idea, or a simple digestion model, the safest move is to simulate the effects (acidity + warmth + mixing) using mild, food-grade materialsnot to try to recreate the real thing.
This guide walks you through a safe, classroom-friendly stomach acid simulation in eight steps, plus how to interpret what you see, common mistakes, and a longer “real-world experiences” section at the end so your project write-up doesn’t feel like it was produced by a robot who’s never met a deadline.
What Stomach Acid Really Is (And Why It’s Not Just “Vinegar With Confidence”)
In real human digestion, “stomach acid” usually refers to gastric juicea cocktail that includes:
- Acid (very low pH) that helps break down food and makes life difficult for many microbes
- Enzymes (like pepsin) that help digest proteins
- Salts and water that help everything mix and move
- Mucus and bicarbonate that protect your stomach lining from… well… your stomach
Depending on what’s going on (empty stomach vs. after eating), stomach acidity changes. That variability is the point: your body is constantly adjusting conditions to help digestion happen safely.
Why People Simulate Stomach Acid
Most folks aren’t simulating stomach acid because they want to role-play as a gastric gland. They’re trying to answer practical questions, like:
- Digestion demos: How do acid and churning work together to break down food?
- Capsule or coating tests: How quickly does something dissolve in an acidic environment?
- Neutralization demos: What happens when an antacid meets acid?
- Materials questions: Why do some substances break down faster in acidic conditions?
In professional labs (like pharmaceutical testing), standardized “simulated gastric fluid” exists for specific purposes. For everyday learning, you can do a safer, simpler version that still teaches the core ideas.
Safety First: What This Article Will NOT Tell You To Do
Let’s be crystal clear: do not try to make “real” stomach acid or use strong acids at home. That’s a fast track to chemical burns, damaged surfaces, ruined clothing, and a very awkward conversation with whoever buys the cleaning supplies in your house.
Instead, this guide uses mild, food-grade acids (the kind used in cooking) and focuses on a safe simulation of stomach conditions: acidity, warmth, time, and mixing.
How to Simulate Stomach Acid Safely: 8 Steps
Step 1: Define Your Goal (pH Demo, “Digestion,” or Neutralization?)
Before you mix anything, decide what you’re actually trying to simulate:
- Acidity only: You just need a low pH liquid to compare reactions.
- Digestive conditions: You want to show how warmth + mixing + acidity affects food structure.
- Antacid reaction: You want visible bubbling and pH change when a base is added.
Picking a clear goal helps you avoid a common science-project problem: accidentally testing “vibes.”
Step 2: Choose a Safe “Acid Stand-In”
For a safe stomach-acid simulation, use mild, kitchen-safe acids such as:
- Lemon juice (acidic, familiar, and smells like optimism)
- White vinegar (acidic, consistent, and smells like “someone is cleaning something”)
These won’t perfectly match real gastric juice, but they can approximate the idea of an acidic environment without involving hazardous chemicals.
Step 3: Gather Simple Supplies (Think “Kitchen + Classroom,” Not “Breaking Bad”)
Here’s a basic, safe setup:
- Clear container (plastic is safer than glass for many classrooms)
- Water
- Your acid stand-in (lemon juice or vinegar)
- pH strips (or a basic pH test kit)
- Measuring spoons/cups (for consistency, not for chemical precision)
- Thermometer (optional but helpful)
- Stir stick or spoon
- Paper towels, labels, and a notebook
- Safety glasses (highly recommended)
Step 4: Mix Your “Gastric Simulation” and Measure pH
Start with water in your container. Add a small amount of lemon juice or vinegar, stir, and test with a pH strip. The safest educational range is often around pH 2–3, which is acidic enough to demonstrate meaningful effects while still staying in “mild acid” territory.
Tip: Adjust gradually. If you’re aiming for a consistent pH for comparisons, write down what you did so you can reproduce it.
Important: Do not aim for extreme acidity. The purpose here is a safe model, not a “how acidic can I go” speedrun.
Step 5: Warm It to “Body Temperature” (Optional, but It Makes the Simulation Better)
Your stomach is warmroughly body temperatureso warming your mixture can make results more realistic for digestion demos. The safest method is a warm water bath:
- Place your sealed container of simulation liquid into a larger bowl of warm (not boiling) water.
- Check temperature if you can. Warm is enough; hot is unnecessary.
Avoid direct heating methods. Gentle and controlled wins here.
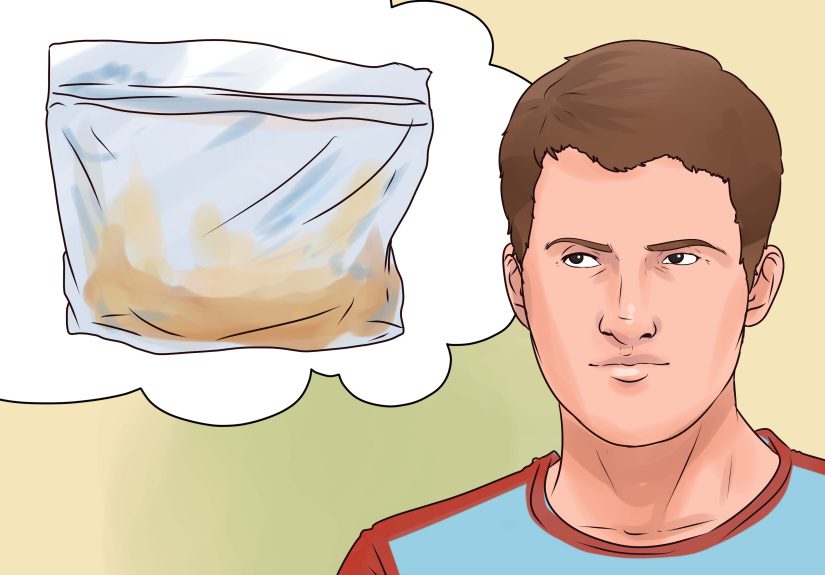
Step 6: Add a “Food Model” to Observe Changes Over Time
Pick something safe, simple, and consistent. Good options include:
- Bread (structure changes and softens)
- Gelatin cubes (easy to size consistently)
- Cooked egg white (protein-heavy; changes can be noticeable over time)
Drop your sample in, start a timer, and record observations at set intervals (like every 5–10 minutes). If you’re doing a science fair, consistency is your best frienduse similar sizes and note the starting condition.
Step 7: Simulate “Stomach Churning” With Gentle Mixing
Your stomach doesn’t just sit there politely. It mixes. To model that, gently swirl or stir your container on a schedule. For example:
- Swirl for 5–10 seconds every few minutes
- Keep the motion consistent between trials
Safety tip: Don’t shake aggressively, and don’t use a tightly sealed container if you add anything that could fizz later. Pressure is not a “bonus feature.”
Step 8: Track Results, Compare Trials, and Clean Up Safely
Now do what scientists do best: write things down. Track:
- Starting pH and temperature
- Sample size/type
- Time points and visual changes (texture, cloudiness, breakdown)
- Final pH (especially if you tested an antacid or another substance)
For cleanup, dilute leftovers with plenty of water. If you want to demonstrate neutralization for learning, you can add small amounts of baking soda slowly to leftover mild acid to observe bubblingnever in a sealed container, and ideally in a sink or large bowl to prevent overflow.
What Your Simulation Can (and Can’t) Prove
What it can show:
- Lower pH can change how some foods break down or soften over time
- Warmth and mixing often speed up visible changes
- Neutralization raises pH and can reduce “acidity effects”
What it can’t fully replicate:
- The exact chemistry of real gastric juice
- The role of specialized enzymes and mucus barriers
- The constantly changing conditions of a living digestive system
In other words: you’re building a model. A model is useful precisely because it simplifies reality without pretending to replace it.
Troubleshooting (Because Science Loves Humbling Everyone)
If nothing seems to happen…
- Use a different sample (some foods resist mild acids for a long time)
- Try warming the setup (gentle heat can make changes more noticeable)
- Extend your observation time and record smaller changes
If the pH won’t stabilize…
- Stir thoroughly before testing
- Use fresh pH strips and don’t “double dip”
- Measure consistently (same amount of liquid, same timing)
If it gets foamy or overflows…
- You likely created a reaction that releases gas (like adding baking soda too quickly)
- Use a larger container and add reactants slowly
- Never cap or seal a vessel during a fizzing reaction
Health Note: Don’t Turn a Science Project Into Self-Treatment
Sometimes people search “simulate stomach acid” because they’re worried about low stomach acid, reflux, or digestion problems. If you’re dealing with frequent heartburn, pain, trouble swallowing, or ongoing GI symptoms, the right next step is talking with a qualified healthcare professionalnot running kitchen experiments on your body.
Experiences Related to “How to Simulate Stomach Acid: 8 Steps” (500+ Words)
When people try to simulate stomach acid for the first timeespecially for a school projectthree “classic experiences” tend to show up. The first is the Expectation vs. Reality moment. Someone imagines their simulated stomach acid will instantly dissolve a chunk of food like a movie villain dissolving a secret letter. Then they drop in a piece of bread, wait 60 seconds, and… nothing dramatic happens. That’s not failure; that’s actually a useful lesson. Real digestion is a combination of chemistry, mechanics, time, and biology. Your stomach doesn’t do magic tricks. It does steady, repeatable work.
The second common experience is the pH strip obsession. People start out thinking pH is a side detail, then realize it’s the whole point. You’ll see students test the pH, adjust, test again, and suddenly everyone becomes very serious about whether something is a 2.5 or a 3.0. It’s funnybecause it’s truebut it also mirrors real science. If you want to compare results, you need consistent starting conditions. The moment you realize that “close enough” isn’t always close enough is the moment your project starts leveling up.
The third experience is what I’ll call the Fizz Incident. Somebody decides to “demonstrate antacids” by tossing baking soda into a container of acidic liquid and thenbecause confidence is powerful and caution is optionalputs a lid on it. A few seconds later, everyone learns a quick lesson about gas production and pressure. If you take only one practical safety idea from this whole topic, let it be this: reactions that produce bubbles need space and ventilation. You don’t need an explosion to have a memorable science fair, and your teacher definitely doesn’t want to explain to the principal why the ceiling smells like vinegar.
There are also some surprisingly positive experiences that come out of this topic. For example, many people discover that a “stomach acid simulation” becomes far more interesting when you compare two or three conditions instead of doing one container and calling it a day. Try a warm vs. room-temperature setup. Try mixing vs. no mixing. Try a “before and after antacid” test (again, done carefully and openly, not sealed). Suddenly you’re not just showing a phenomenonyou’re showing cause and effect. That’s the difference between a demo and an experiment.
Another common takeaway is that the best projects aren’t the ones with the most dramatic visualsthey’re the ones with the clearest story. A strong project write-up usually includes: why stomach acidity matters, what pH means, what you chose to simulate (and what you didn’t), what you observed over time, and what you’d test next if you had better tools. That last part“what I’d do next”is where your work starts sounding like real scientific thinking. It shows you understand the limits of your model and can propose improvements without pretending you’ve built a fully accurate human stomach in a plastic cup.
Finally, there’s a very human experience that shows up: people gain a little respect for how intense the digestive system is. Even a mild acid demo can make it obvious that acidity changes materials, and that your body manages those conditions while protecting itself. That’s not just “cool biology.” It’s a reminder that the stomach is tough, smart, and weirdly underappreciatedkind of like the friend who’s always solving problems quietly while everyone else takes credit for “having energy.”
Conclusion
A safe stomach acid simulation isn’t about recreating gastric juice exactlyit’s about modeling the key conditions that matter: acidity, warmth, mixing, and time. With mild acids, pH testing, and careful observations, you can build a simple experiment that explains real digestive concepts without introducing unnecessary risk. Keep it consistent, write down what you do, and let the results tell the story.