Table of Contents >> Show >> Hide
- What “Stripping” a Hardwood Floor Really Means
- Before You Start: Figure Out What Kind of Floor You Have
- Tools and Materials You’ll Want Nearby
- How To Strip a Hardwood Floor Step by Step
- 1. Empty the room completely
- 2. Clean and inspect the floor
- 3. Contain dust like you actually mean it
- 4. Start with a coarse grit to remove the old finish
- 5. Sand the edges, corners, and tight spots
- 6. Progress through medium and fine grits
- 7. Repair dents, holes, or minor damage
- 8. Buff or screen-sand for a smoother surface
- 9. Vacuum, vacuum again, then get picky
- 10. Decide whether to stain
- 11. Apply sealer and finish
- When a Chemical Stripper Makes Sense
- Mistakes That Ruin Otherwise Good Floor Jobs
- How Long Does It Take?
- Aftercare: Protect the Floor You Just Rescued
- Experience-Based Lessons Homeowners Learn the Hard Way
- Conclusion
Stripping a hardwood floor sounds dramatic, and to be fair, it is. You are taking a beautiful wood surface that has survived muddy shoes, moving day, mystery spills, and at least one chair that got dragged like it was in a hostage negotiation, and giving it a fresh start. The good news is that stripping a hardwood floor is absolutely doable for a careful DIYer. The bad news is that it is dusty, noisy, and deeply committed to exposing your shortcuts.
If you want a floor that looks clean, smooth, and ready for stain or a fresh protective finish, the secret is not brute force. It is method. You need to know whether your floor actually needs a full strip, what kind of wood floor you have, how to remove the old finish without gouging the boards, and how to avoid turning your living room into a sawdust weather system.
This guide walks you through the full process step by step, from deciding whether to strip or simply recoat, to sanding, cleaning, staining, sealing, and surviving the part where you question every life choice while holding a shop vacuum. Let’s make your floor look like it deserves compliments again.
What “Stripping” a Hardwood Floor Really Means
In most real-world hardwood floor projects, “stripping” means removing the old finish and exposing bare wood so the floor can be refinished. For whole-room work, that usually means sanding, not slathering on a harsh chemical remover like you are restoring a Victorian dresser in a candlelit basement. Sanding is the standard method because it removes worn finish evenly and prepares the surface for a new stain or topcoat.
Chemical strippers still have a place, but usually in smaller or trickier situations: painted patches, stubborn residue, corners the machine cannot reach, or waxy buildup that makes new finish fail. For the average hardwood floor that is dull, scratched, stained, or peeling, sanding down to bare wood is the cleaner and more predictable route.
Before You Start: Figure Out What Kind of Floor You Have
Solid hardwood vs. engineered hardwood
Solid hardwood can usually handle multiple refinishing jobs over its lifetime, which is one reason people love it. Engineered hardwood is a different story. Some engineered floors have a wear layer thick enough for refinishing, while others do not. If you sand too aggressively on a thin engineered floor, you can burn right through the top veneer and create a truly unforgettable mistake.
If you are not sure what you have, check a floor vent, threshold, exposed board edge, or leftover planks. If it is engineered and the wear layer seems thin, bring in a pro before renting heavy sanding equipment and a bag of optimism.
Does the floor need a full strip or just a recoat?
Not every tired floor needs to go all the way back to bare wood. If the finish is only dull and lightly scratched, a screen-and-recoat or buff-and-recoat may be enough. A quick test helps: place a few drops of water on the floor. If the water beads or soaks in very slowly, the finish is still doing some work and the floor may only need cleaning, buffing, or recoating. If the water disappears quickly, the finish is likely worn enough that refinishing makes more sense.
You should plan on a full strip if the floor has deep scratches, black water stains, patchy wear, peeling topcoat, old wax, or if you want to change the stain color. New stain over old mystery finish is a gamble, and the floor usually wins.
Check the age of the house
If the home was built before 1978, treat the project with extra caution. Disturbing old coatings in an older home can create dangerous lead dust. That does not mean you cannot touch the floor, but it does mean you should use lead-safe practices, contain the work area, and think very carefully before going full DIY if painted surfaces or old finishes are involved nearby.
Tools and Materials You’ll Want Nearby
- Drum sander, belt sander, or DIY-friendlier random orbital floor sander
- Floor edger or small orbital sander for perimeter work
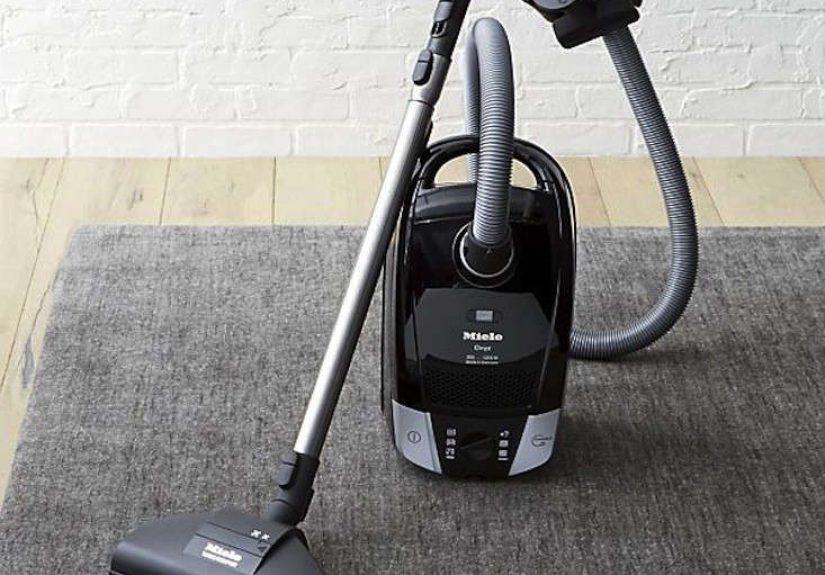
- Shop vacuum or HEPA-capable vacuum
- Scraper for corners and stubborn finish
- Sanding discs or belts in coarse, medium, and fine grits
- Tack cloths or microfiber cloths
- Plastic sheeting and painter’s tape
- Respiratory protection and hearing protection
- Wood filler for small gaps or dents
- Stain, sealer, and polyurethane or other finish of choice
- Applicator pad, brush, or roller recommended by the finish manufacturer
If you are new to floor sanding, a random orbital sander is usually more forgiving than a drum sander. It is slower, yes, but it is also less likely to leave trenches in the middle of your floor and in the middle of your soul.
How To Strip a Hardwood Floor Step by Step
1. Empty the room completely
Everything has to go: rugs, curtains, furniture, floor vents, pet bowls, lamps, and any object you would rather not wear a fine coating of wood dust. If possible, remove shoe molding or base shoe so you can sand closer to the walls and get a cleaner finished look. Label trim pieces as you remove them. Your future self will appreciate this when reinstalling them becomes a puzzle instead of a personality test.
2. Clean and inspect the floor
Sweep and vacuum thoroughly before sanding. Dirt, grit, and small debris can act like sandpaper under the machine, which would be funny if it were not your floor. Walk the room and look for protruding nails, loose boards, cracked planks, pet stains, or old repair patches. Set nails slightly below the surface with a nail set. Tighten or repair anything obvious before the sanding begins.
3. Contain dust like you actually mean it
Seal doorways with plastic. Cover HVAC vents. If you are working in an older home, containment matters even more. Dust is not just messy. It can spread contaminants, settle in other rooms, and turn cleanup into a weeks-long side quest. Good prep is the least glamorous part of the project and the part you will miss the most if you skip it.
4. Start with a coarse grit to remove the old finish
This is where the old finish comes off. Most floor refinishing systems begin with a coarse grit in roughly the 36- to 40-grit range, though some guidance suggests never starting finer than 60 on floors that truly need serious removal. The right starting grit depends on how damaged the finish is, what machine you are using, and how experienced you are.
Run the main sander steadily across the floor and keep it moving. Do not stop with the drum or sanding head sitting in one place unless your goal is to create a dramatic dip that will annoy you forever. Overlap each pass slightly so you do not leave unsanded lanes. If you are using a drum or belt sander, work with the grain when appropriate and follow the rental instructions carefully. If you are using a random orbital floor sander, you get a little more forgiveness, but not immunity from bad decisions.
5. Sand the edges, corners, and tight spots
The big machine cannot hug the walls, squeeze into closets, or charm corners into cooperating. That is why you need an edger, orbital sander, or hand scraper. Match the grit progression at the edges to what you are doing in the center of the room. If you sand the middle to one texture and the perimeter to another, the difference can show after stain and finish go on. Floors love revealing inconsistency at the worst possible moment.
6. Progress through medium and fine grits
After the first pass removes the old finish, move up through finer grits. A common progression is 36 or 40, then 60, then 80 or 100, depending on the floor and the final look you want. The goal is not to polish the wood into oblivion. It is to remove the scratches from the previous grit and leave the surface smooth, clean, and ready for color or sealer.
Do not skip grit levels to save time. Skipping from coarse to fine usually leaves visible scratch patterns that become much more obvious after stain. This is the flooring equivalent of trying to fix bedhead with a tuxedo.
7. Repair dents, holes, or minor damage
Once the floor is mostly stripped, you can see what you are really working with. Fill small holes or dents with stainable wood filler if needed. Let it dry fully, then sand those areas smooth so they blend into the surrounding boards. For badly damaged planks, consider replacing the board rather than pretending finish will somehow become a magician.
8. Buff or screen-sand for a smoother surface
Many strong results come from one final smoothing pass with a buffer or screen. This helps blend edger marks, soften minor sanding scratches, and even out the floor. It is one of those steps people skip when they are tired, and one of the steps they later wish they had not skipped.
9. Vacuum, vacuum again, then get picky
Dust removal is not a single event. It is a philosophy. Vacuum the floor, the walls, the window sills, the trim, and any horizontal surface that seems capable of betrayal. Then wipe the floor with a tack cloth or a cloth lightly dampened according to the finish system you are using. Some pros use mineral spirits for final dust pickup on bare wood before sealing, but always follow the finish manufacturer’s directions so you do not create adhesion problems.
If a speck of dust, hair, or grit is left behind, there is a decent chance it will end up preserved forever under your new finish like an accidental museum exhibit.
10. Decide whether to stain
At this point, you can leave the wood natural or apply stain. Natural wood with a clear finish gives you a clean, classic look and saves a step. Stain lets you shift the tone, hide uneven color, or better match adjoining rooms. Test stain in an inconspicuous spot or on a sample board first. Wood species, grain, and previous sun exposure can all change how color develops.
Apply stain evenly and work in manageable sections. Wipe off excess before it dries unevenly. If you want a dark dramatic color, patience matters more than enthusiasm. A rushed stain job can leave lap marks, blotches, or a tone that looks less “rich walnut” and more “regret with undertones.”
11. Apply sealer and finish
Once the bare wood is clean and dry, apply your sealer or first coat of finish according to the product instructions. Cut in along the perimeter first, then coat the main field of the floor with an applicator designed for hardwood finishes. Work with the grain and maintain a wet edge to reduce lap lines.
Water-based finishes are popular because they dry faster, stay clearer on light woods, and usually have lower odor than solvent-heavy systems. Oil-based finishes generally offer longer open time and a warmer amber tone. Either way, the best finish is the one you apply correctly and allow to cure properly.
Most floors need multiple coats for durability. Let each coat dry fully, abrade between coats if the product requires it, and keep dust, pets, shoes, and curious family members off the surface until the finish has reached the stage recommended for light foot traffic and full cure.
When a Chemical Stripper Makes Sense
If you are dealing with old wax, stubborn paint splatters, finish buildup in corners, or a localized mess that sanding alone is not handling well, a chemical stripper can help. Use it carefully and sparingly. Choose a product intended for wood refinishing, read the label like it contains your deposit refund, and ventilate the room well. Wear the right gloves and respiratory protection for the product you choose.
Do not mix strippers, do not assume more product equals faster results, and do not leave softened finish residue on the floor. Any leftover chemical contamination can interfere with stain absorption or finish adhesion later. In other words, the stripper is a helper, not the star of the show.
Mistakes That Ruin Otherwise Good Floor Jobs
- Using the wrong sander for your experience level
- Skipping grit steps
- Letting the sander sit still in one place
- Failing to sand the edges with the same grit sequence
- Leaving dust behind before staining or sealing
- Applying stain too heavily or unevenly
- Rushing the dry or cure time
- Trying to aggressively sand a thin engineered floor
- Ignoring old wax, contamination, or lead concerns
The most common mistake is treating the project like a race. Floor stripping is a slow-and-steady job. The wood will remember everything you did to it. Unfortunately, it has an excellent memory.
How Long Does It Take?
For one average room, stripping and refinishing can take a long weekend or more depending on repairs, stain choice, weather, product dry times, and how often you stop to stare at the floor and mutter. Sanding itself may only take part of a day, but prep, dust cleanup, stain drying, and multiple finish coats stretch the timeline. Full curing can take several days, sometimes longer, so do not rush furniture back into the room just because the floor looks dry enough to flirt with.
Aftercare: Protect the Floor You Just Rescued
Once the finish has fully cured, help it stay handsome. Use felt pads under furniture. Keep pet nails trimmed. Put mats at entries. Sweep or dry mop regularly so grit does not grind into the finish. Avoid over-wetting the floor during cleaning, and use products made for finished hardwood instead of random kitchen chemistry experiments.
A stripped and refinished hardwood floor can last for years before it needs serious attention again. That is the reward for doing the job carefully now instead of trying to speedrun it with wishful thinking and one sanding disc.
Experience-Based Lessons Homeowners Learn the Hard Way
One of the biggest real-world lessons with hardwood floor stripping is that the floor often looks worse before it looks better, and that stage can last longer than people expect. Homeowners usually start the project excited by the idea of “revealing the wood underneath,” and then the first sanding pass uncovers an unholy combination of scratch marks, color variation, old stain residue, black heel scuffs, and one suspicious dark patch near the window. This is normal. Stripping a floor is not a magic reveal in the first hour. It is a process of gradually taking chaos and turning it into a consistent surface.
Another common experience is realizing how much dust floor work creates, even with modern equipment and careful prep. People often imagine they will just vacuum at the end and be done. In reality, dust settles everywhere, including spots that seem personally offended by clean living. The homeowners who end up happiest with the result are usually the ones who take containment seriously from the start and clean between stages like they are preparing for surgery instead of a stain coat.
Many DIYers also discover that sanding skill matters more than strength. The temptation is to push harder when old finish will not come off fast enough, but experienced refinishers know the better move is to let the machine and grit do the work. Pressing down, tilting the sander, or lingering in one spot is how people create gouges and waves. A calm pace almost always produces a flatter, cleaner floor than a heroic one.
Color choice is another area where experience changes behavior. Homeowners frequently fall in love with a stain swatch and assume it will look identical across an entire room. Then they test it on their actual floor and realize that oak, maple, mixed boards, sun fading, and old repairs all change the final color. The smartest experience-based habit is simple: test first, preferably in multiple spots. That tiny step can save you from living with a tone you describe for the next seven years as “not exactly what I meant.”
Finally, people who have stripped hardwood floors once almost always say the same thing afterward: the prep and cleanup were a bigger share of the job than expected, but they were also what made the final finish look professional. Not the rented machine. Not the expensive topcoat. The patience. The repeated vacuuming. The careful edge work. The waiting between coats. That is the stuff that turns a DIY floor from “pretty good from the doorway” into “wow, you did that yourself?” And honestly, that reaction is worth a weekend of noise, dust, and temporarily feeling like you moved into a workshop.
Conclusion
If you want to strip a hardwood floor successfully, think less about aggression and more about sequence. Identify the floor type, confirm whether it needs a full strip, remove the old finish with the right sanding progression, clean obsessively, and apply the new finish with patience. That is the formula. No shortcuts, no mystery products, no hoping the corners will somehow fix themselves.
Done right, stripping a hardwood floor does more than improve appearance. It resets the room. It brings back grain, warmth, and character that may have been hiding under years of wear. And once the final coat cures and the light hits the boards just right, you will forget most of the dust, most of the noise, and at least some of the words you muttered at the edger.