Table of Contents >> Show >> Hide
- Know Your LS-1217 Threading “Rules of the Road”
- Quick Prep Checklist (Do This First)
- Step 1: Wind the Bobbin on a Brother LS-1217
- Step 2: Load the Bobbin Into the Bobbin Case (Lower Threading)
- Step 3: Thread the Upper Thread (Needle Threading)
- Step 4: Bring Up the Bobbin Thread (So You Can Actually Sew)
- Do a 60-Second Stitch Test (And Save Yourself 60 Minutes)
- Troubleshooting: Common Threading Problems (And Their Real Causes)
- Extra Tips That Make the LS-1217 Easier to Live With
- Mini FAQ
- Real-World Experiences: What Threading the LS-1217 Feels Like After You’ve Done It a While (500+ Words)
- Conclusion
- SEO Tags
Threading a sewing machine feels a little like assembling a tiny roller coaster… for thread. One wrong turn and your
spool goes from “productive craft time” to “why is there a bird’s nest under my fabric?” in about three stitches.
The good news: the Brother LS-1217 is a straightforward mechanical machine, and once you learn its thread path,
you’ll be able to rethread it in under two minuteswithout bargaining with the sewing gods.
This guide walks you through winding the bobbin, loading the bobbin case,
threading the upper thread, and bringing up the bobbin threadplus common
mistakes and quick fixes (because “I did everything right” is usually the first lie we tell ourselves in sewing).
Know Your LS-1217 Threading “Rules of the Road”
Before we touch thread, here are the three habits that prevent 80% of threading drama:
-
Presser foot UP while threading the top. This opens the tension discs so the thread can seat
properly. If the presser foot is down, the thread may ride outside the tension system and you’ll get loops and tangles. -
Take-up lever at its highest point. Turn the handwheel toward you until the take-up lever is fully up.
If it’s not, the machine can’t control the thread consistently. - Thread goes through the take-up lever. Missing it is the classic “everything looks threaded… but nothing sews” situation.
Quick Prep Checklist (Do This First)
- Turn the power off and place the machine on a stable surface.
- Raise the presser foot using the presser foot lifter.
-
Raise the needle and take-up lever to their highest position by turning the handwheel
toward you (counterclockwise). -
Use a fresh needle if you’ve had recent issues (skipped stitches, shredding thread, popping sounds).
A slightly bent needle can ruin your day quietly and efficiently. -
Choose decent thread (avoid fuzzy bargain-bin thread that sheds lint like a golden retriever).
Better thread = smoother tension = fewer mysterious snarls.
Step 1: Wind the Bobbin on a Brother LS-1217
Your bobbin is the “underground subway” of stitches: you don’t see it much, but when it’s wrong, everything stops.
Wind a bobbin neatly and you’ll avoid uneven tension and surprise thread jams.
Bobbin Winding Steps
- Place the spool on the spool pin.
- Guide the thread around the bobbin-winding tension disc (this helps it wind evenly).
- Thread the bobbin by passing the end of the thread through the hole in the bobbin from the inside.
-
Put the bobbin on the bobbin-winding shaft and slide the shaft to the right.
Turn the bobbin by hand until the shaft’s spring drops into the bobbin’s slit. - Hold the thread tail and press the foot controller gently to wind a few wraps, then stop.
- Trim the tail close to the bobbin and continue winding.
-
When the bobbin is full, the machine should stop winding.
Cut the thread, slide the shaft back to the left, and remove the bobbin.
Small but important note: Even though the needle bar doesn’t move while winding, the handwheel can still turn.
Keep fingers, hair, and dangling hoodie strings away from moving parts. Your machine is not hungry, but it is extremely curious.
Step 2: Load the Bobbin Into the Bobbin Case (Lower Threading)
The LS-1217 uses a removable bobbin case behind the shuttle cover (front-loading style). The key is getting
the thread under the bobbin case’s tension spring and making sure the case “locks” into the shuttle race correctly.
Insert the Bobbin Into the Bobbin Case
- Raise the needle to its highest position and raise the presser foot.
- Open the shuttle cover on the front of the machine (behind the extension table area).
- Remove the bobbin case by pulling the latch toward you and pulling the case out of the shuttle race.
- Pull out about 4 inches (10 cm) of bobbin thread from a full bobbin.
- Drop the bobbin into the bobbin case so the thread comes off in the correct direction (the thread tail should feed smoothly).
- Pull the thread into the slot, then down and to the left until it slips under the tension spring and into the delivery eye.
Reinstall the Bobbin Case Into the Machine
- Hold the bobbin case by its latch (keep the latch open while inserting).
- Insert the bobbin case fully into the shuttle race.
-
Release the latch and confirm the bobbin case is seated.
The bobbin case “finger” must fit into the notch at the top of the shuttle race.
If the bobbin case finger isn’t in the notch, the case can pop out as soon as you start sewingan event that feels
dramatic even when it’s not dangerous. It’s like your machine saying, “I respectfully decline.”
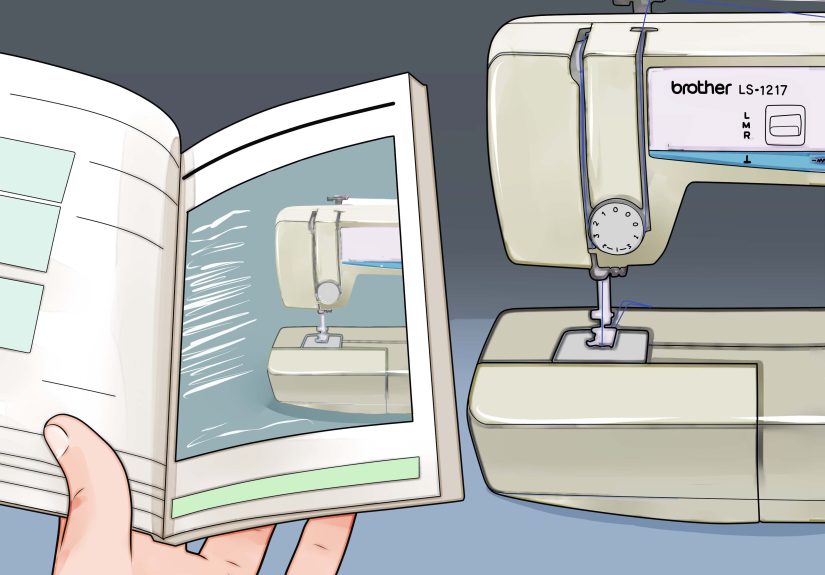
Step 3: Thread the Upper Thread (Needle Threading)
This is the part people “sort of” do, and then wonder why the stitches look like spaghetti art. Take your time the first
few times. After that, your hands will remember the path.
Upper Threading Steps
- Presser foot UP. Yes, again. It’s that important.
- Take-up lever at the highest position (turn the handwheel toward you).
- Place the spool on the spool pin.
- Pass thread through the thread guide at the top.
- Guide the thread down the right channel on the front of the machine.
-
Bring the thread into the tension discs / behind the tension dial from right to left.
Then gently pull so the thread seats properly. -
Guide the thread up the left channel, catching the thread into/around the take-up lever,
then bring it back down the left side toward the needle. - Pass the thread through any lower guides near the needle area.
- Thread the needle from front to back, and pull out about 2 inches of thread tail.
Pro tip: If you want to confirm the thread is actually in the tension system, do a quick “feel test.”
With the presser foot up, the thread should pull easily. Lower the presser foot and pull againyou should feel more resistance.
That contrast usually means the thread is seated correctly in the tension discs.
Step 4: Bring Up the Bobbin Thread (So You Can Actually Sew)
You’ve got top thread and bobbin thread, but they’re not “introduced” yet. This step makes them meet.
- Raise the presser foot and ensure the needle is at the highest position.
- Hold the upper (needle) thread tail lightly with your left hand.
-
Turn the handwheel toward you (counterclockwise) with your right hand
until the needle goes down and comes back up. - Gently pull the upper thread to bring up a loop of bobbin thread.
-
Use your fingers (or a small tool) to pull the bobbin loop out, then pull both threads
under and behind the presser foot.
Now you’re ready to sew. And yeshold both thread tails for the first couple stitches. It’s the sewing equivalent
of buckling your seatbelt.
Do a 60-Second Stitch Test (And Save Yourself 60 Minutes)
Before sewing your actual project, test on a scrap similar in thickness to your real fabric.
If you want a super-clear tension check, use two different thread colors (one in the needle, one in the bobbin).
- If you see the bobbin thread pulling up to the top, your upper tension is likely too tight.
- If you see the needle thread looping on the underside, your upper tension is likely too looseor the machine is mis-threaded on top.
Adjust the upper tension dial in small steps. Higher numbers generally mean tighter upper tension; lower numbers mean looser.
Make one change, test again, repeat. Tension is not a personality traitit’s adjustable.
Troubleshooting: Common Threading Problems (And Their Real Causes)
| Problem | Most Likely Cause | Fast Fix |
|---|---|---|
| Thread “bird’s nest” under fabric | Upper thread not seated in tension / take-up lever missed | Presser foot UP, rethread top completely, then test |
| Needle thread keeps unthreading | Not threaded front-to-back, tail too short, or take-up lever missed | Rethread, pull 2–3″ tail, hold tails for first stitches |
| Bobbin case pops out | Bobbin case finger not in the notch | Reinsert bobbin caseconfirm finger seats at top notch |
| Stitches skip or look uneven | Dull/bent needle or wrong needle type | Replace needle, confirm correct size for fabric |
| Thread breaks often | Tension too tight, poor-quality thread, lint buildup | Lower tension slightly, use better thread, clean shuttle area |
| Bobbin winds lumpy/loose | Thread not around bobbin-winding tension disc or winding too fast | Rethread bobbin-winding path and wind at moderate speed |
The #1 Fix That Feels Too Simple
If anything looks off, rethread the top thread from scratch. Clip the thread near the spool and pull it out
through the needle (don’t yank it backward through the machine). Then rethread with the presser foot up and take-up lever high.
This solves the majority of looping and tangling issues.
When “It’s the Bobbin” Is Actually Not the Bobbin
If loops are forming underneath, it’s usually not because your bobbin is possessed. It’s typically because the upper thread
isn’t controlling tensionoften due to mis-threading, presser foot down while threading, or a missed take-up lever.
Bobbin problems happen too (wrong direction, not under the spring), but top-threading issues are the usual suspects.
Extra Tips That Make the LS-1217 Easier to Live With
-
Start with medium settings for general sewing, then adjust based on fabric.
Very thin fabric or very thick seams may need different tension and needle choices. -
Clean lint regularly, especially around the bobbin case and shuttle race.
Lint changes tension and can cause thread breaks. - Hold thread tails behind the presser foot for the first 2–3 stitches to prevent tangles.
- Turn the handwheel toward you. Turning it backward can unseat thread paths on some machines and create timing-like symptoms.
Mini FAQ
Do I need to rethread every time I change stitches?
Not usually. But if you change thread, change the bobbin, or you’ve had a jam, rethreading is a smart reset.
Why does my thread keep popping out near the needle?
Most often: the take-up lever was missed, the thread tail is too short, or you started sewing without holding the tails.
Also check that the needle is inserted correctly and not damaged.
How do I know the bobbin is going the right way?
The thread should feed smoothly through the bobbin case slot and under the tension spring. If you pull the tail and it “catches,”
remove the bobbin and try the opposite orientation (then re-seat under the spring).
Real-World Experiences: What Threading the LS-1217 Feels Like After You’ve Done It a While (500+ Words)
If you’re new to the Brother LS-1217 (or sewing machines in general), here’s the honest truth: the first few threading attempts
are less “graceful artisan” and more “confused spaghetti chef.” That’s normal. The machine isn’t hardyour hands just haven’t learned
the choreography yet. Many sewists describe the same early-stage pattern: they thread the top, load the bobbin, start sewing, and within
seconds there’s a wad of thread under the fabric that looks like it’s trying to form a tiny bird’s nest and hatch a drama.
The biggest “aha” moment people tend to have is realizing how much the presser foot position matters. Threading with the presser foot down
can look correct at a glance, but the thread may not actually sit between the tension discs. Then the machine can’t regulate top tension, so the
needle thread pours to the underside like it’s escaping a bad apartment lease. Once sewists switch to a routinepresser foot up, take-up lever high,
then threadthe machine suddenly behaves like the calm, dependable mechanical model it is.
Another common experience: the bobbin case feels “fiddly” the first time you reinstall it. The latch, the shuttle race, the little finger that must sit
in the notchthere’s a lot of “tiny precision” packed into a small space. What helps is treating it like docking a spaceship: align first, insert fully,
then release the latch and do a gentle wiggle check. After a few repetitions, you’ll be able to seat it by feel without squinting like you’re defusing a bomb.
Bobbin winding also has a learning curve. Many people wind their first bobbin too fast, or they miss the bobbin-winding tension disc,
and the bobbin winds unevenlytight in one spot, loose in another. That uneven wind can show up later as inconsistent stitching or random tension hiccups.
A practical habit is winding at a moderate speed and stopping once to look at the bobbin: if the thread is stacking neatly, keep going; if it’s piling up on one
side, rethread the winding path and try again. It sounds picky, but it saves you from chasing “mystery problems” during actual sewing.
Lots of sewists also develop a “start-of-seam ritual.” They pull both threads under the presser foot and behind it, hold the tails for the first couple stitches,
and then let go. That tiny habit prevents the thread tails from getting sucked into the machine at the start and creating a snarl underneath. It’s not glamorous,
but it workslike washing your hands before cooking. No one applauds, but everyone benefits.
Finally, experienced LS-1217 users often keep one low-stress troubleshooting rule: when in doubt, rethread from zero.
Not “half-rethread,” not “poke it back into the guide,” but the full resetclip near the spool, pull thread out through the needle, presser foot up, take-up lever high,
and follow the path step by step. It’s the sewing equivalent of restarting your phone, except it actually fixes things more often than you’d expect.
Once you accept that rethreading is a normal maintenance move (not a personal failure), sewing becomes dramatically more fun.
Conclusion
Threading the Brother LS-1217 is a repeatable process: wind a smooth bobbin, seat the bobbin in the case under the tension spring, insert the case with its finger
in the notch, thread the upper path with the presser foot up and take-up lever high, then bring up the bobbin thread. Do a quick stitch test on scrap fabric,
adjust tension in small steps, and remember the simplest truth in sewing: if it suddenly starts acting weird, it probably just wants a calm, complete rethread.