Table of Contents >> Show >> Hide
- First, What a Planer Actually Does (and Doesn’t Do)
- Tip #1: Start With Safety and Setup (Yes, Before the Fun Part)
- Tip #2: Read the Grain Direction to Prevent Tear-Out
- Tip #3: Take Light Passes and Sneak Up on Final Thickness
- Tip #4: Defeat Planer Snipe With Support, Sequence, and Strategy
- Tip #5: Use Jigs for Warped, Thin, or Short Stock
- Tip #6: Maintain the Planer for Better Cuts (and Less Drama)
- Common Mistakes That Make a Planer Feel “Hard” to Use
- Final Thoughts: Use the Planer Like a Pro by Thinking Like a Process Person
- Shop Experience Notes (Extra 500+ Words): What I’d Tell a Friend Before Their First Real Planer Session
A wood planer is one of those shop tools that can make you feel like a genius… right up until it launches a blizzard of shavings, leaves snipe on both ends, and reminds you that lumber has opinions. The good news? Most planer problems come from a handful of setup and technique mistakes, not from some secret woodworking curse.
In this guide, you’ll learn how to use a planer like a pro with six practical tips that improve safety, accuracy, surface quality, and consistency. We’ll focus on the thickness planer (especially benchtop planers), with clear examples and real-world shop habits you can use immediately.
First, What a Planer Actually Does (and Doesn’t Do)
Let’s clear up the biggest misconception first: a thickness planer is designed to make a board a consistent thickness and create parallel faces. It is not a magic flattening machine for badly warped lumber by itself. If one face is twisted or bowed, the planer can simply copy that problem onto the opposite face.
In practical terms, the best workflow is usually:
- Flatten one face first (often with a jointer or a planer sled setup).
- Run that stable face down on the planer bed.
- Plane the opposite face until flat and parallel.
- Sneak up on final thickness with lighter passes.
Think of the planer as your precision thickness machine, not your therapist for warped boards. It can help, but only if you set it up for success.
Tip #1: Start With Safety and Setup (Yes, Before the Fun Part)
Secure the planer and create proper infeed/outfeed support
If you use a benchtop planer, bolt it down. Long boards act like levers, and a lightweight planer can tip or shift if it isn’t secured. That’s not “shop excitement.” That’s a bad afternoon.
Also, plan your machine location with enough clearance in front of and behind the planer. If your board length exceeds your available space, the board can hit a wall, pull the workpiece off level, or force you into awkward body positions. Use roller stands or infeed/outfeed supports to keep the stock level as it enters and exits the machine.
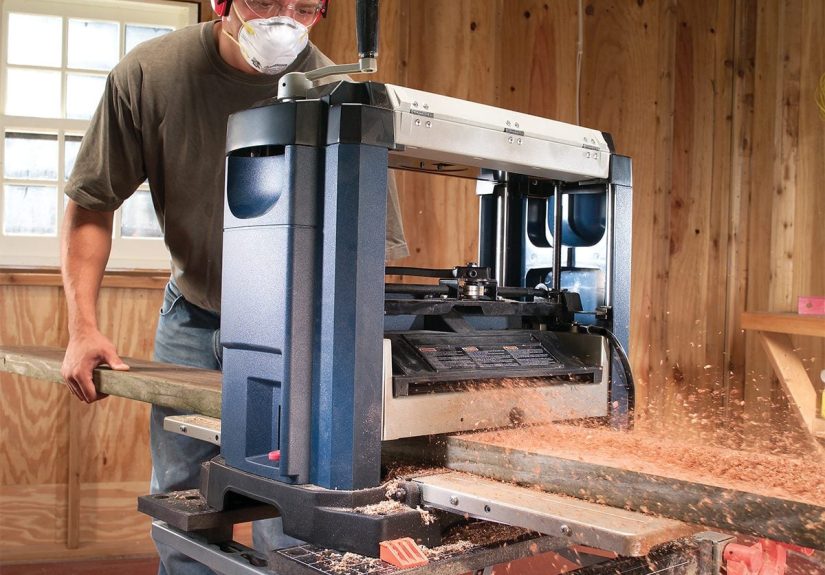
Wear the right PPE and respect the machine
Planers are loud, fast, and extremely good at not caring about your fingers. Wear eye protection and hearing protection every time. Add a dust mask or respirator when you’re planing a lot of rough stock or resinous woods. Keep loose sleeves, jewelry, and anything dangling out of the machine’s “snack zone.”
If a board jams, stop the machine and clear it only after the machine is off and motion has stopped. Never look directly into the infeed or outfeed opening while the planer is running.
Quick pre-flight checklist
- Board is free of nails, screws, staples, and embedded grit.
- Dust collection hose is connected and flowing well.
- Tables/supports are level and aligned.
- Planer is stable and locked down.
- You know the machine’s minimum and maximum stock dimensions from the manual.
Tip #2: Read the Grain Direction to Prevent Tear-Out
If you only remember one “pro” trick, make it this: pay attention to grain direction before every pass. Feeding a board the wrong way is one of the fastest routes to tear-out, chipped surfaces, and dramatic sighing.
Look at the edge grain and imagine the fibers as tiny ramps. You generally want the grain running “downhill” into the planer. When the cutterhead cuts with the grain, the surface comes out cleaner. When it cuts against the grain, the knives can lift fibers and tear chunks out.
How to spot the right direction
- Inspect the edge of the board under good light.
- Look for grain lines that slope in one direction.
- Feed so the cutter meets the grain in the smoother “downhill” direction.
- If the surface starts tearing, stop and reverse direction on the next pass.
Bonus pro move: skew difficult boards
For tricky grain, lightly feed the board at a slight angle (skewed) instead of perfectly straight, if your planer setup and stock width allow it. This can create a shearing effect that improves cut quality on figured or stubborn wood.
No, this doesn’t mean “yeet it diagonally and hope.” Keep the board supported and controlled the whole time.
Tip #3: Take Light Passes and Sneak Up on Final Thickness
The planer can remove a lot of material in one pass on some machines. That doesn’t mean it should, especially if you want clean cuts, less tear-out, less snipe, and longer knife life.
A pro approach is to remove stock in stages:
- Rough passes: moderate cuts to get close.
- Control passes: lighter cuts as you approach final thickness.
- Finish passes: very light cuts on both faces for better surface quality.
Why lighter passes work better
- Reduce tear-out risk
- Lower strain on the motor
- Improve consistency on wide boards
- Reduce snipe near the ends
- Make final thickness easier to control
Use calipers (or a reliable thickness gauge) often. “I’ll eyeball it” is a famous last sentence in woodworking. Measure both ends and the middle, especially when accuracy matters for joinery.
Alternate faces to keep the board stable
Once both faces are flat and parallel, remove material evenly from both sides by flipping the board end-for-end between passes (while maintaining the correct grain direction). This helps reduce stress imbalance and helps keep the board flatter.
Tip #4: Defeat Planer Snipe With Support, Sequence, and Strategy
Planer snipe is that annoying deeper cut at the leading or trailing end of the board. It happens when the board is not fully supported by both feed rollers at the same time, allowing the stock to lift slightly into the cutterhead.
Translation: the board moves just enough for the machine to get “extra ambitious” at the ends.
6 smart ways to reduce snipe
- Use infeed and outfeed support: Keep boards level entering and exiting the planer.
- Lift the free end gently: A slight hand lift at the right moment can help keep the unsupported end planted against the bed.
- Run boards end-to-end (“planer train”): Butt same-thickness boards together so roller pressure stays more consistent.
- Use sacrificial lead/trail boards: Let the snipe happen on scrap instead of your workpiece.
- Take lighter final passes: Snipe gets worse with aggressive cuts.
- Tune tables/rollers if your machine allows it: Slight adjustments to infeed/outfeed tables or table rollers can help on some models.
When to stop chasing perfection
Even well-tuned machines can produce a little snipe. Pros often plan for it by leaving boards extra long and trimming the ends later. That’s not cheating. That’s smart process planning.
Tip #5: Use Jigs for Warped, Thin, or Short Stock
This is where you start looking like a planer wizard.
A planer works best when the stock is stable. If a board rocks, flexes, or is too short/thin for the machine to feed safely, don’t force it. Use a jig, carrier board, or sled.
Planer sled for twisted or bowed boards
A planer sled supports the board so it doesn’t rock under the feed rollers. Shims fill gaps under the board, and the assembly passes through the planer so one face can be flattened safely. Many woodworkers secure shims with hot glue or similar temporary methods to prevent shifting.
Start with a very shallow “skip pass,” then continue with light cuts until the top face is flat. After that, remove the sled and plane the opposite face flat and parallel.
Carrier boards for thin stock
Thin pieces can flex upward into the cutterhead, especially near the ends, causing snipe or uneven cuts. A carrier board (such as MDF or plywood, depending on the application) gives the workpiece a stable ride and helps the feed rollers maintain better control.
Short stock caution
Short pieces are where people get into trouble. If the stock is shorter than your planer’s safe minimum length, do not run it as-is. Use approved techniques from your machine’s manual (such as runners/carrier methods where appropriate), or mill the part before cutting it to final length.
In other words: do not negotiate with physics.
Tip #6: Maintain the Planer for Better Cuts (and Less Drama)
A surprising number of “my planer is terrible” problems are actually “my planer needs maintenance” problems.
Routine maintenance improves feed consistency, reduces friction, helps accuracy, and can lower the chance of snipe and surface defects.
What to maintain regularly
- Planer bed and extension tables: Clean and wax for smoother feeding.
- Threaded posts/columns: Clean and lubricate so height adjustments stay smooth and accurate.
- Feed rollers: Remove pitch and dust buildup that can affect grip and feed consistency.
- Knives/cutterhead: Replace or rotate dull/damaged knives promptly.
- Dust collection path: Keep chip ejection and hoses clear to prevent clogs.
Why dust collection matters more than people think
Planers create a huge volume of chips fast. Poor chip removal can lead to clogging, poor cut quality, and a shop floor that looks like a hamster exploded. A strong dust collection setup (or a machine with effective chip ejection) keeps the cutterhead area clearer and the workflow smoother.
Use machine features intelligently
Many modern benchtop planers include features like multiple feed speeds, carriage locks (manual or automatic), material removal gauges, and improved chip ejection. Learn what your machine offers and use those features on purpose instead of leaving performance on the table.
Common Mistakes That Make a Planer Feel “Hard” to Use
- Taking heavy cuts and expecting a finish-ready surface
- Ignoring grain direction
- Skipping infeed/outfeed support
- Trying to flatten a warped board without a jointer or sled
- Planing dirty/reclaimed wood without checking for metal
- Using dull knives and blaming the wood
- Not measuring thickness during the process
If your results are rough, inconsistent, or sniped, don’t assume you “aren’t good at woodworking.” Usually, one setup adjustment and one technique change fix most of it.
Final Thoughts: Use the Planer Like a Pro by Thinking Like a Process Person
Professional-looking planed boards don’t come from luck. They come from repeatable habits: safe setup, grain awareness, light passes, stock support, smart jigs, and regular maintenance.
The planer is one of the best tools in the shop for turning rough lumber into accurate, project-ready stock. Once you stop treating it like a giant pencil sharpener and start treating it like a precision milling machine, your results improve fast.
And yes, you’ll still get snipe once in a while. Even seasoned woodworkers do. The difference is they plan for it, control it, and move on without a meltdown.
Shop Experience Notes (Extra 500+ Words): What I’d Tell a Friend Before Their First Real Planer Session
If you’re new to using a planer, your first session usually goes one of two ways: either you’re thrilled because rough lumber suddenly looks gorgeous, or you’re confused because the board comes out with tear-out, snipe, and a new shape you definitely did not order. That learning curve is normal.
A common beginner experience is assuming the planer will “fix” a twisted board. You feed it through, the top looks cleaner, and you think, “Amazing.” Then you take measurements and realize the board is now a beautifully smooth version of the same problem. That’s the moment people learn the difference between flattening and thicknessing. It feels annoying for about ten minutes and then becomes one of the most valuable lessons in woodworking.
Another very real experience: underestimating chip volume. The first time someone planes a stack of boards without proper dust collection, they discover that a planer can fill a bag, a floor, and somehow the inside of their shirt in record time. It’s almost impressive. Once you connect better chip collection, the whole process feels calmer, cleaner, and more professional.
There’s also the “mystery tear-out” phase. You run one board and get a glassy surface. You run the next board and it looks like a beaver got emotional. In many cases, the difference is grain direction. After a few projects, you begin checking edge grain automatically before each pass. That tiny habit makes a huge difference in surface quality and sanding time.
Snipe is another rite of passage. Most people get it, hate it, and then start trying every trick in the book. The real breakthrough usually comes when you combine methods instead of chasing a single perfect fix: support stands, lighter finish passes, sacrificial boards, and leaving parts a bit long. Once you approach snipe as a process variable instead of a personal insult, it becomes manageable.
A lot of woodworkers also report that the planer becomes dramatically more enjoyable after basic maintenance. Cleaning pitch off the rollers, waxing the bed, and replacing dull knives can make an old machine feel “new” again. Feeding becomes smoother, the motor sounds less strained, and the cut quality improves enough that you wonder why you waited so long.
Finally, one of the best experiences with a planer is the confidence it gives you when building projects from rough lumber. Instead of depending on whatever thickness the home center happens to stock, you can mill boards to match your design. Need rails and stiles to finish at exactly the same thickness? Need a panel cleaned up after glue-up? Need to batch-mill parts so joinery fits consistently? That’s where the planer stops being just another tool and starts becoming a core part of your workflow.
So if your early attempts feel messy, noisy, or slightly humbling, congratulationsyou’re using a planer correctly. Keep your cuts light, your grain direction right, your support steady, and your expectations realistic. The “pro” results come sooner than most people think.