Table of Contents >> Show >> Hide
- What Is an Inversion Table, Exactly?
- Before You Start: Who Should Not Use an Inversion Table?
- How to Use an Inversion Table: 9 Steps
- Step 1: Read the Manual and Set Up the Table Correctly
- Step 2: Adjust the Height to Match Your Body
- Step 3: Wear the Right Shoes and Secure Your Ankles Properly
- Step 4: Start With a Small Angle, Not Full Inversion
- Step 5: Lower Yourself Slowly and Breathe Normally
- Step 6: Stay There Briefly the First Few Times
- Step 7: Use Small Movements Only If They Feel Comfortable
- Step 8: Return Upright Slowly
- Step 9: Evaluate How You Feel Afterward
- How Often Should You Use an Inversion Table?
- Common Mistakes to Avoid
- When to Stop and Call a Doctor
- Is an Inversion Table Worth Trying?
- Real-World Experiences With Inversion Tables
- Conclusion
If you have ever looked at an inversion table and thought, “So the plan is to hang upside down and somehow feel better?” you are not alone. It sounds a little dramatic, a little medieval, and a little like something your gym buddy swears by after deadlifts. But inversion tables are still popular for one simple reason: some people say they help relieve pressure in the spine and temporarily ease back discomfort.
The important word there is temporarily. An inversion table is not a magic carpet ride to a perfect back. For some people, it can offer short-term relief. For others, it is uncomfortable, unhelpful, or not safe at all. That is why learning how to use an inversion table correctly matters just as much as deciding whether you should use one in the first place.
This guide walks you through 9 practical steps for using an inversion table safely, comfortably, and with realistic expectations. You will also learn who should skip inversion therapy, what mistakes beginners often make, and how to tell whether the table is helping or simply turning you into a cautious bat with buyer’s remorse.
What Is an Inversion Table, Exactly?
An inversion table is a piece of equipment that lets you lean backward at varying angles so your body tilts upside down or partially upside down. The idea is that gravity helps reduce pressure on the spine, stretch the muscles around the back, and create a gentle traction effect. Many people use inversion therapy for lower back pain, sciatica symptoms, stiffness, muscle tightness, or a general feeling that their spine has spent too many hours dealing with chairs, cars, and terrible posture.
Still, an inversion table works best when you treat it like one tool in a larger back-care routine. It is not a replacement for physical therapy, exercise, body mechanics, medical evaluation, or common sense. If your back pain is severe, getting worse, or comes with weakness, numbness, fever, or bladder or bowel changes, that is a medical issue first and a furniture issue second.
Before You Start: Who Should Not Use an Inversion Table?
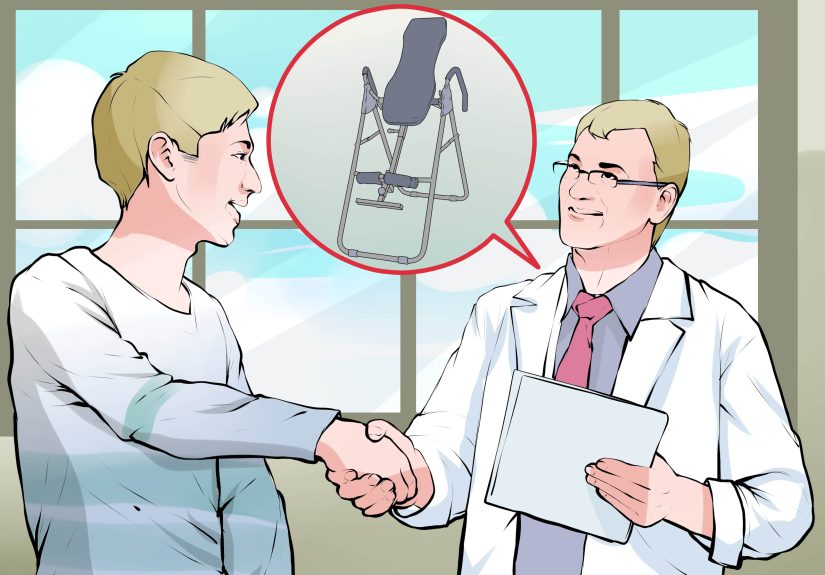
Before we get to the step-by-step part, here is the safety reality check. Inversion is not for everyone. Because hanging at an inverted angle can increase pressure in the head and eyes and can affect blood pressure and heart rate, you should talk to a healthcare professional before using an inversion table if you have any of the following:
- High blood pressure
- Heart disease or circulation problems
- Glaucoma, retinal issues, or eye pressure problems
- Osteoporosis or fragile bones
- A hernia
- A recent fracture, surgery, or major injury
- Pregnancy
- Frequent dizziness, vertigo, or balance problems
- Severe disc problems, progressive weakness, or significant nerve symptoms
If you have been inactive for a while, are older, or have a chronic medical condition, getting cleared first is the grown-up move. Yes, it is less exciting than impulsively flipping upside down in your living room, but it is also much less likely to end with an awkward call for help.
How to Use an Inversion Table: 9 Steps
Step 1: Read the Manual and Set Up the Table Correctly
This is the least glamorous step and one of the most important. Every inversion table has its own design, locking system, ankle supports, height settings, and angle controls. Do not assume that all tables work the same way. A table that is not assembled properly or adjusted to your body can feel unstable and increase your risk of slipping, straining, or flipping farther back than intended.
Place the table on a flat, stable surface with enough room around it. Check the frame, pins, ankle locks, straps, and handles before every session. If anything feels loose, bent, or suspiciously wobbly, skip the session. Your spine deserves better than a gamble.
Step 2: Adjust the Height to Match Your Body
Most inversion tables have a height adjustment on the main shaft. Set it to your actual height, not the height you claim on your driver’s license. This adjustment matters because it affects how easily the table tips backward and returns upright. If it is off, the table may not balance correctly, which can make your movement jerky or unpredictable.
After adjusting the height, test the table in a controlled way before doing a full session. A well-fitted table should respond smoothly to your body weight and arm position, not launch you into a dramatic trust exercise with gravity.
Step 3: Wear the Right Shoes and Secure Your Ankles Properly
Wear supportive athletic shoes unless the manufacturer says otherwise. Bare feet, slippery socks, or loose sandals are not good inversion-table fashion choices. Most tables secure you at the ankles, so you want stable footwear that helps the locking system grip properly.
When you step into the ankle holders, make sure both feet are positioned evenly and the lock is fully engaged. Tug gently before leaning back. If your ankles feel loose, pinched, or uneven, adjust them before continuing. You should feel secure, not trapped or precarious.
Step 4: Start With a Small Angle, Not Full Inversion
This is where many beginners go wrong. You do not need to go fully upside down on day one. In fact, you usually should not. Start with a modest angle, often around 20 to 30 degrees, to see how your body responds. A smaller angle can still provide a stretching sensation without overwhelming your balance system or making you feel like your face is filling with gravity.
Partial inversion is often enough for beginners and, for some people, enough overall. More angle does not automatically equal more benefit. It may simply equal more discomfort.
Step 5: Lower Yourself Slowly and Breathe Normally
Once your ankles are secured and you are holding the handles, lean back slowly. Keep your movements controlled. Do not throw your arms around or use momentum like you are trying to audition for a stunt reel. Let the table tip gradually as your weight shifts.
Once you reach your chosen angle, pause and breathe. Slow, steady breathing helps your muscles relax and reduces the urge to tense up. A lot of beginners unknowingly hold their breath, which makes the whole experience feel more intense than it needs to.
If you feel dizzy, panicky, or suddenly uncomfortable, return to upright right away. That is not failure. That is useful information.
Step 6: Stay There Briefly the First Few Times
Your first session should be short. Very short. Think 1 to 2 minutes, not a full podcast episode. The goal is to see how your body reacts, not to prove toughness. Some people feel a gentle stretch and light relief. Others feel head pressure, ankle discomfort, or disorientation. Starting with a short duration helps you assess tolerance without overdoing it.
If your first few sessions go well, you can gradually work toward a few minutes at a time. Many people use inversion tables in short intervals rather than one long hang. Longer is not always better, especially if your symptoms increase afterward.
Step 7: Use Small Movements Only If They Feel Comfortable
Once you are at a comfortable angle, you may notice that tiny body shifts change the intensity of the stretch. Some people gently raise an arm overhead or slightly reposition the torso to encourage a little more decompression. Keep it subtle. An inversion table is not the place for twisting, crunching, bouncing, or any heroic “advanced stretch” you made up on the spot.
If your table’s manufacturer gives specific approved movements, follow those instructions only. Gentle is the theme here. If your back pain spikes or symptoms travel down a leg, stop.
Step 8: Return Upright Slowly
Coming back up matters just as much as going down. Use the handles and your body weight to return gradually to an upright position. Do not pop up too quickly. Rapid changes can make you lightheaded, increase discomfort, or cause your muscles to tense suddenly.
Once you are upright, stay there for a moment before unlocking your ankles. Let your body readjust. If you jump off the table too quickly, you may feel dizzy or unsteady. Inversion therapy should end with calm re-entry, not a dramatic stagger across the room.
Step 9: Evaluate How You Feel Afterward
The real test is not how the inversion table feels during the session. It is how you feel afterward. Ask yourself:
- Did my back feel looser or less compressed?
- Did pain improve, stay the same, or get worse?
- Did I feel dizzy, headachy, or strange afterward?
- Did numbness, tingling, or leg symptoms increase?
If you feel better after a short, controlled session, that may be a sign the table is worth continuing cautiously. If you feel worse, cut back or stop altogether. There is no prize for sticking with a method your body clearly dislikes.
How Often Should You Use an Inversion Table?
There is no one-size-fits-all schedule, but beginners should usually start with short sessions a few times per week rather than diving into multiple daily hangs. Give your body time to respond. You can always increase frequency gradually if you feel good afterward and your clinician says inversion is appropriate for you.
What you do the rest of the day matters too. If you invert for two minutes and then spend the next nine hours slumped like a question mark at your desk, the table is not going to save you. Better results typically come when inversion is paired with posture improvement, walking, stretching, core strength, and smarter body mechanics.
Common Mistakes to Avoid
- Going too far too fast: Full inversion on your first try is rarely necessary.
- Ignoring medical conditions: Blood pressure, eye issues, and bone problems matter here.
- Using pain as a guide to “push through”: A stretch is one thing. Sharp or worsening pain is another.
- Skipping table adjustments: Improper height and ankle setup can make the whole session feel wrong.
- Staying inverted too long: More time upside down does not guarantee more relief.
- Treating inversion as the only solution: Back pain often improves more reliably with a broader plan.
When to Stop and Call a Doctor
Stop using the inversion table and seek medical care if you have:
- New or worsening weakness
- Numbness in the legs, groin, or pelvis
- Loss of bladder or bowel control
- Severe pain after a fall, injury, or sudden movement
- Dizziness, chest pain, vision changes, or severe headache during inversion
- Back pain with fever, unexplained weight loss, or worsening nighttime pain
Those symptoms are not “part of the stretch.” They are signs that something more serious may be going on.
Is an Inversion Table Worth Trying?
For the right person, maybe. If you have mild to moderate back tightness, have been cleared to use one, and want a home option that may provide temporary spinal decompression, an inversion table can be reasonable. But realistic expectations are essential. The best-case scenario is often modest: less pressure, less stiffness, and a little relief that makes it easier to move.
The table becomes much more useful when it supports a bigger strategy that includes exercise, mobility work, lifting mechanics, and medical guidance when needed. In other words, inversion therapy can be a supporting actor. It should not be the entire movie.
Real-World Experiences With Inversion Tables
People’s experiences with inversion tables tend to fall into a few familiar camps. The first group tries it and immediately loves the sensation. These are the people who say their lower back feels “unloaded” for the first time all day. They often describe a feeling of space in the spine, less tightness after sitting for long hours, and easier movement for a while afterward. For desk workers, drivers, or anyone who feels compressed by the end of the day, that short burst of relief can feel surprisingly satisfying.
The second group has a more neutral experience. They do not hate it, but they do not suddenly hear angelic music coming from their lumbar region either. Maybe the stretch feels nice, but the benefit is brief. Maybe the ankles are uncomfortable. Maybe the table helps on stiff days but does nothing on flare-up days. This is actually a very common and honest outcome. Inversion therapy is often more “that helped a little” than “I have seen the light.”
Then there is the third group: the people who try it once and decide gravity is too much of a drama queen. They may feel dizzy, get head pressure, or notice that their back pain does not improve. Sometimes they discover that the table itself is not the issue, but the timing is. For example, using it during an acute flare-up may feel worse than using it on a day when the back is simply tight and tired. That is one reason gradual testing matters so much.
Many long-term users say the most helpful approach is to keep sessions short and consistent. Instead of hanging at a steep angle for a long stretch, they use the table for a minute or two at a mild angle and then follow that with walking, gentle stretching, or core work. In that routine, the inversion table acts like a reset button. It is not the whole answer, but it can make the rest of the routine feel more comfortable and effective.
There are also practical lessons people tend to learn the hard way. One is that setup matters more than expected. A poorly adjusted table can make you feel unstable or jam your ankles. Another is that returning upright too fast is a great way to feel woozy and question your life choices. Many beginners also discover that being fully upside down is unnecessary. A moderate angle is often enough to feel the stretch without making the session feel intense.
Another common experience is psychological, not just physical. Some people are simply uneasy with inversion. Even if the table is safe and stable, being tilted backward can trigger tension instead of relaxation. If that is you, forcing yourself through it is not particularly noble. There are plenty of other ways to work on back pain, including walking, physical therapy, mobility exercises, and strength training. Your best method is the one you can do safely and consistently.
Perhaps the most useful takeaway from real-world use is this: inversion tables seem to help the most when they are used thoughtfully, not desperately. People who expect a cure are often disappointed. People who use the table as one part of a bigger plan are usually more satisfied. That bigger plan might include better posture, fewer marathon sitting sessions, stronger glutes and core muscles, gentler lifting habits, and medical evaluation when symptoms start throwing red flags.
So yes, inversion tables can be helpful. But the most believable success stories are usually the boring ones. No miracle. No overnight transformation. Just a little less pressure, a little more movement, and a more comfortable back on some days. Honestly, in the world of back pain, that is not boring at all. That is a win.
Conclusion
Learning how to use an inversion table safely comes down to patience, body awareness, and respect for the fact that upside down is not a casual position for the human body. Start small. Secure your ankles well. Choose a mild angle. Keep sessions short. Return upright slowly. And always pay attention to what your body says after the session, not just during it.
If the table gives you a bit of relief, great. Use that relief as a bridge to better movement, better posture, and a stronger overall back-care plan. If it does not help, that is useful too. The goal is not to force one gadget to work. The goal is to find safe, effective ways to help you move through life with less pain and more confidence.