Table of Contents >> Show >> Hide
- Why a Pallet Compost Bin Works So Well
- Start Smart: How to Choose Safe Pallets
- Materials and Tools
- Where to Put Your Pallet Compost Bin
- Build Option 1: The Super-Simple 3-Sided Pallet Compost Bin
- Build Option 2: The Classic 4-Sided Pallet Compost Bin (With a Removable Side)
- Build Option 3: A Two-Bin (or Three-Bin) Pallet Compost System
- Composting Basics Inside Your Pallet Bin (So It Actually Works)
- What to Compost (and What to Keep Out)
- How to Load Your Pallet Compost Bin (A Simple “Recipe”)
- Troubleshooting: Fix the Most Common Compost Bin Problems
- When Is Compost Done?
- Keeping Your Pallet Composter Going (Without Rebuilding It Every Season)
- Experience Notes: What It’s Really Like Making a Compost Bin From Pallets (The Extra )
- Conclusion
If you’ve ever looked at a stack of free wooden pallets and thought, “I could build something with those,” congratulations:
you are officially one cup of coffee away from becoming the neighborhood’s most charmingly unhinged upcycler.
And honestly? A pallet compost bin is one of the best “I can’t believe this worked” DIY projects you can do.
It’s inexpensive, sturdy, breathable (your compost needs that), and it turns kitchen scraps and yard waste into dark, crumbly
garden gold. The kind of gold that tomatoes write thank-you notes about.
In this guide, you’ll learn how to choose safe pallets, pick a good spot, build a simple or removable-front bin, level up to a
two- or three-bin system, and actually use the thing so it doesn’t become a haunted box of slimy regrets. We’ll keep it practical,
a little funny, and very friendly to Google and Bingbecause your compost deserves good SEO too.
Why a Pallet Compost Bin Works So Well
A good compost setup needs three things: air, enough volume to heat up, and a way to keep materials contained. Pallets basically
show up to that job interview wearing a suit.
- Built-in airflow: The slats let oxygen in, which supports aerobic decomposition (the kind that smells earthy, not “swamp monster”).
- Great size for hot composting: Many experts recommend a bin around 3 feet x 3 feet x 3 feet (about one cubic yard) so the pile can heat up efficiently.
- Fast and flexible: You can build a simple 3-sided bin, a 4-sided bin with a removable front, or a multi-bin system.
- Budget-friendly: If pallets are free, your biggest expense is usually screws and latchesplus the emotional cost of telling yourself you’ll “only take four.”
- Sustainable: Reusing pallets keeps wood out of landfills and gives you compost that improves soil structure and water-holding capacity.
Start Smart: How to Choose Safe Pallets
Let’s get real for a second: pallets are like thrift-store couches. Most are fine, some are sketchy, and you should not take one
home if it smells like mystery chemicals and poor decisions.
Look for pallet stamps (your compost bin’s “background check”)
- Choose HT (Heat Treated): These pallets were treated with heat to kill pests. They’re commonly recommended for DIY garden projects.
- Avoid MB (Methyl Bromide): Pallets marked MB were fumigated with methyl bromide. Many safety-minded sources advise avoiding them entirely for projects, especially around gardens.
- Skip painted or heavily stained pallets: Paint and unknown stains can mean unknown chemicals.
- Inspect for spills: If a pallet looks like it carried something that required hazmat vibes, leave it behind.
Quick cleaning (because “it’s fine” is not a cleaning method)
Brush off dirt, hose the pallets down, and let them dry. If you want to be extra cautious, scrub with mild soapy water and rinse well.
Avoid harsh chemicalsyour compost microbes are tiny, but they have standards.
Materials and Tools
You can build a basic pallet compost bin with simple supplies. Here’s the typical shopping (and scavenging) list.
Materials
- 4 pallets (standard size) for a 4-sided bin, or 3 pallets for a 3-sided bin
- Exterior-grade screws (or strong fasteners/bolts). Screws hold better than nails for this project.
- 2–4 latches (hooks-and-eyes, bolt latches, or gate latches) if you want a removable side/front
- 2–4 sturdy stakes or metal T-posts (optional but highly recommended for stability)
- Hardware cloth / welded wire mesh (optional, for critter control)
- Zip ties or wire (optional, for quick assembly or temporary holds)
- Cardboard (optional base layer to smother grass)
Tools
- Work gloves (splinter prevention is self-care)
- Drill/driver and bits
- Measuring tape
- Level (or your best “squint and hope” technique)
- Shovel/rake for leveling ground
- Safety glasses (especially if cutting or drilling a lot)
- Saw (optional, if you’re trimming pallets or making a slatted front)
Where to Put Your Pallet Compost Bin
Location matters. Put it in a spot that makes composting easy, not a chore you’ll “totally do this weekend” for nine months.
- Close to where you’ll use it: Near the garden saves effort when it’s time to spread finished compost.
- Accessible year-round: You want a path that won’t turn into a mud slip-n-slide during rainy seasons.
- Good drainage: Compost likes moisture, not swimming lessons.
- Partial sun is helpful: Some sun can warm the pile, but full blazing sun can dry it out fast.
- Set it on soil if possible: This allows beneficial microbes and decomposers to move in from below.
Build Option 1: The Super-Simple 3-Sided Pallet Compost Bin
This is the “I want compost by Saturday” design. It’s fast, functional, and easy to buildeven if your DIY résumé is mostly “assembled
a bookshelf once.”
Step-by-step
- Level the ground: Clear weeds and level the area so the pallets stand upright without wobbling.
- Stand up three pallets: Make a U-shape: one pallet for the back and one for each side.
- Fasten the corners: Screw the pallets together where the edges meet. If you’re in a hurry, heavy-duty wire/zip ties can work temporarily, but screws are sturdier.
- Anchor for stability: Drive stakes or T-posts along the outside corners and screw the pallets to them. This helps the bin stay upright when the compost gets heavy.
- Optional: add mesh: Staple hardware cloth to the inside walls if rodents are common in your area.
This bin stays open in the front, which is handy for tossing in materials and turning with a pitchfork. It’s also a little messier-looking,
but compost is not a beauty pageant. It’s a science project with worms.
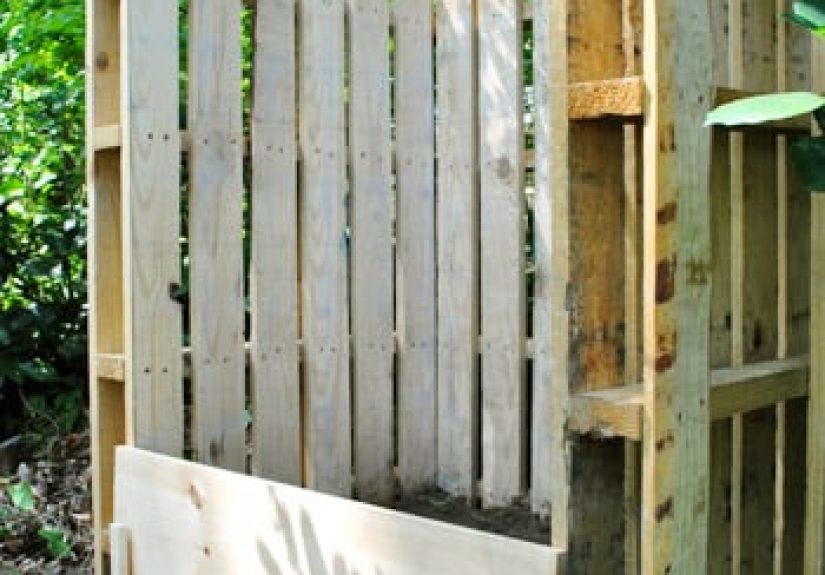
Build Option 2: The Classic 4-Sided Pallet Compost Bin (With a Removable Side)
If you want a neat, enclosed pallet composter that’s easier to manage (and less likely to spill out like a compost avalanche),
build the 4-sided version. Many DIY plans recommend making it at least 3 x 3 x 3 feet so the pile can heat effectively.
Step-by-step
- Arrange four pallets into a square: Stand them upright in a box shape.
- Pick your “door” side: Decide which pallet you want to open/remove for turning and harvesting.
- Attach three corners permanently: Screw three pallets together firmly (or use corner brackets).
- Install latches on the “door” pallet: Use hooks-and-eyes, bolt latches, or gate latches so you can unfasten one side quickly.
- Anchor everything: Add stakes/T-posts at corners for a sturdier structure.
- Optional base pallet: Some designs use a fifth pallet as a base for airflow, but keep in mind it may decompose faster and can make turning the bottom harder.
This style is especially good if you want your backyard composting setup to look tidy. Knowing compost, it will still occasionally attempt
to escape, but at least it will do so politely.
Build Option 3: A Two-Bin (or Three-Bin) Pallet Compost System
If you want faster results and less “where do I put this half-finished compost?” confusion, go multi-bin. Many composting guides recommend
at least two bins: one for active composting and one for curing/finishing. A three-bin system adds a “fresh ingredients” bin
plus an active bin plus a curing binlike a compost assembly line.
Simple two-bin layout
- Bin 1: Active pile (new materials + turning)
- Bin 2: Curing pile (mostly finished compost that matures and stabilizes)
How you use it (the satisfying part)
When Bin 1 is full, you move the contents into Bin 2 by removing a front panel (or opening a side) and pitchforking it over.
That transfer adds oxygen and mixes materialsboth help speed decomposition. Then Bin 1 becomes your “start here” bin again.
Composting Basics Inside Your Pallet Bin (So It Actually Works)
A pallet compost bin is just a container. The magic happens when you feed it the right mix and give it what it needs: carbon, nitrogen,
oxygen, and moisture.
Greens + Browns (a love story with better boundaries than most reality TV)
- Greens (nitrogen): fruit/veg scraps, coffee grounds, fresh grass clippings, plant trimmings
- Browns (carbon): dry leaves, straw, shredded cardboard, shredded paper (non-glossy), small wood chips
Many compost science resources point to an ideal carbon-to-nitrogen balance around 30:1 by weight. In real-life backyard terms,
a practical rule is about two parts browns to one part greens by volume. If your pile smells funky, it often needs more browns
and more air.
Moisture: “Wrung-out sponge” is the goal
Compost should feel like a wrung-out spongemoist but not dripping. Too dry and decomposition crawls. Too wet and the pile turns anaerobic,
which is the compost equivalent of forgetting deodorant at the gym.
Oxygen: turn it like you mean it
Turning introduces oxygen and mixes materials. If you’re aiming for faster compost, turn every week or two. If you’re going for “low effort,
slow reward,” you can turn less oftenjust expect it to take longer.
Size matters (for heating up)
A bin around 3x3x3 feet is commonly recommended because it’s large enough to retain heat but not so large that air can’t reach the
center. Bigger isn’t always betterif the center can’t breathe, you’re back in swamp territory.
What to Compost (and What to Keep Out)
Composting at home is easiest when you stick to materials that break down cleanly and don’t invite pests to move in like they pay rent.
Good additions
- Fruit and vegetable scraps
- Coffee grounds and paper filters
- Crushed eggshells
- Dry leaves and straw
- Shredded cardboard and non-glossy paper
- Small amounts of garden trimmings (chop larger pieces for faster breakdown)
Common “no thanks” items
- Meat, fish, dairy, grease, oils: attract pests and can cause odors
- Pet waste: can carry pathogens not suitable for a typical backyard compost pile
- Diseased plants: may survive if your pile doesn’t reach sustained hot-compost temperatures
- Chemically treated grass clippings or plants: herbicide residue can persist
- Black walnut leaves/twigs: can contain juglone, which can affect sensitive plants
How to Load Your Pallet Compost Bin (A Simple “Recipe”)
Here’s an easy method that works well for backyard composting beginners and keeps your pile balanced.
- Base layer: A loose layer of twigs or coarse browns helps airflow at the bottom.
- Add browns: A thicker layer of dry leaves or shredded cardboard.
- Add greens: A thinner layer of food scraps or fresh clippings.
- Repeat: Keep building in layers, aiming for roughly 2:1 browns to greens by volume.
- Moisten as needed: Add a little water if everything is dry, especially in hot weather.
- Cover the top: A layer of browns (or a piece of cardboard) helps reduce odors and flies.
Example: If you add a small kitchen bucket of veggie scraps (greens), cover it with about two buckets of shredded leaves or torn
cardboard (browns). Then give the pile a stir every week or two. It’s not complicatedjust consistent.
Troubleshooting: Fix the Most Common Compost Bin Problems
Problem: “It smells bad.”
- Likely cause: Too wet, too many greens, not enough oxygen.
- Fix: Add browns (dry leaves/cardboard), turn the pile, and keep moisture at wrung-out sponge level.
Problem: “It’s not breaking down.”
- Likely cause: Too dry, pieces too large, not enough nitrogen, or pile too small.
- Fix: Add greens (or coffee grounds), chop materials smaller, moisten lightly, and build volume toward that 3x3x3 sweet spot.
Problem: “Animals are interested.”
- Likely cause: Food smells, exposed scraps, or composting the wrong items.
- Fix: Avoid meat/dairy/grease, bury food scraps in the center, cover with browns, and consider hardware cloth lining.
Problem: “Too many flies.”
- Likely cause: Exposed food scraps and overly wet conditions.
- Fix: Always top with browns and keep a cardboard “lid” layer. Stir and add dry material if needed.
When Is Compost Done?
Finished compost is dark, crumbly, and smells earthy (like a forest floor, not like last week’s forgotten leftovers). You shouldn’t recognize
most of the original materials. If you still see obvious chunks, let it cure longer or screen it and toss the larger pieces back into the active bin.
Even when compost looks done, a short curing period helps stabilize itespecially if you’re making “hot” compost quickly. That’s one
reason multi-bin systems are so handy: one bin cooks, one bin rests.
Keeping Your Pallet Composter Going (Without Rebuilding It Every Season)
- Expect some wear: Pallets can rot over time, especially where wood touches moist soil.
- Improve longevity: Good drainage, airflow, and a stable frame (stakes/T-posts) help a lot.
- Replace a panel when needed: The modular pallet design makes repairs easyswap one side instead of rebuilding everything.
- Don’t burn old pallets: Even “safe” pallets can contain residues or unknown history. Disposal is safer than bonfire roulette.
Experience Notes: What It’s Really Like Making a Compost Bin From Pallets (The Extra )
Here’s the part no one tells you: building a pallet compost bin feels like a tiny victory over chaos. You start with scrap wood that was
destined to be forgotten behind a warehouse, and you end with a functional system that turns banana peels into soil. That’s basically alchemy,
except your “spell book” is a drill manual and your wand is a slightly bent screw bit.
The first “experience lesson” most people learn is that pallets are rarely identical. You’ll measure one pallet, feel proud of your precision,
then discover the next pallet is a half-inch taller and shaped like it spent its teen years skateboarding. The good news is compost bins are
forgiving. If the corners don’t line up perfectly, latches and screws can bridge small gaps, and stakes can keep things sturdy.
The goal isn’t fine furnitureit’s a breathable box for decomposing leaves.
The second lesson is that a removable side or front panel is not a fancy upgrade. It’s a sanity upgrade. The first time your bin is full and
you try to turn it through a small opening, you’ll understand why so many DIY plans recommend latches. Compost is heavy, and turning it is
basically stirring a dense, damp salad made of twigs. Being able to open one side makes it dramatically easier to aerate the pile, remix the
center, and prevent soggy pockets that smell like defeat.
Another real-world surprise: moisture management is the whole game. In dry weather, a pallet bin’s airflow is a blessing and a curse.
Great oxygen, yesbut your pile can dry out faster than you expect. A piece of cardboard on top, a loose tarp (not sealed tight), or a thick
cap of dry leaves can help hold moisture while still letting air circulate. In rainy weather, the opposite happens: pallets breathe, but water
still finds a way. If the pile gets too wet, adding shredded cardboard is like pressing the “undo” button. It soaks up excess moisture, increases
carbon, and helps restore structure so air can move again.
You’ll also learn quickly that “greens” can be sneaky. Fresh grass clippings are powerful nitrogen, but in thick mats they can turn slimy and
anaerobic. The trick is to mix clippings with dry leaves or shredded paper as you add them, like you’re making lasagna that nobody eats.
Kitchen scraps are similar: if you dump a big bucket in one spot, you’ve basically created a moist fruit-and-veg center that attracts flies.
If you bury scraps in the middle and cover them with browns, the pile stays calmer, and your backyard doesn’t become a buffet for every curious
critter within three zip codes.
The best part, though, is the moment the compost finally “clicks.” One day you open the bin and it smells like rich soilnot rotten, not sour,
not weird. You scoop a handful and it crumbles instead of clumping. That’s when you realize the pallet compost bin isn’t just a DIY project;
it’s a habit. You start saving leaves in the fall, tearing cardboard into strips, and looking at coffee grounds like they’re premium fertilizer.
And the next time you see free pallets on the curb, you don’t just see woodyou see potential. (Also, you see another project. You may need a
support group. But at least your garden will be thriving.)
Conclusion
Making a compost bin from pallets is one of those rare DIY wins that’s affordable, practical, and genuinely good for your garden. Choose safe
heat-treated pallets, build a bin around that 3x3x3 “sweet spot,” and keep your compost happy with the right balance of browns, greens, moisture,
and oxygen. If you want easier turning and faster results, add latches and consider a two-bin system. You’ll reduce waste, enrich your soil, and
gain the deeply satisfying feeling of turning leftovers into something your plants will brag about.