Table of Contents >> Show >> Hide
- Why DIY Marble Contact Paper Shelves Work So Well
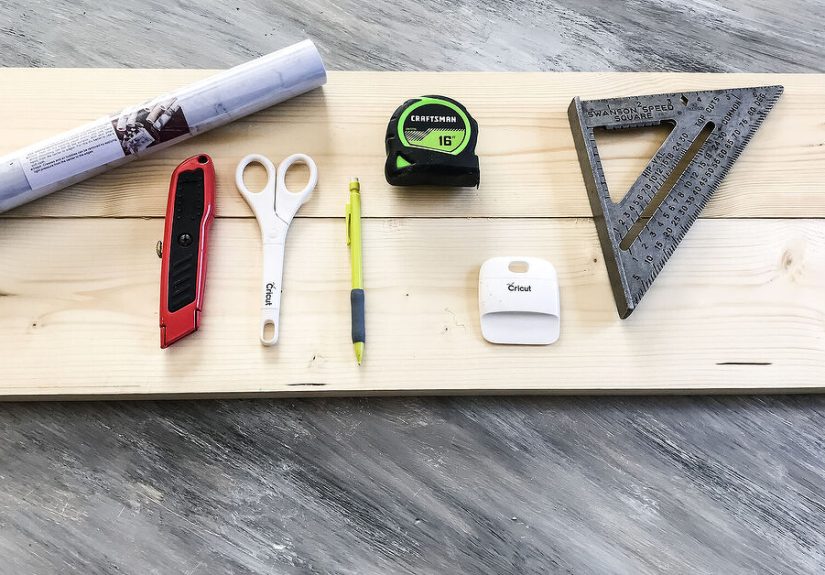
- Materials and Tools
- Step-by-Step: Make Marble-Look Shelves With Contact Paper
- 1) Pick your shelf style (floating vs. bracketed)
- 2) Prep the shelf board like a pro
- 3) Measure twice, buy once (and add “oops” inches)
- 4) Plan the marble veining so it looks intentional
- 5) Apply contact paper: the slow-and-steady method that avoids bubbles
- 6) Wrap edges and corners for a “real shelf” look
- 7) Make seams nearly invisible (when one piece isn’t enough)
- 8) Optional: add protection where life gets messy
- Install the Shelves Securely (So “Marble” Doesn’t Become “Mayhem”)
- Where Marble Contact Paper Shelves Look Best
- Durability, Cleaning, and How to Keep It Looking New
- Troubleshooting: Common Problems (and Easy Fixes)
- Pro Tips Borrowed From the DIY World (Without the Paywall Drama)
- Example Project: A Simple Two-Shelf “Marble Moment”
- Conclusion
- DIYers’ Real-World Experiences (The Stuff People Learn After the First Shelf)
Real marble shelves are gorgeous. They’re also heavy, pricey, and about as forgiving as a group chat screenshot.
The good news: you can get that crisp, veiny marble look with peel-and-stick marble contact paper
and a weekend-level DIY skill setno stone saws, no dust clouds, no “why is my credit card crying?” moments.
In this guide, you’ll learn how to build and install faux marble shelves using contact paper the right way:
clean seams, smooth edges, minimal bubbles, andmost importantlysecure mounting that won’t betray you at 2 a.m.
Why DIY Marble Contact Paper Shelves Work So Well
“Marble shelves” can mean two things: actual stone shelves (stunning, expensive, heavy) or shelves that
look like marble. Contact paper falls into the second category, and it’s popular for a reason.
You get the aestheticcool, bright, upscalewithout the stone price tag or structural headaches.
The big perks
- Budget-friendly: Contact paper and basic lumber are usually far cheaper than marble or quartz.
- Renter-friendly: You can remove the wrap later; the shelf itself can be reused or repainted.
- Fast transformation: Big visual impact with a relatively small project.
- Style flexibility: White marble, black marble, warm beige veiningpick your vibe.
Reality check (so you don’t rage-quit)
- Contact paper adds “look,” not strength. Your shelf capacity depends on the shelf board and the hardware.
- Edges and seams matter. The difference between “wow” and “DIY… oh” is usually corner work.
- Heat + moisture require common sense. Most vinyl films are water-resistant, but seams and edges can lift if constantly soaked or heated.
Materials and Tools
Think of this as a two-part project: (1) build or buy shelves, (2) wrap them with marble contact paper,
then (3) mount them securely. You can do it with floating shelves, bracketed shelves, or open shelving systems.
Shopping list
- Shelf board: MDF, pine, plywood, or pre-made shelves (common sizes: 24–36 in. long, 6–10 in. deep).
- Marble contact paper: Peel-and-stick vinyl film (buy extra for pattern matching and mistakes).
- Mounting hardware: Floating shelf brackets, standard shelf brackets, or a rail/cleat system.
- Fasteners: Screws appropriate for studs/anchors; drywall anchors if studs aren’t available.
- Optional protection: Clear water-based polycrylic or edge sealer (test first for adhesion compatibility).
Tools you’ll actually use
- Tape measure and pencil
- Level (a longer level helps shelves look truly straight)
- Stud finder
- Drill/driver + bits
- Smoothing tool (felt-edged squeegee is ideal; a credit card works in a pinch)
- Sharp utility knife or X-Acto + extra blades
- Scissors (for rough cuts)
- Metal ruler/straight edge
- Microfiber cloth + mild cleaner
- Hair dryer (the secret weapon for corners and stubborn edges)
Safety note: Sharp blades and drills don’t care about your mood. Cut away from your body,
take your time, and consider adult help if you’re new to power tools.
Step-by-Step: Make Marble-Look Shelves With Contact Paper
1) Pick your shelf style (floating vs. bracketed)
If you want a clean “stone slab” illusion, floating shelves look the most convincing because the hardware is hidden.
Bracketed shelves are easier, often stronger, and give you a fun chance to mix finishes (black, brass, nickel).
Either way: choose hardware that matches your wall type and the weight you plan to store.
2) Prep the shelf board like a pro
Contact paper shows every bump, crumb, and tiny wood splinter like it’s auditioning for a close-up.
Start with a smooth surface.
- Sand lightly (especially edges) to remove rough spots.
- Clean thoroughly: wipe with a damp cloth, then dry.
- Seal MDF edges (recommended): MDF edges can be porous. A quick primer or sanding sealer helps film stick evenly.
3) Measure twice, buy once (and add “oops” inches)
Measure every surface you plan to cover: top, bottom (optional), front edge, side edges, and any returns.
Add extra length for wrapping edges and aligning the marble pattern. For shelves, many DIYers buy an extra roll
so the veining flows the same direction across multiple shelves.
4) Plan the marble veining so it looks intentional
Marble patterns can look high-end or chaotic depending on how you orient them. Lay out the contact paper
(still on its backing) and decide which direction the “veins” should run. For most shelves, lengthwise veining
looks more natural and less “gift wrap.”
5) Apply contact paper: the slow-and-steady method that avoids bubbles
-
Cut a generous piece: Use the grid backing as a guide. Cut 1–2 inches larger than the shelf surface
on all sides (you’ll trim later). -
Create a hinge: Align the sheet on the shelf (still backed). Tape one edge in place with painter’s tape.
This helps you keep alignment when you start sticking. -
Peel a little, stick a little: Peel back 3–6 inches of backing, press the film down, then use a smoothing tool
from the center outward. Continue peeling the backing slowly as you smooth forward. -
Keep tension gentle: Don’t yank the film tight like you’re wrapping a burrito. Gentle tension prevents wrinkles
without stretching the pattern.
Bubble fix: If you trap air, try lifting the film gently and re-smoothing. For stubborn micro-bubbles,
a tiny pin-prick followed by smoothing can make them vanish.
6) Wrap edges and corners for a “real shelf” look
The edges are where faux marble becomes “faux-shion.” To make it look like a slab:
- Front edge first: Smooth the film over the front edge, then wrap underneath.
- Use a hair dryer on low: Warmth makes vinyl more flexible so it molds around corners and adheres better.
- Trim cleanly: Use a sharp blade and a straight edge. Replace blades oftendull blades snag and tear.
7) Make seams nearly invisible (when one piece isn’t enough)
If your shelf is deeper or longer than your roll width, you may need seams. The goal is a seam that looks like
a natural vein, not a sticker overlap.
- Overlap slightly (about a quarter inch) and align the veining.
- Double-cut for a perfect seam: With a straight edge, cut through both layers along the overlap line,
remove the waste strips, and smooth the two fresh edges together. - Warm and press: A little heat plus firm smoothing helps the seam bond.
8) Optional: add protection where life gets messy
For decorative shelves (candles, frames, tiny plants), contact paper alone is usually fine. For high-use shelves
(coffee bar, toiletries), consider a light protective topcoatbut test first. Some sealers can react with vinyl
or reduce adhesion at edges. Another low-drama option is a clear shelf liner placed on top (removable and replaceable).
Install the Shelves Securely (So “Marble” Doesn’t Become “Mayhem”)
A stunning shelf is pointless if it’s mounted like a motivational poster (with vibes and hope).
Follow the hardware instructions, and whenever possible, anchor into studs.
Find studs and plan placement
In many U.S. homes, studs are commonly spaced 16 or 24 inches apart. Use a stud finder, confirm with a second pass,
and mark your mounting points. A level line across the wall helps multiple shelves look aligned.
Anchors: use the right type for your wall and load
If you can’t hit studs, choose anchors rated for shelving loads (not lightweight picture-hanging anchors).
The wall type matters: drywall, plaster, masonry, and tile all need different bits and anchors.
When in doubt, reduce the load or choose a bracketed system that spreads weight across more fasteners.
Leveling: the “one tiny tilt” problem
Shelves magnify crookedness. Mark your line, pre-drill pilot holes when appropriate, and check level again
before tightening everything down. If you’re installing multiple shelves, step back and eyeball the spacing
before you commit to the final screw.
Reminder: The contact paper is decorative. Your safety comes from proper mounting, correct fasteners,
and realistic expectations about weight.
Where Marble Contact Paper Shelves Look Best
Kitchen
Use faux marble shelves for a coffee station, cookbook display, or pantry overflow. Keep them away from direct heat
sources (like the side of a stove) and wipe spills quickly so seams don’t soak.
Bathroom
Great for perfumes, rolled towels, and skincareespecially if you seal edges well and avoid constant splash zones.
Ventilation helps contact paper last longer in humid rooms.
Bedroom or entry
Try a pair of small shelves as nightstands, a display ledge for collectibles, or an entry “drop zone.”
Marble pattern + warm wood + brass is a classic combo that reads expensive without actually being expensive.
Durability, Cleaning, and How to Keep It Looking New
- Cleaning: Use a soft cloth with mild soap and water. Skip abrasives and harsh solvents.
- Heat: Don’t place hot appliances or mugs directly on vinyl film. Use coasters or a tray.
- Moisture: Water-resistant isn’t the same as waterproof. Dry standing water promptly.
- Edge care: If an edge starts lifting, warm it gently with a hair dryer and press firmly.
Troubleshooting: Common Problems (and Easy Fixes)
Bubbles
Lift and re-smooth if possible. For tiny trapped bubbles, a pin-prick and a firm pass with a smoothing tool often works.
The key is gentle pressure from the center out.
Wrinkles near corners
Warm the vinyl slightly and rework it. Wrinkles often happen when the film is forced around a corner too quickly.
Heat helps it relax and conform.
Seams that look obvious
Place seams where a darker vein runs, or use the double-cut technique to create a tighter join.
Also make sure the veining direction matchesyour eyes notice “pattern disagreement” instantly.
Edges lifting over time
Clean off any dust, warm the edge, press firmly, and consider adding a tiny strip of clear double-sided tape
on the underside where it won’t be visible (only if you’re okay with slightly less removability).
Pro Tips Borrowed From the DIY World (Without the Paywall Drama)
This project has been tackled by everyone from big home-improvement guides to design magazines and hands-on DIY bloggers.
The most consistent advice across outlets like Home Depot, Lowe’s, This Old House,
Better Homes & Gardens, Martha Stewart, Real Simple, HGTV,
Apartment Therapy, The Kitchn, Bob Vila, Reviewed,
Family Handyman, and popular DIY blogs is refreshingly similar:
- Prep and clean like adhesion depends on it (because it does).
- Use a smoothing tool and go center-out to avoid bubbles.
- Use a sharp blade for clean trimming and professional edges.
- Use gentle heat for corners and stubborn edges.
- Mount shelves properly: find studs when possible and use the right anchors for your wall.
- Go slow: peel a little, smooth a lot. Rushing creates creases you’ll stare at forever.
Example Project: A Simple Two-Shelf “Marble Moment”
Here’s a practical setup you can copy:
- Two shelves: 24 inches long x 8 inches deep boards
- Finish: marble contact paper on top + front + sides (optional wrap underneath for a thicker slab look)
- Hardware: two sturdy brackets per shelf (or a floating bracket system rated for your intended load)
- Styling: a small plant, two cookbooks, a candle, and one tray (the tray also protects the surface)
Visually, this reads like a boutique upgrade. Functionally, it’s still a normal shelfso keep heavy stacks,
cast-iron cookware, and your emotional baggage on something structural.
Conclusion
DIY marble shelves with contact paper are one of the best “small effort, big payoff” upgrades you can do.
The trick is treating it like a real finish: prep the surface, plan the pattern, use the right tools, and take your time.
Then mount the shelves like you respect gravity (because gravity never takes a day off).
Do it right, and you’ll get shelves that look crisp, bright, and high-endwithout the stone cost, the stone weight,
or the stone-level commitment.
DIYers’ Real-World Experiences (The Stuff People Learn After the First Shelf)
If you’ve never used marble contact paper before, the first few minutes can feel suspiciously easylike a “free trial”
that’s about to auto-renew into chaos. The film goes down smoothly, you think, “Wow, I’m basically a contractor now,”
and then you reach a corner. Corners are where confidence goes to do yoga and pull a hamstring.
One of the most common experiences DIYers report is realizing that the marble pattern matters more than you think.
On the roll, the veining looks random and natural. On a shelf, if the veins run different directions from shelf to shelf,
your eyes notice immediatelyeven if you can’t explain why. Many people end up unrolling the entire sheet on the floor,
stepping back, and choosing “the good section” for the top surface, saving busier sections for the underside or smaller pieces.
It’s the DIY version of picking the best avocado: you learn by doing, and you get better fast.
Another real-life lesson: the backing paper is not your enemyuntil you peel too much at once.
Lots of first-timers peel off half the backing, the contact paper flops down, and suddenly you’re trying to unstick a giant,
clingy rectangle without stretching it. The smoother, calmer approachpeel a few inches, smooth, peel a few inches, smooth
feels slower but usually saves time because you’re not redoing sections. People who start slow often finish sooner.
Bubbles are also a shared rite of passage. The funny part is that big bubbles feel dramatic, but they’re usually fixable
if you catch them early. Tiny bubbles can be more annoying because you don’t see them until the light hits “just right,”
which is always when someone walks in to admire your work. Many DIYers learn to do a final pass with a smoothing tool,
then check the shelf from different angles before trimming. It’s like taking a photo in harsh sunlight: better to spot the flaw now
than after everything is mounted.
The most satisfying moment tends to be the first clean trim. When you swap in a fresh blade and run it along a straight edge,
the cut is crisp and the shelf instantly looks more “finished.” People are often surprised how much a dull blade affects the outcome.
A new blade is one of the cheapest “quality upgrades” you can buy for this project.
On the installation side, the most common “I wish I’d known” experience is that a shelf can look perfect on the table
and still look wrong on the wall if the wall isn’t level or if you eyeballed spacing. DIYers frequently recommend marking lines,
measuring from fixed points (like the countertop or floor), and using a level for each bracketnot just the first one. If you’re installing
multiple shelves, many people also do a “mock layout” using painter’s tape on the wall so they can preview the spacing before drilling.
Finally, a lot of folks end up loving this project because it’s forgiving in a very specific way: if you mess up the wrap, you can redo it
without rebuilding the shelf. That makes it a great confidence-builder. You start with one shelf, learn the rhythm, then the second shelf goes
faster and looks better. By the time you finish, you’ve gained a surprisingly useful set of skillsmeasuring, smoothing, trimming, pattern planning,
and mountingplus you get the daily reward of walking past your shelves and thinking, “Yeah. I did that.”