Table of Contents >> Show >> Hide
- Start With a Plan (Not Just a Pretty Picture)
- Know Your Fireplace Type Before You Buy Materials
- Choosing Materials: Style Meets Safety
- Build a Realistic Budget
- Create a Detailed Materials List (Young-House-Love Style)
- Where to Shop and How to Compare Products
- Order, Stage, and Dry-Fit Before You Demo
- Common Fireplace Makeover Mistakes to Avoid
- Simple, Budget-Friendly Upgrade Options
- 500-Word Experience: What You Learn Planning a Fireplace Makeover
If your fireplace looks more “sad campfire” than “cozy magazine spread,” a makeover is one of the most satisfying home projects you can tackle. The tricky part isn’t just picking pretty tile or a dreamy mantel photo on Pinterestit’s planning the design, buying the right materials, and avoiding the “oops, we forgot backer board” panic mid-project.
This guide walks you through how to plan a fireplace makeover, choose safe and stylish materials, and build a realistic shopping list so you can walk into the home center like a pro, not a confused person Googling grout in Aisle 14.
Start With a Plan (Not Just a Pretty Picture)
Define the purpose of your makeover
Before you order a single tile sample, ask what you want from this fireplace makeover:
- Aesthetic upgrade: Do you want to modernize a dated brick surround, lighten a dark stone wall, or make an electric unit look built-in?
- Function upgrade: Are you switching from wood to gas, adding glass doors, or improving heat efficiency?
- Layout changes: Do you want to widen the surround, raise or lower the hearth, or add built-in shelves or a TV niche nearby?
Knowing your priorities keeps you from impulse-buying marble tile when you really needed budget-friendly porcelain and a new mantel.
Collect reference photos (but measure your reality)
Save inspiration photos that truly match your room: similar ceiling height, wall width, and fireplace size. A full-height stone chimney that looks dreamy in a 2-story great room might overwhelm an 8-foot living room wall.
Then grab a tape measure and note:
- Width and height of the existing surround
- Firebox opening size
- Hearth depth and width
- Distance from firebox to combustible materials like trim and wood floors
These measurements will guide how much tile, stone, or wood you’ll need and help you check clearances against local building codes and the fireplace manufacturer’s manual.
Know Your Fireplace Type Before You Buy Materials
Different fireplaces tolerate heat and materials differently, so you can’t shop effectively without knowing what you’re working with.
Wood-burning fireplaces
Traditional wood-burning fireboxes get very hot and may throw sparks. Near the opening and on the hearth, you generally need fully non-combustible materialsthink stone, brick, or properly rated tilenot wood or MDF. Your local building code usually specifies minimum hearth depth and non-combustible clearances.
Gas fireplaces
Gas units often run cooler than roaring wood fires, but they still generate substantial heat. Many have specific instructions about how close trim, tile, or mantels can be to the opening, especially above the firebox. Always read the manual; it may limit what you can build out or attach around the insert.
Electric fireplaces
Electric fireplaces are usually the most forgiving. They don’t emit real flames or ash, which gives you more flexibility with materials and layout. You still want flame-resistant surfaces for aesthetics and durability, but you’re less constrained by code when it comes to wood trim, shiplap, and built-out surrounds.
Bottom line: do a quick code and manual check before you add anything to your cart.
Choosing Materials: Style Meets Safety
Fireplace makeovers are usually a combo of three zones: the surround/face, the hearth, and the mantel or architectural trim. Each zone has its own job and material options.
Surround and face materials
The surround is the visible surface around the firebox. Popular choices include:
- Porcelain or ceramic tile: Durable, budget-friendly, and available in every style from concrete-look to marble-look. Look for tiles rated for fireplace or high-heat use.
- Natural stone: Marble, slate, granite, limestone, and quartzite bring a timeless, high-end look. They’re generally very heat resistant, but stone can be heavier and pricier and may require sealing.
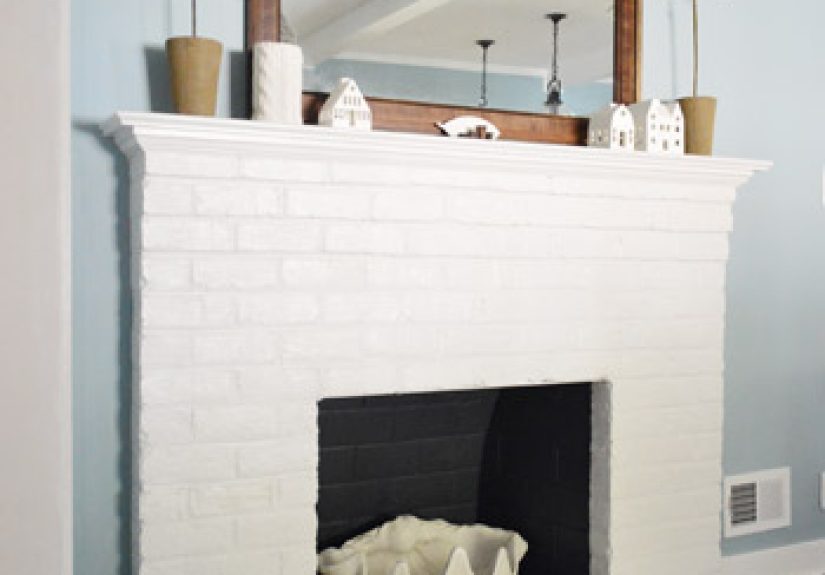
- Brick: Classic, cozy, and often already there. You can clean it, paint it with high-temp or masonry paint, or German smear or limewash it for a rustic update.
- Engineered stone or veneer: Ledge stone panels and stone veneer deliver the texture of stone in thinner, lighter pieces.
Hearth materials
The hearth takes the most abusehot embers, metal fireplace tools, boots, and sometimes pets who think it’s their personal stage.
Top hearth materials include:
- Brick or natural stone slab: Extremely durable and heat resistant. Granite, slate, and other dense stones are popular because they resist cracking and discoloration.
- Porcelain tile: A great option if you want pattern or a modern look at a mid-range price. Choose thicker, floor-rated tiles with good slip resistance.
- Concrete: Poured or precast concrete hearths give a modern, monolithic feel and can be tinted or polished.
Whatever you choose, make sure it’s rated for floors and high heatthin, decorative wall tile can crack when it’s used on a working hearth.
Mantel, surround frame, and trim
This is where wood and MDF can come in. Many DIYers build a boxy surround structure from 2x4s, sheathe it in MDF or plywood, then add trim, paneling, or shiplap, always respecting the minimum distance to the firebox opening.
Common framing and trim materials:
- 2×4 or 2×6 lumber for framing
- MDF or plywood as a smooth base for paint and trim
- 1×4 or 1×6 pine boards for casing and mantel edges
- Baseboard, crown molding, or lattice for decorative details
Painted wood mantels look crisp and classic, while stained wood can bring warmth and contrast against tile or stone.
Build a Realistic Budget
You don’t have to spend five figures to upgrade a fireplace, but you do need to budget carefully so you don’t blow your funds on tile and forget you still need grout, backer board, screws, and paint.
Cost buckets to plan for
- Surface materials: Tile, brick, stone, veneer, or paneling for the surround and hearth.
- Structural materials: Cement backer board, framing lumber, MDF, plywood, blocking, and fasteners.
- Installation supplies: Thinset or tile adhesive, grout, spacers, caulk, sealer, primer, and paint.
- Tools: Tile saw rental, trowels, mixing buckets, level, laser level, safety gear, brad nailer or drill.
- Professional help (if needed): Gas line work, electrical adjustments, or masonry repairs.
A modest cosmetic makeover with paint and tile could land in the low hundreds of dollars, while full-height stone, custom carpentry, or a new gas insert can easily climb into the thousands. Planning each category ahead of time makes the checkout total less shocking.
Create a Detailed Materials List (Young-House-Love Style)
One of the smartest moves you can make is a line-by-line materials list that covers everything from big-ticket items to the “oh yeah, grout sponges” stuff. Here’s a sample shopping list for a tiled surround with a simple wood mantel:
For the surround and hearth
- Tile for surround and hearth (calculate square footage and add 10–15% overage for cuts)
- Cement backer board and appropriate screws
- Thinset mortar or approved tile adhesive
- Grout (consider stain-resistant or epoxy grout for a low-maintenance finish)
- Tile spacers and edge trim (bullnose or metal profile)
- Grout sealer and tile sealer if required
For the mantel and built-out frame
- 2×4 lumber for framing any build-out
- MDF or plywood sheathing for smooth faces
- 1x lumber for mantel top and sides
- Trim pieces: crown, baseboard, lattice, or panel molding
- Construction adhesive and brad nails or wood screws
- Wood filler, caulk, primer, and paint
Tools and protection
- Tile cutter or wet saw (rent if you don’t own one)
- Notched trowel, mixing paddle, buckets, and grout float
- Level, tape measure, and laser level
- Dust mask, safety glasses, knee pads, and drop cloths
- Temporary floor protection (hardboard or rosin paper) to protect surrounding floors while you work.
Double-check this list against your design drawings and inspiration photos to make sure you haven’t forgotten trim pieces or transition strips where the hearth meets existing flooring.
Where to Shop and How to Compare Products
You don’t have to buy everything from one store. In fact, splitting your shopping list can save money and give you more design options.
Big-box home centers
Home centers are great for cement board, fasteners, tools, and many tile options. Look for in-stock tile if you’re on a tight timeline, or be prepared for special-order lead times if you fall in love with something more unique.
Tile and stone showrooms
Specialty showrooms often have a wider range of heat-resistant tile and stone that’s rated specifically for fireplace surrounds and hearths, along with knowledgeable staff who can confirm suitability and help you choose grout color, edge trims, and sealers.
Online retailers and local salvage
Online tile options are nearly endlessbut always check the specs for heat resistance and slip resistance. Architectural salvage yards can be excellent sources for unique mantels, corbels, or brick, often at a lower price than brand-new materials.
Order, Stage, and Dry-Fit Before You Demo
Demolition is fun, but it’s a lot more fun when you already have your materials onsite and a plan for how they’ll go together.
Order early and inspect everything
- Order all tile, stone, and specialty trim at the same time to avoid color-lot differences.
- Open boxes and inspect for breakage, color variation, and warping.
- Confirm that you’ve received all pieces: edge trims, corners, and special shapes.
Dry-lay your tile or stone
Before you mix thinset, lay out tile on the floor in front of the fireplace to test pattern, grout lines, and cut locations. For natural stone, shuffle tiles to blend color variation evenly across the surround and hearth.
Protect your floors and furniture
Cover nearby floors and furniture with hardboard, drop cloths, and plastic sheeting before demo. Masonry dust and tile shards have a special talent for traveling farther than you think.
Common Fireplace Makeover Mistakes to Avoid
- Ignoring clearance rules: Building a gorgeous wood mantel too close to the firebox can be a code violation and a safety risk.
- Using the wrong tile: Wall-only decorative tile or thin glass tile can crack or discolor if it’s too close to a hot firebox.
- Skipping backer board: Tiling directly over painted drywall near a working fire can lead to cracked grout and tiles as heat and movement take their toll.
- Underestimating prep: Old soot, glossy paint, and uneven brick all need cleaning, scuffing, or leveling before you install new finishes.
- Forgetting future maintenance: Highly textured stone with light grout might look dreamy but show every soot smudge; a smoother, sealed surface may be easier to live with.
Simple, Budget-Friendly Upgrade Options
If you’re not ready for full tile and carpentry, you can still transform your fireplace with a smaller “Phase 1” makeover:
- Masonry paint or limewash: Lighten heavy brick with masonry-safe paint or limewash to soften the look without changing materials.
- Peel-and-stick tile (for non-working surrounds): In decorative, non-heating areas, peel-and-stick tile can provide a temporary splash of pattern or color.
- New mantel only: Swapping a dated mantel for a simpler, chunkier design instantly modernizes the wall with minimal mess.
500-Word Experience: What You Learn Planning a Fireplace Makeover
The first time you plan a fireplace makeover, you quickly discover it’s part design project, part puzzle, and part exercise in patience. On paper, it’s easy: pick pretty tile, add wood, boominstant transformation. In real life, the learning curve starts the moment you stand in the tile aisle trying to decide if “greige stone-look porcelain, matte finish” is actually different from the other six greige stone-look porcelains in your cart.
One of the biggest lessons is that scale matters more than you think. Those small mosaic sheets that look delicate online can turn into visual noise when wrapped around a huge fireplace wall. Conversely, very large tiles might look sleek on a sample board but require tricky cuts around the firebox opening. Dry-laying a few rows at home helps you see how patterns and grout joints will actually read from across the room, not just in a close-up product shot.
You also learn how much prep work saves your sanity later. It’s tempting to chip off a little loose tile and immediately start installing the new surround. But cleaning soot stains, grinding down high spots, and making sure the wall is flat and solid make a massive difference in how the finished tile looksand how long it lasts. Taking time to protect your floors, tape off baseboards, and set up a cutting and mixing station pays off when you’re not tracking mortar through the rest of the house.
Another key takeaway: the little items on your list matter just as much as the big ones. Everyone remembers to budget for tile and a mantel; fewer people remember sanding sponges, shims, extra screws, or the right kind of caulk. Mid-project runs to the store are practically a DIY rite of passage, but a thorough listfrom masonry screws to grout sealerkeeps them to a minimum and helps keep your budget realistic. Think of every step: demo, rebuild, tile, grout, paint, and touch-up. If you need a tool or material for that step, put it on the list before you swipe your card.
There’s also a surprising amount of problem-solving and improvisation. Maybe the wall behind your old surround is less than perfect, or the firebox isn’t perfectly centered, or the original hearth is slightly out of level. A good plan doesn’t eliminate surprises, but it makes them manageable. Having extra tile, a bit of flexibility in your trim design, and a “just in case” cushion in your budget gives you room to adapt without panic.
Finally, you learn how transformative a fireplace makeover is for the way a room feels. Once the last bit of grout haze is wiped away and the mantel is styled, the entire space suddenly feels more pulled together and intentional. The fireplace stops being something you ignore and becomes the backdrop for holidays, movie nights, and lazy Sunday mornings. That payoff makes all the planning, measuring, and tile-cutting absolutely worth it.
If you’re standing in front of a tired-looking fireplace wondering where to start, remember this: you don’t need to know everything on day one. Start with safety, make a honest budget, build a detailed materials list, and take it one step at a time. The difference between “before” and “after” is just a series of small decisions and a few weekends of focused effort.