Table of Contents >> Show >> Hide
- Why “Pulp Fiction” Works: The Secret Is Not the Paper
- A Quick History of “Chewed Paper,” Minus the Dusty Lecture
- Materials That Matter: Paste, Pulp, and the Armature Truth
- Structure First: How to Build Big Without Building Heavy
- From “Craft” to “Creature”: Finishing Techniques That Change Everything
- Keep It Clean: Mold, Moisture, and the “Please Dry Already” Phase
- Project Ideas Inspired by “Pulp Fiction Paper Mâché Fantasy”
- Why Makers Keep Coming Back to Paper
- Field Notes: of Real-World “Pulp Fiction” Experience (Without the Hollywood Budget)
- The moment you realize the armature is everything
- Drying is the “unsexy skill” that makes you better
- You learn to switch materials instead of forcing one material to do everything
- Texture becomes intentional (and that’s when your work starts looking expensive)
- Finishing teaches humility, then rewards you for it
- You start seeing paper as a serious material, not a placeholder
- Conclusion
Paper mâché has a reputation problem. Say the words out loud and most people picture a balloon, a bowl of gluey paste,
and a lopsided school-project planet that looks like it’s been through a minor hurricane. But in the maker world,
“chewed paper” can level up fastfast enough to land you in the realm of studio-quality monsters, cinematic textures,
and creature faces so convincing you’ll instinctively check them for a pulse (don’t worry, they’re paper).
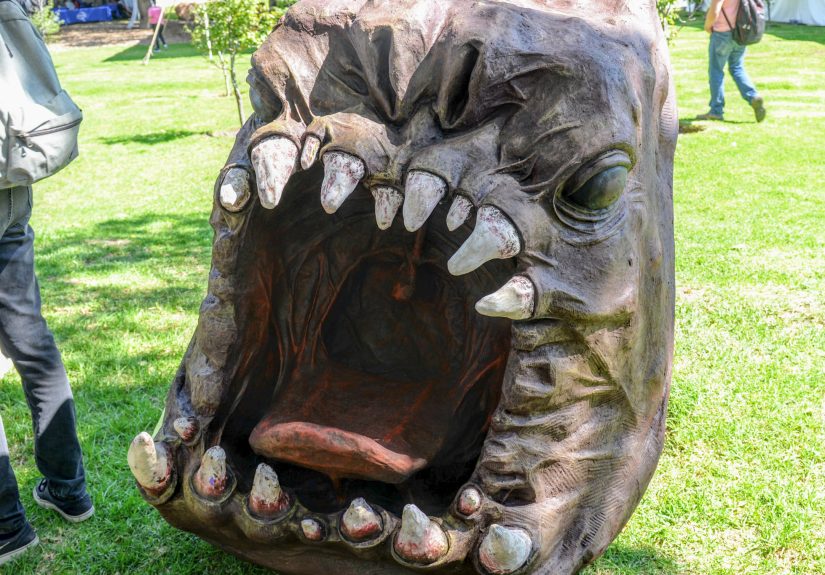
That’s the delightful twist behind Make:’s “Pulp Fiction Paper Mâché Fantasy,” which spotlights artist Fernando Pérez Carrizales
and his jaw-dropping paper creationsthink fantasy and sci-fi creatures rendered with the kind of detail you’d expect from foam latex,
resin casts, or high-end sculpting clay. Instead, the backbone is humble paper: torn, pulped, pasted, layered, carved, and painted
into something that feels bigger than the sum of its recycled parts.
This article is your deep dive into how paper mâché escapes the “kids’ craft” corner and becomes a serious maker materialpart art history,
part technique breakdown, part practical inspiration. If you’ve ever wanted to build a creature bust, a wall-mounted monster mask,
or a cosplay prop that doesn’t weigh as much as a small refrigerator, welcome to the pulp party.
Why “Pulp Fiction” Works: The Secret Is Not the Paper
The paper is the headline, but the real magic is the mindset. High-impact paper mâché doesn’t rely on “more paste, more layers, more hope.”
It relies on three grown-up ideas that traditional paper mâché projects often skip:
- Engineering first: a smart armature (internal structure) does most of the heavy lifting.
- Texture on purpose: surface detail is sculpted, carved, and refinedthen sealed like a real finish.
- Story sells the sculpture: a creature face isn’t just anatomy; it’s attitude, posture, and personality.
In Make:’s feature, Carrizales describes returning to paper even after using materials like wax, epoxy, resins, and foam rubberbecause paper can be
shaped, carved, and molded in multiple ways, and it’s everywhere (often discarded). That versatility is the heart of “Pulp Fiction”:
paper isn’t the limitationit’s the superpower.
A Quick History of “Chewed Paper,” Minus the Dusty Lecture
From ancient utility to modern spectacle
Paper mâché is older and more global than its summer-camp reputation. Many educational overviews trace early papier-mâché techniques back to China,
where paper-based constructions were hardened and toughened (including by protective coatings), then spread through trade routes into other regions,
eventually becoming a popular decorative and functional technique across cultures.
Papier-mâché also shows up in performance traditionsfamously in oversized festival heads and giant figures. Smithsonian coverage of Catalan culture,
for example, highlights “big heads” and giant costumes that use colorful papier-mâché to create larger-than-life characters for public celebration.
Translation: papier-mâché has been doing “immersive entertainment” for centurieslong before anyone coined the phrase.
Yes, it even had an industrial era
Here’s the part that surprises people: papier-mâché isn’t only artsyit’s practical. Historical accounts from U.S. sources describe molded papier-mâché
being used in manufacturing contexts where weight and materials mattered. Connecticut history reporting, for instance, notes that clock cases were once
produced from molded papier-mâché, saving critical metals during wartime constraints and reducing weight for transport.
So if your inner critic says, “But it’s just paper,” you can politely reply: “So were industrial clock cases, festival icons, and museum-grade decorative objects.
Now let me finish my dragon.”
Materials That Matter: Paste, Pulp, and the Armature Truth
The fastest way to upgrade your results is to stop thinking of paper mâché as “paper strips + paste” and start thinking of it as a system:
structure + skin + detail + finish. Each layer has a job. When you assign jobs, your sculpture stops collapsing emotionally and physically.
Paper choices: not all scraps behave the same
- Newspaper strips: classic for fast coverage and strong layering; great for the “skin” over a form.
- Brown paper / kraft: tougher fibers, often smoother; useful when you want fewer wrinkles.
- Toilet paper / soft tissue: breaks down easily for pulp mixes and clay-like blends (details, smoothing, sculpted features).
- Egg cartons: a common pulp ingredient for a stronger, thicker, papier-mâché “clay” feel.
Paste options: pick your glue like you pick your friends
A lot of DIY guides focus on flour-and-water paste because it’s cheap and familiar. A common no-cook approach is a simple flour-and-water mixture,
sometimes with salt added. It works, especially for quick, low-stakes builds. But it can be more prone to issues if projects dry slowly or stay humid.
PVA glue (think school glue) is a popular upgrade: it tends to dry stronger and can be more forgiving for larger builds. Many crafters use diluted PVA
for strip layers, then switch to a pulp/clay mixture for fine detail. If you prefer the convenience route, art suppliers also sell ready-to-mix papier-mâché
products and pre-made formsuseful for classrooms, quick decor, or when you’d rather spend your time painting than tearing newspapers into confetti.
Pulp and “paper mâché clay”: where the details live
The Make:-style fantasy look comes from detailcreases, pores, ridges, and edges that don’t scream “layers of strips.” That’s where pulp mixtures shine.
Many makers create a spreadable “paper mâché clay” by combining shredded paper with glue and a filler that helps it spread smoothly and hold shape.
Some community lessons even specify ingredients like joint compound (used carefully) to create a workable, sculptable paste for final layers and detailing.
Safety note: If you use any powdered fillers or chemical coatings, follow the product label, avoid breathing dust, and work in a ventilated area.
For teens, it’s smart to involve an adult for anything beyond basic paste and paper.
Structure First: How to Build Big Without Building Heavy
Paper mâché is a skin, not a skeleton. If your armature is wobbly, the final creature will be wobblyjust with better paint. Strong builds start with
a stable internal form that matches the pose and weight distribution of your design.
Armature ideas that actually work
- Cardboard + tape: fast, cheap, and surprisingly strong for busts, masks, and wall-mounted pieces.
- Wire frame: excellent for horns, fingers, ears, or anything that sticks out and wants to snap off later.
- Crumpled paper “volume blocks”: fill space without weight; tape it tight so it doesn’t settle as it dries.
- Molds (when you want multiples): paper can be pressed into molds for repeatable shapeshandy for props and costume parts.
Layering strategy: fewer, smarter layers beat “infinite lasagna”
If you’ve ever kept layering “just to be safe,” you already know the downside: longer dry times, trapped moisture, and a higher chance of warping.
Many experienced paper artists recommend using only as many strip layers as you truly need for strength, then moving to thinner detail coats.
Translation: aim for efficient strength, not a paper-based monument to anxiety.
From “Craft” to “Creature”: Finishing Techniques That Change Everything
The difference between a charming piñata and a convincing monster is often the finish. Great finishing is boring in the moment and spectacular later.
It’s sanding. It’s sealing. It’s letting things dry when you really want to paint right now.
Prime, paint, and fake reality (politely)
- Prime first: a base coat helps unify the surface so paint behaves consistently.
- Layer paint: use multiple thin coats instead of one thick one; it reads more like “skin” and less like “painted paper.”
- Weathering is your friend: shadows in creases, subtle highlights on edges, and tone variation make texture feel real.
Seal it like you mean it
Paper mâché isn’t naturally waterproof. But you can make it more moisture-resistant with a proper sealer once it is completely dry.
Many crafters use brush-on sealers (including decoupage-style products that act as glue/sealer/finish) or clear acrylic coatings designed to protect surfaces.
Read the label, use ventilation, and don’t rush: sealing too early can trap moisture and invite problems later.
If your project is meant to live indoors (most paper mâché should), a durable clear finish helps protect paint and reduces moisture absorption.
If you want outdoor durability, paper mâché becomes a much bigger engineering challengethink of it as “weather-resistant for light exposure,” not “rain-proof forever.”
Keep It Clean: Mold, Moisture, and the “Please Dry Already” Phase
Paper mâché fails for predictable reasons, and most of them involve moisture lingering where it shouldn’t. If you remember only one rule, make it this:
dry fast, dry fully, then seal.
- Use the thinnest workable layers so moisture can escape.
- Dry in moving air (a fan helps) and keep the piece in a warm, dry spot.
- Never paint or seal if there’s moisture inside the form.
- Store finished pieces like you’d store a watercolor painting: dry, stable, and not in a damp basement corner.
Project Ideas Inspired by “Pulp Fiction Paper Mâché Fantasy”
1) The wall-mounted creature mask
The Make: feature highlights wall-scale creature faces that feel like they belong in a film set hallway.
You can design your own original monster and mount it like a trophy maskdramatic, lightweight, and perfect for showing off texture work.
2) A fantasy bust for your desk or shelf
Busts are the sweet spot for paper mâché: they’re stable, they don’t require long limb supports, and they let you practice facial anatomy, horns, scales,
or whatever weird and wonderful details you love.
3) The “big head” festival-style character
Oversized heads aren’t just funnythey’re historically grounded performance art. Build a lightweight, wearable head (carefully planned for airflow and visibility)
and you’ve got a costume piece that turns heads… literally.
4) Creature hands, claws, and prop parts
Smaller componentslike claws, shoulder armor, or decorative panelsare a smart way to test materials and finishes before you commit to a full creature build.
They also photograph beautifully, which is half the joy of making.
5) Sustainable diorama monsters
Paper is easy to source responsibly. A “pulp fantasy” diorama is a perfect excuse to turn scrap paper into terrain, ruins, creature eggs, and eerie set dressing
like a tiny movie set powered by yesterday’s recycling.
Why Makers Keep Coming Back to Paper
The Make: article lands on a truth that experienced builders recognize instantly: paper is underrated. It’s cheap, available, and adaptable.
It can be layered, carved, spread, pressed into molds, and finished to a surprisingly professional look. It also plays well with other maker skills:
you can add LEDs for glowing eyes, embed wire supports, combine it with fabrics, or build hybrid pieces that borrow techniques from prop-making and sculpture.
And maybe the best part is philosophical: paper mâché gives you permission to experiment. If something goes wrong, you’re not out a fortune in resin.
You’re out some glue, some paper, and a little pridewhich, let’s be honest, was due for a recycling bin anyway.
Field Notes: of Real-World “Pulp Fiction” Experience (Without the Hollywood Budget)
Makers who fall in love with paper mâché often share the same arc: first build is chaos, second build is confidence,
and by the third build you’re casually saying things like, “I think I’ll carve the cheekbones more,” as if you’re running a creature studio
instead of a kitchen table. Here are the most common, most useful lessons people pick up while chasing that “Paper Mâché Fantasy” look.
The moment you realize the armature is everything
Early projects tend to treat the structure like a suggestionthen the sculpture slowly slumps as it dries, like it just heard sad music.
Makers who get serious start building the form the way you’d build a tiny piece of furniture: balanced, braced, and reinforced where anything sticks out.
Horns get wire spines. Snouts get cardboard ribs. Big surfaces get internal supports so they don’t flex and crack later.
Drying is the “unsexy skill” that makes you better
The biggest emotional challenge is patience. You want to paint. The piece wants to stay wet inside. If you paint too early, the surface may look fine
until you notice softness, odor, or a finish that never really feels stable. People who build gorgeous paper work get almost boring about airflow:
they rotate pieces, aim fans, and treat drying time as part of the craft, not an annoying delay.
You learn to switch materials instead of forcing one material to do everything
Strips are great for coverage and strength. Pulp/clay mixes are great for sculpted detail. A common maker “breakthrough” is realizing you don’t have to pick one.
You can build a strong base with strips, then move into a smoother, sculptable layer for brows, lips, scars, scales, and wrinkles.
That one change often takes a piece from “cool craft” to “wow, what is that made of?”
Texture becomes intentional (and that’s when your work starts looking expensive)
Beginners try to erase texture. Experienced makers design texture. Rough paper grain can become reptile skin.
Layer seams can become muscle striation. Tiny dents can become age, wear, and realismespecially once paint adds shadows and highlights.
Instead of fighting every imperfection, people start choosing which imperfections help the character.
Finishing teaches humility, then rewards you for it
Makers often describe finishing as a weird emotional tax: you do a bunch of work that doesn’t feel creativesanding, sealing, repainting
and then suddenly the piece “snaps into reality.” The paint sits better. The shadows read deeper. The surface stops looking thirsty.
If you’re chasing the Make:-style fantasy effect, finishing isn’t optional; it’s the final spell.
You start seeing paper as a serious material, not a placeholder
One of the most satisfying “experience shifts” is realizing that paper isn’t the budget alternative to resin; it’s a different path to quality.
When you see artists produce massive creature faces and detailed figures with paper as the core, it changes what you believe is possible at home.
The result is a very maker-ish confidence: “If I can design the structure and control the finish, I can build almost anything.”