Table of Contents >> Show >> Hide
- What Are Salt Plates and Salt Bricks, Exactly?
- Why Cook on Salt? The Flavor and the Science
- Choosing the Right Salt Plate or Salt Brick
- How to Heat a Salt Brick Without Turning It into Modern Art
- Chilling a Salt Plate: The Cold Side of the Glow-Up
- What to Cook on a Salt Brick (Best Foods for Success)
- What NOT to Cook on a Salt Plate (Unless You Love Regret)
- Cleaning and Care: How to Keep Your Salt Brick Alive
- Food Safety and Common Myths
- Troubleshooting: Cracks, Sticking, and “Why Is It Sweating?”
- Serving Ideas That Make You Look Like You Have a TV Show
- of Real-World “Experience” Notes (What It’s Like to Live With One)
- Conclusion
If you’ve ever walked past a kitchen store display and thought, “Why is there a pink rock sitting next to the fancy spatulas?”
congratulationsyou’ve met the salt plate and its beefier cousin, the salt brick. They look like something you’d gift a
geologist with a grill obsession, but they’re actually legit cooking tools: part cookware, part seasoning, part dinner-party
magic trick.
In this guide, we’ll break down what salt plates and salt bricks are, how they work, how to use them without cracking your
“edible serving platter,” and which foods shine (and which foods will turn your salt slab into a sad puddle). Along the way,
we’ll keep it practical, a little nerdy, and just humorous enough that your salt brick won’t feel judged for being… a rock.
What Are Salt Plates and Salt Bricks, Exactly?
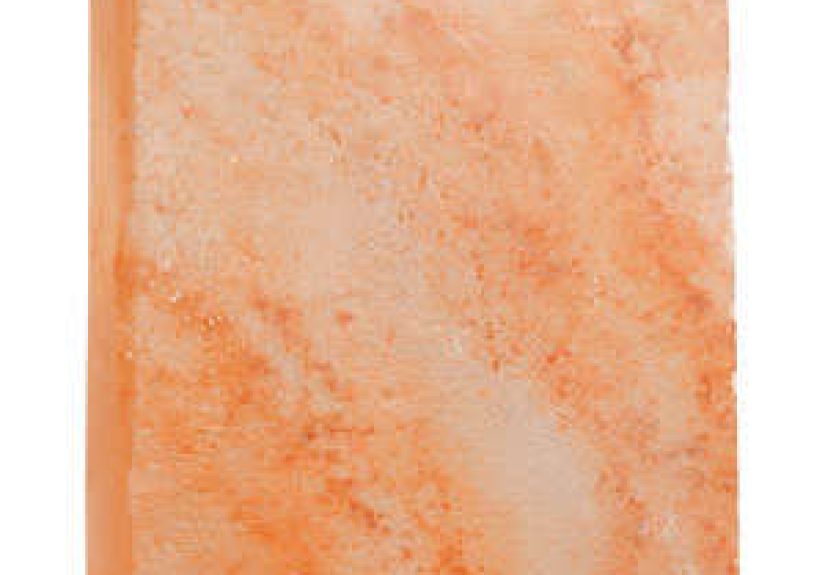
Salt plates (also called salt slabs, salt planks, or salt tiles) are flat pieces of culinary-grade saltmost
commonly Himalayan pink saltcut into a serving-platter shape. Salt bricks are the thicker, heavier versions
designed to hold heat (or cold) longer and take more intense use.
Salt Plate vs. Salt Brick: The Quick Difference
- Salt plates: thinner and lighter; great for serving, chilling, and quick sears.
- Salt bricks: thicker and heavier; better heat retention; ideal for grill/oven use and tableside searing.
- Both: season food gently on contact and look wildly impressive doing it.
Most are made from pink Himalayan salt (sodium chloride with trace minerals that give it the rosy color). You’ll also see
“salt plates” made from other regional salts, but Himalayan slabs dominate the U.S. market for one simple reason: they’re
widely available in uniform, thick cuts that can survive repeated heating and chilling.
Why Cook on Salt? The Flavor and the Science
A salt brick isn’t just a hot surface. It’s a hot surface that seasons while it cooks. But here’s the twist:
the salt transfer is usually more subtle than people expectespecially if you’re searing quickly and your food isn’t soaking wet.
How Salt Moves from Block to Food
Salt doesn’t “jump” into your steak because it’s excited. It transfers mostly when moisture dissolves the surface layer of salt.
That means:
- Wetter foods (scallops, sushi, juicy fruit) pick up salt faster.
- Drier foods (well-patted steak, vegetables with minimal moisture) pick up salt more slowly.
- Longer contact time increases seasoninggreat for delicate flavor, risky for over-salting if you forget the timer.
Heat Retention = Restaurant Drama (In a Good Way)
Salt bricks hold temperature well. Heated slowly, they become a stable cooking surface for quick-cooking foodsperfect for
that “tableside sizzle” moment where guests suddenly believe you went to culinary school.
Choosing the Right Salt Plate or Salt Brick
Before you buy the largest slab you can carry like a medieval shield, think about how you’ll actually use it.
Size and Thickness Tips
- 8 x 8 inches: great starter size; manageable on a grill or in an oven.
- 12 x 8 inches: a popular “party platter” size; better for serving and larger batches.
- Thickness matters: thicker bricks resist cracking better and stay hot/cold longer.
Look for These Features
- Flat, even surface: helps food cook consistently.
- Carrier or holder: makes moving safer and helps protect countertops.
- Food-safe labeling: you want a cooking slab, not a decorative salt tile pretending to be cookware.
How to Heat a Salt Brick Without Turning It into Modern Art
The #1 rule of salt block cooking is simple: go slow. Salt can crack from thermal shocksudden temperature change
just like certain glass cookware (or your confidence when you realize you’ve been “freehanding” baking powder).
The Slow-Heat Method (Works for Most Setups)
- Start with a completely dry salt plate/brick.
- Warm it gently (low heat) for 15–20 minutes.
- Increase to medium for another 15–20 minutes.
- Increase to medium-high/high until it’s cooking-hot.
- Cook thin cuts first while you learn how fast your slab seasons.
Oven Method (Most Beginner-Friendly)
Place the salt brick on a sheet pan, put it in a cold oven, then heat gradually. The oven’s even heat makes cracking less likely,
and you don’t have to wrestle with burner hot spots. Once hot, you can finish foods on the slab or bring it to the table (carefully).
Grill Method (Peak Summer Energy)
Start with the salt brick on a cold grill and bring the grill up slowly. This method shines for quick-searing proteins and vegetables.
It also wins points for theater: the grill marks you get are basically edible bragging rights.
Stovetop Method (Use Caution)
If your salt slab sits directly on a coil or an aggressive flame, it can heat unevenly. If you do stovetop heating,
use a diffuser or keep the heat low and steady at first. The goal is to avoid a “one side lava, one side winter” situation.
Chilling a Salt Plate: The Cold Side of the Glow-Up
Salt plates aren’t only for heat. Chill one in the freezer and it becomes a cold-serving platform that keeps foods cool and adds
a whisper of seasoning. Think: sashimi, smoked salmon, melon, burrata, or even chocolate-dipped strawberries that suddenly taste
more “dessert restaurant” than “I panicked and bought berries.”
How to Chill Safely
- Place the salt plate in the freezer for 1–2 hours (or until noticeably cold).
- Serve cold foods directly on topespecially foods you want to keep cool for longer.
- Wipe clean after use and dry thoroughly before storing.
What to Cook on a Salt Brick (Best Foods for Success)
Salt blocks love foods that cook quickly and benefit from gentle, surface-level seasoning.
Your salt brick is basically saying: “Give me thin cuts and a little patience, and I’ll make you look like a pro.”
Top Picks
- Seafood: scallops, shrimp, salmon portions, thin white fish fillets (pat dry first).
- Thin-sliced meats: flank steak slices, skirt steak strips, shaved lamb, pork cutlets.
- Vegetables: asparagus, zucchini planks, mushrooms, peppers, onions.
- Eggs and small bites: quail eggs, halloumi, quick-toasting flatbreads.
- Dessert experiments: pineapple, peaches, shortbread, even cookies if your slab is used to the heat.
A Few Specific Examples (So You Can Picture It)
-
Scallops: heat the salt brick until very hot, pat scallops dry, sear briefly. You’ll get a golden crust and a clean,
gentle saltinessno heavy-handed brine vibe. -
Rib-eye on a salt block: preheat slowly, then sear like you would on cast iron. Skip extra salting until you taste.
(Your salt brick is already doing a job.) -
Cold smoked salmon on a chilled salt plate: slice thin, serve with dill, lemon, and cucumbers. The salt plate seasons
the surface just enough to feel fancy.
What NOT to Cook on a Salt Plate (Unless You Love Regret)
Some foods are basically kryptonite for salt slabsusually because they’re too wet, too delicate, or too likely to dissolve your
“plate” into a salty puddle.
- Soupy or saucy dishes: marinara, curry, stew. Your slab will melt in protest.
- Long braises or slow cooking: salt blocks are not Dutch ovens with identity crises.
- Very thin, very wet fish: it can over-salt quickly and stick.
- Anything you already salted heavily: double-salt is a bold strategy (and not in a good way).
Cleaning and Care: How to Keep Your Salt Brick Alive
Salt plates and bricks are low-maintenance, but they are not “throw it in the dishwasher and pray” cookware. Salt dissolves in water,
so cleaning is about using as little water as possible and letting the slab dry completely.
Cleaning Steps
- Cool completely to room temperature before cleaning.
- Scrape off stuck bits with a spatula or brush.
- Wipe with a damp cloth or sponge (not dripping wet).
- Skip soapthe slab doesn’t need it, and you don’t want soapy flavor memories.
- Pat dry and let it air-dry thoroughly (often overnight) before storing.
Storage Tips
- Keep in a cool, dry place (humidity is not your slab’s love language).
- Store on a rack or breathable surface so moisture doesn’t get trapped underneath.
- Expect discoloration over timethis is normal and often just “flavor patina.”
Food Safety and Common Myths
Salt is naturally hostile to many microbes because it reduces water activity, but that doesn’t mean you can ignore basic kitchen hygiene.
Treat your salt plate like any other food-contact surface: keep it clean, dry, and free of raw-protein residue.
Myth: “It’s Salt, So It Sterilizes Everything.”
Reality: Salt helps, but don’t rely on it as your only safety plan. Always handle raw proteins safely, avoid cross-contamination,
and clean the slab properly after use.
Myth: “Cooking on a Salt Brick Makes Food Super Salty.”
Reality: Many foods pick up a gentle seasoningespecially with quick cooks. Saltiness depends on moisture, contact time,
and the food’s surface texture. You’re in control (and your taste buds are the referee).
Troubleshooting: Cracks, Sticking, and “Why Is It Sweating?”
If Your Salt Block Cracks
- Small cracks are common and often harmless.
- Major splits usually come from heating too fast or from moisture inside the slab.
- Prevention: go slow, and make sure it’s fully dry before reheating.
If Food Sticks
- Let the slab get properly hot before searing.
- Pat proteins dry and lightly oil the food (not the slab).
- Use a thin metal spatula and don’t force itstuck food often releases as it cooks.
If the Slab “Sweats”
Salt attracts moisture from the air. In humid kitchens, a salt plate can feel damp or look glossy. That’s not automatically a problem,
but you should dry it well and store it in a low-humidity spot.
Serving Ideas That Make You Look Like You Have a TV Show
Salt plates are born for entertaining. They turn ordinary foods into “event foods.”
Warm Serving Ideas
- Bring a heated salt brick to the table and let guests sear thin steak slices or shrimp.
- Serve roasted vegetables on a warm salt plate for gentle seasoning as they cool.
- Finish a grilled protein on the salt brick for a final sear and a clean salty edge.
Cold Serving Ideas
- Chilled sushi or sashimi platter (with citrus and herbs for balance).
- Fruit board: watermelon, pineapple, peaches, berriessalt makes fruit taste louder.
- Cheese board upgrade: burrata or fresh mozzarella loves a chilled salt plate.
of Real-World “Experience” Notes (What It’s Like to Live With One)
Let’s talk about the part nobody puts on the packaging: the relationship you develop with a salt plate. It starts as a shiny,
rosy rectangle that makes you feel like a culinary wizard. Then, around the second or third use, you notice it has a few stains and
maybe a tiny crack. This is the moment many home cooks panicuntil they realize salt slabs age like cast iron: imperfectly, proudly,
and with a little attitude.
One of the first things cooks tend to notice is that salt block cooking is less “salty explosion” and more “seasoning you can’t quite
place.” The flavor isn’t the same as sprinkling table salt. It’s gentler and more surface-focused, like your food got a light ocean breeze
rather than a salt shaker ambush. The easiest win is usually shrimp or scallops: they cook fast, pick up a balanced seasoning, and make you
look like you planned the evening instead of improvising with whatever was in the freezer.
The second realization: preheating is a ritual. If you try to rush it, the slab may punish you with a dramatic crack that
feels personal (it’s not personal; it’s physics). People who love salt bricks often treat the warm-up like a pregame: start low, do something
else, come back, turn it up, repeat. It’s oddly calminglike waiting for sourdough, but with more sizzling.
Then there’s the entertaining factor. A warm salt brick brought to the table creates instant curiosity. Guests will ask questions. Someone will
take a photo. Someone will say, “Is that safe?” (Yes, if you use it correctly.) The best part is interactive cooking: thin steak slices, quick
shrimp, or even vegetables that cook in minutes. The salt brick turns dinner into a mini event without requiring you to plate like a Michelin
chef. You just set it down, provide tongs, and let people feel involvedwhile you casually accept compliments like you didn’t spend 40 minutes
slowly heating a rock.
Cleaning is where expectations get corrected. You don’t wash it like a pan; you “wipe it like a priceless artifact.” Most cooks learn quickly
that too much water is the enemy. A damp wipe, a scrub for stuck bits, and then a long dry-out period (overnight is a common habit) is the
routine. The slab will slowly wear down over time, and that’s normal. In a way, it’s part of the charm: the salt plate is both tool and ingredient,
giving a little of itself to the fooddramatic, yes, but also oddly poetic for a kitchen rock.
The final lived-in lesson is balance. Salt plates are best when you treat them as a finishing and fast-cooking tool, not a replacement for
every pan you own. Use them when you want clean seasoning, showy serving, and quick sears. When you want a simmering sauce or a long braise,
let your regular cookware do its job. Your salt brick will be waitingquietly, confidentlylike the most patient dinner guest you’ve ever invited.
Conclusion
Salt plates and salt bricks are one of the rare kitchen trends that can be both fun and genuinely useful. They season food gently, hold heat (or cold)
beautifully, and turn simple dishes into something memorable. If you heat them slowly, keep them dry, and treat them like the culinary tool they are,
they’ll reward you with crisp sears, gorgeous presentations, and the kind of dinner-table conversation that usually requires a flame thrower.
(Good news: you don’t need a flame thrower. You need a salt brick.)