Table of Contents >> Show >> Hide
- Why Choose DIY Corner Bookmarks?
- Materials You’ll Need for DIY Corner Bookmarks
- Step-by-Step Instructions for Making Simple DIY Corner Bookmarks
- Customizing Your DIY Corner Bookmarks
- Tips for Making Corner Bookmarks
- Why DIY Corner Bookmarks Make Great Gifts
- Conclusion
- Personal Experience with DIY Corner Bookmarks
Whether you’re an avid reader, a crafting enthusiast, or just someone looking to add a personal touch to your bookshelf, making simple DIY corner bookmarks can be a fun and creative way to mark your place in any book. Corner bookmarks are practical, unique, and easy to create using basic materials. In this article, we’ll walk you through the steps of making these bookmarks, provide tips for customization, and explore different ways to use them. So grab your supplies, and let’s dive into the world of DIY corner bookmarks!
Why Choose DIY Corner Bookmarks?
Corner bookmarks have quickly become a favorite among book lovers and crafters for good reason. Unlike traditional bookmarks that slip between pages, corner bookmarks hug the corner of a page, making them less likely to fall out. They’re easy to spot, stylish, and functional. Plus, creating your own DIY corner bookmarks allows you to add your personal flair to each design.
In addition to their practical benefits, corner bookmarks make excellent gifts for fellow readers, teachers, or anyone who appreciates unique handmade items. They also offer a fun way to use up scraps of paper, fabric, or other crafting materials, making them an eco-friendly choice for environmentally-conscious crafters.
Materials You’ll Need for DIY Corner Bookmarks
One of the best things about DIY corner bookmarks is that they require minimal materials. Here’s what you’ll need:
- Cardstock or scrapbook paper: Choose thick paper or cardstock to ensure durability. You can use patterned paper, solid colors, or even old magazines or newspapers for a unique look.
- Scissors: For cutting out the shapes of your bookmarks.
- Glue or double-sided tape: To secure the folds and pieces together.
- Ruler: To measure and cut straight lines, if necessary.
- Markers, stickers, or stamps: These are for decorating your bookmarks and adding personal touches.
- Paperclips or embellishments: Optional, for adding extra flair to your bookmark designs.
Once you’ve gathered your materials, you’re ready to start crafting your corner bookmarks!
Step-by-Step Instructions for Making Simple DIY Corner Bookmarks
Let’s break down the process of making your own corner bookmarks. This is a simple and beginner-friendly craft that doesn’t require any specialized skills, so don’t be intimidated if you’re a first-time crafter!
1. Cut the Paper
Start by cutting a square of paper. The size of the square can vary depending on the size of your book. A good rule of thumb is to use a square that’s about 3×3 inches or 4×4 inches for standard-sized books. You can experiment with different sizes based on your personal preference.
2. Fold the Square
Next, fold the square diagonally to create a triangle. Make sure the corners are aligned neatly, and crease the fold firmly to ensure a crisp edge. Once you have the triangle shape, open it up again to reveal the crease, and then fold it the other way along the other diagonal. You should now have an “X” shape crease in the center of your paper.
3. Fold the Corners
Now, take each corner of the triangle and fold it inward to meet the center crease. You should have a smaller triangle shape with the corners neatly tucked in. This is the basic structure of your corner bookmark!
4. Decorate Your Bookmark
Here’s where you can let your creativity shine! Use markers, stamps, stickers, or even patterned paper to decorate your corner bookmark. You could add a design related to your favorite book, a cute quote, or a fun graphic that expresses your personality. For instance, you can draw a simple heart, star, or book illustration to give your bookmark a charming touch.
5. Secure the Folds
Once you’re happy with your design, use glue or double-sided tape to secure the folded edges of the corners in place. You don’t need too much gluejust enough to ensure the folds stay in place. Make sure to let the glue dry completely before using the bookmark.
6. Final Touches
If you want to add extra flair, consider using a paperclip or small embellishments like ribbons, buttons, or sequins. These can be glued to the edges of your corner bookmark for an extra personalized look.
Customizing Your DIY Corner Bookmarks
The beauty of DIY corner bookmarks is that they are highly customizable. Here are a few ways to make your bookmarks even more unique:
- Use patterned or textured paper: Try using vintage maps, fabric, or textured paper for a distinctive touch.
- Personalized quotes: Add a favorite quote or motivational phrase that speaks to you or the person you’re gifting the bookmark to.
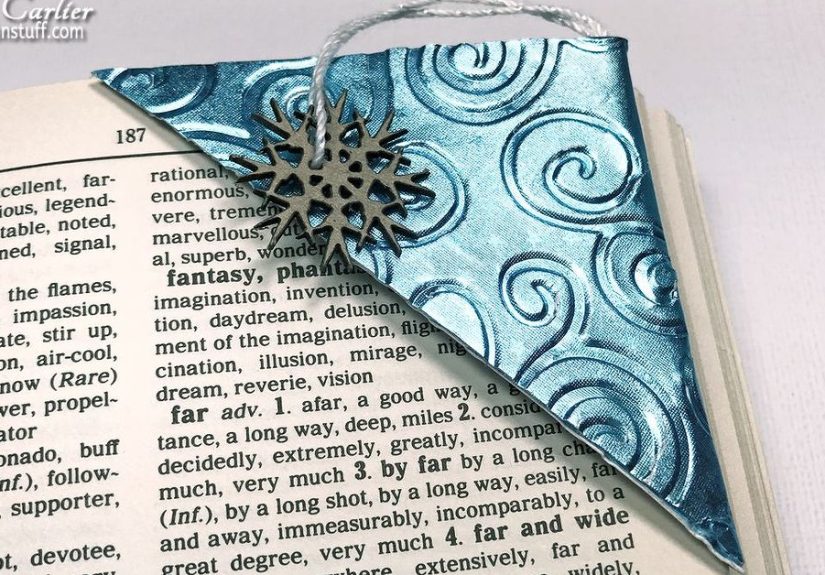
- Themed designs: If you’re making bookmarks for a specific occasion, such as a book club, birthday, or holiday, tailor the design to match the theme. For example, create bookmarks with autumn leaves for fall or snowflakes for winter.
- Add tassels: For a more sophisticated look, you can add a tassel to the corner of your bookmark using string or embroidery thread.
Tips for Making Corner Bookmarks
Here are a few tips to help you as you craft your DIY corner bookmarks:
- Experiment with paper thickness: Thicker paper or cardstock will make your bookmark more durable and sturdy, but don’t be afraid to try lighter materials for a different feel.
- Use a paper cutter: If you want perfectly straight lines and crisp edges, a paper cutter can make your job easier.
- Incorporate texture: Add texture to your bookmarks by using embossed or 3D stickers for added depth and interest.
- Consider your book: For larger books, opt for bigger corner bookmarks to ensure they stay in place.
Why DIY Corner Bookmarks Make Great Gifts
Looking for a personal, thoughtful gift idea? DIY corner bookmarks are perfect for any occasion. You can create bookmarks to match someone’s personality, favorite color, or hobby. For example, if you’re gifting a bookmark to a book lover, you could add a favorite literary quote or illustration of a beloved character.
Corner bookmarks are also great for teachers, students, and coworkers. You can make them for special occasions such as birthdays, end-of-year gifts, or as part of a welcome package for new employees or students. The best part is that these bookmarks are budget-friendly, so you can create them in bulk without breaking the bank.
Conclusion
DIY corner bookmarks are a simple, fun, and creative craft that anyone can enjoy. Whether you’re marking your place in a book or giving them as gifts, these bookmarks are versatile, practical, and a great way to add a personal touch to your reading experience. So gather your materials, get creative, and start making your own corner bookmarks today!
Personal Experience with DIY Corner Bookmarks
As someone who has always loved both reading and crafting, making DIY corner bookmarks has become one of my favorite ways to combine these passions. I first stumbled upon the idea while looking for unique gift ideas for friends who were avid readers. I wanted something thoughtful but simple that they could use every day. The DIY corner bookmark turned out to be the perfect choice, and I ended up making a few extras for myself!
The process of designing the bookmarks was surprisingly therapeutic. I spent an afternoon experimenting with different patterns, quotes, and colors. My favorite design involved using patterned paper and adding gold leaf accents to give the bookmarks a little extra shine. I also added personal quotes from books I loved, which made them even more meaningful.
What surprised me the most was how practical these bookmarks turned out to be. The corner design really does stay in place, and I’ve used them daily without worrying about them slipping out. I’ve since gifted several of them to friends and family, and they were all thrilled with the personalized touches.
Overall, making DIY corner bookmarks has been a rewarding experience. It’s a simple craft that anyone can do, and it’s a great way to inject a little creativity into your reading routine. I highly recommend giving it a try, especially if you enjoy making handmade gifts or adding a personal flair to your book collection!