Table of Contents >> Show >> Hide
- Why Home Staging Works
- The Pro Staging Mindset Before You Start
- Staging a House for Sale: The Pro Checklist
- 1) Declutter like you’re moving tomorrow
- 2) Depersonalize without making it feel empty
- 3) Deep clean like a camera crew is coming
- 4) Fix small issues before they become big buyer questions
- 5) Maximize light and make every room feel brighter
- 6) Stage the rooms that move the needle most
- 7) Define awkward or empty spaces
- 8) Boost curb appeal before buyers touch the doorbell
- 9) Prep for photos, videos, and showings separately
- DIY, Partial, Full-Service, or Virtual Staging?
- How Much Does Home Staging Cost?
- Common Staging Mistakes Pros Avoid
- A Simple 10-Day Staging Plan
- Real-World Experiences and Lessons From Staging Homes for Sale
- Final Thoughts
Let’s be honest: selling a house is a little like hosting the most important open house party of your lifeexcept the guests are judging your grout, your closet space, and whether your entryway smells like “fresh linen” or “wet dog.” The good news? Great staging is not about making your house look expensive. It’s about making it feel easy to say “yes” to.
Professional home staging helps buyers picture themselves living in the space, not just touring your current setup. And that one shiftfrom your life to their futureis what can turn a “nice house” into “we should make an offer tonight.”
This guide breaks down practical, pro-level staging advice you can actually use, whether you’re hiring a stager, doing it yourself, or somewhere in between. We’ll cover what matters most, what to skip, how to budget smartly, and how to avoid common staging mistakes that accidentally scare buyers away.
Why Home Staging Works
It helps buyers emotionally move in
Buyers rarely purchase a home based on square footage alone. They buy based on how the home makes them feel. A staged home tells a clear story: this is where coffee happens in the morning, this is where friends gather, this is where you finally become the kind of person who folds laundry on time.
Good staging removes distractions and highlights what buyers care about most: space, light, flow, and function. When a room has a clear purpose and a calm visual style, buyers don’t have to work as hard to imagine living there. And in real estate, less mental effort usually means more buyer confidence.
Your first showing is online
Before buyers step through your front door, they usually scroll past it on a phone. That means staging isn’t just for in-person showingsit’s for listing photos, 3D tours, and video walkthroughs too. If the photos are dark, cluttered, or visually noisy, buyers may never book a showing at all.
Think of staging as marketing, not decorating. You’re not redesigning your life; you’re packaging a product (your home) so it presents beautifully in person and on screen.
The Pro Staging Mindset Before You Start
Here’s the golden rule professional stagers live by: style to sell, not style to live. That means you’re optimizing for broad appeal, not personal taste.
- Neutral wins: Buyers need a visual blank canvas.
- Less is more: Space sells, and clutter hides space.
- Function matters: Every room should answer the question, “What is this space for?”
- Consistency counts: A clean, cohesive home feels more “move-in ready.”
If you remember nothing else, remember this: staging is less about adding things and more about editing the right things out.
Staging a House for Sale: The Pro Checklist
1) Declutter like you’re moving tomorrow
Decluttering is the highest-return staging move because it makes almost every room look larger, cleaner, and more expensive. Start by removing anything that makes surfaces feel busy: extra appliances, stacks of mail, countertop decor, bins, pet toys, and the legendary “junk chair” in the bedroom.
Focus on visible volume:
- Kitchen counters (keep only 1–2 simple accents)
- Bathroom vanities (hide personal products)
- Entryways (clear shoes, bags, coats)
- Coffee tables and side tables (minimal styling only)
- Closets (buyers will peekmake them look roomy)
Pro tip: if you’re not sure whether to keep something out, put it in a box. If you don’t need it for daily life during the listing period, store it off-site or in a neatly organized garage section.
2) Depersonalize without making it feel empty
Buyers should be imagining their photos on the wall, not trying to decode your family reunion collage from 2014. Remove personal photos, kids’ artwork (save it!), bold collections, and anything overly specific in style or message.
That includes décor that might feel polarizing:
- Very bold prints or colors
- Highly themed rooms
- Political or religious statement pieces
- Controversial or niche artwork
Depersonalizing does not mean making the home cold. You still want warmthjust use universal details like neutral pillows, fresh towels, soft bedding, and simple greenery.
3) Deep clean like a camera crew is coming
Because one probably is. Listing photography (and now video and 3D tours) catches everything: dusty vents, streaky windows, smudged stainless steel, and mystery spots on the baseboards you stopped noticing years ago.
Your clean list should include:
- Windows and mirrors
- Baseboards and trim
- Light fixtures and bulbs
- Cabinet fronts and hardware
- Grout and shower glass
- Floors, rugs, and carpets
- Pet areas and odor sources
Odor matters more than most sellers realize. Skip heavy air freshenersthey can make buyers suspicious. Aim for “clean and neutral,” not “vanilla thunderstorm explosion.”
4) Fix small issues before they become big buyer questions
Staging and maintenance work together. A beautifully styled room with a dripping faucet, cracked outlet cover, or squeaky door still reads as “work needed.” Buyers notice more than you think, especially when they’re deciding how aggressively to negotiate.
Knock out the easy fixes:
- Touch-up paint and scuffs
- Loose handles and knobs
- Leaky faucets
- Burned-out light bulbs
- Caulk gaps in kitchens and baths
- Sticky doors and noisy hinges
These repairs are usually inexpensive, but they help the home feel well cared forwhich can raise buyer confidence fast.
5) Maximize light and make every room feel brighter
Buyers love bright homes because brightness reads as clean, open, and cheerful. Even a small room can feel better when it’s lit well.
Use these pro lighting moves:
- Open blinds and curtains fully
- Replace dim or mismatched bulbs
- Use consistent warm-to-soft-white bulbs throughout
- Add lamps in dark corners
- Use mirrors strategically to bounce natural light
Lighting is one of the easiest ways to upgrade the mood of a home without spending a fortune.
6) Stage the rooms that move the needle most
If your budget is limited, stage the spaces buyers care about most. You do not need to turn every closet and laundry zone into a magazine spread.
Living Room
This is often the emotional anchor of the home. Arrange furniture in a way that creates conversation and shows off the room’s size. Pull furniture away from walls when possible, and avoid blocking natural paths.
Kitchen
Clear counters. Seriously. A toaster, coffee maker, and fruit bowl may be plenty. Wipe down appliances, remove magnets and notes from the fridge, and make the kitchen feel easy to maintain.
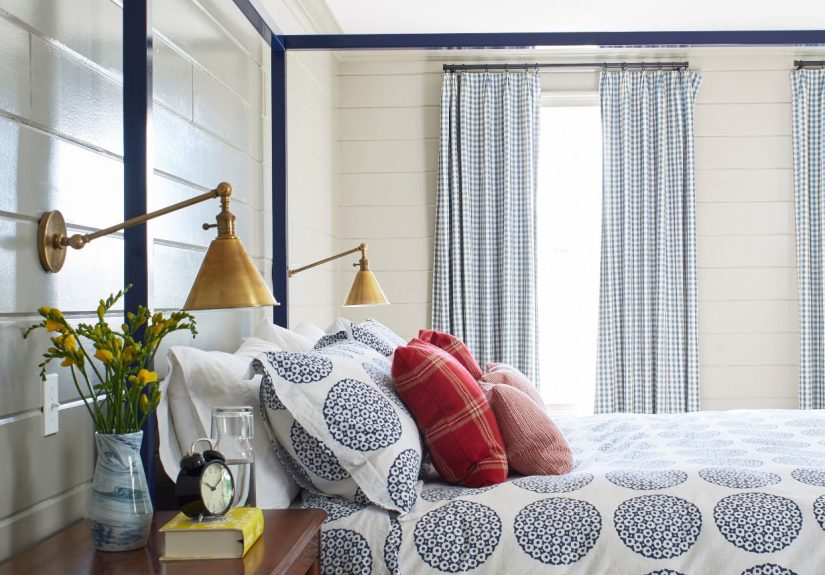
Primary Bedroom
Keep it calm, neutral, and restful. Crisp bedding, fewer personal items, and symmetrical styling (lamps or nightstands) can make the room feel balanced and polished.
Bathrooms
Think spa, not morning rush hour. Hide personal products, use fresh white or neutral towels, and keep surfaces nearly empty. A clean bar of soap and tidy shower area go a long way.
Dining Area
Even a small dining space should feel intentional. A simple table setting or centerpiece can help buyers understand how the space functions.
7) Define awkward or empty spaces
That extra room off the hallway? The weird nook by the stairs? The bonus area over the garage? Buyers hesitate when they can’t tell what a space is for.
Give every ambiguous area a job:
- Small desk + chair = home office
- Chair + lamp + side table = reading nook
- Bench + hooks = drop zone
- Yoga mat + plant + mirror = wellness corner
You’re not just filling spaceyou’re selling possibilities.
8) Boost curb appeal before buyers touch the doorbell
Curb appeal is your handshake. Buyers start forming opinions the second they pull up, and online shoppers judge the exterior photo even faster.
Pro curb appeal priorities:
- Mow and edge the lawn
- Trim overgrown shrubs
- Clear debris from walkways and porch
- Power wash driveway or front path if needed
- Refresh the doormat and house numbers
- Add one or two healthy potted plants
- Make sure the front door area is spotless
The goal is simple: make buyers want to come inside before they’ve seen a single bedroom.
9) Prep for photos, videos, and showings separately
Photo day and showing day are not exactly the same mission.
For photos/videos:
- Hide cords and chargers
- Remove trash cans and pet bowls
- Close toilet lids
- Turn on lights
- Open blinds
- Fluff pillows and straighten bedding
For showings:
- Keep a “10-minute reset” basket for last-minute cleanup
- Take pets out if possible
- Leave during showings so buyers can speak freely
- Keep the home quiet, clean, and comfortably lit
Yes, it’s a little annoying. Yes, it’s worth it.
DIY, Partial, Full-Service, or Virtual Staging?
DIY Staging
Best for sellers with good design instincts, time, and a tight budget. DIY can work very well if your home already has decent furniture, a neutral palette, and no major layout issues.
Partial Staging
A smart middle ground. A pro helps with key rooms or gives a consultation, and you do the rest. This is often the sweet spot for owner-occupied homes.
Full-Service Staging
Best for vacant homes, luxury homes, or sellers who want the least stress. A stager handles furniture, accessories, layout, and visual consistency. It costs more, but it can dramatically improve presentation.
Virtual Staging
Useful for vacant listings and online marketing, especially when physical staging isn’t practical. It’s cost-effective and great for listing photos, but buyers still need the in-person experience to match the promise.
In short: use the lightest staging option that still makes your home look unmistakably market-ready.
How Much Does Home Staging Cost?
Staging costs vary by home size, location, whether the home is occupied or vacant, and how much furniture or décor needs to be rented. In general, sellers can expect costs to range from a few hundred dollars for a consultation and DIY execution to several thousand dollars for professional staging with rentals.
What drives the price up most often?
- Vacant homes (furniture rentals add up fast)
- Larger homes and more rooms staged
- Longer staging timelines (monthly rental fees)
- Repairs and cosmetic upgrades before styling
- Higher-end/luxury staging packages
Budget-friendly pro move: pay for a consultation first. Many stagers will walk the home, tell you exactly what to remove, what to rearrange, and what to ignore. That single session can save you from overspending on the wrong upgrades.
Common Staging Mistakes Pros Avoid
Over-staging
Too many accessories, too many pillows, too many little decorative signs (“Live, Laugh, Buy This House”) can make rooms feel cramped or cheesy. Clean and intentional beats “decor store exploded” every time.
Ignoring the neighborhood
A staging plan should match the buyer profile for your area. A downtown condo and a suburban family home should not be styled the same way. Pros stage for the likely buyer, not a generic internet mood board.
Keeping bold personal taste front and center
Buyers don’t need to share your decorating style. Neutral doesn’t mean boringit means easier to imagine. Save the dramatic wallpaper and neon accent wall energy for your next house.
Forgetting scent and sound
Strong food odors, pet smells, heavy fragrances, loud TVs, or barking dogs can disrupt a showing fast. A staged home should feel calm and fresh, not like a sensory obstacle course.
A Simple 10-Day Staging Plan
Days 1–2: Edit and Pack
Declutter, depersonalize, and start packing non-essentials. Use labeled bins. This helps staging and gives you a head start on moving.
Days 3–4: Clean and Repair
Deep clean the house and fix small maintenance issues. If needed, book carpet cleaning or a cleaning crew.
Days 5–6: Rearrange and Style
Rework furniture layout, define awkward spaces, simplify décor, and style high-impact rooms.
Days 7–8: Exterior and Entry
Handle landscaping touch-ups, porch cleanup, and curb appeal details.
Days 9–10: Photo-Ready Prep
Final polish for listing photos and videos: lights on, blinds open, surfaces clear, beds crisp, and zero clutter in sight.
Once the listing is live, maintain a daily reset routine so you’re always ready for a showing on short notice.
Real-World Experiences and Lessons From Staging Homes for Sale
One of the most useful things I’ve seen in real-world staging is how often sellers focus on the wrong upgrades. They’ll panic about replacing a perfectly fine countertop, but ignore the packed bookshelves, crowded furniture, and dark lighting that make the whole house feel smaller. In practice, the biggest transformation usually comes from editing, cleaning, and layoutnot a full remodel.
A common example: the “comfortable but crowded” living room. Sellers often have a large sofa, two recliners, a side cabinet, an ottoman, a coffee table, and maybe a bonus chair they forgot they even owned. It works for daily life, but in photos it looks like a furniture traffic jam. After removing just two pieces, angling the rug correctly, and adding better lighting, the room suddenly reads as spacious. Same room. Same square footage. Completely different buyer reaction.
Kitchens are another place where tiny changes matter. I’ve seen sellers spend hours wiping down appliances and then leave ten items on the counters because “we use them every day.” Buyers don’t care that the blender is useful. They care that the kitchen feels big. A staged kitchen with clean counters, a simple bowl of fruit, and no visual clutter feels more premiumeven in an older home.
Bedrooms are where emotion really kicks in. One seller had a primary bedroom with excellent natural light and plenty of space, but the room felt chaotic because the bedding was mismatched and every surface held something personal. We swapped in neutral bedding, removed half the décor, and cleared the dresser. The seller joked that the room looked like a hotel. Exactly. Buyers love hotel energy: clean, calm, and easy to imagine.
Odor is the silent deal-breaker nobody wants to talk about. A house can look beautiful and still lose buyers if the smell is off. Pets, cooking, old carpet, and strong air fresheners can all create problems. The best results usually come from actual cleaning and ventilation, not trying to “cover” smells. Buyers notice when a scent feels forced, and it can create doubt immediately.
I’ve also seen sellers underestimate how much their home needs to be staged for the camera, not just in person. Video tours and listing photos reveal things your eye ignores: cord clutter, uneven lampshades, dusty blinds, and random items sitting in corners “just for now.” A quick walk-through while recording on your phone is a surprisingly effective trickyou’ll spot issues fast.
One of the smartest budget-saving strategies I’ve seen is the consultation-only approach. A stager spends an hour or two creating a room-by-room action plan, and the seller does the work. This works especially well when the home already has decent furniture but needs editing and better placement. It keeps costs lower while still bringing in expert judgment.
And finally, the biggest lesson: staging works best when sellers stop thinking of it as criticism. It’s not about your taste being “wrong.” It’s about marketing. The house served your life well. Now it has a new jobto attract the next owner. When sellers make that mental shift, staging becomes easier, faster, and much more effective.
Final Thoughts
Staging a house for sale is one of the few selling tasks that improves almost everything at once: photos, showings, buyer emotion, and perceived value. You don’t need a luxury budget or designer furniture to do it well. You need a clear plan, a neutral eye, and a willingness to edit ruthlessly.
If you’re overwhelmed, start with the three D’s: declutter, depersonalize, deep clean. Then focus on the rooms buyers care about most, brighten everything, and make the home easy to understand. That’s the pro approachand it works in almost every market.