Table of Contents >> Show >> Hide
- What exactly are surgical sutures?
- Main types of surgical sutures
- Common suturing techniques (the “how” behind the stitches)
- How wounds heal with sutures in place
- How to care for your stitches at home
- When will my sutures be removed?
- Special situations: staples, adhesive strips, and skin glue
- Real-world experiences and practical tips about surgical sutures
- 1. Plan your “suture lifestyle” in advance
- 2. Suture care is easier when you build a small routine
- 3. Itchiness and weird sensations are commonbut still worth mentioning
- 4. Kids, pets, and seatbelts: the unglamorous hazards
- 5. Emotional healing matters too
- 6. Follow-up visits are part of the treatment, not an optional extra
- 7. The golden rule: when in doubt, ask
- Bottom line
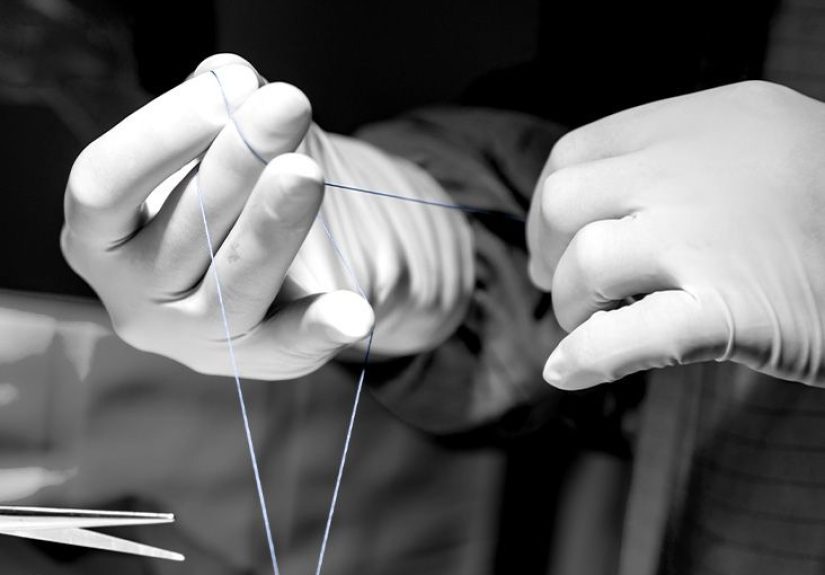
If you’ve recently left the operating room with a neat little row of knots holding your skin together, congratulations: you are now the proud owner of surgical sutures (also known as stitches). They may not be as exciting as a new phone, but they’re doing something far more importantkeeping your tissues aligned so your body can heal properly. Understanding what those threads are made of, how they’re placed, and how to care for them can make recovery smoother, safer, and a lot less stressful.
This guide walks you through the main types of surgical sutures, the basic suturing techniques surgeons use, and practical, down-to-earth advice on how to care for stitches at home. Think of it as “Stitches 101” with a friendly tone, minus the lecture hall and formal exam.
What exactly are surgical sutures?
Surgical sutures are sterile threads (or sometimes strips or staples) used to bring wound edges together so your body can heal with minimal gaps and less scarring. They can be used on your skin, deeper tissues, or internal organs, depending on the procedure. Their main jobs are to:
- Hold tissues in the right position while they heal
- Reduce bleeding and fluid leakage
- Lower the risk of wound reopening
- Help create a cleaner, smoother scar
Surgeons choose suture type and technique based on where the incision is, how much movement or tension the area experiences, your overall health, and how quickly the tissue is expected to heal.
Main types of surgical sutures
Absorbable vs. non-absorbable sutures
One of the most important distinctions is whether sutures are absorbable or non-absorbable.
Absorbable sutures
Absorbable sutures are designed to break down inside the body over time. Your tissues gradually digest the material, so there’s no need for a removal appointment. These are commonly used for:
- Internal layers of tissue (such as muscle or fascia)
- Areas that are hard or uncomfortable to access later for suture removal
- Deep lacerations that are closed in multiple layers
Modern absorbable sutures are usually made from synthetic materials that maintain strength for a predictable period before dissolving. The exact timing depends on the specific material, but it typically ranges from a few weeks to a couple of months.
Non-absorbable sutures
Non-absorbable sutures are made from materials that do not dissolve in the body. They are often used to close the skin or provide long-term support to tissues that need extended reinforcement. These sutures need to be removed once healing has progressed enough.
Common uses include:
- Superficial skin closures after surgery or injury
- Areas under high tension (for example, over joints)
- Certain repairs involving tendons or strong connective tissue
In many cases, your surgeon will use absorbable sutures inside and non-absorbable sutures or staples on the skin surface, then remove the outer sutures at a follow-up visit.
Monofilament vs. braided sutures
Sutures can also be classified by how the thread itself is constructed:
- Monofilament sutures are a single smooth strand. They glide through tissue more easily and are less likely to harbor bacteria, but they can be a bit trickier to knot securely.
- Braided sutures consist of multiple small fibers woven together. They have excellent knot security and are easier to handle, but their braided structure can hold onto bacteria if contaminated and may cause more tissue friction.
Again, the surgeon balances ease of handling, infection risk, and the needs of the specific tissue when choosing between these options.
Common suturing techniques (the “how” behind the stitches)
Even if you never plan to pick up a needle and thread in an operating room, knowing the basics of suturing techniques can help you understand why your incision looks the way it doesand what your surgeon was trying to achieve.
Simple interrupted sutures
The simple interrupted suture is the classic, textbook stitch. Each stitch is tied and cut off individually. This takes more time, but it has big advantages:
- If one stitch breaks, the others still hold the wound together.
- Tension can be adjusted stitch by stitch for a more even closure.
- It works well on irregular or curved wounds.
It’s often used in trauma repairs (like cuts in the emergency department) and in many routine skin closures.
Continuous (running) sutures
A continuous suture looks more like a tiny spiral zipper running along your wound. One thread passes back and forth along the entire incision and is tied only at the beginning and end.
Benefits include:
- Faster to place than multiple individual stitches
- Even distribution of tension along the wound
- A smooth, efficient closure for long, straight incisions
The trade-off? If the suture breaks in the middle, a large portion of the wound can loosen. Continuous sutures are often used for internal layers or low-tension skin closures.
Vertical and horizontal mattress sutures
Mattress sutures are like the heavy-duty setting on your sewing machine. They are designed to evert wound edges (turn them slightly outward) and increase strength in areas under tension.
- Vertical mattress sutures help pull deeper tissue layers together and are great when you need both depth and edge control.
- Horizontal mattress sutures spread tension across a slightly wider area and are useful near fragile or delicate skin.
These are often used in areas where the skin is thin or under a lot of stretchthink knees, shoulders, or the back.
Subcuticular (under-the-skin) sutures
If your incision line looks almost invisible, with no visible “railroad tracks,” you may have a subcuticular closure. In this technique, a continuous suture runs just under the top layer of skin, and the knots may be buried at the ends.
This approach is common in cosmetic procedures, C-sections, and planned surgical incisions where minimizing visible scarring is a priority. Skin glue or adhesive strips may be added on top to protect the area.
How wounds heal with sutures in place
Once your incision is closed, your body starts a very organized process of healing:
- Inflammation (first few days): The area may look a bit red and slightly swollen. This is your immune system cleaning things up and starting repair.
- Proliferation (days to weeks): New tissue and tiny blood vessels form, filling in the wound from the inside.
- Remodeling (weeks to months): The scar gradually strengthens and flattens. It may itch or feel tight during this stage.
Wounds gain strength relatively quickly in the first six weeks and may reach around 80% of their original strength by about three months, though individual healing varies.
How to care for your stitches at home
Good surgical wound care is just as important as what happened in the operating room. Your surgeon’s instructions always come first, but these general principles are widely recommended by major health organizations.
Keep the area clean (but don’t overdo it)
- For the first 24–48 hours, many clinicians recommend keeping the incision dry to reduce infection risk, unless your surgeon tells you otherwise.
- After that, brief showers are usually preferred over baths or soaking. Let clean water run gently over the area; don’t scrub directly on the incision. Mild, unscented soap is often suggested.
- Pat the area dry with a clean towel or gauze instead of rubbing it.
Protect the dressing and incision
Depending on the surgery, your incision may be covered with a dressing for several days. In general:
- Keep the dressing clean and dry.
- Change it only as instructed by your surgical team.
- If it becomes soaked, dirty, or starts to peel off, call your provider or follow the replacement instructions you were given.
Watch for signs of infection
This part is crucial. Contact your healthcare provider right away if you notice:
- Increasing redness spreading outward from the incision
- Worsening pain instead of gradual improvement
- Swelling, warmth, or hardness around the wound
- Yellow, green, or foul-smelling drainage
- Fever or chills
- The wound edges opening up or stitches pulling free
Major U.S. medical centers emphasize that these can be early signs of a surgical site infection, and early evaluation can prevent more serious complications.
Activity and movement
Your surgeon will usually give specific limits based on the procedure. In general:
- Avoid heavy lifting, straining, or intense exercise until cleared.
- Try not to stretch or put direct tension on the incision line.
- For leg or abdominal incisions, supporting the area with a small pillow when you cough or move can make things more comfortable.
Remember, just because the skin looks “closed” doesn’t mean the deeper tissues are fully healed. Respect the timeline your provider gives you.
Itching, scabs, and the urge to pick
At some point, your stitches may start itching like crazy. Annoying? Yes. A sign of healing? Often, yes. Still, please resist the urge to:
- Scratch directly on the incision
- Pick at scabs
- Trim or pull at any suture ends sticking out
Instead, you can ask your provider about:
- Cool compresses (used carefully, and not directly on open incisions)
- Over-the-counter pain relief or anti-itch measures that are safe for you
When will my sutures be removed?
If you have non-absorbable stitches on the skin, they’ll need to be removed at a clinic visit. The timing depends on where the incision is and how you’re healing. Common ranges often look something like:
- Face: around 5–7 days
- Scalp: about 7–10 days
- Chest, abdomen, arms: roughly 7–14 days
- Joints or high-tension areas (knees, back): up to 10–14 days or more
These are general ranges only; your surgeon may adjust based on your health, the type of surgery, and your healing progress.
Whatever you do, don’t cut or remove your own sutures at home unless a healthcare professional has explicitly taught you how and told you it’s safe in your specific situation. Most people are better off letting the pros handle it.
Special situations: staples, adhesive strips, and skin glue
Not all “stitches” are technically sutures. Some incisions are closed with:
- Staples – metal clips commonly used for long, straight incisions
- Adhesive strips – thin, sticky strips used for small or low-tension wounds
- Skin glue – medical adhesive that holds wound edges together and peels off on its own over about two weeks
The basic care principles are similar: keep the area clean and mostly dry at first, avoid picking at the strips or glue, and watch closely for infection signs. Your removal timeline may differ, so follow the specific instructions you’re given.
Real-world experiences and practical tips about surgical sutures
Medical textbooks describe tidy wound-healing phases. Real life, however, is more like a messy group chat: lots of questions, small worries, and “Is this normal?” moments. Here are some lived-experience–style insights that often help patients feel more prepared.
1. Plan your “suture lifestyle” in advance
Before surgery, it’s worth asking a few practical questions:
- Where exactly will the incision be?
- Will the stitches be visible, or mostly under the skin?
- How long are they expected to stay in?
Knowing this helps you plan clothing (looser waistbands, button-front shirts, soft bras, or stretchy pants), sleeping positions, and even how you’ll shower. People often say they wish they’d packed one or two “wound-friendly” outfits for the ride home and the first week.
2. Suture care is easier when you build a small routine
Many patients find it helpful to build a simple ritual around incision care:
- Wash your hands.
- Gently check the incision in a mirror or with a phone photo (if you can’t see it directly).
- Look quickly for increased redness, new drainage, or gaps between the edges.
- Note any change in pain from the day before.
This kind of daily “mini-assessment” takes less than five minutes and helps you catch early problems. Some people even jot notes on their phone, which can be surprisingly helpful when you’re updating your surgeon: “The redness started on day 4 and looked worse on day 5,” and so on.
3. Itchiness and weird sensations are commonbut still worth mentioning
It’s extremely common to notice tugging, tightness, or occasional “zings” along the incision line, especially when you move. As nerves wake up and tissues remodel, those sensations can feel strange, but not necessarily dangerous.
On the flip side, new or suddenly intense painespecially if it comes with redness, warmth, or swellingis a red flag. Patients sometimes downplay this because they “don’t want to bother the doctor.” In reality, surgeons would much rather see you early for a small concern than late for a serious infection.
4. Kids, pets, and seatbelts: the unglamorous hazards
People don’t always realize how many everyday things bump, poke, or pull on sutures:
- Children who like to cuddle or climb
- Pets who jump onto laps or chests
- Car seatbelts rubbing across abdominal or chest incisions
- Backpacks, crossbody bags, or sports bras pressing on shoulder stitches
A few practical strategies:
- Use a small folded towel or cushion between the seatbelt and your incision for car rides (without changing how the belt fits your body for safety).
- For chest or shoulder incisions, consider a soft, front-closing support garment your surgeon approves.
- If you live with energetic kids or pets, set some clear rules and recruit help for the first couple of weeks so your wound doesn’t become a target during playtime.
5. Emotional healing matters too
Surgical scars tell a storysometimes of recovery, sometimes of a difficult diagnosis, sometimes of a life-saving emergency. It’s totally normal to have mixed feelings about how your incision looks while sutures are still in place.
Some people feel squeamish and avoid looking at the wound; others stare at it constantly, analyzing every millimeter. Either reaction is understandable. What often helps is:
- Having a trusted friend or family member check the incision with you, at least at first.
- Asking your surgeon realistically what to expect in terms of scar appearance at 1 month, 3 months, and 1 year.
- Remembering that early scars almost always look worse than they will later. Color, thickness, and texture usually improve over time.
6. Follow-up visits are part of the treatment, not an optional extra
Going back to the clinic for suture removal or wound checks can feel inconvenient, especially if you’re busy or feeling mostly fine. But those appointments are where:
- Sutures or staples are removed at the safest time for your specific wound
- Any small problems (like minor separation or irritation) can be addressed early
- You can get personalized advice about scar care, activity level, and next steps
If attending in person is difficult, ask whether virtual check-ins or secure photo uploads are availablebut don’t skip follow-up altogether if your surgeon recommends it.
7. The golden rule: when in doubt, ask
No article, no matter how detailed, can replace your own surgical team. If something about your stitches doesn’t feel rightwhether that’s drainage, pain, color changes, or just a gut feeling that “this looks off”reach out. Most post-op concerns turn out to be minor, but when they’re not, acting quickly makes a huge difference.
And if everything is healing nicely? Enjoy the slow but steady process. Your sutures are doing their job, your body is rebuilding itself, and before long, those little threads will be gone and the incision will simply be one part of your story.
Bottom line
Surgical sutures may look simple, but there’s a lot of science behind the materials, techniques, and timing that surgeons use. Knowing the difference between absorbable and non-absorbable sutures, recognizing common stitch patterns, and following solid wound-care basics can help you protect your incision, reduce complications, and feel more confident during recovery.
Use this information as a friendly roadmapbut let your surgeon’s instructions be your GPS. If your symptoms, incision, or healing course ever don’t match what you expected, that’s your cue to call and ask for directions.