Table of Contents >> Show >> Hide
- What Are Whitewashed Reclaimed Wooden Boards?
- Why Designers Love Reclaimed Wood
- Reclaimed vs. New Wood: Pros and Cons
- Where to Use Whitewashed Reclaimed Wooden Boards
- How to Choose the Right Reclaimed Boards
- How to Whitewash Reclaimed Wood Boards (Step by Step)
- Design Ideas with Whitewashed Reclaimed Boards
- Caring for Whitewashed Reclaimed Boards
- Real-Life Experiences with Whitewashed Reclaimed Wooden Boards
- Lesson 1: Samples Save Sanity
- Lesson 2: Imperfection Looks Better in the End
- Lesson 3: Layout Matters More Than You Think
- Lesson 4: Reclaimed Wood Smell Is Real (But Temporary)
- Lesson 5: It Changes How a Room Feels Emotionally
- Lesson 6: People Will Ask Where You Got It
- Lesson 7: You Might Start Planning Your Next Project
- Wrapping Up
If you’ve ever scrolled past a bright, cozy farmhouse living room and thought, “I want that wall,” there’s a good chance you were looking at whitewashed reclaimed wooden boards. They’re rustic but fresh, old yet surprisingly modern, and they make your home look like you hired an interior designer who drinks oat lattes and says things like “curated patina.”
Whether you’re planning a DIY accent wall, a ceiling upgrade, or custom shelves, whitewashed reclaimed wood lets you blend history, sustainability, and style in one project. Let’s walk through what it is, why designers love it, how to use it, and how to actually get that perfect whitewashed finish without turning your boards into chalky stripes.
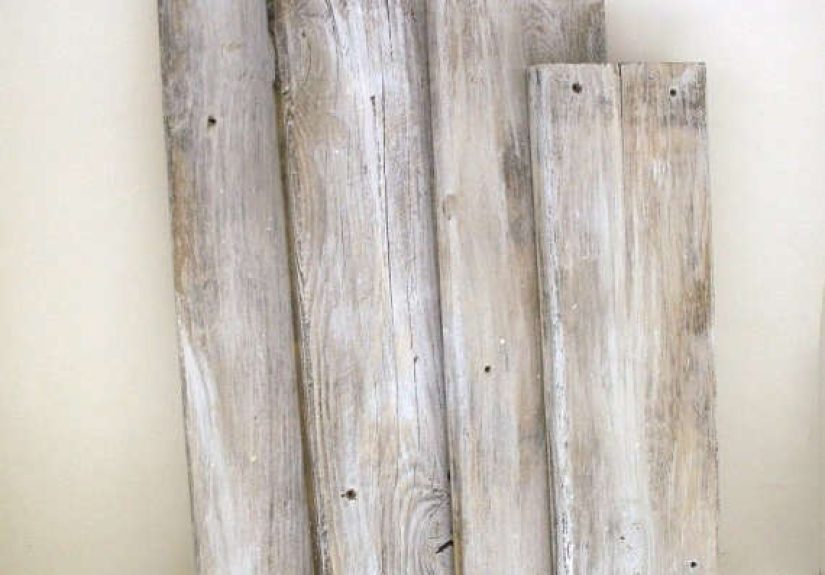
What Are Whitewashed Reclaimed Wooden Boards?
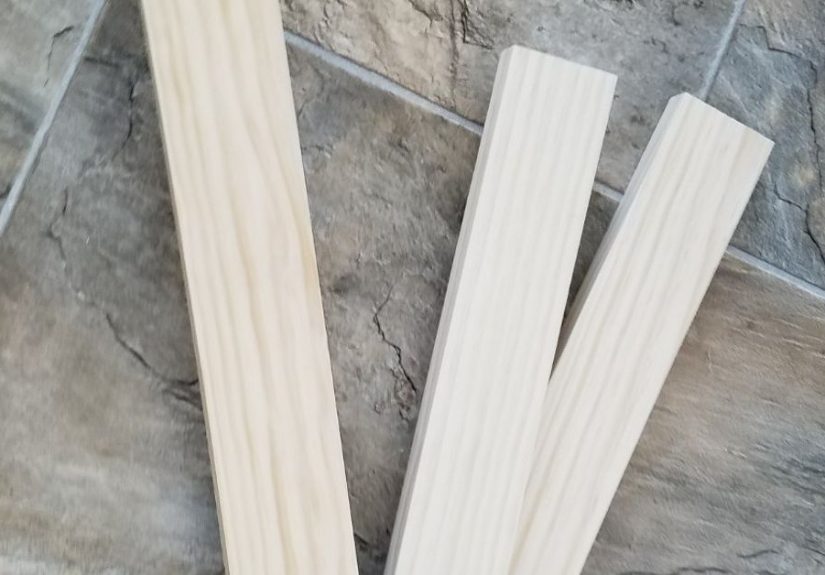
Reclaimed wooden boards are planks salvaged from older buildings and structuresthink barns, warehouses, factories, schools, or even old homes. Instead of sending that lumber to a landfill, it’s cleaned, milled, and given a second life. When you add a whitewashed finish, you get boards that look sun-faded and beachy but still show off their character and grain.
Whitewashing typically means applying a thinned white paint or stain that softens the wood tone instead of covering it completely. You still see knots, nail holes, saw marks, and color variationjust through a veil of white. The result: a light, airy backdrop that doesn’t feel flat or fake.
Why Designers Love Reclaimed Wood
Instant Character and Story
New lumber is like a blank notebook. Reclaimed wood is a vintage diary. Each board carries marks, dents, and weathered tones that you simply can’t replicate with fresh lumber and a can of stain. Designers love using reclaimed planks on walls, ceilings, and furniture because every piece is slightly different, which gives rooms that layered, “collected over time” feeling instead of a showroom vibe.
In a whitewashed finish, this character doesn’t disappearit just gets softened. The heavy browns and oranges of aged wood can feel dark, especially in small rooms. Whitewashing lets the texture and history stay front and center while brightening everything up.
Sustainable and Eco-Friendly
Reclaimed wood is a sustainability win. Instead of cutting down new trees, you’re reusing boards that already exist. That means less demand for virgin lumber and less building material heading for landfills. For eco-conscious homeowners, whitewashed reclaimed boards are a smart way to align design choices with environmental values.
Many reclaimed wood suppliers now kiln-dry, clean, and sort boards, which helps remove pests and stabilize the material. You get the environmental benefits plus a product ready for modern homes.
Durability and Stability
Reclaimed lumber has already survived decades of use and weather. That’s a good sign. Because it has had time to season and dry, it’s often more stable than brand-new wood that’s still adjusting to temperature and humidity changes. When properly sourced and prepped, reclaimed boards can handle daily life just as well as new onesand sometimes better.
Reclaimed vs. New Wood: Pros and Cons
Advantages of Reclaimed Wood
- Unique look: No two boards are the same, which makes walls and ceilings more interesting and less “cookie cutter.”
- Environmental benefits: Reusing lumber reduces waste and demand for new logging, which can lower your project’s footprint.
- Authentic texture: The nail holes, knots, and color variations are real, not printed on like faux wood panels.
Disadvantages to Watch For
- Higher cost: Prepped, quality reclaimed boards are often more expensive than new lumber because of the extra laborremoving nails, cleaning, milling, and grading.
- Limited sizes and quantities: You may not get endless lengths in the exact width you want. Planning ahead is key.
- Potential hidden issues: Poorly processed boards can hide nails, old finishes, or pests. That’s why buying from a reputable supplier matters.
For many homeowners, the character and sustainability benefits outweigh the downsides, especially for feature walls, smaller rooms, or key design moments like fireplace surrounds and headboards.
Where to Use Whitewashed Reclaimed Wooden Boards
Accent Walls That Steal the Show
The most popular use for whitewashed reclaimed boards is a single accent wall. It works especially well behind:
- The living room sofa
- The bed in a primary or guest bedroom
- A dining table or breakfast nook
- A TV or media console (with careful cable planning)
The whitewash keeps the room bright, while the reclaimed texture stops it from feeling too plain. It’s also more forgiving than flat white paint; a bump from a chair or toy isn’t going to ruin its lookit probably just adds to the story.
Ceilings and “Fifth Walls”
Want a ceiling that doesn’t look like office drywall? Whitewashed reclaimed boards are perfect for cottage, coastal, and farmhouse styles. They draw the eye upward and make even simple light fixtures feel special. Because the boards are lighter than raw barnwood in color, they won’t visually crush the room.
Floors, Shelves, and Furniture
Whitewashed reclaimed boards can also work as flooring, though you’ll want a durable topcoat and professional installation. For most DIYers, it’s easier (and more budget-friendly) to use them for:
- Floating shelves in the kitchen or living room
- Console or coffee table tops
- Built-in nooks or bench fronts
- Headboards and wall-mounted art panels
Small Spaces and Nooks
If you’re nervous about going all-in, start small. A whitewashed reclaimed board backdrop in a mudroom, reading nook, or home office corner can be enough to change the mood of the whole space without a major renovation.
How to Choose the Right Reclaimed Boards
Source Matters
Look for suppliers who clearly state where the wood came from and how it’s processed. Ideally, the boards should be:
- Cleaned and de-nailed
- Kiln-dried to reduce moisture and pests
- Planed or at least sorted by thickness so installation goes smoothly
Cheap, unknown reclaimed boards can be tempting, but they can also hide nails, lead-based paint, or insect damage. In other words: not the kind of “extra character” you want.
Pay Attention to Color and Texture
Even with whitewash, your starting color matters. Very dark boards will still read moodier, while lighter boards will look softer and more coastal. Ask for samples or buy a small batch first to test your whitewash mix on real pieces.
Also think about texture: heavily weathered surfaces will grab more paint, creating a more opaque, chalky look. Smoother boards give a more subtle, modern finish.
Plan for Waste and Layout
With reclaimed wood, assume you’ll need extra. A good rule of thumb is to order 10–15% more than your wall’s square footage to account for cuts, defects, and boards you just don’t love the look of once you see them in place.
How to Whitewash Reclaimed Wood Boards (Step by Step)
Ready to get hands-on? Here’s a simple, homeowner-friendly way to whitewash reclaimed boards while keeping the grain and character visible.
Step 1: Prep the Boards
- Inspect for metal: Check each board for nails, screws, or staples and remove them. Your sander and saw will thank you.
- Clean the surface: Vacuum and wipe with a damp cloth to remove dust and loose dirt. For very grimy boards, a mild soap and water solution (allowed to dry completely) can help.
- Light sanding: You don’t necessarily want to erase all texture, but a quick pass with medium-grit sandpaper can knock down splinters and help the whitewash adhere.
Step 2: Mix Your Whitewash
The classic whitewash formula uses white water-based paint diluted with water. A couple of common ratios:
- 2 parts paint : 1 part water for a thicker, more opaque farmhouse look.
- 1 part paint : 1 part water for a softer, more transparent finish.
Start with a small test board so you can tweak the ratio. If it looks too bright and solid, add more water. If it’s barely visible, add more paint.
Step 3: Brush and Wipe
- Stir your paint-water mix thoroughly.
- Using a chip brush or other inexpensive brush, apply the whitewash in the direction of the grain.
- Work in small sections. Before the paint dries, wipe back with a lint-free rag to let the grain show through.
- For more drama, leave more paint on; for a subtle look, wipe off more.
Don’t aim for perfection. A little streakiness and variation is exactly what keeps reclaimed boards looking authentic rather than mass-produced.
Step 4: Layer and Seal (Optional)
If you want a stronger white effect, let the first coat dry and apply a second light layer. Just remember that every extra pass makes the grain less visible.
For walls and ceilings, many people leave the boards as-is, especially in low-traffic areas. For shelves, table tops, or other high-use surfaces, consider a clear, water-based topcoat to protect the finish while keeping the color soft.
Design Ideas with Whitewashed Reclaimed Boards
Modern Farmhouse
Pair whitewashed reclaimed boards with black window frames, simple metal lighting, and neutral furniture. Add texture with woven baskets, linen pillows, and a chunky rug. The boards keep the room warm and inviting, so the black accents never feel harsh.
Coastal and Beach-Inspired
Whitewashed reclaimed wood practically belongs in a coastal home. Combine it with sandy neutrals, soft blues, and natural fibers like jute or seagrass. A whitewashed reclaimed plank wall behind a simple slipcovered sofa instantly feels like a beach house, even if the nearest ocean is just your phone’s wallpaper.
Scandinavian Minimalist
If you lean minimalist but still want warmth, whitewashed boards can be your secret weapon. Stick to clean lines, pale woods, and a restrained color palettethink black, white, gray, and one accent color. The reclaimed texture prevents the space from feeling sterile.
Industrial Meets Cozy
Industrial spaces loaded with concrete, metal, and clean glass can feel cold. Whitewashed reclaimed boards add just enough warmth while staying on-brand with the “repurposed materials” vibe. Use them behind open shelving in a kitchen or as a feature wall in a loft-style living room.
Caring for Whitewashed Reclaimed Boards
Good news: the whole point of reclaimed wood is that it doesn’t need to look perfect. A little wear just adds to the story.
- Dust regularly: Use a microfiber cloth or soft brush attachment on a vacuum to remove dust from grooves and texture.
- Spot clean gently: For marks, use a slightly damp cloth and mild soap if needed. Avoid harsh chemicals that can strip the finish.
- Control humidity: Moderate humidity is best for any wood. Try to avoid extreme swings that can cause boards to expand or contract more than usual.
- Protect high-traffic surfaces: On tabletops and shelves, use coasters, mats, or a clear topcoat to keep the whitewash looking fresh.
Real-Life Experiences with Whitewashed Reclaimed Wooden Boards
Design advice is great, but nothing beats real-world lessons from actual projects. Here’s what many homeowners and DIY enthusiasts discover once they dive into the world of whitewashed reclaimed boards.
Lesson 1: Samples Save Sanity
On paper, “whitewashed reclaimed wood” sounds straightforward. In reality, the final look depends on the starting wood color, the paint you use, the water ratio, and how aggressively you wipe back the finish. People who skip samples often realize halfway through their wall that it’s either much whiter or much darker than they imagined.
The smarter approach is to test a few boards first. Try two or three different whitewash ratios and even different shades of white (warm vs. cool). Hold the boards up in the actual room at different times of day. Natural light in the morning can make the boards look completely different from evening lamp light.
Lesson 2: Imperfection Looks Better in the End
DIYers often start out trying to make every board match. After a couple of hours, they realize that slight variation actually looks more intentional and high-end. When boards are too uniform, the wall can feel flatalmost like printed faux wood. Small differences in opacity, streaks, and grain visibility bring the surface to life.
A helpful mindset: instead of chasing identical boards, aim for a cohesive overall feel. Think “family resemblance” rather than “clones.”
Lesson 3: Layout Matters More Than You Think
When people rush straight into installation, they sometimes end up with clusters of very knotted or very plain boards in one corner. Taking the time to lay out the boards on the floor first makes a huge difference.
Many homeowners like to mix visually heavy boardslots of knots, nail holes, or darker toneswith calmer boards so the wall feels balanced. Stagger board lengths, avoid lining up seams in a ladder pattern, and step back often during installation to check the overall look.
Lesson 4: Reclaimed Wood Smell Is Real (But Temporary)
Freshly delivered reclaimed boards can have a distinct smellwood, dust, sometimes a hint of the building they came from. Most people report that any odor fades after the boards are cleaned, whitewashed, and installed. If you’re sensitive, keep boards in a ventilated area for a few days before finishing and hanging them.
Lesson 5: It Changes How a Room Feels Emotionally
One of the most common reactions after installing a whitewashed reclaimed wall is, “I didn’t realize how bare the room felt before.” The boards don’t just add texture; they add a psychological sense of warmth and coziness.
In open-plan homes, a whitewashed reclaimed wall can help define zonesa seating area, dining nook, or workspacewithout putting up actual walls. In bedrooms, it can make the bed wall feel grounded and restful, especially when combined with simple linens and soft lighting.
Lesson 6: People Will Ask Where You Got It
Because every reclaimed wood project is slightly unique, guests notice. They run their hands over the boards, look at the knots and nail holes, and ask where you found them. Be prepared to either share your source or just smile and say, “Oh, these old boards? They’ve had quite a life.”
Lesson 7: You Might Start Planning Your Next Project
Once homeowners see how much character a single whitewashed reclaimed wall or set of shelves adds, they often start scheming. Maybe the mudroom needs a little love. Maybe the hallway ceiling could use planks. Maybe the kitchen island wants a reclaimed wood makeover.
That’s the beauty of whitewashed reclaimed boards: they’re endlessly adaptable. Each new project feels a little different, but all of them share the same core ingredientshistory, texture, and that easygoing, light-filled look that makes a house feel like home.
Wrapping Up
Whitewashed reclaimed wooden boards bring together the best of both worlds: the warmth and story of old wood with the brightness and freshness of a modern white interior. They work on walls, ceilings, shelves, and furniture, and they shine in styles from farmhouse to coastal to minimalist.
If you choose quality boards, prep them well, and take time to test your whitewash mix, you’ll end up with a surface that’s durable, sustainable, and seriously good-looking. And when people ask how you created such a cozy, airy space, you can say the truth: “It’s just a little paint, some old boards, and a whole lot of charm.”