
Table of Contents >> Show >> Hide
- What You’ll Learn
- Before You Start: Pick the Right Rod and Curtain Setup
- Tools and Materials Checklist
- How High Should a Shower Curtain Rod Be?
- How to Install a Shower Curtain: 15 Steps
- Step 1: Measure the shower opening
- Step 2: Choose rod type based on your reality
- Step 3: Confirm curtain length and ring style
- Step 4: Decide the rod height
- Step 5: Mark your end points
- Step 6: Level-check your marks
- Step 7: Prep for mounting (permanent rods only)
- Step 8: Drill pilot holes (permanent rods only)
- Step 9: Insert wall anchors (permanent rods only)
- Step 10: Install the brackets (permanent rods only)
- Step 11: Assemble and adjust the rod
- Step 12: Place the rod
- Step 13: Add rings/hooks to the curtain and liner
- Step 14: Hang the curtain and liner on the rod
- Step 15: Test, tweak, and water-proof your results
- Common Mistakes (and How to Avoid Them)
- Troubleshooting: Quick Fixes for Real Bathrooms
- Maintenance Tips: Keep It Clean (Without Turning It Into a Whole Lifestyle)
- Real-World Experiences: of “I Wish Someone Told Me This Earlier”
- Conclusion
Installing a shower curtain sounds like the kind of task you can do with one hand while brushing your teeth.
And sometimes it is. Other times, it turns into a tiny bathroom drama: a crooked rod, a liner that tries to
escape the tub, and that one ring that refuses to close like it has a personal vendetta.
The good news: once you know the right order (and a couple of “don’t do that” moments), you can install a
shower curtain and rod in under an houroften in 15–30 minutes for tension rods and 30–60 minutes for
permanent mounts. This guide walks you through both, step-by-step, with practical tips that keep water
inside the shower where it belongs.
What You’ll Learn
- How to choose the right shower curtain rod (tension vs. permanent vs. curved)
- Where to place the rod so the curtain actually works (and looks good)
- A simple, reliable 15-step install process
- Pro tips to prevent leaks, sagging rods, mildew, and “clingy curtain syndrome”
Before You Start: Pick the Right Rod and Curtain Setup
Tension rod (no drilling)
Best for renters, quick installs, or anyone who breaks into a sweat when they hear the word “anchor.”
A tension rod uses spring pressure to hold itself between two walls. It’s fast, but can slip if installed
incorrectly or if the walls are slick tile.
Permanent wall-mounted rod (drilled brackets)
Best for long-term stability, heavier curtains, and curved rods. You’ll mount brackets with screws and
anchors (or into studs when possible). More steps, but usually sturdier.
Curved shower rod (more elbow room)
Curved rods bow outward, giving you extra space so the curtain doesn’t cling to you like a needy cat.
They’re usually mounted with brackets (some models also offer tension-style installs).
Don’t forget the liner
In most bathrooms, the liner is the real waterproof hero. The decorative curtain stays outside the tub;
the liner stays inside the tub to direct water downward. If you skip the liner, your bath mat will become
a sponge with ambition.
Tools and Materials Checklist
- Shower curtain rod (tension or wall-mounted; straight or curved)
- Shower curtain + shower curtain liner (recommended)
- Rings/hooks (usually 12 for standard curtains)
- Tape measure
- Pencil (or painter’s tape for marking on tile)
- Level (short or long)
- For permanent rods: drill, appropriate drill bits, anchors, screwdriver
- Optional but helpful: silicone sealant for screw holes in wet zones, safety glasses
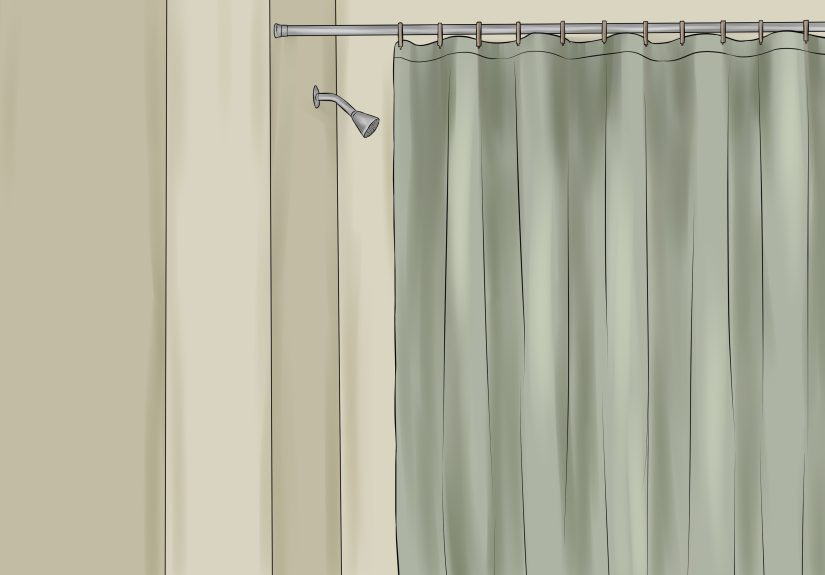
How High Should a Shower Curtain Rod Be?
A common goal is for the curtain to hang low enough to block splashes but not drag or puddle water.
Many people place the rod so the bottom of a standard curtain hangs a couple inches above the shower floor
(or just inside the tub). If you’re using a typical 72-inch curtain, a frequent height range is roughly
75–77 inches from the floorthen adjusted based on your ring style, tub height, and personal preference.
The most reliable method is hilariously low-tech: hold up the curtain + rings where you want them, then
mark the rod height. Bathrooms vary. Curtains vary. Gravity is consistentbut everything else is chaos.
How to Install a Shower Curtain: 15 Steps
These steps cover both tension rods and permanent wall-mounted rods.
When a step applies to only one type, you’ll see a note (so you don’t start drilling holes for a tension rod
like you’re auditioning for a home improvement show).
-
Step 1: Measure the shower opening
Measure wall-to-wall at the height where you want the rod. If your shower walls aren’t perfectly parallel
(many aren’t), measure in two spots: near the front edge of the tub and near the back wall. -
Step 2: Choose rod type based on your reality
If you’re renting or want a fast install, choose a tension rod. If you want maximum stability, have a heavy
curtain, or want a curved rod, wall-mounted is usually best. -
Step 3: Confirm curtain length and ring style
Curtains are commonly 70–72 inches long, but extra-long options exist for taller spaces. Rings/hooks add
a little drop, and some grommet-style curtains hang differently. Lay everything out now so you don’t end up
with a curtain that “almost reaches” (the enemy of dry floors). -
Step 4: Decide the rod height
Aim for a height that keeps the curtain hanging neatly without dragging. For tubs, many people like the bottom
of the liner to sit inside the tub by a couple inches. For walk-in showers, you’ll typically keep the liner
a bit above the floor so it dries faster and doesn’t collect grime. -
Step 5: Mark your end points
Use a pencil on painted walls. For tile, use painter’s tape and mark on the tapecleaner, easier to see, and
less likely to slip. Mark both sides at the same height. -
Step 6: Level-check your marks
Place a level across the marks (or measure down from a consistent reference line) to ensure both sides match.
A crooked rod is not just cosmeticwater will find the low side and celebrate. -
Step 7: Prep for mounting (permanent rods only)
If you’re using a permanent rod, hold the bracket/mounting plate at your mark and trace the screw holes.
If possible, align at least one screw into a stud. If not, use anchors rated for your wall type.Skip this step if you’re installing a tension rod.
-
Step 8: Drill pilot holes (permanent rods only)
Drill carefully at the marked holes using the correct bit. For tile, use the appropriate tile/masonry bit and
drill gently to avoid cracking. Keep the drill steady and avoid forcing ittile is tough, but not forgiving.Skip this step if you’re installing a tension rod.
-
Step 9: Insert wall anchors (permanent rods only)
Tap anchors in until flush. Use anchors designed for your wall type (drywall, tile over drywall, etc.).
If you’re unsure, a sturdier anchor choice is better than “whatever was in the junk drawer since 2012.”Skip this step if you’re installing a tension rod.
-
Step 10: Install the brackets (permanent rods only)
Screw the brackets into the anchors (or studs) until snug. Don’t overtighten on tiletoo much force can crack
it. If the instructions recommend it, a tiny bead of silicone around holes can help keep moisture out.Skip this step if you’re installing a tension rod.
-
Step 11: Assemble and adjust the rod
For adjustable rods, extend to the correct length. For some tension rods, the best grip comes from extending
the rod slightly longer than the opening, then compressing it into place so it locks tightly. -
Step 12: Place the rod
Tension rod: Set one end at your mark, compress the rod, and place the other end at the opposite mark.
Twist/lock according to your model so it holds firm.Permanent rod: Fit the rod into the mounted brackets and secure any set screws or locking pieces.
Curved rods may require specific orientationdouble-check before tightening everything. -
Step 13: Add rings/hooks to the curtain and liner
Lay the decorative curtain and liner flat, align the holes, and thread rings through both. Standard setups use
the liner inside (toward the water) and the curtain outside. If your rings are the snapping type, make sure
they fully closean open ring is a tiny metal escape artist. -
Step 14: Hang the curtain and liner on the rod
Hang rings evenly across the rod. Ensure the liner sits inside the tub along the entire length. If the liner
sits outside, water will happily migrate to your bathroom floor like it’s paying rent. -
Step 15: Test, tweak, and water-proof your results
Slide the curtain back and forth to check for snagging. Tug gently on the rod to ensure it’s secure.
Then run the shower for a minute and watch for splashes or gapsespecially at the corners. If water escapes,
adjust the liner placement, add a weighted liner, or reposition the rod slightly.
Common Mistakes (and How to Avoid Them)
Putting the liner on the outside
The liner goes inside the tub/shower basin. That’s the #1 reason people think they “installed everything correctly”
while their bath mat slowly becomes a swamp.
Installing a tension rod with too little pressure
If the rod slides down over time, it usually needs more tension and a better grip. Clean the tile where the ends
touch, then re-install with stronger compression. Some rods also have rubber end capsmake sure they’re seated flat.
Skipping the level check
Even a small tilt looks obvious in a small bathroom. Plus, a slanted rod encourages the curtain to drift.
Level it now so you don’t stare at it forever later.
Using weak anchors for a heavy setup
Curved rods and thicker curtains can add leverage and weight. If you’re mounting into drywall/tile without studs,
use quality anchors rated for the load. “It came free with the rod” is not a guarantee of greatness.
Troubleshooting: Quick Fixes for Real Bathrooms
The curtain is too short
Either the rod is too high, the rings add extra drop, or the curtain is a shorter size. Lower the rod slightly
(if possible) or switch to an extra-long curtain (often labeled 78 or 84 inches).
The curtain drags or puddles
Raise the rod, use shorter rings, or choose a shorter curtain length. Dragging fabric collects water, soap residue,
and whatever lint creatures live on your bathroom floor.
The liner clings to you like it misses you
Try a heavier or weighted liner, add small liner weights, or switch to a curved rod for more space.
Better ventilation also helps reduce “curtain cling.”
Mildew is showing up too fast
Keep the liner spread out after showers so it dries. Run the exhaust fan during and after showers, and wash or
replace liners on a regular schedule. If you prefer low maintenance, look for antimicrobial liners designed to
resist mold and mildew.
Maintenance Tips: Keep It Clean (Without Turning It Into a Whole Lifestyle)
- After each shower: Pull the curtain mostly closed so the liner can dry instead of staying bunched up.
- Weekly quick clean: Spritz the liner with a gentle cleaner or a diluted vinegar-and-water mix (test first).
- Machine washing: Many fabric curtains and some liners can be washed on a gentle cycle. Air dry afterward.
- When to replace: If a plastic liner stays smelly or stained after cleaning, it’s time for a fresh one.
The goal isn’t perfection. The goal is a curtain that slides smoothly, keeps water in the shower, and doesn’t
look like it’s auditioning for a horror movie.
Real-World Experiences: of “I Wish Someone Told Me This Earlier”
On paper, installing a shower curtain is a simple DIY job. In real bathroomswhere walls aren’t perfectly straight,
tile is glossy, and tubs have weird ledgespeople tend to learn the same lessons the hard way. Here are the most
useful, experience-based tips that come up again and again.
First: the liner placement matters more than the curtain. Many first-time installers focus on the decorative curtain
because it’s the visible part, then wonder why the floor is wet after every shower. The fix is almost always the same:
keep the liner fully inside the tub basin and make sure it overlaps the tub edge at the corners. Corners are where
water likes to sneak outespecially if you aim the showerhead toward the curtain side even a little.
Second: tension rods are “easy,” not “effortless.” People often set a tension rod to the exact width of the shower opening,
pop it in place, and call it done. A week later, gravity wins. The better approach is to clean the tile where the end caps
touch (soap film reduces grip), then install the rod with firm compression and lock it according to the rod’s design.
If your bathroom gets steamy and the walls get slick, that extra grip is the difference between “sturdy” and “surprise rod to the forehead.”
Third: curved rods feel amazinguntil you realize they can change splash behavior. The extra space is great, but the curve can
pull the curtain outward slightly. In some showers, that means more opportunity for water to hit the liner at a different angle.
The fix is simple: use a weighted liner, keep the liner tucked, and ensure the curtain closes fully at both ends. Some rods and ring systems
make it easier to keep the ends snug so gaps don’t form near the wall.
Fourth: ring choice is not just aesthetics. In real life, cheap rings can snag, pop open, or scrape loudly every time you slide the curtain.
People who upgrade to smoother hooks (or roller-style rings) often report the whole setup feels “less annoying” instantlywhich is a valid lifestyle upgrade.
Also, if you have a fabric curtain with grommets, make sure the rings fit correctly; too-small rings fight the grommets, and you’ll feel it every morning.
Fifth: height is personal. Some people want a hotel look with the rod higher; others want maximum water control and place it a bit lower.
The best “experienced” advice is to mock it up: hold the curtain and liner up with the rings attached, stand back, and choose the height that looks right
and keeps the liner inside the tub. This two-minute test prevents the classic mistake of mounting too high, then realizing your “standard” curtain
is suddenly a “cropped top.”
Finally: mildew prevention is mostly about drying. People who keep the liner bunched to one side often see mildew faster because folds trap moisture.
Simply spreading the liner out after showering can make a huge difference. If you want the low-effort version: pull the curtain mostly closed, turn on the fan,
and let physics do the rest.


