Table of Contents >> Show >> Hide
- Before You Start: What Makes IKEA Cabinets Different?
- Tools and Materials You’ll Actually Use
- Step 1: Inventory, Plan, and Stage the Chaos
- Step 2: Prep the Room Like You Mean It
- Step 3: Install the Suspension Rails (The “Measure Twice, Drill Once, Celebrate Later” Stage)
- Step 4: Assemble Cabinet Boxes (But Don’t Add Doors Yet)
- Step 5: Install Wall Cabinets First (Usually)
- Step 6: Install Base Cabinets (Corner First, Always Checking Level)
- Step 7: Islands and Peninsulas (The Rule: Anchor It)
- Step 8: Fillers, Cover Panels, and the “Make It Look Built-In” Part
- Step 9: Toe Kicks, Trim, and the Final 10% That Takes 40% of Your Time
- Step 10: Doors, Drawer Fronts, and Adjustments
- Countertops, Sink Cutouts, and Appliances
- Common Mistakes (So You Don’t Star in Your Own “Before” Photo)
- Field Notes: of IKEA Kitchen Reality (From People Who’ve Been There)
- Conclusion
Installing IKEA kitchen cabinets is a little like adopting a very organized Swedish puppy: it’s exciting, it comes in a lot of boxes,
and it will absolutely test your patience if you skip training (a.k.a. planning). The good news? IKEA’s rail-based system is genuinely
DIY-friendly, adjustable, and forgiving if you get the rails level and your layout right the first time.
This guide walks you through the full IKEA kitchen cabinet installation processprep, rails, wall cabinets, base cabinets,
panels, toe kicks, and those finishing details that separate “wow” from “why is there a gap the size of my confidence?”
Before You Start: What Makes IKEA Cabinets Different?
Most traditional cabinets get screwed directly into studs as you hang each box, one by one, while quietly questioning your life choices.
IKEA’s SEKTION system (common in the U.S.) uses suspension rails: you mount a metal rail to the wall, then hang cabinet boxes on it.
Because the rail does the heavy lifting (literally and figuratively), cabinets can slide side-to-side for fine adjustments before you lock
them in place. That’s a big advantagebut it also means the rail must be straight, solid, and stud-anchored.
Tools and Materials You’ll Actually Use
You don’t need a garage that looks like a hardware store, but you do need the basicsand a couple IKEA-specific helpers.
Core tools
- Stud finder, tape measure, pencil, and a good level (a long one is gold)
- Drill/driver and bits (including a countersink bit for clean cabinet connections)
- Clamps (help align cabinet faces and keep things from drifting)
- Safety glasses (your future self likes having two functioning eyeballs)
- Fine-tooth saw or jigsaw (for fillers, panels, and utility cutouts)
- Pozidriv screwdriver bit (IKEA hardware often prefers it over Phillipsyes, it matters)
Materials
- Appropriate screws/anchors for your wall type (IKEA doesn’t include these because walls vary)
- Shims/spacers (uneven walls and floors happen in real houses, not just haunted ones)
- Painter’s tape (marking stud locations and layout lines without turning your wall into a crime scene)
Step 1: Inventory, Plan, and Stage the Chaos
Before you demo your existing kitchen into a post-apocalyptic cooking situation, confirm you have all your boxes and parts.
IKEA kitchen projects are famously “many items, one missing bracket.” Keep cabinets and countertops stored indoors at normal temperature/humidity,
and stage boxes in installation order so you’re not playing “Where’s Waldo?” with a 30-inch base cabinet.
Use your IKEA plan (or your measured layout) to mark cabinet positions on the wall. This is where you confirm:
plumbing, electrical, ventilation, windows, and appliance clearances all make sensebefore you hang anything.
Step 2: Prep the Room Like You Mean It
Cabinets are not a magic trick that makes walls straight and floors level. If your floor slopes, your cabinets will follow it unless you fight back.
This is the moment to patch, paint, address flooring, and verify corners and walls are reasonably square.
Find the highest point of the floor
This matters because you’ll set your cabinet heights from the highest spot, not the lowest (unless you enjoy rocking cabinets).
Use a long level or laser level and identify the floor’s high point along your cabinet run. Mark it clearly.
Step 3: Install the Suspension Rails (The “Measure Twice, Drill Once, Celebrate Later” Stage)
If IKEA cabinet installation had a boss level, it’s the rails. Get these right and the rest feels surprisingly civilized.
Get these wrong and you’ll invent new vocabulary.
Rail height for base cabinets
A common IKEA guideline is placing the underside of the base cabinet suspension rail about
32 3/16 inches above the highest point of the floor. That measurement helps you land the standard cabinet height with toe kick.
Always verify against your specific cabinet plan and countertop thickness.
Spacing for upper rails
A typical approach is to allow roughly 22 5/16 inches between the bottom of your wall cabinets and the bottom of the base rail
when you’re setting the upper rail height. This helps preserve workable countertop-to-upper clearance (commonly around 18–20 inches,
depending on cabinet/countertop choices).
Mount rail into studs (and don’t panic if holes don’t align)
You want the rail fastened securelypreferably into studs as often as possible. Studs are commonly spaced about 16 inches on center in many U.S. homes,
but real life likes surprises. The rail has many holes, which helps you catch studs more often. If your exact stud location doesn’t line up
perfectly, installers sometimes drill an additional hole in the rail where needed (carefully, and without compromising strength).
Shim behind the rail if the wall is wavy
If the wall bows, the rail can twist when you tighten screws. Use shims/spacers behind the rail so it stays straight and flush.
A rail that looks level before tightening can turn into a subtle “smile” after tighteninguntil your cabinets hang like they’re judging you.
Step 4: Assemble Cabinet Boxes (But Don’t Add Doors Yet)
Build your cabinet frames according to IKEA instructions, but hold off on doors, drawer fronts, and interior organizers
until the boxes are installed. Lighter boxes are easier to handle, and you’ll be less likely to ding a door corner that costs more than your first car.
Step 5: Install Wall Cabinets First (Usually)
In most kitchens, it’s easier to hang wall cabinets before base cabinets. Why? You get clear floor space to move ladders, tools, and your sanity.
The exception is certain layouts (like a tall cabinet anchoring a run) where installing that tall unit first makes alignment easier.
Use a temporary ledger if you want an extra hand
Even though IKEA uses a rail, many installers still like a temporary ledger board or support screws along a level line
to hold cabinet weight while hooking onto the railespecially if you’re working without a full-time helper named “Chris.”
Hang, slide, align, then lock
Lift the cabinet onto the rail hardware, slide it into position, then lock it down. This is where IKEA’s system shines:
you can nudge cabinets sideways for tight alignment before final fastening. Keep checking level and plumb as you go.
Clamp and connect cabinet boxes
Once two cabinets are aligned at the front, clamp them together, predrill as needed, and screw them together so they behave like one solid unit.
This strengthens the run and keeps face lines consistent (a fancy way of saying “the doors won’t look like they’re in separate time zones”).
Step 6: Install Base Cabinets (Corner First, Always Checking Level)
Start base cabinets at a corner or an anchor point that your layout depends on (like the sink base). Set the corner cabinet first,
then work outward. Keep screws slightly loose until the whole run is positioned, then tighten once alignment looks clean.
Account for plumbing and utilities early
Mark plumbing and electrical paths on the cabinet backs. Many cabinet boxes can be cut with a jigsaw to create custom openings,
but cutouts can affect drawer configurationso plan that before you commit.
Leveling: legs, shims, and reality
IKEA base cabinets typically use adjustable legs. Use them to level the cabinet run front-to-back and side-to-side.
Shim where neededespecially near wallsso cabinet backs don’t warp or pull out of square when you fasten them.
Secure to rail and/or wall as designed
Base cabinets may clip onto a rail for alignment, but they still need proper securing per the system and your wall type.
The goal is simple: no wobble, no drifting, no “it shifts when I open the dishwasher” drama.
Step 7: Islands and Peninsulas (The Rule: Anchor It)
If your cabinets don’t have a wall behind themlike an islandyou can’t rely on the suspension rail alone.
Islands must be secured to the floor using the recommended legs and/or a built base frame, fastened to the floor and cabinets.
A common field solution is building a platform the same height as the toe kick so cabinets sit on a stable base,
then anchoring that base to the floor before attaching cabinet boxes. If you’re drilling into tile, use the right bit,
go slow, and pretend the tile is expensive (because it is).
Step 8: Fillers, Cover Panels, and the “Make It Look Built-In” Part
This is where your kitchen goes from “installed” to “intentional.”
Fillers prevent door/drawer collisions
Filler pieces close gaps between cabinets and walls and ensure drawers and doors open fullyespecially near corners and tight runs.
If the wall isn’t straight, you’ll scribe the filler to match it.
How to scribe a filler (without becoming a wood whisperer)
A simple method: hold the filler against the cabinet, then use a small block of wood and a pencil to trace the wall contour onto the filler.
Cut along your line, test-fit, trim as needed, then attach the filler using a support strip and screws. Finish with a neat bead of silicone/caulk
for a clean edge.
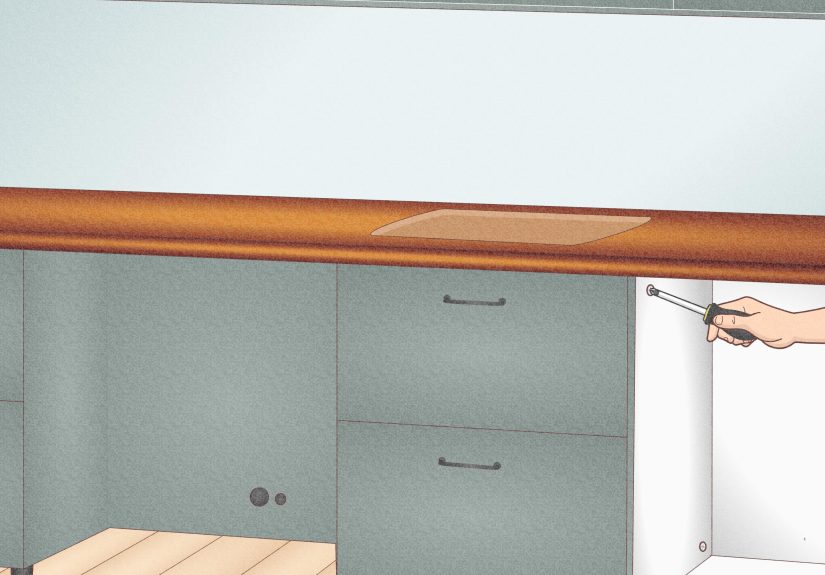
Cover panels hide cabinet sides
Any exposed cabinet side (end of a run, side of an island, etc.) usually gets a cover panel for a finished look.
Many DIYers attach panels by screwing through the cabinet box into the panelcarefully choosing screw locations so everything stays tight and tidy.
Step 9: Toe Kicks, Trim, and the Final 10% That Takes 40% of Your Time
Toe kicks hide legs and make the base run look seamless. Install them once your cabinets are level and secured.
Then add any trim, light valances, crown (if you’re going fancy), and end caps per your design.
Step 10: Doors, Drawer Fronts, and Adjustments
Now you get the satisfying part: doors and drawers. Install hinges and drawer fronts, then fine-tune.
IKEA-style hinges are adjustable, so you can align reveals and straighten door gaps like you’re editing a photoexcept it’s your kitchen.
- Adjust doors for even gaps and level alignment
- Check drawer fronts for consistent spacing
- Install handles/knobs using a jig or careful measuring
Countertops, Sink Cutouts, and Appliances
Countertop installation varies by material (laminate, butcher block, stone). Follow the countertop manufacturer’s instructions,
and always confirm sink cutout placement from underneath before cutting. If you’re working with plumbing, gas, or electrical,
hire licensed pros where requiredthis is not the place to freestyle.
Common Mistakes (So You Don’t Star in Your Own “Before” Photo)
1) Rushing the rail
The rail is the foundation. If it’s not level, everything downstream becomes a “creative interpretation” of straight.
2) Skipping stud planning
Mark studs clearly, plan rail fasteners, and use proper anchors where studs aren’t available. Cabinets are heavy; gravity is undefeated.
3) Installing doors too early
Doors and drawers add weight and get damaged easily. Install boxes first, then finish.
4) Ignoring filler needs
That tiny gap you ignore today becomes the drawer that won’t open tomorrow. Use fillers and panels like a grown-up.
Field Notes: of IKEA Kitchen Reality (From People Who’ve Been There)
Let’s talk about what happens in the real worldwhere walls aren’t straight, floors slope like they’re auditioning for a ski jump,
and the number of boxes in your living room makes your friends think you’re starting a cardboard-based startup.
First: the suspension rail is both your best friend and your most demanding coach. DIYers often describe the moment the rail goes up
as the moment they realize the project is “real.” It’s not hard in a complicated-math way; it’s hard in a “hold this perfectly level
while drilling into a stud you can’t see” way. Many people solve this with teamwork: one person holds and checks level, the other drills.
If you’re solo, temporary support screws can act like a third handan unglamorous, reliable third hand that never asks for snack breaks.
Second: American stud spacing and IKEA hole patterns don’t always line up like a romantic comedy ending. That’s why experienced installers
plan stud locations early, mark the full stud width, and pre-plan where each rail screw will go. When a rail hole misses a stud by half an inch,
some DIYers drill a new hole in the rail (carefully) rather than compromise cabinet position. The moral of the story: your layout should drive
your cabinet placement, but your fasteners must still be structurally sound. If you’re not sure, consult a contractorthis is not the moment
to rely on “it feels sturdy-ish.”
Third: expect the “little stuff” to take longer than you think. The cabinet boxes go up and you feel unstoppable. Then you meet fillers,
cover panels, and toe kicksaka the detail squad. Scribing a filler to a wavy wall is one of those strangely satisfying tasks that can also
eat an afternoon because you’ll test-fit, trim, test-fit again, and repeat until it’s perfect. The good news is that a clean filler makes the
whole kitchen look custom. The bad news is you will become emotionally invested in a 3-inch strip of wood.
Fourth: appliances and special zones deserve extra planning. One memorable example DIYers share is refrigerator depth and enclosure build-out.
Since many cabinet systems are around 24 inches deep, people sometimes add a spacer (like a 2×4) behind rails in specific areas to make cabinet
faces align with surrounding elements and reduce awkward setbacks. These micro-adjustments aren’t “mandatory,” but they’re the kind of thoughtful
tweak that turns a good install into a great one.
Finally: give yourself permission to be human. The most common “experience-based” tip is to slow down at the alignment stages.
Keep screws a bit loose until a run is fully assembled, clamp faces before joining cabinets, and check level constantly.
When you feel frustrated, take the classic IKEA guide advice and take a coffee breakbecause yes, sometimes the most professional move is
stepping away before you try to “fix” a 1/16-inch issue with a 3-pound hammer.
Conclusion
Installing IKEA kitchen cabinets is absolutely doable for a careful DIYer: prep the room, set a dead-level suspension rail,
hang and align cabinets methodically, then finish strong with fillers, panels, toe kicks, and properly adjusted doors and drawers.
Take your time on the rails and layoutthose two steps are where “professional-looking” is born.