
Table of Contents >> Show >> Hide
- Why a Large Salvaged Wood Kitchen Island Works So Well
- What “Large” Means for a Kitchen Island
- Salvaged Wood Benefits and the Fine Print
- Best Layout Options for a Large Salvaged Wood Kitchen Island
- Construction Checklist for a Large Salvaged Wood Island
- Design and Styling Ideas for a Large Salvaged Wood Island
- Safety, Code-Minded Planning, and Old-Wood Reality Checks
- Maintenance Tips That Keep Salvaged Wood Looking Great
- Mistakes to Avoid When Buying or Building a Large Salvaged Wood Kitchen Island
- Experience Notes: What Homeowners and Designers Commonly Notice (Extended Section)
- Conclusion
A large salvaged wood kitchen island is the design equivalent of a great host: it welcomes everyone, holds the snacks, and somehow makes the whole room feel warmer. It can be a prep station, breakfast bar, storage monster, homework desk, party magnet, and the place where people “just stop by for a minute” and stay for an hour.
But here’s the plot twist: a big island made from salvaged wood only works beautifully when the size, clearance, and construction are handled correctly. Too large, and your kitchen becomes a hallway obstacle course. Poorly prepared wood, and your gorgeous top may cup, crack, or surprise you with mystery nails. This guide walks through what “large” really means, how to plan a functional layout, how to choose safe and stable reclaimed materials, and how to style and maintain the island so it looks amazing for years.
Why a Large Salvaged Wood Kitchen Island Works So Well
Kitchen islands are no longer just bonus counters. In modern homes, they often act as the social center of the kitchen, with seating, storage, and flexible work zones. A large island made from salvaged wood takes that idea further by adding visible character: saw marks, knots, old grain patterns, and subtle imperfections that make the piece feel lived-in instead of factory-perfect.
In practical terms, salvaged wood also pairs well with many styles: farmhouse, modern rustic, transitional, industrial, and even minimalist kitchens that need one “softening” element. It can anchor painted cabinets, balance stone countertops, and make a new kitchen feel less like a showroom and more like a home where people actually cook.
The appeal is also emotional. New kitchens can look a little too polished (we love them, but still). Salvaged wood brings warmth and history. It says, “Yes, I meal-prep on Sundays, but I also know how to make chili for twelve people.”
What “Large” Means for a Kitchen Island
Start with room size before island size
“Large” should describe the island’s usefulness, not just its footprint. The first rule is simple: measure your circulation space before you shop or build. A large island needs enough room around it for doors, drawers, appliances, and people who are carrying hot pans and not looking where they’re going.
A common planning benchmark is keeping at least 42 inches of clearance around the island, and often 48 inches in kitchens with multiple cooks or heavier traffic. If an oven opens into the aisle, more clearance is usually better. This is where many oversized-island dreams go to dieand honestly, that’s a good thing. A slightly smaller island that functions well always beats a giant one that creates daily traffic jams.
Use seating math, not guesswork
Large islands often include seating, but stools need real elbow room. A good baseline is 24 inches of width per seated person. Knee space also matters and changes based on counter height. If the island is counter height (around 36 inches), you’ll typically want deeper knee space than a bar-height setup. In other words: don’t just count stools, count comfort.
This is especially important for a salvaged wood kitchen island large enough to seat four or more people. The island can look amazing in photos, but if everyone has to eat with one shoulder angled like they’re on an airplane, the design missed the assignment.
Think in zones, not just dimensions
A large island works best when it has intentional zones:
- Prep zone: open counter space for chopping, mixing, and staging ingredients
- Serve zone: a landing area for platters, snacks, or coffee setup
- Seat zone: overhang space for stools and conversation
- Storage zone: drawers, shelves, baskets, or cabinet doors
If you plan for all four, the island becomes the hardest-working piece in the kitchen instead of just a handsome plank with opinions.
Salvaged Wood Benefits and the Fine Print
What makes salvaged wood special
Salvaged or reclaimed wood is often sourced from old buildings, barns, industrial spaces, or architectural elements. It tends to have denser grain, richer patina, and a one-of-a-kind appearance that new lumber can’t easily copy. Many homeowners choose it for sustainability reasons too, since reuse can reduce demand for newly milled material and keep usable wood in circulation.
You also get visual depth. Tiny dents, old nail shadows, and weathered grain patterns read as texture, not damage, when used well. On a large kitchen island, those details become a feature, not a flaw.
Hidden risks nobody puts in the pretty showroom photos
Salvaged wood needs careful prep. Old boards may contain nails, screws, paint residue, or contaminants depending on where they came from. In older homes or materials, lead-based paint is a serious concern. If your source is unknown, assume the wood needs inspection and proper refinishing before it belongs in a food-adjacent space.
Moisture is another big one. Wood constantly responds to humidity. Even beautifully aged wood can move if its moisture content isn’t appropriate for your home environment. That movement can show up later as slight cupping, bowing, or seasonal gaps. A reputable builder or seller should stabilize, plane, and finish the material with this in mind.
And yes, pests are part of the conversation. Reclaimed hardwood can sometimes hide evidence of old insect activity. That does not mean reclaimed wood is a bad idea; it means reclaimed wood is a “check first, brag later” material.
Best Layout Options for a Large Salvaged Wood Kitchen Island
1) Prep-and-seating island
This is the most versatile layout and usually the smartest first choice. Keep the island top open for prep, add seating on one long side, and load the base with drawers and shelves. It gives you function without adding plumbing or ventilation complexity.
A large salvaged wood top shines here because the surface is visually uninterrupted. The grain tells the story, and the island becomes a focal point without trying too hard.
2) Sink island with cleanup support
If your kitchen workflow revolves around prep and cleanup, a sink in the island can work beautifully. Just be careful not to sacrifice all your landing space. Large islands can handle a sink while still leaving room for chopping, but only if the proportions are planned well. You also need to think about dishwasher door swings and traffic paths, especially in busy family kitchens.
3) Cooktop island (high-function, high-planning)
A cooktop in the island can look sleek, but it raises the planning difficulty level. You’ll need proper clearance, code-aware installation, and ventilation designed for the setup. It can be worth it in a large kitchen where the cook wants to face guests, but it is not the “easy mode” version of an island.
If you go this route, plan landing areas and splatter management carefully. Salvaged wood is charming, but it does not enjoy hot oil drama.
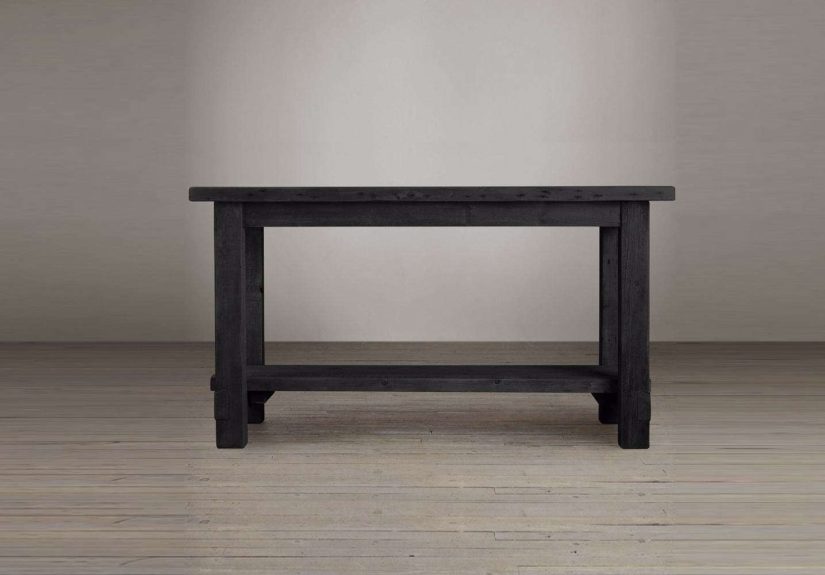
4) Furniture-style worktable island
This is where salvaged wood really flexes. A furniture-style island looks like a substantial table or old workshop bench, often with open shelving, baskets, or turned legs. It feels less built-in and more collected over time, which is perfect if you want the kitchen to feel curated rather than hyper-custom.
This style is especially strong in open-concept homes because it reads as furniture from the living area while still working hard in the kitchen.
Construction Checklist for a Large Salvaged Wood Island
Choose the right top thickness and base strength
Large islands need structural support, not just good looks. Salvaged tops are often heavy, especially if you use thick planks or solid timbers. The base should be designed to carry the load without sagging or racking over time. This is where hidden steel reinforcement, stretchers, or a sturdy apron can make a huge difference.
Confirm wood prep and finish details
Ask these questions before buying:
- Was the wood de-nailed and metal-scanned?
- Was it kiln-dried or otherwise stabilized for interior use?
- What finish is on the top (wax, oil, polyurethane, conversion varnish, etc.)?
- Is the finish appropriate for food-adjacent kitchen use?
- What maintenance does the finish require?
A lot of frustration later can be avoided with five minutes of very specific questions today. Glamorous? No. Wise? Extremely.
Plan storage with your real habits in mind
Large islands become clutter magnets unless the storage is designed for how you actually live. If you bake a lot, prioritize deep drawers for mixing bowls and sheet pans. If your kitchen is the family drop zone, include a shelf for baskets. If you entertain, add bottle storage or dedicated serving drawers.
Open shelving looks gorgeous with baskets and cookbooks, but closed storage hides the toaster, the blender, and the mystery gadget you bought at 1 a.m. and still haven’t used. A mixed approach usually wins.
Design and Styling Ideas for a Large Salvaged Wood Island
Go contrast-heavy for a designer look
One of the easiest ways to make a salvaged wood kitchen island large and intentional is contrast. Pair a warm, textured wood top with painted perimeter cabinets (white, black, deep green, navy, or soft gray). The island becomes the visual anchor while the rest of the kitchen supports it.
Mix refined and rustic materials
Salvaged wood doesn’t mean the whole kitchen needs to look like a barn conversion. Try mixing reclaimed wood with:
- Stone counters on perimeter cabinets
- Matte black or aged brass hardware
- Simple shaker cabinets
- Industrial stools with metal frames
- Soft pendant lighting above the island
The goal is balance. Let the island bring character while the surrounding finishes keep the room clean and functional.
Use real product dimensions as a planning shortcut
Retail examples are helpful even if you’re planning a custom build. Some furniture-style islands in the U.S. market range from compact pieces around the 48- to 56-inch mark up to much larger options in the 72-, 80-, and even 96-inch range. That spread gives you a practical way to compare what “large” feels like before committing to custom millwork.
In other words, use product specs like a fitting room for your floor plan. Tape the footprint on the floor, walk around it, open your dishwasher, and see if your future self still likes the idea.
Safety, Code-Minded Planning, and Old-Wood Reality Checks
If your salvaged wood comes from older structures, safety screening matters. Painted or coated surfaces may contain hazardous materials, and renovation or refinishing work can generate dust. If there is any chance the material came from pre-1978 painted components, use lead-safe practices and qualified professionals where needed.
Ventilation also matters if your island includes a cooktop. A large island can make cooking more social, but it still needs good exhaust planning and manufacturer-compliant installation. This is not the place to improvise with a pretty hood and optimism.
Finally, remember that wood is a living material even after it becomes furniture. Seasonal humidity changes affect performance. Smart design allows for movement instead of pretending it won’t happen.
Maintenance Tips That Keep Salvaged Wood Looking Great
Daily care
- Wipe spills quickly, especially around seams and end grain.
- Use trivets for hot cookware.
- Use cutting boards instead of cutting directly on the island top.
- Clean with a soft cloth and a wood-safe cleaner (avoid soaking the surface).
Periodic care
Maintenance depends on the finish. Some salvaged wood islands are sealed and low-maintenance; others use wax or oil finishes that need refreshing. A waxed or oiled finish may require occasional reapplication, especially in high-use kitchens. The upside is that small scratches often blend into the patina instead of screaming for attention.
If the top is intentionally rustic and unsealed, embrace some movement and texture changes over time. That’s part of the charm. Think “character development,” not “defect.”
Mistakes to Avoid When Buying or Building a Large Salvaged Wood Kitchen Island
- Buying for looks only: If it blocks the aisle, it is not a good island, no matter how photogenic it is.
- Ignoring stool spacing: Four stools do not automatically fit because four stools exist.
- Skipping finish questions: “Reclaimed” describes the wood source, not the final durability.
- Forgetting humidity: Stabilized wood performs better; mystery wood does mystery things.
- Overloading one surface: A giant island can still feel crowded if every function is stacked into one zone.
- Not testing the footprint: Tape outlines on the floor before ordering. This saves marriages and shins.
Experience Notes: What Homeowners and Designers Commonly Notice (Extended Section)
One of the most common experiences people describe after installing a large salvaged wood island is that the kitchen changes socially before it changes functionally. They expected more prep space, but what they notice first is how people gather around it. Kids do homework there. Friends stand there during dinner parties even when there are perfectly good chairs elsewhere. The island becomes the room’s unofficial meeting point, and the salvaged wood texture makes it feel inviting rather than formal.
Another frequent experience is surprise at scale. A taped floor outline can look “about right,” but once the island is built, the visual weight of thick salvaged wood makes it feel larger than expected. This is especially true with chunky tops, heavy legs, and open lower shelves. Designers often compensate by keeping surrounding finishes lighter and cleaner so the island reads as a focal point, not a block in the middle of the room.
Homeowners also mention that salvaged wood ages differently than new factory finishes, and that is usually a positive. Small dings and scratches tend to blend into the existing patina instead of standing out. A busy family kitchen can use the island daily without the constant panic that comes with ultra-gloss surfaces. People often describe this as “freedom to actually use the kitchen,” which is exactly what a good island should provide.
On the practical side, experienced remodelers often say the biggest success factor is not the wood species or stain color; it is the clearance plan. Kitchens with a well-sized island feel effortless. You can open the dishwasher, walk behind someone cooking, and still reach the fridge without turning sideways like a crab. Kitchens with oversized islands may look impressive in photos but feel cramped every single day. That difference becomes obvious within the first week of use.
Another common lesson is that storage planning matters more than expected. Many people order a beautiful furniture-style island and then realize they need deep drawers for sheet pans, appliances, or mixing bowls. Others do the opposite: they overbuild storage and leave too little legroom for seating. The best outcomes usually come from assigning specific items to the island before finalizing the design. If you know exactly what lives there, the island stays organized longer.
Owners of salvaged wood islands also talk about maintenance in a more relaxed way than owners of pristine engineered surfaces. They wipe it down, use cutting boards, and refresh the finish when needed, but they are less obsessed with perfection. Because the material already has natural variation and history, a little wear feels appropriate. Many people end up liking the island more after a year than on install day because it develops a richer, lived-in look.
The final shared experience is emotional: a well-designed large salvaged wood kitchen island often becomes the “favorite spot” in the house. Not just because it is useful, but because it holds daily life. Coffee mugs, grocery lists, birthday cupcakes, late-night conversations, and the occasional awkward science project all happen there. A good island is furniture, workspace, and memory-maker in one. The salvaged wood just gives it a head start in the character department.
Conclusion
A Salvaged Wood Kitchen Island Large can be one of the smartest and most beautiful upgrades in a kitchen, but the magic comes from planning. Prioritize clearance, seating comfort, workflow zones, and proper wood preparation. Choose a finish that matches your lifestyle, not just your mood board. And if you are using reclaimed materials, treat sourcing and safety like part of the design process, not an afterthought.
Done right, a large salvaged wood island does more than fill space. It gives your kitchen personality, improves how the room works, and becomes the place where real life happensmessy, useful, and pretty enough to make you smile while you clean up.


