Table of Contents >> Show >> Hide
- Before You Start: The Hoodie Matters More Than Your Playlist
- Supplies Checklist (So You Don’t Improvise With a Pasta Strainer)
- How to Tie Dye a Hoodie: 12 Steps (Fun, Not Fussy)
- Step 1: Check the label and set expectations
- Step 2: Pre-wash the hoodie (skip fabric softener)
- Step 3: Protect your workspace like you’re prepping for a paintball fight
- Step 4: Prep the hoodie for dye bonding (the “science” step)
- Step 5: Decide your pattern (hoodie-friendly options)
- Step 6: Fold, twist, or scrunchthen band it tight
- Step 7: Mix your dye correctly (strong color starts here)
- Step 8: Apply dye slowlyhoodies need patience (and more saturation)
- Step 9: Flip it and repeat (because gravity is not your art assistant)
- Step 10: Bag it up and let it setkeep it damp
- Step 11: Rinse smart: cold to warm, until mostly clear
- Step 12: Wash and dry for the big reveal (and long-term color)
- Design Tips That Make Tie-Dye Hoodies Look “Intentional”
- Troubleshooting: Common Tie-Dye Hoodie Problems (and Fixes)
- Care Tips: Keep Your Tie-Dye Hoodie Bright
- FAQ: Quick Answers People Google at 11:47 PM
- Conclusion: Your Hoodie, But Cooler
- Experiences & Field Notes: What Tie-Dyeing a Hoodie Is Really Like (500+ Words)
Tie-dye is basically legal chaos: you start with a plain hoodie, add a little science and a lot of color, and end up with something that looks like it was blessed by a rainbow.
The best part? You don’t need an art degreejust a willingness to get a little messy and laugh when your “subtle pastel moment” turns into “neon galaxy explosion.”
This guide walks you through how to tie dye a hoodie in 12 clear steps, plus hoodie-specific tips (because hood seams, pockets, and thick fleece like to play hard-to-get with dye).
We’ll keep it beginner-friendly, but still nerdy enough to get you bright, long-lasting color.
Before You Start: The Hoodie Matters More Than Your Playlist
The single biggest “make or break” factor in a tie dye hoodie is the fabric content.
Most classic tie-dye dyes love natural fibers like cotton; synthetics like polyester are more stubborn and may come out softer or heathered (which can still look awesomejust not as saturated).
Choose the right hoodie
- Best: 100% cotton hoodie (or mostly cotton) for bold color.
- Okay: cotton/poly blends (expect a more vintage, muted look).
- Tricky: 100% polyesterneeds specialty dye/heat methods beyond typical tie-dye kits.
Pick your dye “system”
- Fiber-reactive dye (often Procion-type): brightest on cotton; typically uses a soda ash step.
- One-step tie-dye kits: convenient squeeze bottles; great for beginners.
- All-purpose dye: workable for some blends, but results vary; read your dye’s instructions closely.
Quick hoodie reality check: hoodies are thick. That’s why the most common hoodie tie-dye mistake is under-saturating the folds.
Translation: you’ll probably use more dye than you used on a T-shirt. Your hoodie is basically a dye sponge wearing a winter coat.
Supplies Checklist (So You Don’t Improvise With a Pasta Strainer)
- White or light-colored hoodie (clean)
- Fiber-reactive dye or tie-dye kit (squeeze bottles help a lot)
- Rubber bands (the MVPs of patterns)
- Disposable gloves (unless you want “mystery hands” for 3 days)
- Plastic table cover/trash bags + paper towels
- Zip-top bags or plastic wrap (keeps fabric damp while dye sets)
- Wire rack over a tray (optional, but reduces puddle-mush)
- Measuring cup/spoons + a bucket/tub for soaking
- Soda ash (if using fiber-reactive dye that requires it)
- Detergent for washing after (a dye-safe detergent is a bonus)
Optional but helpful: a spray bottle with water (for re-dampening), a spoon/fork (for a tidy spiral start),
and a dust mask if you’re working with powdered dye (nobody wants to inhale “Blue #5: The Sequel”).
How to Tie Dye a Hoodie: 12 Steps (Fun, Not Fussy)
Step 1: Check the label and set expectations
Look at your hoodie tag. If it’s mostly cotton, you’re heading toward bold color.
If it’s a heavy polyester blend, plan for a softer, more washed look (still cooljust different).
Decide whether you want high-contrast (more white space) or more coverage (less white, more color).
Step 2: Pre-wash the hoodie (skip fabric softener)
Wash your hoodie to remove factory finishes, oils, or “mystery softness” that can block dye.
Don’t use fabric softener. It’s basically dye’s clingy ex who won’t let go.
Leave the hoodie slightly dampdamp fabric helps dye move into the fibers more evenly.
Step 3: Protect your workspace like you’re prepping for a paintball fight
Cover your table with plastic. Wear old clothes. Put on gloves.
Keep paper towels nearby for quick wipe-upsespecially if you’re switching between colors.
If you’re indoors, pick a spot that can handle splashes (a garage/laundry room is ideal).
Step 4: Prep the hoodie for dye bonding (the “science” step)
If you’re using a kit that’s truly one-step, follow its instructions.
If you’re using fiber-reactive dye, prep a soda ash soak (common ratio is about 1 cup soda ash per gallon of water).
Soak the hoodie, then wring it out until it’s dampnot dripping like a sad sponge.
Step 5: Decide your pattern (hoodie-friendly options)
Hoodies have seams, a hood, and that kangaroo pocketthree places where patterns can either look amazing or look like you got distracted mid-project.
Choose a pattern that plays nicely with bulky fabric:
- Scrunch (crumple): easiest, great for thick fleece, hides “oops” moments beautifully.
- Spiral: classic; looks bold, but requires tighter control on a thicker garment.
- Bullseye/sunburst: dramatic center point; great on the back panel.
- Shibori-inspired binds: more white space, very stylish, very “I totally planned this.”
Step 6: Fold, twist, or scrunchthen band it tight
Lay the hoodie flat. For a scrunch, grab sections and bunch them into a loose mound.
For a spiral, pinch the center point and twist until the hoodie coils like a cinnamon roll (a delicious craft metaphor).
Add rubber bands to create sections. Tighter bands = more white space.
Hoodie pro tip: don’t ignore the sleeves. Fold them in so they get included in the bundle, or band them separately for intentional design.
Step 7: Mix your dye correctly (strong color starts here)
Mix dye exactly as directed. Use warm water when recommended so powder dissolves fully.
If you’re using multiple colors, set them up like a little paint station.
Consider picking 2–4 colors that blend well (neighbors on the color wheel) to avoid accidental “brown soup” in the middle.
Step 8: Apply dye slowlyhoodies need patience (and more saturation)
Put the hoodie bundle on a rack over a tray if you have one.
Apply dye to each section. Push the bottle tip into folds to get deeper coverage.
Start with lighter colors first (yellow, light pink) so they don’t get swallowed by navy or black.
Step 9: Flip it and repeat (because gravity is not your art assistant)
Turn the bundle over and apply dye to the back side using the same color layout.
Hoodies are thick; if you only dye one side, you’ll open it later and discover large “surprise white zones.”
(Sometimes that’s great. Sometimes it looks like you ran out of enthusiasm halfway through.)
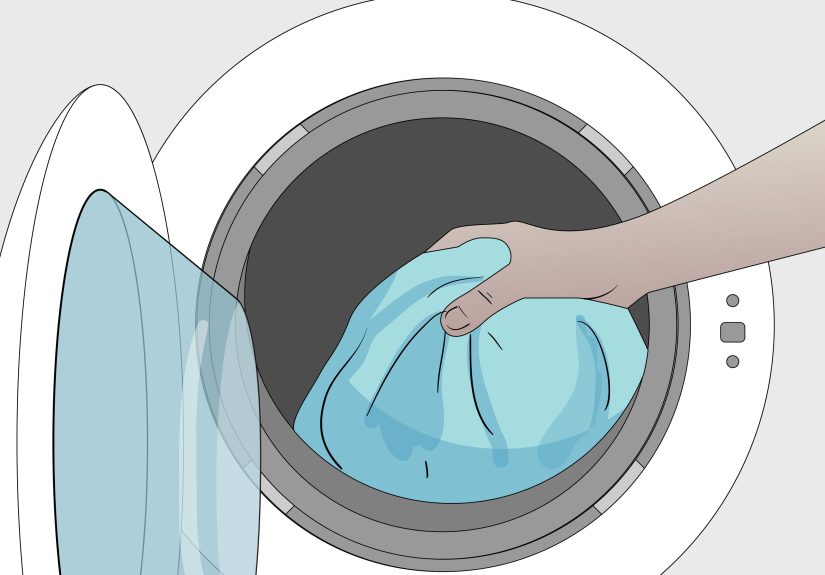
Step 10: Bag it up and let it setkeep it damp
Place the dyed hoodie in a plastic bag or wrap it in plastic to keep it from drying out.
Let it batch at room temperature or a warm spot. Many kits suggest 6–8 hours or overnight;
fiber-reactive dyes often benefit from a longer set time like 12–24 hours for richer color.
Step 11: Rinse smart: cold to warm, until mostly clear
Keep gloves on. Remove rubber bands. Rinse in cool water first to prevent back-staining,
then gradually warm the water as the runoff lightens. This helps flush out excess dye without muddying your pattern.
Take your timethis is where crisp designs are saved or sabotaged.
Step 12: Wash and dry for the big reveal (and long-term color)
Wash the hoodie separately the first time (or first few times) using cold water and detergent.
Avoid bleach and go easy on fabric softener early on. Dry as you prefer, but heat can fade some dyes faster over timeair-drying is gentler.
Then wear it like you bought it from a boutique with a suspiciously cool name.
Design Tips That Make Tie-Dye Hoodies Look “Intentional”
Work with the hoodie’s anatomy
- Kangaroo pocket: Either dye it as one bold block (great for contrast) or scrunch it separately for texture.
- Hood: Treat it like its own mini-canvas. A two-color dip on the hood can look clean and modern.
- Ribbed cuffs/hem: They absorb dye differently. If you want them lighter, apply less dye there.
Color combos that almost always work
- Ocean: turquoise + teal + navy (add a pinch of purple if you’re feeling fancy)
- Sunset: yellow + coral + fuchsia
- Galaxy: black + deep purple + electric blue (leave white space for “stars”)
- Soft pastel: diluted dye + lots of white space + gentle blends
Want crisp lines? Tight folds and tight bands.
Want watercolor vibes? Looser scrunch, slightly diluted dye, and more blending between sections.
Troubleshooting: Common Tie-Dye Hoodie Problems (and Fixes)
“My hoodie looks washed out.”
- It may be a high-poly blend. Expect softer color on synthetics.
- You may need more dye saturationhoodies drink dye like it’s their job.
- It may have dried out while setting. Keep it bagged and damp.
“My colors turned muddy.”
- Too many opposite colors overlapped (think red + green, or every color in one spot).
- Oversaturation can cause sections to bleed together. Use a little less dye per area and keep sections clearer.
“I got weird white streaks I didn’t plan.”
- That’s often under-saturation in deep foldscommon with thick fleece.
- Solution: open folds slightly during dyeing, apply dye from multiple angles, and flip the hoodie.
“My hands are stained. I look like a blueberry.”
Gloves next time. For now: soap, warm water, and patience. The good news is you can claim it’s “limited-edition nail art.”
Care Tips: Keep Your Tie-Dye Hoodie Bright
- Wash separately for the first few washes to avoid dye transfer.
- Use cold water and turn the hoodie inside out.
- Avoid bleach; avoid heavy fabric softener early on.
- Air-dry when possible, or use low heat.
Bonus tip: if you made a masterpiece, don’t immediately toss it into a wash with your favorite white socks.
That’s how you accidentally invent “tie-dye socks,” which is fun… unless it wasn’t the plan.
FAQ: Quick Answers People Google at 11:47 PM
How long should I let tie-dye set on a hoodie?
Many kits recommend 6–8 hours or overnight, but thicker hoodies often benefit from longer.
For fiber-reactive dye methods, 12–24 hours can deepen colorespecially on heavy cotton fleece.
Can I tie dye a hoodie that’s not white?
Yes, but results depend on the base color. Light colors (pale gray, light blue) work well.
Dark hoodies won’t show bright dye unless you use a different approach (like reverse dyeing/discharge), which requires extra care.
Do I need soda ash?
It depends. Many one-step kits include what you need. Fiber-reactive dyes typically use soda ash to help dye bond strongly to cotton.
If your instructions mention it, it’s not optionalunless you enjoy “beautiful dye that washes out.”
Should I remove the drawstring?
If it’s removable, pulling it out makes dyeing easier and more even.
If it’s not, you can tie it into the bundle and dye it too (or wrap it to keep it lighter).
Conclusion: Your Hoodie, But Cooler
Tie-dyeing a hoodie is the perfect mix of craft and controlled mayhem.
Once you understand the basicsfabric choice, damp setup, saturation, and a proper set-and-rinseyou can make designs that look genuinely professional.
Start simple (scrunch is undefeated), then level up to spirals, shibori-inspired binds, and color palettes that match your vibe.
Most importantly: don’t chase perfection. Tie-dye is supposed to look alive, not “printed in a factory by a robot with trust issues.”
Make one hoodie, learn what you’d tweak, and then suddenly you’ll be the person everyone texts like, “Hey… can you dye mine too?”
Experiences & Field Notes: What Tie-Dyeing a Hoodie Is Really Like (500+ Words)
If you’ve only tie-dyed T-shirts, your first hoodie will feel like upgrading from a tricycle to a pickup truck. The fabric is thicker, the seams are beefier,
and the hood has a way of folding into itself like it’s trying to disappear from responsibility. The first “experience” most beginners have is realizing the bundle is
bigger than expected. You’ll scrunch it up, add rubber bands, and then stare at it like, “So… where did the sleeves go?” That’s normal. Sleeves love to wander.
The second classic hoodie moment happens when you start applying dye and think, “Wow, this is taking a lot.” Also normal. Hoodies soak up dye like they’re storing it
for winter. On a T-shirt, you can get away with light coverage and still get decent color. On a hoodie, light coverage can turn into surprise white patches inside folds.
Some people love that high-contrast look; others open the hoodie later and gasp like they’ve discovered a secret map. If you want fewer surprises, the trick is to
apply dye from multiple angles, gently open thick folds with the bottle tip, and absolutely flip the bundle. Gravity does not dye the backside out of kindness.
Another real-world learning curve: the hood and pocket behave differently than the back panel. The pocket is layered fabric, so it can hold onto dye longerand it can
also rinse slower. If you rinse too aggressively right away, you might push dye where you didn’t intend. If you rinse too timidly, leftover dye can back-stain lighter areas.
The sweet spot feels a little like washing a very dramatic pet: start cool, be gentle, and gradually warm up once the water stops looking like a melted popsicle.
Color mixing is its own adventure. People often begin with every color they own because “options!” and end up with a muddy middle where everything overlaps.
A surprisingly good experience-based rule: pick two or three main colors and one “pop” color, and leave some white space on purpose. White space isn’t empty;
it’s contrast. It makes your colors look brighter and your design look planned. If you want “galaxy,” you don’t need seven colorsdeep blue, purple, and black with
pockets of white can look more cosmic than an entire rainbow squeezed into one sleeve.
Timing is also where tie-dye becomes an exercise in patience. The dye needs time to react, and hoodiesbeing thickbenefit from a longer set time than a thin tee.
Many first-timers peek too early, like opening an oven every two minutes. Resist. Keep it wrapped and damp, let it do its thing, and your future self will thank you
when the colors come out richer. While you wait, you can clean up your workspace and marvel at how dye gets everywhere except precisely where you set down the paper towels.
Finally, there’s the big revealarguably the best part. You remove rubber bands, unfold the hoodie, and see a pattern you couldn’t have fully predicted.
That “half surprise” is the whole charm. Even when it’s not what you imagined, it’s usually still wearable and unique. And if it really went off the rails?
Congratulations: you now own a one-of-one hoodie that nobody on earth can copy. In the world of fashion, that’s basically a flex.