
Table of Contents >> Show >> Hide
- Step 1: Identify Your Hibiscus Type (Because “Hibiscus” Is a Big Family)
- Step 2: Choose the Right Spot for Sunlight (Bloom Power Lives Here)
- Step 3: Get Soil Right (Drainage + Richness = Happy Roots)
- Step 4: Pick the Right Pot (If You’re Growing Hibiscus in Containers)
- Step 5: Plant at the Correct Depth and Give It Breathing Room
- Step 6: Water Consistently (Not Randomly, Like a Garden Gremlin)
- Step 7: Mulch Like You Mean It (Especially Outdoors)
- Step 8: Feed Your Hibiscus (It’s a Heavy Feeder, Not a Minimalist)
- Step 9: Prune at the Right Time (Haircuts, Not Amputations)
- Step 10: Deadhead and Groom (Small Effort, Big Payoff)
- Step 11: Watch for Pests Early (Because They Will Not RSVP)
- Step 12: Prevent Disease with Airflow and Smart Watering
- Step 13: Manage Indoor Light, Humidity, and Drafts (Winter Care for Tropical Hibiscus)
- Step 14: Troubleshoot Common Problems (Your Hibiscus Is Communicating)
- Conclusion
- Real-World Hibiscus Care: Experiences That Make the Steps Stick (About )
- SEO Tags
Hibiscus plants are basically the extroverts of the garden: big, bold, and not at all shy about showing off.
Give them what they want, and they’ll reward you with dinner-plate blooms that make your porch look like it hired a professional stylist.
Ignore their needs, andwellhibiscus can be a little dramatic (bud drop is their signature move).
This guide walks you through hibiscus plant care in 14 practical steps, whether you’re growing
a tropical hibiscus in a pot or a hardy hibiscus in the ground. You’ll learn how to
dial in sunlight, watering, fertilizer, pruning, pest control, and overwinteringwithout turning your weekend into a full-time gardening internship.
Step 1: Identify Your Hibiscus Type (Because “Hibiscus” Is a Big Family)
What to do
Figure out whether you have:
tropical hibiscus (often Hibiscus rosa-sinensisglossy leaves, nonstop blooms in warmth),
or hardy hibiscus (like Hibiscus moscheutosperennial, dies back in winter, returns in late spring/summer).
Also note your USDA zone and whether you’re growing in a container or in-ground.
Why it works
Care differs most around cold tolerance and winter strategy. Tropical hibiscus hates frost and usually needs indoor time.
Hardy hibiscus can handle winter outdoors (and tends to wake up fashionably late in spring).
Step 2: Choose the Right Spot for Sunlight (Bloom Power Lives Here)
What to do
Aim for full sun in most climatesthink at least 6 hours of direct light.
If you live where summers are intense, give afternoon shade to reduce stress, especially for potted plants.
Indoors, place tropical hibiscus near your brightest window (south or west is usually best).
Why it works
Hibiscus can survive in partial shade, but “survive” and “put on a flower show” are different life goals.
Less light often means fewer blooms, leggier growth, and more sulking.
Step 3: Get Soil Right (Drainage + Richness = Happy Roots)
What to do
Use fertile, well-draining soil with organic matter. For containers, choose a quality potting mix and consider
mixing in compost for nutrition. Avoid dense garden soil in pots (it compacts like a bad mattress).
Why it works
Hibiscus likes consistent moisture, but not swampy roots. Good drainage helps prevent root rot while still
allowing you to water generously during active growth.
Step 4: Pick the Right Pot (If You’re Growing Hibiscus in Containers)
What to do
Choose a pot with drainage holes and enough room for roots to grow. A slightly larger pot is fine, but don’t
jump to a huge container unless you enjoy guessing moisture levels (and losing).
If the plant is root-bound, repot in spring and refresh the mix.
Why it works
Container hibiscus dries faster than in-ground plants, but it also gives you control over soil quality,
sunlight positioning, and winter protectionbasically the deluxe management package.
Step 5: Plant at the Correct Depth and Give It Breathing Room
What to do
Plant hibiscus so the root ball sits at the same depth it was growing before. Don’t bury the crown.
In-ground, space plants based on mature size so air can move through the canopy.
Why it works
Correct depth prevents rot and stress. Spacing reduces fungal issues and makes pest scouting easierbecause
nobody wants to play hide-and-seek with spider mites.
Step 6: Water Consistently (Not Randomly, Like a Garden Gremlin)
What to do
During the growing season, water when the top inch of soil feels dry, then water deeply.
In hot, windy weather, containers may need daily watering. In cooler conditions, back off.
Always check moisture before watering againhibiscus dislikes both drought and soggy roots.
Why it works
Consistent moisture supports continuous blooming and reduces stress-related problems like yellow leaves or bud drop.
The key phrase is “consistently moist,” not “constantly soaked.”
Step 7: Mulch Like You Mean It (Especially Outdoors)
What to do
Add 2–3 inches of mulch around outdoor hibiscus, keeping it a couple of inches away from the stem.
Use shredded bark, leaf mold, or composted wood chips.
Why it works
Mulch stabilizes soil temperature, slows evaporation, and gradually improves soil structurehelpful for
hibiscus watering consistency and for keeping roots from overheating in summer.
Step 8: Feed Your Hibiscus (It’s a Heavy Feeder, Not a Minimalist)
What to do
Use a balanced fertilizer or a bloom-focused option during active growth (spring through early fall).
For containers, smaller, more frequent feedings often work bestthink “snacks,” not “one giant buffet.”
Reduce or stop fertilizing in winter, especially if a tropical hibiscus is indoors and growing slowly.
Why it works
Hibiscus invests heavily in flowers, so it needs consistent nutrients. Overdoing nitrogen can produce lush leaves
with fewer blooms, so aim for balanced feeding and follow label directions.
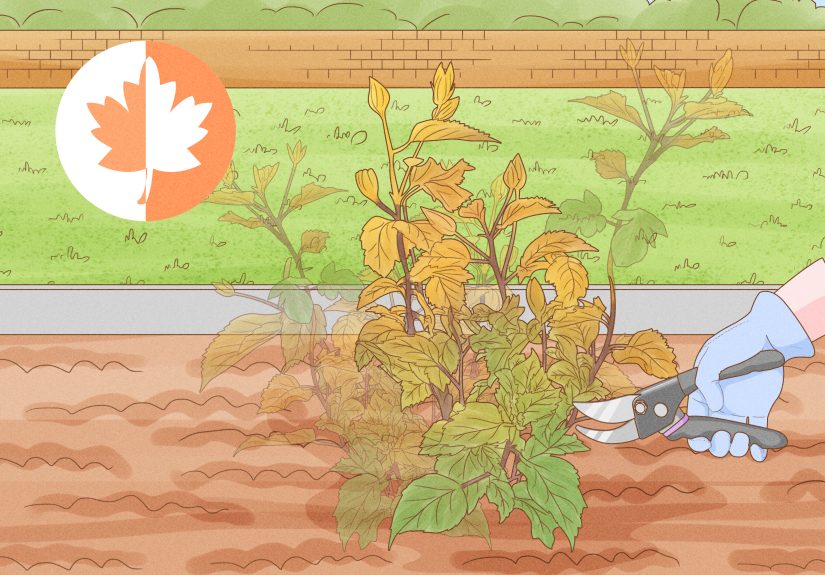
Step 9: Prune at the Right Time (Haircuts, Not Amputations)
What to do
Prune to shape and encourage branching. Remove dead, damaged, or crossing stems any time.
For tropical hibiscus, prune in spring as growth resumes (often after moving it outdoors and it acclimates).
For hardy hibiscus, cut back dead stems in late winter/early spring or after frost once you’ve confirmed dieback.
Why it works
Pruning helps create a fuller plant with more flowering tips. Timing matters because heavy pruning too late
can reduce budshibiscus blooms on new growth, and you don’t want to delete the future.
Step 10: Deadhead and Groom (Small Effort, Big Payoff)
What to do
Pinch or snip off spent blooms and remove yellowing leaves. Clean up fallen petals in pots to discourage pests.
If your hibiscus produces seed pods and you want more blooms, remove pods so the plant puts energy back into flowering.
Why it works
Grooming improves airflow, reduces fungal risk, and keeps the plant focused on flowering instead of seed-making.
It also makes your hibiscus look like it has its life together.
Step 11: Watch for Pests Early (Because They Will Not RSVP)
What to do
Check the undersides of leaves weekly for aphids, whiteflies, mealybugs, and spider mites.
Start with the gentlest approach: a strong spray of water, then insecticidal soap or horticultural oil if needed.
Indoors, isolate new plants and inspect before placing them near your hibiscus.
Why it works
Pests multiply fast in warm, dry conditionsespecially indoors. Early detection prevents distorted leaves,
yellowing, sticky honeydew, and that “why does my plant look tired?” vibe.
Step 12: Prevent Disease with Airflow and Smart Watering
What to do
Water at the soil line when possible and avoid splashing foliage late in the day.
Space plants for airflow and prune crowded areas. Remove and discard severely diseased leaves (don’t compost them if disease is active).
Why it works
Many fungal issues thrive with damp leaves and stagnant air. Basic prevention is easier than trying to rescue a plant
after problems spread through the canopy.
Step 13: Manage Indoor Light, Humidity, and Drafts (Winter Care for Tropical Hibiscus)
What to do
Before bringing a tropical hibiscus indoors, inspect for pests and rinse the plant thoroughly.
Place it in bright light, keep it away from heating vents and cold drafts, and consider raising humidity
(a pebble tray or humidifier can help). Water less than in summer, letting the top layer dry slightly between waterings.
Why it works
Indoor environments are often darker and drier, which can trigger leaf drop, bud drop, and pest flare-ups.
Stable conditions reduce stress and help your hibiscus coast through winter without a meltdown.
Step 14: Troubleshoot Common Problems (Your Hibiscus Is Communicating)
What to do
-
Yellow leaves: Check watering first (too much or too little are both common). Confirm drainage,
then review sunlight and feeding. Also inspect for pests. -
Bud drop: Reduce sudden changesmoving the pot, shifting light, temperature swings, or inconsistent moisture can trigger it.
Keep conditions steady and avoid letting roots dry out. - Lots of leaves, few blooms: Increase sunlight, adjust fertilizer (avoid excess nitrogen), and prune lightly in spring to promote branching.
- Wilting in heat: Water deeply in the morning, mulch outdoor plants, and provide afternoon shade in extreme climates.
Why it works
Hibiscus problems are usually care mismatches, not mysteries. When you treat the cause (light, water, nutrients, pests),
the plant often rebounds quicklylike it’s saying, “Finally, you’re listening.”
Conclusion
Great hibiscus care isn’t complicatedit’s consistent. Give your plant strong light, rich well-draining soil,
steady watering, and regular feeding during the growing season. Prune at the right time, keep an eye out for pests,
and adjust your strategy in winter depending on whether you’re growing tropical or hardy hibiscus.
Do that, and your hibiscus will keep producing those wow-factor blooms that make neighbors “accidentally” wander onto your porch to look closer.
Real-World Hibiscus Care: Experiences That Make the Steps Stick (About )
The first hibiscus I ever cared for taught me a valuable lesson: this plant does not appreciate surprise lifestyle changes.
I brought home a tropical hibiscus in full bloom, set it on my patio, and felt like a gardening genius for exactly four days.
Then I moved it to “a better spot” (translation: I rearranged furniture and the hibiscus became collateral damage).
Within a week, buds started dropping like my phone battery on a road trip. The plant wasn’t dyingit was protesting.
When I stopped relocating it every time I changed my mind, the bud drop slowed and blooming returned. Moral: pick a good spot and commit.
My second lesson came from watering. Hibiscus is thirsty, but it’s not interested in soggy socks.
One summer, I watered on a schedule instead of checking the soilbecause I, too, enjoy living dangerously.
After a stretch of humid weather, the pot stayed wet longer than usual, and leaves turned yellow.
I assumed the plant needed more fertilizer (classic overachiever mistake), which made things worse.
Once I let the mix dry slightly and improved drainage, the plant perked up. Now I do the finger test:
if the top inch is dry, water; if it’s damp, I back away slowly and apologize for even thinking about it.
Fertilizer was my third “aha.” Hibiscus blooms hard, so feeding matters, especially in containers.
But more isn’t bettermore is just… more. I once used a high-nitrogen lawn-style fertilizer because it was nearby,
which produced a hibiscus with the leafy confidence of a rainforest and the flower output of a shy cactus.
Switching to a balanced or bloom-leaning fertilizer and feeding consistently (not aggressively) brought flowers back into the relationship.
Also: never fertilize dry soil. Water first, then feedthink “meal with a drink,” not “saltine cracker challenge.”
Winter care is where hibiscus owners earn their merit badge. The first year I brought my tropical hibiscus indoors,
I skipped pest checks. Big mistake. Tiny pests love cozy indoor conditions, and I ended up battling spider mites
like it was a part-time job. Now my routine is simple: rinse the plant, inspect under leaves, isolate it for a week,
and only then let it join the houseplants. Indoors, I accept that growth slows, so I cut back on water and stop pushing fertilizer.
The goal is “stable and healthy,” not “actively auditioning for a flower commercial in January.”
The best experience, though, is when you finally get the rhythm right: morning sun, consistent moisture, regular feeding,
and a quick weekly pest scan. Hibiscus responds fastnew buds form, leaves look glossy, and flowers open like a daily celebration.
It’s the kind of plant that makes you feel like you know what you’re doing… even if you’re still googling “is this leaf normal”
at 11:47 p.m. (No judgment. We’ve all been there.)


