Table of Contents >> Show >> Hide
- What Is Unicorn Spit (and Why Is It Everywhere)?
- The Big IKEA Reality Check: Your Table Isn’t “Wood” (Mostly)
- Materials and Tools
- Step-by-Step: Unicorn Spit IKEA Table Hack (The Reliable Method)
- Design Ideas That Look Fancy (Even If You Made Them in Pajamas)
- Troubleshooting: Fixes for Common “Oops” Moments
- How to Make It Last on a Real Table
- FAQ
- Conclusion
- Real-World Experiences and Lessons Learned (So You Don’t Learn Them the Hard Way)
The IKEA table is the beige cardigan of furniture: practical, inexpensive, and somehow always in your life even if you swear you “don’t do neutrals.”
Unicorn Spit, on the other hand, is the glitter cannon of the DIY world. Put them together and you get the holy grail of weekend projects:
a Unicorn Spit IKEA table hack that turns a basic side table into a glossy, colorful conversation starter that looks like it
came from an art gallery… or at least a very confident mermaid’s living room.
This guide is for anyone who wants bold color without complicated tools. We’ll cover what Unicorn Spit actually is, why IKEA tables need a little
special handling, the easiest step-by-step method, and how to seal it so the finish doesn’t look like a sad, dusty rainbow. There will be tips,
troubleshooting, and at least one reminder that Unicorn Spit is not a snack (the name is misleading; life is unfair).
What Is Unicorn Spit (and Why Is It Everywhere)?
Unicorn Spit is a highly concentrated, water-based colorant that acts like a paint, gel stain, and glaze depending on how you use it.
Straight from the bottle it can be vivid and opaque. Add water and it becomes more like a translucent stain or wash. It dries with a chalky look
that feels underwhelming for about five minutesuntil you seal it. Then it “wakes up” and gets that deep, saturated, almost dimensional pop
that makes people ask if you used resin (sometimes you did, sometimes you didn’t, and sometimes you just nod mysteriously).
Why it’s perfect for an IKEA table makeover
- Wild color with minimal effort (blend, mist, smearart school vibes, no tuition).
- Flexible looks: watercolor wash, marbled swirls, stained-glass vibes, or bold opaque patches.
- Fast gratification: you can usually finish the color layer in a single session and seal later.
- DIY-friendly: brushes, foam pads, rags, even gloved hands work.
The Big IKEA Reality Check: Your Table Isn’t “Wood” (Mostly)
Many popular IKEA tables (especially the LACK series) are constructed from engineered boards with a lightweight honeycomb paper interior.
Translation: they’re strong enough for real life, but they’re not the kind of solid wood you can aggressively sand, stain, and pretend you’re
in a woodworking montage.
The outside is typically a smooth, sealed surface (often foil/laminate). That matters because traditional stains want to soak into porous wood.
A slick IKEA surface doesn’t absorb much, so Unicorn Spit behaves more like a glaze/paint layer than a true penetrating stain.
The hack still works beautifullyyou just prep differently and choose the right sealer.
Two smart approaches (choose your adventure)
-
Classic “Unicorn Spit on IKEA finish” method: clean, lightly scuff, optional primer, then Unicorn Spit as glaze/paint.
This is quickest and keeps the table lightweight. -
“Real wood top” upgrade: add a thin plywood/wood panel on top (or veneer) so Unicorn Spit can act more like a stain.
This looks extra luxe and gives you more control over grain effects.
Materials and Tools
You don’t need a workshop. You need a small pile of supplies and the confidence to make a mess on purpose.
Must-haves
- IKEA table (LACK is the usual suspect, but any small IKEA top works)
- Unicorn Spit gel stain/glaze (2–4 colors is plenty; more is chaosfun chaos, but chaos)
- Cleaner/degreaser (or dish soap and warm water)
- Lint-free rags or paper towels
- Foam brush or soft paintbrush
- Spray bottle with water (for blending, soft edges, and fixing “oops” moments)
- Disposable gloves (unless you want rainbow hands that scream “I craft in my sleep”)
Strongly recommended
- Fine sandpaper (220 grit) or a sanding sponge (light scuffing only)
- Tack cloth or microfiber cloth (for dust removal)
- Painter’s tape (clean edges, masked designs, or “I meant to do that” geometry)
-
Sealer:
- Oil-based polyurethane (classic, durable, warm glossy depth)
- Or a clear epoxy/resin topcoat for a thick glassy finish (high drama, high shine)
Step-by-Step: Unicorn Spit IKEA Table Hack (The Reliable Method)
This is the version that works even if your IKEA tabletop laughs at stains and refuses to absorb anything like a polite piece of oak would.
We’re using Unicorn Spit as a decorative color layer, then locking it in with the right topcoat.
1) Prep like you actually want it to last
- Clean thoroughly. Remove oils, fingerprints, and that mysterious sticky spot you’ve been ignoring since 2022.
-
Lightly scuff the surface (220 grit). You are not sanding down a deck. You’re just giving the slick finish a little tooth.
Avoid aggressive sanding on IKEA honeycomb-style piecesyou don’t want to break through the outer layer. - Wipe off dust with a slightly damp cloth and let it dry fully.
2) Optional but helpful: Prime for paint-like durability
If your IKEA surface is especially glossy or you know the table will take daily abuse (kids, roommates, your own iced coffee habits),
a bonding primer can make a huge difference. A shellac-based primer is a common go-to for laminate-style surfaces because it grips slick finishes well.
Let the primer cure according to the label before adding color.
3) Lay down your Unicorn Spit color
This is the fun part. The goal is controlled chaos: enough movement to look artistic, not so much that it looks like a tie-dye shirt
lost a fight with a mop.
-
Plan a palette. Try one of these combos:
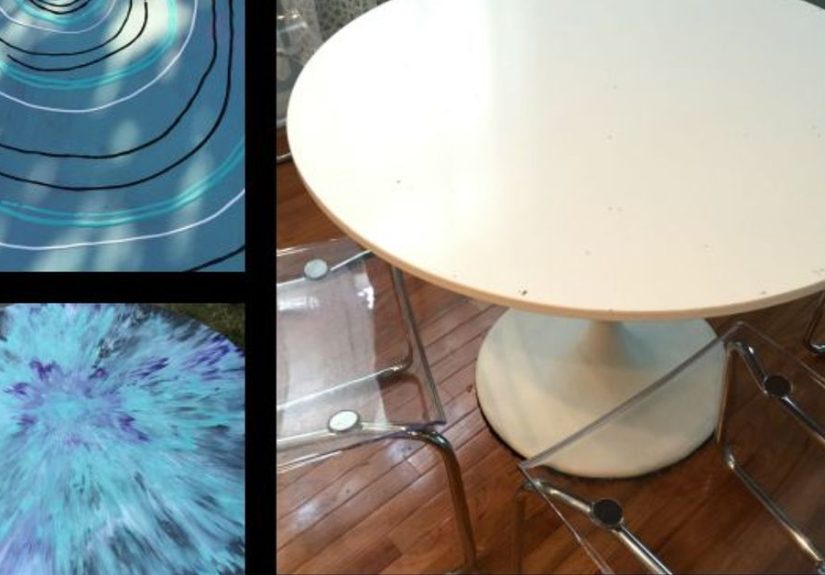
- Galaxy: deep blue + purple + a touch of black, with hints of teal.
- Sunset sherbet: coral/red + orange + pink, softened with water for an ombré fade.
- Peacock: teal + green + gold accents (especially great under a glossy topcoat).
- Modern neon: bright turquoise + magenta + yellow, with crisp taped geometric sections.
-
Apply in sections. Put small amounts of Unicorn Spit directly on the surface or on a foam brush/rag, then spread.
Work in patches rather than covering the entire tabletop at onceUnicorn Spit dries fairly fast. -
Mist with water to blend. Use your spray bottle to soften edges, create watercolor blooms, and keep the product workable.
You can also mist your rag/brush instead of the table for more control. -
Create movement. Swipe lightly with a damp cloth, dab with a sponge, or swirl with a brush tip.
Want “cells” or marbling? Add a tiny bit of water and gently nudge colors togetherdon’t overmix. - Let it dry until it looks chalky. This is normal. Resist the urge to panic-text your craft group chat.
4) Smooth it (without erasing the magic)
Once dry, you may see texture or little “clumps” where pigment concentrated. Lightly buff with very fine sandpaper (or even a brown paper bag)
to knock down roughness. Wipe off dust gently.
5) Seal it the right way (this is where it becomes “wow”)
Sealing is not optional unless you enjoy living dangerously. Unicorn Spit needs a protective topcoat on tabletops.
For the signature deep, glossy look, a non-water-based topcoat is commonly recommendedespecially when you want maximum color pop and dimension.
Option A: Oil-based polyurethane (the classic)
- Apply thin coats with a high-quality brush or foam applicator.
- Let each coat dry fully (follow your product label; ventilation helps).
- Lightly sand between coats with 320–400 grit for a smoother final finish.
- Do 3–5 coats for tabletops. More coats = more depth and better protection.
Option B: Epoxy/resin topcoat (maximum shine, maximum drama)
If you want a thick, glass-like surface that looks like you trapped a rainbow under ice, epoxy can do that.
It’s also great for heavy-use tables, but it requires careful mixing, level surfaces, and a dust-free curing area.
This is the “I want it to look store-bought expensive” route.
Design Ideas That Look Fancy (Even If You Made Them in Pajamas)
1) Stained-glass illusion
Tape off faux “lead lines” with thin strips of tape, apply Unicorn Spit in each section, then peel tape and seal.
Under a glossy topcoat, it gives major stained-glass energywithout requiring you to own a cathedral.
2) Marble swirl tabletop
Use two main colors plus a tiny touch of a third for veining. Work wet-on-wet, mist lightly, and drag a thin brush through the blend.
Seal with high-gloss polyurethane or epoxy for a deep stone-like finish.
3) Ombre fade (clean and modern)
Choose one color family and dilute progressively with water. Start darkest at one edge and fade to nearly transparent.
This looks especially sharp on minimalist IKEA shapes.
4) “Expensive” wood-look cheat (without actual wood)
Paint the top in a light neutral first, then use Unicorn Spit as a tinted glaze in long strokes to mimic grain.
A warm gloss topcoat makes it look far more high-end than it has any right to be.
Troubleshooting: Fixes for Common “Oops” Moments
Problem: It looks dull and chalky
That’s normal before sealing. Add your topcoat and the color will deepen dramatically. If it still looks dull after sealing, you may have used
a matte/satin topcoat; switch to gloss for more depth.
Problem: The color beaded up or wouldn’t stick
That’s usually leftover grease, silicone polish, or an ultra-slick surface. Clean again, scuff lightly, and consider a bonding primer.
Problem: Muddy colors
Too much blending turns bright colors into “mystery bruise.” Work in smaller sections, mist lightly, and stop mixing sooner.
Let layers dry and add fresh color on top instead of stirring everything together.
Problem: Sticky finish after sealing
Sticky usually means coats were too thick, humidity was high, or the prior layer wasn’t fully dry.
Give it more time, improve ventilation, and use thinner coats next time. If it stays tacky, lightly sand and recoat properly.
How to Make It Last on a Real Table
- Use coasters for hot drinks (your rainbow deserves basic respect).
- Avoid harsh cleaners for the first couple weeks while the topcoat cures fully.
- Wipe spills quicklyespecially alcohol and nail polish remover, which can be finish bullies.
- Recoat later if needed. A light scuff and a fresh topcoat can revive shine without redoing the color.
FAQ
Can I do this on a LACK table without adding wood on top?
Yes. Treat Unicorn Spit like a decorative glaze/paint layer on the existing surface. Prep well, and seal with a durable topcoat.
If you want true stain absorption and grain effects, adding a thin wood top is the upgrade.
Do I have to use oil-based polyurethane?
Many makers prefer non-water-based topcoats because they keep Unicorn Spit looking vibrant and deep.
Water-based finishes can sometimes change the look (often making it flatter or less “alive”).
If you experiment with water-based sealers, test on a sample board first.
How many colors should I use?
For a first-time Unicorn Spit IKEA table hack, 2–3 colors is the sweet spot. Four is possible. Five is a lifestyle choice.
Conclusion
The beauty of a Unicorn Spit IKEA table hack is that it’s equal parts “easy win” and “art experiment.”
You start with an ordinary IKEA table that’s doing its best. You add vivid color in layers, blend with water like you meant to do that,
and then seal it until it looks like the finish has actual depth.
If you keep two things in mindprep matters and sealing is the magic trickyou’ll end up with a table
that looks custom, glossy, and weirdly expensive for something that started as flat-pack furniture. And if anyone asks where you bought it,
you’re allowed to say, “Oh, this old thing? It’s a one-of-one.”
Real-World Experiences and Lessons Learned (So You Don’t Learn Them the Hard Way)
People who try a Unicorn Spit IKEA table hack usually fall into two camps: the “I planned a palette and taped crisp lines” camp,
and the “I blinked and now it looks like a wizard battle happened on my tabletop” camp. Both can end in a gorgeous table, but the journey
feels differentkind of like baking bread versus letting a sourdough starter choose chaos.
One common experience is the emotional roller coaster of the dry stage. Unicorn Spit often dries looking chalky and muted, which can feel
like the project went from “vibrant rainbow” to “pastel regret.” This is the moment where patience pays off. The topcoat is what transforms
the surface from dusty to dimensional. Many DIYers describe that first coat of sealer as the “movie makeover montage” momentthe point where
the colors suddenly look deeper, cleaner, and more intentional. If you’re the kind of person who needs proof before commitment, do a quick
test patch on the underside of the tabletop. Watching one sealed corner pop can calm your nervous system immediately.
Another frequent lesson: IKEA surfaces are picky. If the color beads up, slides around, or wipes off too easily, it’s usually not because you
“did it wrong,” but because the tabletop is too slick or has invisible residue (cleaners, polish, cooking oils, hand lotionhuman life is oily).
The fix is nearly always the same: clean again, scuff lightly, and consider a bonding primer if the table will see heavy use. People are often
surprised that a little prep can make the difference between “this is art” and “this is a temporary mood.”
Blending is where most of the personality shows up. Some folks love misting water and letting colors bloom like watercolor on paper. Others
prefer controlled strokes and gentle transitions. The shared discovery is that less mixing makes brighter results.
Over-blending can turn jewel tones into muddy neutrals, especially with complementary colors. A trick many makers adopt: place colors next to each
other, mist lightly, and let the edges blend on their ownthen stop touching it. If you want more complexity, add a second layer after the first
dries rather than stirring everything together while wet.
Sealing experiences vary by finish choice. Oil-based polyurethane is often described as giving the richest “depth,” but it comes with stronger
odor and longer dry timesso people learn quickly that ventilation is not optional. Epoxy/resin is praised for the thick glassy look, but beginners
often discover the “dust tax”: anything floating in the air will try to land in your perfectly poured surface like it’s paying rent. The most
practical habit is creating a curing “tent” (a clean box or plastic cover held above the surface) to keep dust and curious pets out.
Finally, there’s the durability reality check. Even the prettiest table needs some manners: coasters, gentle cleaning for a while, and time for
the topcoat to fully cure. The best stories come from people who use these tables dailybedside stands, plant pedestals, entryway catch-allsand
realize that a good finish doesn’t just protect the art, it makes the piece feel more legitimate. The takeaway is simple: you’re not just making
something colorful. You’re making something usable. And that’s the sweetest kind of DIY magic.


