
Table of Contents >> Show >> Hide
- Why Make Scented Candles at Home?
- What You Need to Make Scented Candles
- How to Make Scented Candles: 6 Simple Steps
- Best Fragrance Ideas for Homemade Scented Candles
- Common Candle-Making Mistakes to Avoid
- Candle Safety Tips Every Maker Should Know
- Extra Experience: Lessons from Making Scented Candles at Home
- Conclusion
Making scented candles at home is one of those rare hobbies that feels fancy, smells amazing, and does not require you to own a pottery wheel, a barn, or a mysterious “crafting room” with perfect lighting. With the right wax, wick, fragrance oil, container, and a little patience, you can turn a simple kitchen counter into a tiny candle studio. The best part? You get to choose the scent. Lavender for calm evenings, citrus for bright mornings, vanilla for cozy movie nights, or cedarwood when you want your living room to smell like a stylish cabin with excellent Wi-Fi.
This guide explains how to make scented candles in six simple steps, from choosing supplies to curing and burning your finished candle. It is written for beginners, but it includes the kind of practical details that help you avoid classic candle-making drama: sunken tops, weak scent throw, crooked wicks, smoky flames, and candles that look like they had a rough day.
The main keyword here is how to make scented candles, but we will also naturally cover related topics such as DIY candles, soy wax candles, fragrance oil for candles, candle wick size, candle safety, and homemade candle tips. Let’s melt some waxresponsibly, of course.
Why Make Scented Candles at Home?
Store-bought candles are wonderful, but they can be expensive, especially when the label contains words like “artisan,” “botanical,” or “hand-poured in a moonlit studio.” When you make candles yourself, you control the wax, scent strength, container style, color, and overall mood. You can make a clean white soy candle in a minimalist jar, a warm amber candle for fall, or a floral candle that smells like a garden party without the mosquitoes.
Homemade scented candles also make thoughtful gifts. A candle labeled “Sunday Morning Coffee” or “Please Do Not Talk to Me Until Noon” feels more personal than another generic mug. Plus, once you understand the basics, you can experiment with scent blends, different waxes, decorative labels, and seasonal collections.
What You Need to Make Scented Candles
Before starting, gather everything in one place. Candle making moves calmly, but once wax is hot, you do not want to sprint around looking for a thermometer like you are competing in a craft-themed obstacle course.
Basic Supplies
- Candle wax: Soy wax is beginner-friendly, widely available, and popular for container candles. Coconut wax, beeswax, paraffin, and blended waxes are also common options.
- Fragrance oil: Use fragrance oils made specifically for candles. Not every pleasant-smelling oil is safe or effective in hot wax.
- Wicks: Choose wicks based on your container diameter, wax type, fragrance load, and dye use.
- Heat-safe containers: Use jars or tins designed to handle candle heat. Avoid thin glass, cracked glass, or random mystery jars.
- Double boiler: A pouring pitcher placed in a pot of simmering water works well.
- Digital scale: Weigh wax and fragrance oil for accuracy.
- Thermometer: Temperature matters more than beginners expect.
- Wick stickers or hot glue: These hold the wick tab in place.
- Wick holder: A wick bar, clothespin, or pencil can keep the wick centered.
- Stirring tool: Use a heat-safe spoon or silicone spatula.
- Labels and warning stickers: Especially important if gifting or selling candles.
How to Make Scented Candles: 6 Simple Steps
Step 1: Choose Your Wax, Container, and Wick
The first step in making scented candles is matching the wax, container, and wick. Think of these three as roommates. If one behaves badly, the whole apartment suffers.
For beginners, soy wax is a smart place to start because it is easy to work with, commonly used in container candles, and gives a soft, creamy look. Soy wax can sometimes frost or form uneven tops, but those cosmetic quirks are normal and fixable. Coconut wax blends are often smooth and luxurious, beeswax has a naturally warm aroma, and paraffin can deliver strong scent throw. Each wax has its own melting point, fragrance capacity, and pouring preferences, so always check the manufacturer’s instructions for the specific wax you buy.
Next, choose a container. A straight-sided 8-ounce candle jar is beginner-friendly because it is easier to wick than a very wide, narrow, or oddly shaped vessel. Your container should be heat-resistant and made for candle use. Reusing old jars can be tempting, but not all glass is designed to handle heat. That cute salsa jar may have lived a meaningful life, but it does not automatically deserve a second career as a candle.
Finally, select the wick. Wick size affects flame height, melt pool, scent throw, soot, and how evenly the candle burns. A wick that is too small may tunnel down the center, leaving wax stuck on the sides. A wick that is too large may create a big flame, smoke, or overheated container. Use the wick chart from your supplier as a starting point, then test. Candle makers often test one wick size smaller and one wick size larger than the suggested size because fragrance oil and dye can change how a candle burns.
Step 2: Measure the Wax and Fragrance Oil
Accurate measuring is one of the secrets to a better homemade scented candle. Measuring by weight is more reliable than measuring by volume because wax flakes and fragrance oils vary in density. A digital kitchen scale is your new best friend. Give it a name if you want. It has earned respect.
A common beginner formula is around 6% fragrance load, which means fragrance oil equals about 6% of the total wax weight. Many candle waxes can handle somewhere around 6% to 10%, but more fragrance does not always mean a stronger candle. Too much oil can cause problems such as sweating, poor burning, weak scent throw, or an unstable flame.
For a simple example, if you use 16 ounces of wax and want about a 6% fragrance load, you would use roughly 1 ounce of fragrance oil. This is why many beginner candle recipes recommend 1 ounce of fragrance oil per pound of wax. Once you gain experience, you can adjust based on the wax, fragrance strength, container size, and burn test results.
Here is a practical beginner batch:
- 16 ounces soy container wax
- 1 ounce candle-safe fragrance oil
- Two 8-ounce candle jars, depending on jar fill volume
- Two properly sized wicks
Do not guess fragrance oil by pouring until your heart says “enough.” Your heart is charming, but it is not a measuring instrument.
Step 3: Prepare the Candle Containers
Before melting wax, prepare your jars. Clean them with a lint-free cloth so there is no dust, oil, or sticker residue inside. Make sure they are completely dry. Water and hot wax are not friends; they are more like neighbors who complain about each other.
Attach the wick tab to the center bottom of the container using a wick sticker or a small dot of hot glue. Press it firmly so it stays put when you pour. Then place a wick holder, pencil, chopstick, or clothespin across the top of the jar to keep the wick upright and centered.
Centering the wick matters. A crooked wick may burn unevenly and can make one side of the jar hotter than the other. If the wick leans too close to the glass, the candle may become unsafe. Take a few extra seconds here. Future You will be grateful, and Future Candle will look less like it was assembled during turbulence.
If your room is cool, gently warming the containers can help reduce adhesion issues and rough tops. Some candle makers place empty jars in a warm area before pouring. Do not put cold jars straight into high heat, and never overheat glass. The goal is warm and comfortable, not “tiny sauna for jars.”
Step 4: Melt the Wax Slowly and Add Fragrance
Set up a double boiler by placing a candle pouring pitcher or heat-safe melting pot inside a larger pot with a few inches of water. Heat the water gently. Add wax to the pouring pitcher and let it melt slowly, stirring occasionally. Avoid direct high heat because wax can scorch, discolor, or become unsafe if overheated.
Many soy candle recipes recommend heating wax to around 180°F to 185°F before adding fragrance oil, but your wax manufacturer’s instructions should always be your first guide. This temperature range is often used because it helps fragrance oil bind evenly with melted wax. Once the wax reaches the recommended temperature, remove it from the heat source, add the fragrance oil, and stir gently for one to two minutes.
Gentle stirring matters. You want the fragrance fully incorporated without whipping in air bubbles. Imagine stirring soup for someone you like, not beating pancake batter after a stressful email.
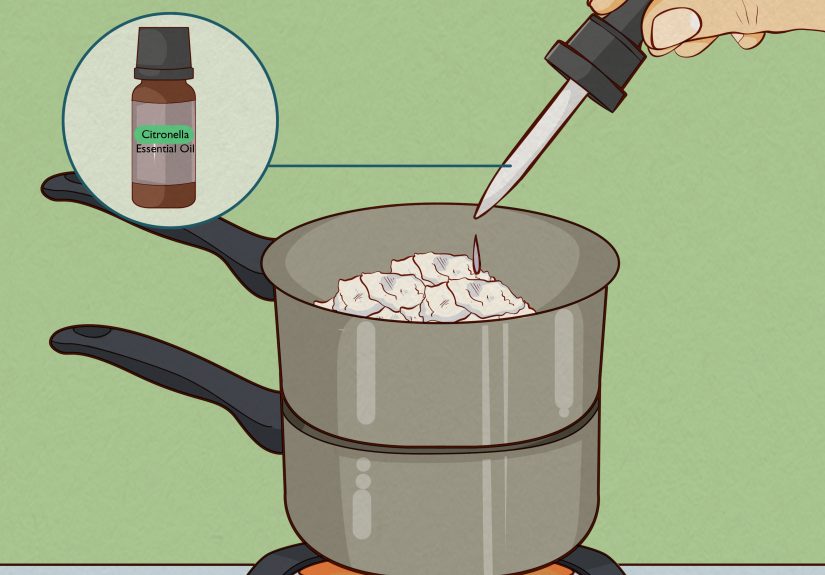
Should you use essential oils or fragrance oils? Both can be used in some candle projects, but candle-safe fragrance oils are usually more predictable for scent throw and performance. Essential oils vary widely; some have low flash points, some smell different when heated, and some fade in wax. If you use essential oils, choose ones recommended for candle making and follow safe usage rates. “It smells nice in a diffuser” does not automatically mean “it belongs in a candle.”
Step 5: Pour the Wax and Let It Cool
After adding fragrance, let the wax cool to the recommended pouring temperature for your wax. For many soy waxes, this may be around 130°F to 160°F, depending on the wax brand and desired finish. Some suppliers recommend hotter pours for specific waxes; others suggest cooler pours for smoother tops. This is why reading the wax instructions is not optional homeworkit is the map.
Pour slowly into the prepared containers. Try not to splash wax on the sides or disturb the wick. Leave a little space at the top of the jar. After pouring, check that the wick is still centered. Adjust it while the wax is liquid if needed.
Let the candles cool at room temperature in a draft-free area. Do not move them too soon. Do not put them in the refrigerator to “speed things up.” Rapid cooling can cause cracking, sinkholes, poor adhesion, or uneven surfaces. Candle making rewards patience, which is inconvenient but true.
If the candle top dries with a small dip or rough patch, do not panic. Many beginners see this with soy wax. You can gently warm the top with a heat gun to smooth the surface. Use light, careful heat and avoid overheating the wax or container.
Step 6: Trim, Cure, Test, and Burn Safely
Once the candles are solid, trim the wick to about 1/4 inch. Add a label if you want, and include basic safety instructions if the candle is a gift. Then let the candles cure. Curing gives wax and fragrance time to settle together, which can improve scent throw. Some candles smell good after 24 to 48 hours, while many soy candles perform better after one to two weeks of curing. Your nose may want instant gratification, but the candle may ask for a small vacation.
Before giving away or making a larger batch, burn test your candle. Place it on a heat-resistant surface, away from drafts and anything flammable. During the first burn, let the melt pool reach near the edges of the container, but do not burn for too long. A common safe practice is to burn candles in sessions of about three to four hours, then allow them to cool before relighting.
Watch the flame. A good flame is steady, moderate, and calm. If it flickers wildly, smokes, mushrooms heavily, or makes the container very hot, stop using the candle and revise the wick, fragrance load, or container choice. Candle testing is not failure; it is quality control wearing comfy clothes.
Best Fragrance Ideas for Homemade Scented Candles
Choosing fragrance is the fun part, but it helps to think in scent families. A balanced candle often has top, middle, and base notes, similar to perfume. Top notes are the first impression, middle notes give body, and base notes linger.
Fresh and Clean
Try combinations like lemon verbena, clean cotton, eucalyptus, sea salt, cucumber, or rainwater. These work well in bathrooms, laundry rooms, and kitchens. They give your home that “I definitely cleaned today” feeling, even if the vacuum is still in the closet judging you.
Warm and Cozy
Vanilla, amber, sandalwood, tonka bean, cinnamon, clove, and cashmere-style fragrance oils create cozy candles for fall and winter. Use spicy fragrance oils carefully because they can be strong. A little cinnamon can smell festive; too much can smell like a bakery got into a wrestling match.
Floral and Romantic
Rose, jasmine, lavender, peony, gardenia, and orange blossom are classic floral choices. Florals can become heavy, so blending them with citrus, green tea, or soft musk can make them feel modern and fresh.
Earthy and Woodsy
Cedar, pine, vetiver, patchouli, oakmoss, and smoky woods make candles feel grounded and sophisticated. These are great for offices, reading corners, and spaces where you want “quiet luxury” without actually buying a yacht.
Common Candle-Making Mistakes to Avoid
Using the Wrong Wick
The wick is not just a string with ambition. It controls how the candle burns. Always test wick size for your exact wax, container, fragrance load, and dye combination.
Adding Too Much Fragrance Oil
More fragrance oil can create weaker performance, not stronger scent. Stay within the recommended fragrance load for your wax. If the candle sweats oil or burns strangely, reduce the fragrance percentage and test again.
Pouring at the Wrong Temperature
Temperature affects adhesion, surface texture, scent binding, and overall appearance. Use a thermometer instead of guessing. Wax may look calm even when it is too hot or too cool.
Skipping the Cure Time
A freshly poured candle may smell nice cold but perform weakly when burned. Letting the candle cure gives the fragrance and wax more time to bond.
Burning Without Trimming the Wick
Trim the wick to about 1/4 inch before each burn. Long wicks can create soot, large flames, uneven burning, and smoky jars.
Candle Safety Tips Every Maker Should Know
Handmade candles are beautiful, but they still involve fire. Treat them with respect. Burn candles on stable, heat-resistant surfaces. Keep them at least 12 inches away from curtains, paper, bedding, books, decorations, and anything else that can burn. Never leave a burning candle unattended, and blow it out before leaving the room or going to sleep.
Keep candles away from children and pets. Curious paws, wagging tails, and tiny hands can turn a cozy moment into chaos very quickly. Avoid placing candles near open windows, fans, air vents, or drafts because moving air can cause uneven burning and excess soot.
Do not burn a candle all the way to the bottom. Stop using it when about 1/2 inch of wax remains, or follow the container and wax manufacturer’s guidance. The remaining wax helps protect the container from excessive heat. Also, never use a candle if the jar is cracked, chipped, or damaged.
Extra Experience: Lessons from Making Scented Candles at Home
After making several batches of scented candles, one thing becomes very clear: candle making looks simple, but tiny details matter. The first candle may not be perfect, and that is completely normal. It may have a slightly bumpy top, a wick that leans like it is listening to gossip, or a scent that smells strong in the jar but shy when burned. None of this means you are bad at candle making. It means you have officially entered the testing phase, where real improvement happens.
One useful experience is to start with small batches. Instead of making twelve candles right away, make one or two. Test them, take notes, and adjust. Write down the wax brand, fragrance oil name, fragrance percentage, wick size, pouring temperature, room temperature, cure time, and burn results. This may sound overly serious for a cozy hobby, but notes save money. Without notes, you may accidentally make your best candle ever and have no idea how to repeat it. That is candle heartbreak, and it smells faintly of regret.
Another lesson is that cold throw and hot throw are different. Cold throw is how the candle smells before burning. Hot throw is how it smells while burning. A candle can smell powerful in the jar but barely scent a room when lit. If that happens, do not immediately dump in more fragrance oil. First, check the wick. A wick that is too small may not create enough melt pool to release fragrance effectively. A wick that is too large may burn too hot and create soot. Balance matters.
Room size also affects how a candle performs. A small 4-ounce candle may smell lovely in a bathroom but disappear in a large open living room. For bigger spaces, use a larger candle, multiple smaller candles placed safely apart, or a stronger fragrance style. Fresh citrus scents may feel bright but light, while amber, vanilla, woods, and spice notes often feel richer and more noticeable.
Fragrance blending is where the hobby gets addictive. Start with simple ratios, such as 70% lavender and 30% vanilla, or 60% cedarwood and 40% amber. Test blends on blotter strips or cotton pads before committing them to wax. Let the blend sit for a while because scents can change as they mingle. Some combinations become elegant; others smell like a soap aisle arguing with a Christmas tree. That is part of the fun.
Labeling also improves the experience. A candle with a name feels finished. “Lavender Vanilla” is fine, but “Quiet Porch at 7 PM” has personality. Labels should include the scent name, wax type, net weight if needed, and safety warnings. If you plan to sell candles, you will need to take labeling, testing, insurance, and safety standards seriously. Gifts can be casual; products for customers require professional care.
Finally, remember that candle making is part science, part craft, and part patience. You are working with heat, chemistry, fragrance, airflow, and personal taste. The goal is not just to make something that smells nice. The goal is to make a candle that burns cleanly, safely, evenly, and beautifully. Once you get your first successful batch, you may suddenly understand why candle makers have shelves full of fragrance oils and strong opinions about wick charts. Welcome to the club. It smells fantastic in here.
Conclusion
Learning how to make scented candles is easier when you follow a clear process: choose the right wax, match the wick to the container, measure fragrance by weight, melt and mix at the proper temperature, pour carefully, cure patiently, and test before gifting or selling. The six steps may look simple, but each one helps create a candle that smells better, burns more evenly, and looks more polished.
For beginners, soy wax container candles are a friendly starting point. Use candle-safe fragrance oils, begin with a moderate fragrance load, and keep detailed notes. Most importantly, respect candle safety. A beautiful candle should create comfort, not a surprise fire drill. With practice, you can create custom candles for every season, mood, room, and overly specific personality trait. Cozy minimalist? There is a candle for that. Citrus-clean kitchen person? Absolutely. Dramatic autumn reader with a blanket collection? Light the amber vanilla and enjoy.


