
Table of Contents >> Show >> Hide
- What Air Compressor Pressure Actually Means
- Before You Set the Pressure: Check These First
- How to Set Air Compressor Pressure: Simple Steps
- Step 1: Place the Compressor on a Stable Surface
- Step 2: Connect the Air Hose
- Step 3: Turn the Regulator Down First
- Step 4: Turn the Compressor On and Let the Tank Fill
- Step 5: Attach the Tool
- Step 6: Adjust the Regulator to the Tool’s Recommended PSI
- Step 7: Test on Scrap Material
- Step 8: Lock the Regulator if Your Compressor Has That Feature
- Common PSI Settings for Popular Air Tools
- How to Fine-Tune Pressure for Better Results
- Safety Rules When Setting Air Compressor Pressure
- Should You Adjust the Pressure Switch?
- Troubleshooting Air Compressor Pressure Problems
- Best Practices for Accurate Pressure Setting
- Experience-Based Tips: What You Learn After Using Compressors for a While
- Conclusion
Setting air compressor pressure sounds like one of those jobs that should require a tiny wrench, a laminated chart, and the confidence of someone named Earl who has owned the same shop stool since 1987. Good news: it is much simpler than that. Once you understand the difference between tank pressure and regulated outlet pressure, you can set your air compressor PSI safely, protect your tools, and avoid the classic “why is my nailer acting like it had too much coffee?” problem.
Air compressor pressure is measured in PSI, or pounds per square inch. Most home and garage users do not need to modify the internal pressure switch. In fact, on many compressors, the pressure switch is factory-set and should be left alone. What you usually adjust is the regulator, which controls how much pressure leaves the compressor and reaches your air hose, nail gun, impact wrench, paint sprayer, airbrush, tire inflator, or other pneumatic tool.
This guide explains how to set air compressor pressure in simple steps, how to read the gauges, how to match PSI to your tool, and how to troubleshoot common pressure problems without turning your compressor into an angry metal teakettle.
What Air Compressor Pressure Actually Means
An air compressor stores compressed air in a tank. That stored air is held at a higher pressure than many tools need. The regulator then lowers and controls the outgoing pressure so your tool receives the right amount of air.
Tank Pressure vs. Regulated Pressure
Most portable compressors have two gauges. The tank pressure gauge shows how much pressure is inside the storage tank. The regulator or outlet pressure gauge shows the pressure being delivered to your tool. These two numbers are not always the same, and they should not be treated as twins wearing matching shirts.
For example, your compressor tank might hold 150 PSI, while your finish nailer only needs 90 PSI. In that case, you do not want to feed the full tank pressure directly into the tool. You use the regulator to bring the outlet pressure down to the tool’s recommended operating range.
Cut-In and Cut-Out Pressure
The compressor’s pressure switch controls when the motor starts and stops. The cut-in pressure is the lower pressure point where the motor turns on to refill the tank. The cut-out pressure is the upper pressure point where the motor stops. A common pattern might be something like 120 PSI cut-out and 90 PSI cut-in, although exact numbers vary by model.
For most users, these settings are not part of everyday adjustment. They are usually set by the manufacturer to match the tank, pump, motor, safety valve, and rated performance. If your compressor keeps running past its normal shutoff pressure or the safety valve pops open, that is not a sign to “just crank something until it behaves.” It may indicate a pressure switch or safety problem that needs proper service.
Before You Set the Pressure: Check These First
Before adjusting anything, take one minute to check the basics. It is faster than repairing a tool, replacing a hose, or explaining to everyone in the garage why the compressor made that noise.
1. Read the Tool’s PSI Requirement
Every pneumatic tool has a recommended operating pressure. Many common air tools run around 70 to 120 PSI, but the correct number depends on the tool. A brad nailer may work well around 70 to 100 PSI. A framing nailer may need more. Some paint sprayers require lower pressure but steady air volume. An impact wrench may need both adequate PSI and high CFM.
Look on the tool body, the manual, or the manufacturer’s specifications. The tool’s maximum pressure rating matters too. Never exceed it. More pressure does not automatically mean better performance. Sometimes it only means louder mistakes.
2. Check the Hose and Accessory Ratings
Your hose, quick couplers, filter, regulator, and fittings should all be rated for the pressure you plan to use. A compressor is only as safe as the weakest part connected to it. If a hose is cracked, swollen, kinked, or rated below your working pressure, replace it before use.
3. Know the Difference Between PSI and CFM
PSI is pressure. CFM, or cubic feet per minute, is airflow volume. A tool can have the correct PSI and still perform badly if the compressor cannot supply enough CFM. This is common with continuous-use tools like sanders, grinders, and some spray guns. The pressure may look fine for a few seconds, then drop quickly because the tool is consuming air faster than the compressor can replace it.
Think of PSI as water pressure and CFM as how much water is flowing. A tiny straw can have pressure, but it will not fill a bucket quickly. Your air tools feel the same way, although thankfully they complain with sputtering instead of emails.
How to Set Air Compressor Pressure: Simple Steps
Here is the basic process for setting air compressor pressure safely and accurately.
Step 1: Place the Compressor on a Stable Surface
Set the compressor on a flat, stable surface with good ventilation. Keep it away from flammable vapors, clutter, puddles, and sawdust piles. Make sure the drain valve at the bottom of the tank is closed before starting. If your compressor is oil-lubricated, check the oil level according to the owner’s manual.
Step 2: Connect the Air Hose
Attach the air hose to the compressor outlet. Use fittings that match your compressor and tool. If threaded fittings require sealing, use the proper thread seal tape or sealant recommended for air systems. Tighten the connection firmly, but do not overdo it like you are trying to win a wrench-based arm wrestling contest.
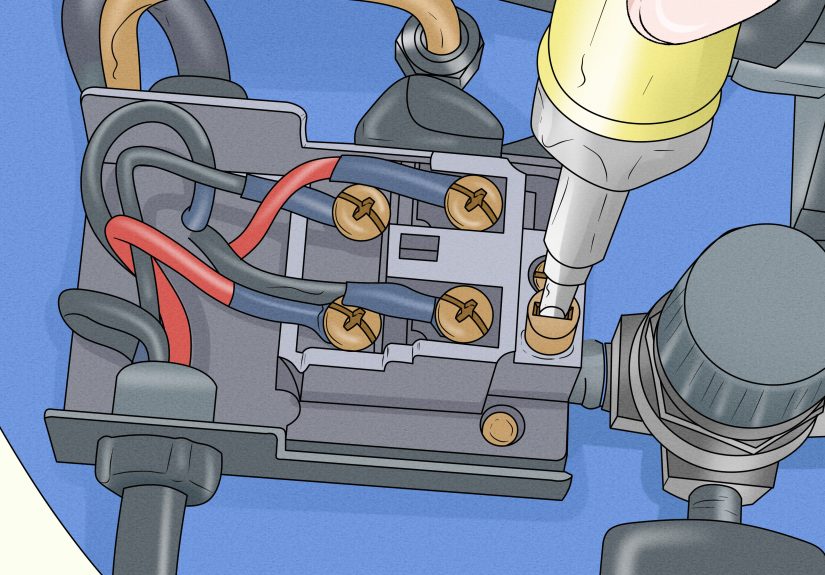
Step 3: Turn the Regulator Down First
Before starting, turn the regulator knob counterclockwise to lower the outlet pressure. On many compressors, clockwise increases pressure and counterclockwise decreases pressure. Starting low gives you more control and helps prevent sending too much pressure to the tool when the compressor first fills.
Step 4: Turn the Compressor On and Let the Tank Fill
Switch the compressor on and let it build tank pressure. Watch the tank gauge. The motor should stop automatically when the tank reaches its factory cut-out pressure. If the motor does not stop, turn the compressor off and do not continue using it until the issue is diagnosed.
Step 5: Attach the Tool
Connect your pneumatic tool to the hose. Hold the hose securely when connecting and disconnecting because trapped air can cause hose whip. Make sure the tool trigger is not pressed while attaching the hose.
Step 6: Adjust the Regulator to the Tool’s Recommended PSI
Turn the regulator knob slowly clockwise to increase outlet pressure. Watch the outlet pressure gauge, not the tank gauge. Set the regulator to the PSI recommended for your tool.
For best accuracy, adjust pressure while the tool is operating or briefly triggered, when appropriate and safe. Some tools show a pressure drop only while air is flowing. Setting the gauge while no air is moving may give you a slightly optimistic number, like a bathroom scale before Thanksgiving dinner.
Step 7: Test on Scrap Material
Do a test run before working on the actual project. For nailers, use scrap wood of the same type and thickness. For sprayers, test on cardboard or scrap material. For impact tools, test carefully on a suitable fastener. Adjust in small increments until the tool performs correctly.
Step 8: Lock the Regulator if Your Compressor Has That Feature
Some compressors have locking regulators to prevent accidental changes. If yours does, lock the setting once the outlet pressure is correct. This is especially useful on busy job sites or in garages where every knob seems to attract curious fingers.
Common PSI Settings for Popular Air Tools
Always follow the manufacturer’s exact recommendation, but these general examples can help you understand typical ranges:
- Brad nailer: often around 70 to 100 PSI
- Finish nailer: often around 70 to 120 PSI
- Framing nailer: often around 90 to 120 PSI
- Air ratchet: commonly around 90 PSI
- Impact wrench: commonly around 90 PSI, with enough CFM
- Paint sprayer: varies widely; follow the gun and coating instructions
- Airbrush: often much lower, depending on paint and nozzle size
- Tire inflation: set according to the tire placard or tire specification, not the compressor maximum
The most important rule is simple: match the compressor outlet pressure to the tool, not your mood. If the tool says 90 PSI, start there. Do not jump to 130 PSI just because the compressor can. Your tools are not impressed by bravado.
How to Fine-Tune Pressure for Better Results
Once the pressure is set, small adjustments can improve performance. The goal is not maximum pressure. The goal is the lowest pressure that does the job cleanly and consistently.
For Nail Guns
If nails sit proud above the surface, increase the pressure slightly or adjust the tool’s depth setting. If nails sink too deeply or damage the material, lower the pressure or reduce the depth adjustment. Use scrap material first. Trim work is not the place to discover your nailer has chosen violence.
For Impact Wrenches
If an impact wrench feels weak at the correct PSI, the problem may be airflow, not pressure. Check the hose diameter, coupler size, regulator flow capacity, and compressor CFM rating. A long, narrow hose or restrictive fitting can starve the tool even when the gauge says 90 PSI.
For Paint Sprayers
Paint sprayers are sensitive. Too much pressure can cause overspray, dry spray, wasted material, and a finish that looks like it was applied during a minor weather event. Too little pressure can cause poor atomization, spitting, or uneven coverage. Follow the sprayer manual, coating label, and test pattern method.
For Tire Inflation
Use the recommended tire pressure listed on the vehicle placard or product label. Inflate in small bursts and check with a reliable tire gauge. Do not rely only on the compressor gauge, especially if precision matters.
Safety Rules When Setting Air Compressor Pressure
Compressed air is useful, but it is not harmless. It stores energy, moves debris, and can damage tools or components when misused.
Do Not Exceed Tool or Accessory Ratings
The regulator outlet pressure should never exceed the maximum pressure rating of the connected tool, hose, or accessory. If a tool requires 90 PSI and has a maximum rating of 120 PSI, stay within that range.
Do Not Use High-Pressure Air for Cleaning
Compressed air used for cleaning can blow chips, dust, and debris into eyes or skin. Workplace rules commonly limit compressed air for cleaning to low pressure with proper guarding and personal protective equipment. Never use compressed air to clean clothing or skin. Your jeans do not need turbocharging.
Drain the Tank Regularly
Moisture collects inside the tank as air is compressed. Drain the tank according to the owner’s manual, usually after use or at regular intervals. Water left inside can cause corrosion, weaken the tank, and send moisture into your tools or finish work.
Watch for Abnormal Cycling
If the compressor cycles on and off too frequently, struggles to build pressure, leaks air, or trips a breaker, stop and inspect the system. Short cycling can overheat the motor and wear components. Leaks, undersized hoses, dirty filters, or tools demanding more CFM than the compressor can provide may all cause trouble.
Should You Adjust the Pressure Switch?
In most home and DIY situations, no. You should adjust the regulator, not the pressure switch. The pressure switch controls the compressor’s automatic start and stop points. These settings are tied to the tank rating, safety valve, motor load, pump design, and overall performance.
Some compressors have adjustable pressure switches, but others are not meant to be altered. If you are not trained or the manual does not clearly permit it, leave the switch alone. Raising cut-out pressure beyond the manufacturer’s limit can activate the safety valve, overload the motor, reduce compressor life, or create a serious hazard.
If your compressor cannot supply the pressure or airflow your tool needs, the safer answer may be a larger compressor, a better regulator, a shorter or wider hose, higher-flow couplers, or a tool better matched to your compressor. The answer is rarely “turn mystery screw clockwise and hope.” Hope is not a calibration method.
Troubleshooting Air Compressor Pressure Problems
The Gauge Shows Pressure, but the Tool Is Weak
Check CFM requirements, hose diameter, couplers, filter restrictions, and leaks. The tank may be full, but the tool may not be receiving enough airflow under load.
The Outlet Pressure Drops Quickly
Your tool may be using more air than the compressor can deliver. This is common with sanders, grinders, and spray guns. Let the compressor recover, use a larger tank or higher-CFM compressor, or work in shorter bursts.
The Compressor Runs but Does Not Build Pressure
Check for an open drain valve, leaking hose, loose fittings, dirty intake filter, worn seals, or a faulty check valve. Turn the unit off before inspecting parts.
The Safety Valve Pops Open
Stop using the compressor. The pressure switch may not be shutting the motor off correctly, or the safety valve may be faulty. Do not plug, tape, clamp, or disable the safety valve. That valve is not being dramatic; it is doing its job.
The Regulator Will Not Hold Pressure
The regulator may be dirty, damaged, undersized, or worn. Some regulators vent downstream air during adjustment, which can be normal. But if pressure drifts constantly or cannot be adjusted, replacement may be needed.
Best Practices for Accurate Pressure Setting
Use the shortest practical hose for the job, especially with high-demand tools. Choose hose diameter based on airflow needs. Keep fittings clean and tight. Add a filter or dryer when moisture can affect tool life or finish quality. Drain the tank often. Store the compressor in a dry place. Check the manual before making adjustments. And most importantly, use the regulator as your daily pressure control.
When setting air compressor pressure, do not chase the highest number. A well-set compressor should feel boring in the best way: steady, predictable, and quietly competent. If your compressor has become the loudest personality in the room, something probably needs attention.
Experience-Based Tips: What You Learn After Using Compressors for a While
After using air compressors on real projects, you start to notice that pressure setting is part science, part habit, and part listening to the tool. The gauge gives you the number, but the tool tells you the truth. A nailer that leaves heads slightly proud is asking for a little more pressure or depth adjustment. A nailer that buries fasteners too deeply is telling you to back off. A spray gun that creates too much mist may not need “more power”; it may need less pressure, better thinning, or a slower pass.
One practical lesson is to set pressure with the tool connected, not while the compressor is sitting alone looking impressive. A compressor at rest may show a clean number on the outlet gauge, but pressure can dip when the trigger is pulled. That dip matters. For tools that consume air continuously, such as sanders and spray guns, the working pressure under airflow is more important than the static pressure before use.
Another useful habit is to sneak up on the right setting. Start slightly low, test, then increase in small steps. This approach is especially helpful with finish nailers and delicate trim. It is much easier to add 5 PSI than to un-crater a piece of soft pine after blasting a nail too deep. Scrap material is your friend. It does not judge you, and it absorbs the mistakes that would otherwise end up in your finished project.
For garage work, many people assume a weak impact wrench means the PSI is too low. Sometimes that is true, but often the real culprit is airflow restriction. A small inside-diameter hose, cheap coupler, clogged filter, or low-flow regulator can choke the tool. The gauge may say 90 PSI, but the tool is gasping like it just ran upstairs. Upgrading the hose and fittings can make a bigger difference than raising pressure.
Moisture is another lesson people learn the annoying way. If you forget to drain the tank, water collects. Then the compressor sends moisture through the line, which can hurt tools, cause rusty fittings, and ruin paint work. Draining the tank after use takes less than a minute and can save a lot of irritation. Open the drain slowly, keep your face away from the outlet, and let the water escape fully before storage.
Noise and cycling patterns also teach you what is normal. A compressor that runs, fills, shuts off, and restarts after tool use is doing its job. A compressor that runs constantly, cuts on every few seconds, or never reaches cut-out pressure is waving a little red flag. It may have a leak, an undersized tank for the tool, a dirty filter, or a mechanical issue. Do not ignore strange behavior. Compressors are usually honest machines; when they act weird, there is a reason.
Finally, labeling common settings can make life easier. If you regularly use a brad nailer at 85 PSI, an impact wrench at 90 PSI, and a sprayer at a lower setting, write those numbers on a small card near the compressor. You still need to check each tool’s manual, but a quick reference prevents guesswork. The best pressure setting is not the biggest number on the dial. It is the setting that gives clean, consistent results while keeping the compressor, hose, and tool within their safe working limits.
Conclusion
Learning how to set air compressor pressure is mostly about understanding what to adjust and what to leave alone. The regulator controls the pressure going to your tool. The tank gauge shows stored pressure. The pressure switch controls the compressor’s start and stop cycle and is usually factory-set. Once you know those roles, the process becomes simple: check the tool’s PSI rating, connect the hose, build tank pressure, adjust the regulator, test on scrap, and fine-tune as needed.
Set the pressure low enough to protect your tools and high enough to do the work properly. Respect tool ratings, drain the tank, inspect hoses, and pay attention to airflow as well as PSI. Do that, and your compressor will stop feeling mysterious and start acting like what it really is: a very useful box of controlled air with a handle.


