
Table of Contents >> Show >> Hide
- Why Cotton Balls Work So Well for Fake Cotton Candy
- Supplies You Will Need
- Method 1: The Soft-Dye Method for Realistic Pastel Cotton Candy
- Method 2: The Paint-and-Glue Paper Craft Method
- Method 3: The 3D Cotton Candy Cone Method
- Best Colors for Cotton Ball Cotton Candy
- Common Mistakes and How to Fix Them
- Creative Ways to Use Fake Cotton Candy Made from Cotton Balls
- Safety and Clean-Up Tips
- Experience Notes: What Actually Works Best in Real Life
- Conclusion
There are crafts that look expensive, crafts that look complicated, and then there is the glorious little trick of turning ordinary cotton balls into fake cotton candy. It is fluffy, pastel, cheerful, and surprisingly convincinguntil someone tries to eat it, which is why we will repeat this early and often: this cotton candy is for decoration, not snacking.
If you are planning a carnival birthday party, a classroom circus theme, a pretend-play sweet shop, a photo booth prop, or a handmade card that needs a cloud of sugary cuteness, cotton balls are your tiny white heroes. They already have the airy texture of spun sugar. All you have to do is tease them apart, add soft color, shape them loosely, and display them in a way that says, “Yes, I came from a fairground,” instead of “Yes, I came from the bathroom cabinet.”
This guide explains exactly how to make cotton balls look like cotton candy using simple supplies, safe craft habits, and a few visual tricks that make the final result fuller, fluffier, and more realistic. The process is easy enough for kids with adult supervision, but polished enough for party decor, classroom displays, DIY centerpieces, or handmade gifts.
Why Cotton Balls Work So Well for Fake Cotton Candy
Real cotton candy is made of fine sugar strands wrapped around air. Cotton balls are also soft, light, and made of tiny fibers that can be pulled into wisps. That is why they are such a good material for a cotton candy craft. When you gently stretch them, the round medical-pad look disappears and the fibers begin to resemble the messy, dreamy fluff of carnival candy.
The secret is not simply coloring cotton balls pink or blue. A round cotton ball that stays round will look like a dyed cotton ball. A cotton ball that has been pulled, layered, tinted lightly, and arranged on a cone will look like a miniature county fair treat. Texture is everything. Color is second. Shape is third. A little patience is the invisible fourth ingredient, which is annoying but true.
Supplies You Will Need
Before you begin, gather your supplies. This project is inexpensive, but having everything ready keeps the craft from turning into a pastel crime scene on your table.
Basic Materials
- Cotton balls or cotton batting
- Food coloring, washable paint, or liquid watercolor
- Water
- Small bowls, spray bottles, or droppers
- White school glue or craft glue
- Cardstock, paper cones, wooden skewers, paper straws, or lollipop sticks
- Parchment paper, wax paper, or a plastic tray for drying
- Disposable gloves, especially if using food coloring
- Paper towels or an old towel
- Scissors
Optional Extras
- Pink, blue, lavender, yellow, or mint craft paint
- Fine iridescent glitter for display crafts only
- Clear treat bags for party favors
- Ribbon, stickers, or printed labels
- A cardboard cone template
- A foam ball or crumpled paper core for larger displays
For children’s projects, choose washable, non-toxic supplies. Look for art materials labeled with safety information such as “Conforms to ASTM D-4236” or products carrying an AP non-toxic seal. That does not mean children should lick the glue bottle like a popsicle, but it does mean the supplies are designed and labeled for safer art use when handled properly.
Method 1: The Soft-Dye Method for Realistic Pastel Cotton Candy
This is the best method when you want fluffy, loose cotton that looks like real cotton candy. It works well for party props, pretend-play food, paper crafts, and classroom decorations.
Step 1: Mix a Light Color Solution
In a small bowl or spray bottle, mix water with a few drops of food coloring or washable liquid watercolor. Start with less color than you think you need. Cotton candy is usually pale, not neon. If your solution looks like a sports drink that could power a marathon runner, dilute it with more water.
For classic cotton candy colors, try these combinations:
- Pink: 2 drops red food coloring in 2 tablespoons water
- Blue: 1 to 2 drops blue food coloring in 2 tablespoons water
- Lavender: 1 drop red plus 1 drop blue in 3 tablespoons water
- Peach: 1 drop red plus 1 drop yellow in 3 tablespoons water
- Mint: 1 drop green in 3 tablespoons water
Step 2: Pull the Cotton Balls into Wisps
Do not dye the cotton balls while they are tightly packed. First, gently pull each cotton ball apart with your fingers. You want thin, airy pieces, not shredded lint confetti. Stretch the cotton slowly until it forms soft clouds. This gives the color more surface area and makes the finished piece look much more like spun sugar.
A good rule: if the cotton still looks like something you would use to remove nail polish, keep fluffing.
Step 3: Add Color Lightly
Place the cotton wisps on a tray lined with parchment paper. Mist them with your colored water using a spray bottle, or dab color onto them with a dropper. You can also dip the edge of a cotton piece into the color solution and let the tint travel through the fibers.
Avoid soaking the cotton. Wet cotton collapses quickly and loses its airy shape. The goal is a whisper of color, not a dramatic swimming lesson. If you accidentally add too much liquid, blot the cotton gently with a paper towel and pull it open again while it is still damp.
Step 4: Let the Cotton Dry Completely
Spread the colored cotton in a thin layer and let it air-dry. Drying time depends on how much liquid you used, but light misting may dry in a few hours. Heavier dyeing may need overnight drying.
Do not pile the cotton while wet. It can clump, flatten, or dry with hard spots. Real cotton candy looks airy because it is mostly space. Your fake cotton candy needs space, too. Very poetic. Also very practical.
Step 5: Re-Fluff After Drying
Once dry, gently pull the cotton again. This final fluffing step is where the magic happens. The fibers separate, the pastel shade softens, and the cotton begins to look less like craft material and more like a tiny carnival cloud.
Method 2: The Paint-and-Glue Paper Craft Method
If you want to make a flat cotton candy picture, greeting card, preschool craft, or bulletin board decoration, use this method. It is less three-dimensional than the cone version, but it is fast, kid-friendly, and adorable.
Step 1: Draw a Cotton Candy Shape
On cardstock, draw a large fluffy oval or cloud shape. Under it, draw a cone or stick. You can make the top rounded, bumpy, or slightly uneven. In fact, uneven is better. Real cotton candy is not known for its architectural discipline.
Step 2: Add Glue to the Paper, Not the Cotton
Spread a thin layer of white glue inside the cotton candy outline. This keeps the mess under control. If children dip every cotton ball into glue, you may end up with sticky fingers, sticky chairs, and one mysterious sticky elbow.
Step 3: Press Fluffed Cotton onto the Glue
Use pulled-apart cotton pieces instead of whole cotton balls. Press them lightly onto the glued area. Let some pieces overlap for fullness. Leave the edges a little irregular so the shape looks soft and natural.
Step 4: Add Gentle Color
You can color the cotton before gluing, or add color afterward with a soft brush, sponge, or dropper. Use a light touch. A few pink and blue areas are enough to suggest cotton candy. If the entire thing becomes one solid block of hot pink, it may still be cute, but it will look more like a bath sponge with ambition.
Method 3: The 3D Cotton Candy Cone Method
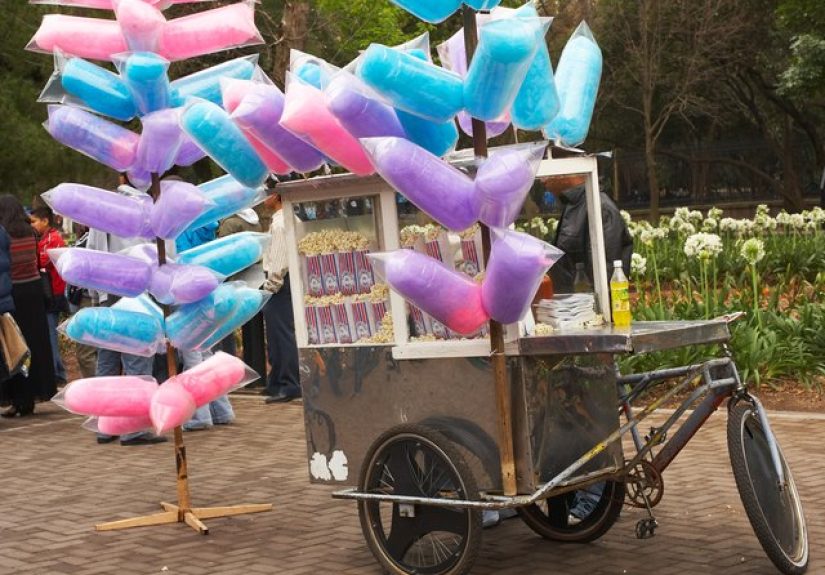
This version is perfect for party decor, pretend-play stands, carnival centerpieces, and photo props. It looks like a little serving of cotton candy on a cone, but it is made entirely from craft materials.
Step 1: Make the Cone or Handle
Roll brown or tan cardstock into a cone and secure it with tape or glue. You can also use a paper straw, wooden skewer, or lollipop stick for a smaller version. For a realistic fairground look, a paper cone works best.
Step 2: Create a Lightweight Core
For larger cotton candy props, make a core from crumpled tissue paper, a small foam ball, or scrap paper. Attach it to the top of the cone with glue or tape. The core gives the cotton something to cling to and helps build volume without using half a bag of cotton balls.
Step 3: Wrap Fluffed Cotton Around the Core
Take dry, colored cotton wisps and wrap them loosely around the core. Use small dots of glue between layers. Do not smash the cotton down. Press only where needed. Think “gentle cloud sculptor,” not “person closing an overstuffed suitcase.”
Step 4: Build an Uneven, Puffy Shape
Add more cotton around the sides, then a little on top. Real cotton candy is taller and wider than the stick or cone holding it. Make the shape slightly lopsided for realism. Perfect symmetry can make it look like a pom-pom. A little chaos makes it deliciously believable.
Step 5: Finish the Display
Let the glue dry fully. Then place your fake cotton candy in a cup, jar, party stand, or clear treat bag. Add a ribbon or label that says “For Decoration Only” if children will be near it. This is especially important because fluffy pastel things have a strange power over snack-focused humans.
Best Colors for Cotton Ball Cotton Candy
The most recognizable cotton candy colors are pale pink and baby blue, but you are not limited to the classics. Soft lavender looks dreamy for a unicorn party. Pale yellow works for a lemonade stand theme. Mint green feels playful for spring decorations. A mix of pink and blue gives that nostalgic fairground look people recognize immediately.
The trick is to keep colors light and uneven. Real cotton candy often has streaks, shadows, and translucent patches. Try combining two colors in separate layers instead of mixing them into one muddy shade. Place pink wisps next to blue wisps, then pull them gently together. The result looks more natural than a single flat color.
Common Mistakes and How to Fix Them
Mistake 1: Using Too Much Water
If the cotton turns soggy, it will shrink and clump. Fix it by blotting with a paper towel, spreading the cotton thinly, and fluffing again once dry.
Mistake 2: Making the Color Too Dark
Cotton candy should look soft and sugary. If the color is too strong, layer undyed cotton over it to mute the shade. You can also mix the dark pieces with white cotton to create a softer blend.
Mistake 3: Leaving Cotton Balls Round
Whole cotton balls rarely look like cotton candy. Pull them apart before coloring or gluing. The more airy the fibers, the better the illusion.
Mistake 4: Using Too Much Glue
Heavy glue makes cotton stiff. Use small dots or a thin glue layer. If you need stronger hold for a 3D prop, glue the inside layers more firmly and keep the outer layer loose and fluffy.
Mistake 5: Forgetting the “Do Not Eat” Factor
Fake cotton candy can look convincing, especially to young children. Keep it out of mouths, avoid using it as a food-table topper unless clearly separated from real snacks, and label display pieces when needed.
Creative Ways to Use Fake Cotton Candy Made from Cotton Balls
Once you know how to make cotton balls look like cotton candy, you can use the technique in many projects. For birthday parties, place several cotton candy cones in jars as centerpieces. For classrooms, make a carnival bulletin board with paper tickets, popcorn boxes, and cotton candy clouds. For pretend play, create a mini sweet shop where kids can “sell” cotton candy without covering the house in sugar.
You can also use cotton ball cotton candy on greeting cards, scrapbook pages, party invitations, gift tags, and photo booth props. A small pink cotton candy shape on a handmade card instantly feels cheerful. Add a phrase like “You’re sweet,” and suddenly you are a craft genius. A slightly sticky craft genius, perhaps, but still a genius.
Safety and Clean-Up Tips
Cover your workspace before you begin. Food coloring can stain fingers, tables, and fabric. Washable paint is usually easier to clean than concentrated dye, making it a good choice for young children. Gloves are helpful, but if you do not have them, use a spoon, tweezers, or clothespin to handle wet cotton.
Let children help with pulling cotton, arranging pieces, choosing colors, and pressing cotton onto paper. Adults should handle hot glue, sharp scissors, and small parts when younger children are involved. Store finished crafts away from pets and toddlers, especially if you used glitter, small sticks, or foam pieces.
For clean-up, wipe surfaces with warm water and mild soap. Throw away heavily dyed paper towels and let trays dry before stacking them. If a few cotton fibers escape, do not panic. Cotton balls are lightweight and dramatic. They like to travel.
Experience Notes: What Actually Works Best in Real Life
After making cotton ball cotton candy for different types of projects, one lesson becomes obvious: the best results come from restraint. The first instinct is to add more color, more glue, more cotton, more everything. But fake cotton candy looks most realistic when it stays light, loose, and slightly imperfect.
For a small paper craft, the easiest approach is to draw the cotton candy outline first, spread glue thinly, and use pre-fluffed cotton. Kids enjoy pressing the cotton down, but they often press too hard. A helpful trick is to say, “Tap it like a sleeping kitten.” That sounds silly, but it works. The cotton stays fluffy, and the child gets a memorable instruction that is much more fun than “Please apply gentle pressure.”
For a 3D cone, the biggest improvement comes from using a core. Without a core, you need a surprising amount of cotton to create volume, and the shape can collapse. A crumpled ball of tissue paper taped to the cone gives the cotton something to wrap around. It also makes the finished prop lighter and sturdier. The outside layer should be the prettiest cotton, because that is what people see. The inside can be plain white cotton or scrap tissue. Crafting is not cheating; it is strategic fluff management.
Color testing also matters. A dye mixture that looks pale in a bowl may dry even lighter on cotton, while a strong mixture may create spots that look more like marker stains than candy. The best method is to test one cotton wisp first. Let it dry for a few minutes and check the shade. If it looks soft and airy, continue. If it looks like it joined a neon dance competition, dilute the color.
Another real-life tip is to make more cotton than you think you need. Once cotton balls are pulled apart, they expand, but they can also become uneven. Having extra pieces lets you choose the fluffiest ones for the visible outer layer. Save the clumpy pieces for filling gaps underneath.
For party decor, clear treat bags make the finished cones look extra polished. Slide the fake cotton candy inside, tie it with ribbon, and add a small label. The bag protects the cotton from dust and keeps curious hands from pulling it apart before guests arrive. However, if children are very young, avoid displaying these near real candy. Put them on a decor table, not beside cupcakes. Confusion is funny only until someone bites a cotton ball.
For classroom use, this craft works well as part of a carnival, color, texture, or community-helper theme. Children can compare soft, rough, smooth, and sticky materials. They can practice fine motor skills by pulling cotton and arranging small pieces. They can also experiment with color mixing by making pink, blue, purple, or peach cotton candy. The project feels playful, but it quietly supports observation, hand control, planning, and creativity.
The most charming versions are rarely perfect. They have uneven edges, soft color changes, and tiny flyaway fibers. That is exactly why they work. Real cotton candy is not a neat object; it is a sugary cloud with a handle. When your cotton ball version has the same carefree shape, people recognize it instantly. And when they ask, “Wait, is that made from cotton balls?” you get the deep satisfaction of saying, “Yes. Yes it is.”
Conclusion
Learning how to make cotton balls look like cotton candy is all about transforming texture, color, and shape. Start by pulling cotton balls into wispy layers, tint them with soft pastel color, let them dry completely, and arrange them loosely on paper, cones, sticks, or display bases. Keep the color light, the glue minimal, and the shape fluffy. That is the difference between a dyed cotton ball and a convincing fake cotton candy craft.
This project is affordable, flexible, and fun for parties, classrooms, pretend play, and handmade decorations. Best of all, it turns a plain household item into something whimsical. It may not taste like sugar, but it definitely looks sweet.


