Table of Contents >> Show >> Hide
- Why Blue + Fabric Works So Well
- Picking the Right Blue Paint (Without Falling Into the “It Looked Different Online” Trap)
- Design Options: Where the Fabric Detail Can Live
- How to Paint a Side Table So It Actually Lasts
- Adding Fabric Detail: Three Reliable Methods
- Sealing It All: Topcoats, Durability, and Cure Time
- Styling Ideas: Make the Blue Side Table Look Like It Belongs There
- Common Mistakes (So You Don’t Have to Learn the Hard Way)
- A Simple Weekend Plan: From “Meh” Table to “Where Did You Get That?”
- Real-World Experiences: Lessons DIYers Learn After Making a Blue Painted Side Table With Fabric Detail
- Conclusion
A blue painted side table with fabric detail is the design equivalent of showing up to brunch in sneakers that somehow look expensive. It’s small, functional, and just bold enough to make your room feel “styled” instead of “I live here and also I eat cereal here.”
This isn’t just about slapping on blue paint and calling it a day. The magic comes from pairing a hardworking finish with a soft, patterned fabric accentsomething that adds texture, story, and personality without taking over the whole space. Whether you’re into coastal calm, modern moody navy, or a playful blue-green that changes with the light, this little table can do a lot.
Why Blue + Fabric Works So Well
Blue is one of the most versatile colors in American interiors because it can feel calming, crisp, dramatic, or airy depending on the shade, undertone, and lighting. Add fabric, and suddenly you’ve got contrast: smooth paint versus tactile weave, solid color versus pattern, clean lines versus cozy detail. It’s the design version of “business on top, party underneath.”
- Paint brings structure: It defines the silhouette and modernizes old furniture.
- Fabric brings warmth: It softens the look and adds pattern without needing more decor clutter.
- Together they feel custom: Like a boutique findexcept you didn’t have to pretend you “just stumbled upon it in a little shop.”
Picking the Right Blue Paint (Without Falling Into the “It Looked Different Online” Trap)
Blues are notorious for shape-shifting. A blue that looks like a calm lake at noon can look like a sad thundercloud at 6 p.m. The secret is undertones: gray, green, or even a whisper of purple can change how the paint reads.
Three blue directions that look great on a side table
- Deep navy (classic + sophisticated): Great for a “tiny table, big confidence” look. Pair with brass hardware or warm wood tones.
- Coastal mid-blues (fresh + relaxed): These feel breezy, especially with linen or striped fabric details.
- Blue-green blends (modern + artsy): Teal-leaning blues can add personality fast, especially in neutral rooms.
Quick lighting reality check
If your table will live near a window, the blue can look brighter and cooler. In darker corners, it can read deeper and moodier. Before committing, test a sample on the underside of the top or the back legwhere you can judge it in your actual lighting without turning your living room into a paint museum.
Design Options: Where the Fabric Detail Can Live
“Fabric detail” can mean a lot of things, and that’s good newsbecause you can choose what matches your skills, time, and tolerance for mess. Here are popular, practical placements that look intentional (not accidental).
1) Fabric-wrapped tabletop (decoupage style)
This is the most dramatic option. A fabric top turns your side table into a statement pieceespecially if the pattern has scale (think oversized floral, geometric, or vintage-inspired prints). It’s also surprisingly doable with decoupage medium if you seal it well.
2) Fabric inset on a shelf or inside a tray-style top
Love the look but want less commitment? Add fabric to the lower shelf or the inside base of a tray top. You still get the pattern pop, but your coffee cup isn’t living directly on fabric art all day.
3) Upholstered drawer front or side panel
If your side table has a drawer, consider upholstering just the drawer front with fabric (and a thin layer of padding if you want that plush look). This works beautifully on small bedside tablesespecially if you add nailhead trim or gimp braid for a clean edge.
4) Fabric “band” detail (wrapped around the apron)
For a tailored look, wrap fabric around the apron (the frame under the tabletop). It reads like a custom designer detailespecially with a crisp stripe or textured weave. It’s subtle, and subtle is sometimes the loudest flex.
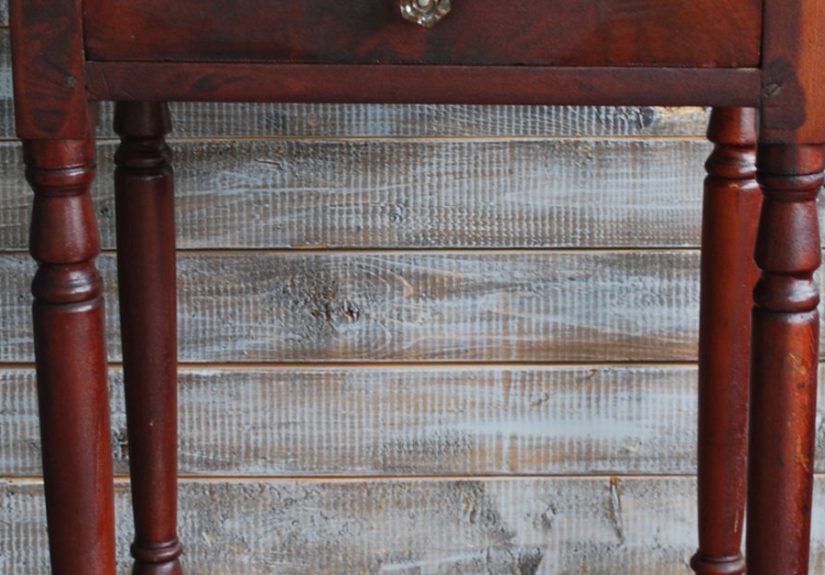
How to Paint a Side Table So It Actually Lasts
A side table gets handled constantlymoved, bumped, wiped, and occasionally used as a “temporary” footrest (we all have that one friend). So the finish matters. The best-looking projects usually follow the same unglamorous truth: prep is the main character.
Step 1: Clean like you mean it
Remove oils, waxes, and mystery residues from old polishes. If you skip this, paint can fisheye, peel, or refuse to bond. Wipe thoroughly, then let it dry completely. (Yes, this is the boring part. It’s also the part that prevents future regret.)
Step 2: Sand to de-gloss, not to punish yourself
You don’t always need to sand down to bare wood. Often, you just need to dull the surface so primer and paint can grip. Use a medium grit to knock down shine, then a finer grit to smooth. Remove dust thoroughly before priming.
Step 3: Prime for adhesion and a smoother finish
Primer is the peace treaty between your old finish and your new paint. A bonding primer is especially helpful on slick surfaces. After the first coat of primer dries, a light sand with a fine sanding sponge can help you get that smooth, furniture-like finish.
Step 4: Paint in thin coats (your patience will be rewarded)
For tabletops and flat areas, a small foam roller can help keep things smooth; use a brush for corners and details. Apply thin, even coats and let them dry fully between rounds. If you want a truly polished look, lightly sand between coats.
Adding Fabric Detail: Three Reliable Methods
Fabric on furniture can be durableif you pick the right technique for the location and seal it correctly. Here are three approaches that DIYers use most often, from easiest to most “I own a staple gun and I’m not afraid to use it.”
Method A: Decoupage fabric to wood (best for flat surfaces)
This works well for tabletops, shelves, or inset panels. Many craft pros recommend washing and drying fabric first, then using a fabric-friendly decoupage medium to reduce fraying and help the pattern lay flat.
- Pre-wash and dry your fabric to prevent future shrinking.
- Iron it flat (wrinkles will show, and they will mock you).
- Apply decoupage medium to the surface, lay the fabric, and smooth from the center outward.
- Trim edges carefully once dry, then seal with topcoat for durability.
Method B: Upholstery-style attachment (best for drawer fronts or panels)
If the fabric will wrap around an edge, stapling on the back side is often stronger than glue alone. For crisp lines (especially on visible edges), upholstery tack strips can help create a clean finish without showing staples.
- Use a thin batting layer if you want a soft, upholstered look.
- Pull fabric taut, working from the center outward to avoid wrinkles.
- Finish edges with trim, nailheads, or braid for a polished look.
Method C: Fabric + insert panel (best for “I want options later” people)
Want the fabric look without permanently committing? Mount fabric onto a thin removable panel (like hardboard), then secure the panel inside the shelf frame or tray area. You can switch patterns laterseasonally, moodily, or whenever you decide your home needs a new personality.
Sealing It All: Topcoats, Durability, and Cure Time
Here’s where great projects separate from “why is my paint sticky?” projects. A topcoat protects your paint and your fabric detail, but different products behave differently. Some dry fast but need more coats; others are tougher but take longer to fully cure.
Polyurethane vs. polycrylic vs. water-based finishes
- Oil-based polyurethane: Extremely durable, but stronger odor and longer cure time. Can amber over time.
- Water-based polyurethane: Clearer finish, faster drying, usually needs more coats than oil-based.
- Polycrylic: Popular for interior furniture; often dries clear but can look cloudy if applied too heavily.
Two rules for a smoother topcoat
- Thin coats win. Heavy coats create drips, cloudiness, and heartbreak.
- Sand lightly between coats. A quick fine-grit sand helps the next layer bond and reduces brush marks.
Also: “dry” and “cured” are not the same thing. Your table might feel dry to the touch quickly, but a full cure can take much longer, especially with oil-based finishes. During cure time, treat your table gentlyno dragging lamps like you’re moving out overnight.
Styling Ideas: Make the Blue Side Table Look Like It Belongs There
Once your blue painted side table with fabric detail is finished, styling is where you let it shine without cluttering it into oblivion. Keep the top functional and the accessories intentional.
Color pairings that look great with blue
- Crisp white: Clean, classic contrast.
- Warm wood tones: Adds balance so blue doesn’t feel chilly.
- Brass or gold accents: Instantly elevates navy and deep blues.
- Soft neutrals (cream, taupe, gray): Calm and flexible.
- Green accents: Especially good with blue-green paint undertones.
Three easy “looks”
- Coastal: Light blue paint + linen or ticking-stripe fabric + a glass lamp and a small woven basket below.
- Modern: Deep navy + geometric fabric inset + black metal lamp + one sculptural object.
- Vintage: Smoky blue + floral fabric top + brass hardware + a small stack of old books.
Common Mistakes (So You Don’t Have to Learn the Hard Way)
- Skipping cleaning: Old wax or silicone residue can cause adhesion failures and weird surface defects.
- Not sanding glossy finishes: Paint needs tooth. Gloss is basically nonstick cookware for your primer.
- Using thick topcoat layers: This leads to drips, cloudiness, and longer drying times.
- Rushing cure time: A tabletop that’s “dry” can still dent if it hasn’t cured.
- Fabric choice mismatch: Delicate fabric on a high-use tabletop is like wearing suede shoes in a snowstorm. Save delicate textiles for insets or drawer fronts.
A Simple Weekend Plan: From “Meh” Table to “Where Did You Get That?”
Saturday: Prep + paint
- Clean and degrease thoroughly.
- Light sand to remove gloss; wipe away dust.
- Prime (especially if the surface is slick, stained, or previously glossy).
- Apply first paint coat; let dry fully.
- Apply second coat; let dry overnight.
Sunday: Fabric detail + seal
- Attach fabric using your chosen method (decoupage, upholstery, or insert panel).
- Let the fabric layer set fullydon’t rush trimming.
- Seal with a compatible topcoat in thin coats, sanding lightly between coats if needed.
- Let it rest and cure before heavy use (your future self will thank you).
Real-World Experiences: Lessons DIYers Learn After Making a Blue Painted Side Table With Fabric Detail
If you’ve ever finished a project, stepped back, and thought, “Wow… I have created a masterpiece,” only to find a fingerprint permanently embedded in the topcoat the next daywelcome. Furniture makeovers are a mix of art, chemistry, and personal growth. Here are the most common real-life lessons people tend to pick up when they tackle a blue painted side table with fabric detail.
First: blue is emotional. Many DIYers start with “soft coastal blue” in their head and end up with “stormy nautical drama” on the table because blues shift with lighting more than expected. The takeaway is simple: test in place, at different times of day. Morning light, afternoon glare, nighttime lampseach one can change your shade. People who test first usually love the final result. People who don’t tend to learn new vocabulary words.
Second: fabric is forgivinguntil it isn’t. A bold pattern looks incredible, but it also makes alignment obvious. DIYers often report that the “center it by eye” method works right up until they seal it, and then they notice the pattern is 2 degrees off and can never unsee it. The fix is low-tech: mark a centerline, dry-fit the fabric, and take a photo from above before gluing anything. Your camera is brutally honest, and that’s a good thing.
Third: topcoat behavior is a whole personality. People learn quickly that “more” isn’t better with clear finishes. Heavy coats can turn into cloudy spots (especially over darker colors) or create drips that harden into permanent sculpture. The folks who get the best finish tend to use thin coats, don’t over-brush, and sand lightly between coats. It’s not glamorous, but it’s how you get that smooth, furniture-store vibe.
Fourth: cure time is the villain and the hero. DIYers often say the project “looked done” long before it was truly ready for real life. A side table is a high-contact objectkeys, cups, skincare bottles, the occasional pizza box (no judgment). Letting the finish cure properly is what keeps it from sticking, denting, or scuffing. The practical compromise many people use is staging: place a decorative tray on top for the first week so the surface is protected while it hardens, and keep anything hot or wet away until you’re confident it’s fully cured.
Finally: the fabric detail is what makes it feel custom. DIYers who add even a small fabric inset often say it transforms the piece from “painted furniture” into “designed furniture.” It looks intentional, layered, and personallike you had a plan. And the fun part? You can match the fabric to your room: echo a pillow pattern, pull a color from your rug, or choose something totally unexpected for contrast. The most successful makeovers usually follow one simple rule: the blue paint is the anchor, and the fabric is the personality.
Conclusion
A blue painted side table with fabric detail is a small upgrade with big payoff: it adds color without overwhelming the room and adds pattern without requiring a full decor overhaul. Choose a blue that works in your lighting, prep the surface like a pro, pick a fabric placement that fits your lifestyle, and seal it thoughtfully. Do thatand your “little table” becomes the kind of piece people remember (and quietly try to copy).


