
Table of Contents >> Show >> Hide
- What “Blocking” Means (Pick Your Flavor)
- Tools & Supplies
- How to Block a Floyd Rose Tremolo (11 Steps)
- Step 1: Decide Your Block Placement (Dive-only vs. Hardtail)
- Step 2: Put the Guitar in a Safe Work Position
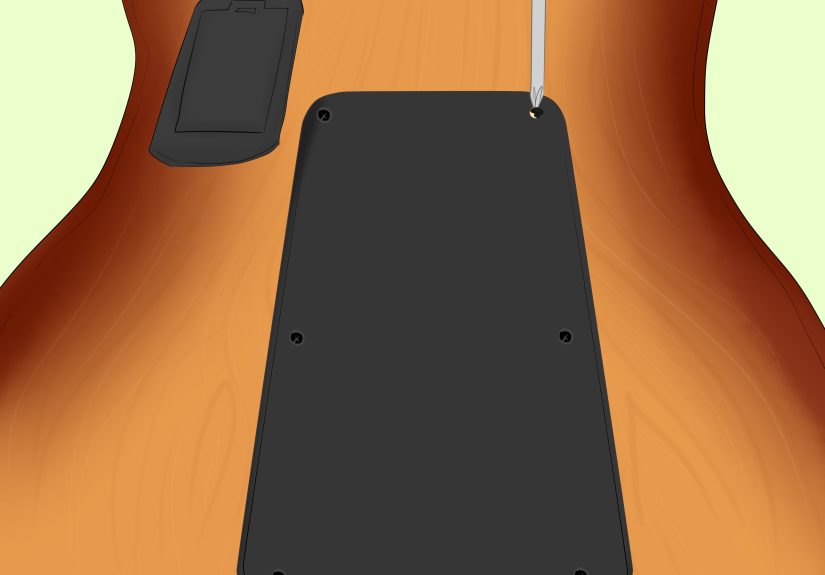
- Step 3: Remove the Rear Tremolo Cavity Cover
- Step 4: Bring the Bridge to a Neutral “At-Rest” Position
- Step 5: Measure the Gap Where the Block Will Go
- Step 6: Cut and Shape the Block for a Snug Fit
- Step 7: Reduce Spring Tension (Safely) Before Inserting the Block
- Step 8: Insert the Block (Neck-side for Dive-only; Both Sides for Hardtail)
- Step 9: Tighten the Claw Screws to Lock the Block in Place
- Step 10: Retune, Set Fine Tuners Mid-Travel, and Lock the Nut
- Step 11: Stress-Test and Do Final Setup Checks (Action & Intonation)
- Troubleshooting (Because Floyd Roses Love Plot Twists)
- Popular Alternatives to a DIY Block
- FAQ
- Real-World Experiences: What Players Notice After Blocking (About )
- Conclusion
A Floyd Rose is the ultimate “do a dive-bomb and still be in tune” machine… until you want to change tunings, do big double-stop bends,
or survive a broken string without your whole guitar sounding like a sad carnival ride.
Blocking a Floyd Rose tremolo is the fix: you limit (or eliminate) the bridge’s ability to move so your tuning gets steadier and your life gets easier.
In this guide, you’ll learn an 11-step, repeatable way to block your Floyd using a fitted block (the most universal method), plus
a few popular hardware alternatives if you’d rather buy your way out of sanding wood.
What “Blocking” Means (Pick Your Flavor)
Before you grab tools, decide which type of blocking you want:
-
Dive-only (a.k.a. “no pull-up”): You can push the bar down to lower pitch, but you can’t pull up to raise pitch.
This is great if you still want whammy tricks but want more stability for bends and palm muting. -
Hardtail mode (fully fixed): The bridge doesn’t move in either direction. This is best if you want maximum stability,
frequent tuning changes, or “I never use the bar anyway.” -
Temporary block (setup helper): You block the bridge only while restringing/setting intonation, then remove the block afterward.
(Super handy even if you keep the Floyd floating.)
Tools & Supplies
- Hex keys: typically 2.5mm/3mm for Floyd hardware (varies by model)
- Phillips screwdriver for the rear cavity cover
- Tuner (clip-on or pedal)
- Small block material: hardwood (maple/poplar/ash), dense plastic, or a purpose-made trem block
- Sandpaper (80–220 grit) or a small file
- Ruler/feeler gauges (optional but helpful)
- Pencil for marking measurements
- Optional: a drill + small screw (to make a “pull-out” handle for a tight block)
Pro tip: Avoid super-soft wood or squishy materials. If the block compresses, your “blocked” Floyd becomes “blocked-ish,” which is
the most annoying category of blocked.
How to Block a Floyd Rose Tremolo (11 Steps)
-
Step 1: Decide Your Block Placement (Dive-only vs. Hardtail)
The tremolo’s sustain block sits in the rear cavity and moves as the bridge pivots.
Where you place the block determines what movement is allowed:-
For dive-only: Fit the block on the neck-side of the sustain block (the side closer to the pickups/neck).
This prevents the bridge from being pulled “up” while still letting you push down. -
For hardtail mode: Use two blocksone on the neck-side and one on the rear-side (closer to the cavity cover).
That sandwiches the sustain block so it can’t move at all.
If you’re not sure, start with dive-only. It’s the best “I still want my whammy bar, just less drama” option.
-
For dive-only: Fit the block on the neck-side of the sustain block (the side closer to the pickups/neck).
-
Step 2: Put the Guitar in a Safe Work Position
Lay the guitar on a stable surface with a towel under it. You’ll be working in the rear cavity, so give yourself light and space.
Bonus points if you don’t do this on a couch cushion where screws can vanish into the upholstery dimension. -
Step 3: Remove the Rear Tremolo Cavity Cover
Unscrew the back plate to access the springs, claw, and sustain block. Keep screws together in a cup or magnetic tray.
(Yes, you will absolutely lose one otherwise. The floor demands tribute.) -
Step 4: Bring the Bridge to a Neutral “At-Rest” Position
Tune the guitar to your usual tuning and check the bridge angle. Many Floyd setups aim for the base plate to sit roughly parallel to the guitar top.
Your goal is to block the bridge in the position you actually want it to live in.If you’re moving from floating to blocked, you may need to do small tuning/claw adjustments later. For now, just get it close to “normal.”
-
Step 5: Measure the Gap Where the Block Will Go
Look at the sustain block in the cavity and measure the distance between the block and the cavity wall where you’ll place your new blocker.
Measure at two points (top and bottom of the sustain block), because cavities and blocks aren’t always perfectly square.Practical approach: Cut your block slightly oversized, then sand down to a snug fit. “Sneak up” on perfectdon’t try to land it in one cut like a movie hero.
-
Step 6: Cut and Shape the Block for a Snug Fit
Cut a piece of hardwood (or dense plastic) to roughly match the sustain block’s width. Then shape the thickness so it fits the measured gap.
You want it snugtight enough to stay put, not so tight that you need a forklift to remove it later.Optional trick: Drill a small pilot hole in the outward-facing side and thread in a short screw. This gives you a “handle”
to pull the block out later if you ever want to return to floating. -
Step 7: Reduce Spring Tension (Safely) Before Inserting the Block
Slightly detune the strings to reduce tension. Then, if needed, loosen the spring claw screws a bit so the bridge can move enough to insert the block.
You generally don’t need to remove springs for a simple block insert, but on some guitars it makes access much easier.Warning: Don’t fully remove tension and let hardware snap around. Springs are small, but they are enthusiastic.
-
Step 8: Insert the Block (Neck-side for Dive-only; Both Sides for Hardtail)
With the bridge relaxed, slide the block into place between the sustain block and the cavity wall:
- Dive-only: block goes on the neck-side of the sustain block
- Hardtail: add a second block on the rear-side
The block should sit flat and not interfere with springs. If it rubs a spring, reshape the block or move springs to a different claw hole pattern.
-
Step 9: Tighten the Claw Screws to Lock the Block in Place
Tighten the claw screws evenly (a half-turn at a time per side) until the springs press the sustain block firmly against your blocker.
This pressure is what makes the block “real,” not just a piece of wood taking a scenic tour of your guitar cavity.If you’re going for hardtail mode with two blocks, adjust until the sustain block is firmly trapped with no wiggle.
-
Step 10: Retune, Set Fine Tuners Mid-Travel, and Lock the Nut
Retune at the headstock first. Before you lock the nut, set the Floyd’s fine tuners to about the middle of their range so you have room to adjust both sharp and flat.
Then lock the nut and do final tweaks using the fine tuners.Reality check: Blocking changes the tension balance. Expect a couple rounds of “tune → adjust claw → tune again” before it settles.
-
Step 11: Stress-Test and Do Final Setup Checks (Action & Intonation)
Now test it like a skeptical friend:
- Big bends: Do other strings stay more stable than before?
- Palm muting: Does the bridge stay put?
- Whammy (dive-only): Can you dive and return to pitch reliably?
- Broken-string scenario (carefully simulated): If one string is detuned, does the rest stay closer to pitch than when floating?
Finally, check action and intonation. Blocking can slightly change how the guitar “sits” under tension. If intonation is off, correct it like a normal Floyd setup:
stabilize the bridge, adjust saddles carefully, and retune in stages.Once everything feels solid, reinstall the rear cavity cover… or leave it off if you’re the kind of person who likes quick access and doesn’t mind seeing springs.
(No judgment. Springs deserve fresh air too.)
Troubleshooting (Because Floyd Roses Love Plot Twists)
The bridge still moves when I bend strings
- Your block may be too thin or not snug enoughremove it and sand a new one for a tighter fit.
- Increase spring claw tension so the sustain block presses harder against the blocker.
- If you aimed for hardtail, add the second block on the rear-side to remove remaining motion.
The block slips or rattles
- Make the block slightly longer/wider to seat more securely.
- Check that it isn’t contacting a spring at an angle (springs can “walk” it out over time).
- A tight fit should eliminate rattles without needing permanent glue.
My tuning is worse after blocking
- Make sure the nut is locked only after you’ve tuned and the bridge is stable.
- Stretch new strings properly (especially with a double-locking system).
- Ensure the bridge returns to the exact same resting point (snug block + consistent spring pressure).
I want to switch between floating and blocked without fuss
If you want “toggle” convenience, consider a purpose-made solution like a tremolo stopper (dive-only limiter) or a device that can lock/unlock modes.
These can be faster than re-fitting a block, especially for gigging.
Popular Alternatives to a DIY Block
Tremolo Stop Lock (dive-only limiter)
A tremolo stop lock installs in the spring cavity and uses an adjustable screw to stop “pull-up,” giving you a more stable dive-only setup.
Think of it as the “small, polite bouncer” that keeps your Floyd from lifting upward.
Tremol-No (switchable modes)
A Tremol-No replaces the spring claw and adds hardware that can be set to float, dive-only, or fully lockeduseful if you bounce between tunings or styles.
Installation typically involves reattaching the claw ground connection properly and aligning the clamp so it doesn’t drag.
Temporary setup blocks (for restringing/intonation)
Even if you keep your Floyd floating, using a temporary block during restringing and setup can make tuning/intonation dramatically less frustrating.
The point is to keep the bridge stable while you worklike putting your coffee on a table instead of balancing it on a skateboard.
FAQ
Will blocking increase sustain?
Some players feel a blocked trem sustains more because the bridge is more mechanically “solid.” Others hear little difference.
What’s not debated: your tuning stability usually improves, and your bends feel more predictable.
Do I have to remove the springs?
Not always. Many guitars allow a block to slip in with minor detuning and small claw adjustments.
If access is tight, removing one spring temporarily can make the job much easier.
Can I reverse it later?
Yesif you avoid permanent glue and fit the block snugly. If you used a screw “handle,” reversing it is even easier.
Real-World Experiences: What Players Notice After Blocking (About )
Blocking a Floyd Rose tends to feel like you finally convinced a hyperactive puppy to sitstill energetic, still lovable, but no longer sprinting
through the house holding your socks hostage. One of the first things many guitarists notice is how much more “normal” bends become. On a fully floating Floyd,
a big bend on the G string can make the other strings dip flat, which is great if you’re trying to recreate the sound of a slightly melting cassette tape,
but not so great if you’re recording stacked harmonies. After blocking (especially in hardtail mode), double-stops and wide bends typically hold together
better, and you spend less time doing the “why does this chord sound haunted?” routine.
Dive-only setups often become a sweet spot: you still get the whammy fun, but palm muting and aggressive picking feel steadier. Players who chug hard
(metal, punk, anything with “downpicking” as a lifestyle) frequently appreciate that the bridge doesn’t react as dramatically to heavy right-hand pressure.
That means fewer micro-wobbles in pitch and fewer moments where your guitar sounds like it’s trying to do vibrato without your permission.
Tuning changes are another common “wow” moment. If you’ve ever tried to go from E standard to Drop D on a floating Floyd without changing anything else,
you’ve probably experienced the classic chain reaction: you drop one string, the bridge shifts, and suddenly every other string is slightly wrong too.
With a blocked bridge, the system stops behaving like a group project where one person quits and everyone else has to do extra work. Drop tunings, alternate tunings,
and quick tweaks become more realisticespecially in a rehearsal setting where nobody wants to watch you perform a 12-minute interpretive dance called
“Balancing Spring Tension.”
Then there’s the broken-string panic test. On a floating Floyd, a snapped string changes the overall tension, the bridge tilts, and the remaining strings
go out of tunefast. With blocking, the bridge is less likely to shift dramatically, so the rest of the guitar tends to stay closer to pitch. That doesn’t mean
you’ll finish a whole set with a missing string like a superhero, but it can mean the difference between “finish the song” and “stop everything while the singer
tells jokes.”
Lastly, a lot of players report a psychological benefit: you play more confidently. When the bridge isn’t constantly “negotiating” with the springs and strings,
the guitar feels more predictable under your hands. And when your instrument stops surprising you, you can get back to the important stufflike deciding whether
your next riff needs more attitude, more notes, or both (the correct answer is usually “both”).
Conclusion
Blocking a Floyd Rose tremolo doesn’t have to be intimidating. If you can measure, sand, and turn screws evenly, you can transform a floating bridge into a
dive-only workhorse or a hardtail-stable tuning machine. The key is a snug-fitting block and consistent spring pressure,
followed by careful retuning and final setup checks.
If you love the Floyd feel but hate the floating side effects, blocking is one of the most satisfying “small change, big payoff” mods you can do
right up there with finding the missing pick you swore the carpet ate.


