Table of Contents >> Show >> Hide
- What Does “Check In at the Airport” Actually Mean?
- Before You Leave for the Airport
- Step 1: Arrive at the Airport Early Enough
- Step 2: Find the Right Check-In Area
- Step 3: Choose Your Check-In Method
- Step 4: Check Your Bags Properly
- Step 5: Get and Review Your Boarding Pass
- Step 6: Head to Security
- Step 7: Find Your Gate and Stay Alert
- Domestic vs. International Airport Check-In
- Common Airport Check-In Mistakes to Avoid
- Quick Example: What This Looks Like in Real Life
- Best Tips for a Faster Airport Check-In
- Conclusion
- Traveler Experiences: What Airport Check-In Really Feels Like
- SEO Tags
Airports are exciting in theory. In practice, they are often a mix of rolling suitcases, suspiciously expensive muffins, and one traveler loudly asking whether gate C27 is “basically nearby.” If you have ever wondered exactly how to check in at the airport without feeling like you accidentally enrolled in a live-action puzzle game, this guide is for you.
Whether you are flying for the first time, taking a family vacation, or just trying to remember what all normal humans do before a flight, airport check-in is easier when you break it into simple steps. The good news? Once you know the process, it becomes far less mysterious and far more manageable.
In this step-by-step guide, you will learn how airport check-in works, what documents to bring, when to arrive, how to use self-service kiosks, when to go to the counter, how to check bags, and what happens after you get your boarding pass. We will also cover common mistakes, practical travel tips, and real-world experiences that make the process much easier.
What Does “Check In at the Airport” Actually Mean?
Checking in at the airport means confirming that you are present for your flight, getting your boarding pass if you do not already have it, and handing over checked luggage if needed. In some cases, it also means having an airline agent verify your passport, visa, or other travel documents.
Think of it as the airline’s way of saying, “Great, you are a real person, you are here on purpose, and your suitcase is now our responsibility.”
You may check in in one of several ways:
- Online or in the airline app before you reach the airport
- At a self-service kiosk in the terminal
- At the airline check-in counter with an agent
- At curbside check-in at select airports and airlines
Even if you already checked in online, you may still need to stop at a bag drop counter, a self-tag station, or the regular desk if you are checking luggage or flying internationally.
Before You Leave for the Airport
1. Check Your Flight Details
Before you even lace up your airport shoes, confirm your airline, terminal, departure time, and check-in requirements. Airlines can have different cutoffs for getting a boarding pass, checking bags, or reaching the gate. Some flights also require document checks that cannot be completed entirely online.
If you are flying domestically, make sure your ID is acceptable. If you are flying internationally, double-check your passport validity and any destination-specific entry requirements. This is not the time to discover your passport expired sometime during the previous administration.
2. Decide Whether You Will Check Bags
This matters more than many travelers realize. If you are bringing only a carry-on, your airport check-in process is usually much faster. If you need to check bags, you will need extra time for printing bag tags, paying fees if applicable, and dropping off luggage before the airline’s cutoff.
Many airlines now encourage travelers to pay bag fees online or in the app first, then print tags at a kiosk and head straight to bag drop. That can save time, especially at busy airports.
3. Prepare Your Documents
Keep your ID, passport, booking confirmation, and payment method in an easy-to-reach place. Do not bury them in the deepest corner of your backpack under headphones, gum wrappers, and mysterious charging cables from 2018.
If you already have a mobile boarding pass, save it to your phone wallet and take a screenshot just in case your signal disappears at the exact wrong moment.
Step 1: Arrive at the Airport Early Enough
One of the biggest airport mistakes is confusing “boarding time” with “time I should stroll into the terminal while holding coffee.” They are not the same thing.
As a general rule:
- Domestic flights: arrive about 2 hours before departure
- International flights: arrive about 3 hours before departure
Those are not random numbers invented to ruin your morning. They account for check-in, bag drop, security screening, and the possibility that half the airport seems to be traveling on the same day as you.
You may need even more time if:
- You are checking oversized or special baggage
- You are traveling with children
- You need visa or passport verification
- You are flying during holidays or peak travel times
- Your airport is known for long security lines
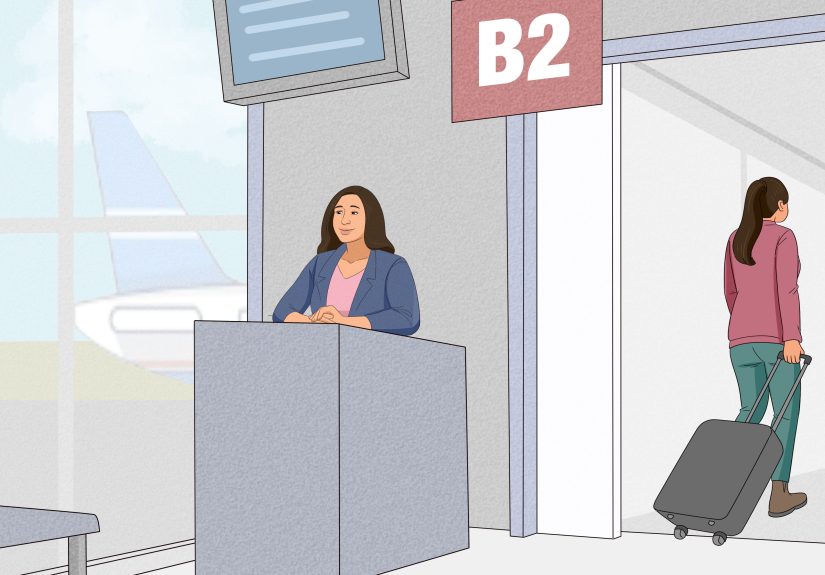
Step 2: Find the Right Check-In Area
Once you enter the terminal, look for departure boards or airline signs showing your carrier’s check-in counter location. Airports usually group check-in areas by airline. If you are unsure, check the airport’s website before you leave home or use the terminal directory when you arrive.
You will usually see one or more of these options:
- Self-service kiosks
- Bag drop counters
- Full-service check-in desks
- Curbside check-in stations
If you already checked in online and have no bags, you may be able to skip the whole check-in zone and go directly to security. That is the airport version of finding a shortcut in a video game.
Step 3: Choose Your Check-In Method
Option A: Use a Self-Service Kiosk
For many travelers, this is the fastest way to check in at the airport. At the kiosk, you usually enter one of the following:
- Your confirmation code
- Your credit card or passport
- Your frequent flyer number
- Your name and flight details
From there, the screen typically lets you review your flight, choose or confirm your seat, add checked bags, pay any baggage fees, and print your boarding pass and bag tags.
If you are checking a bag, attach the printed tag as instructed and take the suitcase to the designated bag drop line. If you are not checking bags, congratulations, you can move on to security looking calm and efficient.
Option B: Check In at the Airline Counter
Go to the staffed counter if:
- You need help with your reservation
- You are flying internationally and documents must be reviewed
- You are traveling with pets, special items, or mobility equipment
- You have an unaccompanied minor or group booking
- The kiosk rejects your trip details and starts acting dramatic
At the counter, an airline agent will confirm your identity, review travel documents, assign or change seats if available, print your boarding pass, and take your checked luggage.
Option C: Use Curbside Check-In
Some airlines and airports offer curbside check-in. This lets you check bags and get help before entering the terminal. It can be a great option if you have heavy luggage or want to avoid long indoor lines. However, availability varies by airline, airport, and time of day, and some services charge a convenience fee.
So yes, curbside can be wonderfully efficient. It can also vanish like a seasonal menu item. Always verify it in advance.
Step 4: Check Your Bags Properly
If you are checking luggage, make sure you know your airline’s baggage rules before you get to the airport. Weight limits, size restrictions, and fees vary by carrier and route.
Once your bag is tagged, the airline will weigh it and send it on its way. Before you hand it over, do a quick final check:
- Remove prohibited items
- Keep medications, passports, batteries, jewelry, and essentials in your carry-on
- Make sure your name is on or in the bag
- Take a photo of your luggage in case it gets delayed
Many airlines have bag acceptance cutoffs, often around 45 to 60 minutes before departure for domestic flights, and sometimes earlier for international trips. Arriving “technically before takeoff” is not the same as arriving early enough to check a bag.
Step 5: Get and Review Your Boarding Pass
After check-in, you will receive a paper boarding pass or use a mobile one. Before you head toward security, review it carefully. Check:
- Your full name
- Flight number
- Date and departure time
- Gate number, if listed
- Boarding time
- Seat assignment
If anything looks wrong, fix it immediately while you are still near the airline desk. Discovering a problem later, when you are already speed-walking to the gate, is much less fun.
Step 6: Head to Security
Once you are checked in, follow signs to the TSA security checkpoint. Have your ID and boarding pass ready. Some airports use digital scanning systems, but it is still wise to keep documents handy until you are through.
To make security smoother:
- Follow the TSA 3-1-1 rule for liquids in carry-ons
- Empty your pockets before reaching the scanner
- Remove prohibited items before you get in line
- Listen to the officers because procedures can vary by lane
If you are enrolled in TSA PreCheck, use that lane when available. If not, regular screening is still perfectly manageable with a little preparation and a little less panic.
Step 7: Find Your Gate and Stay Alert
After security, check the airport monitors or your airline app to confirm your gate. Gates can change. Airports love a surprise, and not always the good kind.
Get to your gate area with enough time to board comfortably. Most airlines begin boarding well before departure, and arriving at the gate after boarding is closed is a spectacularly frustrating way to ruin an otherwise good travel day.
Domestic vs. International Airport Check-In
Domestic Flights
For domestic travel, the process is usually straightforward. A valid government-issued ID, your reservation, and enough time are the main ingredients. If you have a mobile boarding pass and no checked bags, you may skip the counter entirely.
International Flights
International check-in usually takes longer because airlines may need to inspect your passport, visa, return-ticket documentation, or destination forms. Even if you check in online, you may still need to see an agent before getting cleared to board.
That is why arriving three hours early is still good advice for many international flights. It is not overkill. It is self-defense.
Common Airport Check-In Mistakes to Avoid
- Arriving too late: the airline cutoff matters more than your optimism
- Using the wrong terminal: always verify before you leave home
- Not checking baggage rules: overweight bags can slow everything down
- Assuming online check-in solves everything: some trips still require document review
- Ignoring boarding time: departure time is not when boarding starts
- Packing liquids incorrectly: security will notice, and not in a cheerful way
Quick Example: What This Looks Like in Real Life
Let’s say you are flying from Chicago to Orlando on a domestic flight with one checked bag. A smooth check-in routine might look like this:
- Check in on the airline app the day before
- Pay for your checked bag online if the airline allows it
- Arrive at the airport about 2 hours early
- Use the kiosk to print your bag tag
- Drop your suitcase at bag drop
- Go through security with your mobile boarding pass
- Confirm your gate and boarding time
Now compare that with an international trip to Paris. You may still check in online, but at the airport you will likely need a counter agent to verify your passport and travel documents before you can complete the process. Same basic flow, just more paperwork and fewer shortcuts.
Best Tips for a Faster Airport Check-In
- Check in online as early as your airline allows
- Use a mobile boarding pass and save a screenshot
- Pack smart so your carry-on clears security easily
- Prepay for bags when possible
- Keep documents together in one easy-access place
- Wear shoes and layers that do not turn security into a theatrical production
- Double-check terminal and gate information on travel day
Conclusion
Learning how to check in at the airport is one of those travel skills that sounds more complicated than it is. Once you understand the steps, the process becomes predictable: arrive early, find your airline, check in by kiosk or counter, drop your bags if needed, get your boarding pass, and head to security.
The real secret is not magic. It is preparation. Know your flight details, bring the right documents, give yourself enough time, and do not assume the airport will adapt to your last-minute sprint. With a little planning, airport check-in can be smooth, fast, and far less stressful than many travelers expect.
And if all else fails, follow the signs, keep your ID handy, and do not take travel advice from the person yelling at the gate agent. That alone will put you ahead of the game.
Traveler Experiences: What Airport Check-In Really Feels Like
For many travelers, airport check-in is not stressful because it is difficult. It is stressful because it feels like a test you forgot to study for. There are screens, lines, announcements, rolling bags, and at least one person who looks like they know exactly where to go. Meanwhile, you are trying to remember whether your passport is in the front pocket, the side pocket, or the “safe place” that suddenly feels less safe.
First-time flyers often say the hardest part is simply knowing what happens first. Do you go to security before checking in? Do you need to print your boarding pass? What if you already checked in online? The moment you understand that airport check-in is really just confirming your flight and dealing with your luggage, the whole thing starts to feel much more logical.
Business travelers usually approach the process like a speed sport. They check in online, travel with a carry-on, head straight to security, and somehow look mildly annoyed by anyone moving slower than a caffeinated turtle. Leisure travelers, on the other hand, tend to move at a more thoughtful pace. They may stop at the counter to ask about seats, check bags, or make sure the family reservation is all linked correctly. Neither style is wrong. The goal is simply to match your timing to your trip.
Families often experience airport check-in very differently from solo travelers. Checking in with kids can feel like organizing a tiny parade where nobody agrees on snacks. Parents are juggling IDs, strollers, carry-ons, and the sudden emotional importance of one stuffed animal. In that situation, using the full-service counter instead of the kiosk is sometimes the smartest move. Speed matters, but sanity matters too.
International travelers usually describe check-in as the point where a trip starts to feel real. That is when the airline checks the passport, confirms documents, and hands over a boarding pass that makes the whole journey official. It can take longer, but it also gives some peace of mind. Once the agent says everything looks good, travelers tend to relax a little and shift from “administrative panic” into actual travel mode.
Then there is the emotional roller coaster of checking a bag. Some people hand over luggage like they are sending a child off to college. Others wave goodbye and never think about it again. Taking a quick photo of your suitcase, removing valuables, and confirming the destination tag can make that moment feel much less uncertain.
Perhaps the most common experience is discovering that the airport process becomes dramatically easier after the first successful trip. Once you have used a kiosk, dropped a bag, scanned a boarding pass, and made it to your gate with time to spare, the mystery fades. The second trip feels easier. By the third, you are the person calmly explaining to a friend that no, they do not need to line up at the wrong counter, and yes, they should absolutely check the gate screen one more time.
In other words, airport check-in is part logistics, part timing, and part confidence. The more prepared you are, the less chaotic it feels. And once you know the rhythm, it stops feeling like a travel obstacle course and starts feeling like the first successful step of the trip.