
Table of Contents >> Show >> Hide
- Quick Safety Note About Raw Milk (Read This Before You Shake Anything)
- What You Need (Minimal Gear, Maximum Satisfaction)
- Step 1: Choose Your Starting Point (Raw Milk vs. Cream)
- Step 2: Get the Temperature Right (Butter Has Opinions)
- Step 3: Pick a Churning Method (All Roads Lead to Butter)
- Step 4: Drain the Buttermilk (Congratulations, You Made a Bonus Ingredient)
- Step 5: Wash the Butter (The Step That Makes It Last Longer)
- Step 6: Salt and Shape (Or Go Unsalted for Baking)
- Want Next-Level Flavor? Make Cultured Butter
- Troubleshooting (Because Butter Is a Mood)
- How to Store Homemade Butter (And How Long It Lasts)
- Don’t Waste the Buttermilk! (Even If It’s Not the Cultured Kind)
- Beginner FAQ
- Conclusion: Your First Batch Doesn’t Have to Be PerfectJust Butter
- Extra: Real-World Beginner Experiences (What It Actually Feels Like the First Few Times)
Making butter at home is basically kitchen magic with a highly satisfying payoff: you start with liquid cream and end with a golden, spreadable bragging right. Whether you’re working with raw milk (and skimming your own cream) or starting with store-bought cream, the process is beginner-friendly, low-tech, and oddly therapeuticlike a snow globe you can eat.
This guide walks you through the safest, simplest methods, explains what’s happening (without turning into a dairy science textbook), and helps you troubleshoot the most common “Why is this still whipped cream?!” moments. Let’s churn.
Quick Safety Note About Raw Milk (Read This Before You Shake Anything)
If you’re making butter from raw milk or raw cream, you’re not just choosing a vibeyou’re also choosing a higher food-safety risk. Raw milk can contain harmful germs that pasteurization is designed to kill. Butter-making does not reliably “sanitize” raw dairy; it simply separates fat from liquid.
Safer option: use pasteurized cream (heavy cream from the store) or pasteurize your raw milk/cream at home before churning. If you’re pregnant, immunocompromised, serving kids, or just not interested in playing microbial roulette, strongly consider sticking with pasteurized dairy.
What You Need (Minimal Gear, Maximum Satisfaction)
Ingredients
- Cream (best: heavy cream / heavy whipping cream, ideally 36%+ milkfat)
- Optional: salt (fine salt or kosher salt)
- Optional: cultures or crème fraîche (for cultured butter)
Tools (Pick Your Method)
- Jar method: mason jar with a tight lid
- Stand mixer method: stand mixer + whisk attachment (plus a towel for splatter protection)
- Food processor method: food processor (fast and efficient)
- For finishing: strainer or cheesecloth, bowl, spatula or clean hands
- For best results: ice water bath (for washing the butter)
- If using raw milk: wide container for chilling + skimming, or a cream separator
- If pasteurizing at home: thermometer + pot (double boiler style helps)
Step 1: Choose Your Starting Point (Raw Milk vs. Cream)
Option A: Start with Store-Bought Heavy Cream (Easiest)
If you’re brand-new, this is the smoothest path: pour heavy cream into your jar/mixer/processor and go. Store-bought cream is typically pasteurized, which lowers risk and keeps the focus on technique, not food-safety drama.
Option B: Start with Raw Milk (You’ll Skim the Cream First)
Raw milk usually isn’t homogenized, so the cream naturally rises. To skim cream:
- Pour raw milk into a clean, wide container (more surface area = easier skimming).
- Refrigerate undisturbed for 12–24 hours (often you’ll see a thick cream layer on top).
- Use a ladle or large spoon to gently skim the cream into a clean jar.
Pro tip: If you have a cream separator, you’ll get more cream more efficientlyespecially if you’re doing this regularly.
Optional (Recommended): Home Pasteurize Your Raw Milk/Cream
If you want the “from raw milk” experience but would prefer fewer “from risky bacteria” surprises, you can pasteurize at home:
- Heat milk or cream to 145°F and hold it there for 30 minutes, stirring frequently to keep the temperature even.
- Keep it at or above 145°F the whole time (if it dips below, reheat and restart the holding time).
- Cool quickly (an ice bath helps), then refrigerate until cold.
Once chilled, churn as usual. This adds time, but it’s a big safety upgradeespecially if other people will eat your butter.
Step 2: Get the Temperature Right (Butter Has Opinions)
Butter-making is mostly about milkfat behaving correctly. The sweet spot for churning is often around cool room temperaturenot fridge-cold, not warm-and-soupy.
- Too cold: fat stays stubborn; it can take forever to separate.
- Too warm: butter turns greasy and soft; washing becomes annoying, and texture can suffer.
A common beginner-friendly approach: start with cream that’s cold from the fridge, churn until you see separation begin, and if it’s taking ages, let it sit at room temp for 10–15 minutes, then continue.
Step 3: Pick a Churning Method (All Roads Lead to Butter)
Method 1: The Mason Jar Shake (No Appliances, All Upper Body)
This is the classic “pioneer workout plan.” Great for small batches or doing it with kids (and then pretending you’re not out of breath).
- Fill a jar no more than halfway with cream (it needs room to slosh).
- Screw the lid on tightlyseriously tightly.
- Shake vigorously for 5–15 minutes.
- You’ll pass through stages: sloshy cream → thick cream → whipped cream → clumpy butter grains + liquid.
- Once you hear/feel a clear “thunk” and see liquid separate, stop shaking.
Method 2: Stand Mixer (Fast, Effortless, Slightly Dramatic)
This is the easiest way to make a bigger batch, but it can splatter when separation happensbecause butter loves attention.
- Pour cream into the mixer bowl (don’t fill it too high).
- Use the whisk attachment.
- Start on low, then increase to medium-high.
- In a few minutes you’ll get whipped cream; keep going until it breaks into butter solids and buttermilk.
- Drape a clean towel over the mixer head/bowl area if splashing starts.
Method 3: Food Processor (Quickest “Why Didn’t I Do This Sooner?” Option)
- Add cream to the processor bowl.
- Pulse/run until you see separation into butter clumps and liquid.
- Stop as soon as the butter formsover-processing can make texture greasy.
Method 4: Butter Churn (Old-School, Satisfying, Great If You’re Fancy)
If you have a hand-crank churn, follow the manufacturer’s guidance. The process is the sameagitation until fat clumps togetherbut churns can be more consistent and fun for larger batches.
Step 4: Drain the Buttermilk (Congratulations, You Made a Bonus Ingredient)
Once the butter forms, pour everything through a strainer into a bowl. The liquid is technically buttermilk, but it’s usually not the tangy cultured kind you buy in cartons. Still, it’s useful (more on that soon).
Step 5: Wash the Butter (The Step That Makes It Last Longer)
Washing butter sounds odd until you realize the leftover buttermilk trapped inside the butter can spoil faster. Washing removes that extra liquid and helps your butter stay fresher.
- Place the butter solids in a bowl of ice-cold water.
- Press and fold the butter gently (or knead with clean hands).
- Pour off cloudy water and repeat with fresh cold water until the water runs mostly clear.
Tip: Cold water keeps the butter firm so it doesn’t melt while you work it.
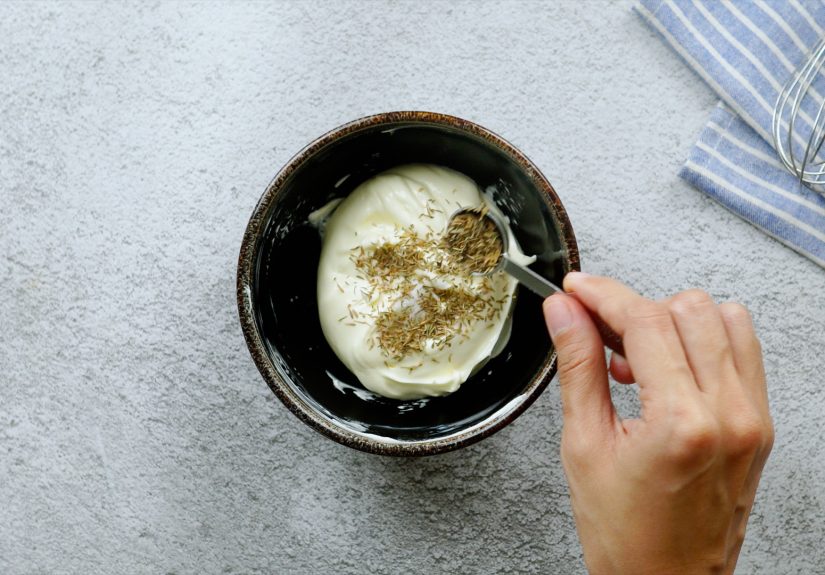
Step 6: Salt and Shape (Or Go Unsalted for Baking)
Salt is optional, but it boosts flavor and can help with keeping quality. Start small; you can always add more.
- Lightly salted: try about 1/4 teaspoon fine salt per 1/2 cup of butter, then taste and adjust.
- Even mixing: sprinkle, then fold/knead the butter until uniform.
Shape your butter into a log, press into a small container, or do rustic spoon-swooshes like a fancy restaurant (you are the fancy restaurant now).
Want Next-Level Flavor? Make Cultured Butter
Cultured butter has a tangy, complex flavorlike butter went to finishing school. You can culture cream by mixing in a spoonful of cultured dairy (like crème fraîche) and letting it sit warm for a while, then chilling and churning.
Simple Cultured Butter Approach
- Stir 1–2 tablespoons of crème fraîche (or cultured buttermilk) into 2 cups of cream.
- Cover and let sit at a warm room temperature until slightly thickened and pleasantly tangy (often overnight).
- Chill thoroughly, then churn as usual.
Result: butter with a gentle “European-style” vibeexcellent on bread, pancakes, and basically your self-esteem.
Troubleshooting (Because Butter Is a Mood)
“It’s been forever and it’s still whipped cream.”
- Temperature issue: let the cream warm slightly, then try again.
- Fat content too low: half-and-half won’t reliably become butteruse heavy cream.
- Overfilled container: cream needs space to agitate; fill jar halfway at most.
- Patience tax: some creams take longer; keep going until it breaks.
“It turned greasy and soft.”
- Cream was likely too warm. Chill the butter briefly, then wash with colder water and handle gently.
“My butter tastes… kind of flat.”
- Add a pinch more salt.
- Try cultured butter next time.
- Use fresher cream (older cream can taste dull).
“My butter is crumbly.”
- Butter may be too cold; let it sit a few minutes, then gently work it to smooth.
- Avoid over-washing or over-working aggressively.
How to Store Homemade Butter (And How Long It Lasts)
Homemade butter often has a shorter shelf life than store-bought because commercial butter is processed for consistency and keeping quality. Your best defense is thorough washing, clean handling, and cold storage.
- Refrigerator: store in an airtight container; keep it away from strong odors (butter is basically a flavor sponge).
- Freezer: wrap tightly to prevent freezer smells; freeze in small portions for convenience.
- Counter: only leave out small amounts you’ll use quickly, especially in warm kitchens.
Important note: Avoid trendy “home-canned butter” storage ideas. Shelf-stable butter preservation at home is not generally considered a safe DIY project.
Don’t Waste the Buttermilk! (Even If It’s Not the Cultured Kind)
The leftover liquid is great in:
- Pancakes and waffles
- Biscuits and quick breads
- Marinades (especially for chicken)
- Soups (as part of the liquid base)
You can also freeze it in small containers for later. Label it “buttermilk (uncultured)” so future-you doesn’t expect it to taste like the carton version.
Beginner FAQ
Can I make butter directly from raw milk without skimming cream?
Not efficiently. Butter is made by churning cream, not whole milk. Whole milk doesn’t have enough fat concentration to churn into butter in a reasonable way.
Does raw milk make “better” butter?
It can make different buttersometimes richer or more aromatic depending on the milk and handling. But “better” is subjective, and it comes with higher food-safety considerations unless you pasteurize first.
Why is homemade butter sometimes more yellow?
Milkfat color depends on diet (like pasture vs. stored feed) and season. That’s normal, and it’s one reason farm butter can look extra golden.
Conclusion: Your First Batch Doesn’t Have to Be PerfectJust Butter
Butter-making is one of those rare kitchen projects that’s both simple and impressive. Use pasteurized heavy cream for the easiest win, or skim cream from raw milk if you want the full homestead experiencepreferably with smart safety practices. Nail the temperature, churn until it breaks, wash until the water runs clear, salt to taste, and suddenly you’re the kind of person who casually says, “Oh, I made the butter.”
Extra: Real-World Beginner Experiences (What It Actually Feels Like the First Few Times)
Your first butter-making session usually starts with confidence and ends with you staring into a bowl, whispering, “Is this… still whipped cream?” That’s normal. The most common beginner experience is learning that butter doesn’t happen gradually. It happens all at oncelike a plot twist. One minute you have fluffy peaks, the next minute you have butter clumps bouncing around in a puddle. If you blink, you’ll miss the exact moment it “breaks,” and you’ll spend ten seconds convinced you ruined it. You didn’t. That’s just the moment the fat finally decides to link arms and become a team.
Another classic first-timer moment: the splatter incident. If you’re using a stand mixer, there’s a brief phase where the cream goes from “stable whipped cream” to “liquid plus flying dairy confetti.” People don’t warn you because they assume you’ll learn the traditional wayby cleaning the walls. The fix is simple: start on lower speed, use a deeper bowl if possible, and drape a towel over the mixer once things start thickening. The towel trick feels like a secret passed down from a long line of butter survivors.
When you try the jar method, you’ll discover butter is also a fitness program. Around minute three, you’re feeling smug. Around minute seven, you’re bargaining with the universe. If you’re making butter with kids, they’ll be thrilled for exactly 90 seconds, then you’ll be the one shaking the jar like you’re auditioning for a percussion band. The good news is that the jar method teaches you the “sound” of butter: once it separates, the slosh changes. It goes from smooth whooshing to a heavier thunking as the butter clumps hit the glass. That’s your cue to stop before your arms file a complaint.
Then comes the washing stepthe part beginners either skip or rush, usually because they’re excited to taste. But washing is where homemade butter levels up. The first rinse looks like cloudy lemon water. The second rinse looks like slightly less cloudy lemon water. And then (finally) the water starts to clear and you realize, “Oh, this is actually working.” The sensory part is oddly satisfying: cold water, firm butter, the gentle squeeze and fold. It’s like kneading dough, but richer, and you don’t have to wait for it to rise.
Flavor-wise, your first taste is a surprise. Even “plain” homemade butter often tastes fresher and more aromatic than you expect, especially if the cream was high quality. If it tastes a bit flat, you’ll learn the power of saltjust a pinch can make it pop. If you try cultured butter, you’ll have a whole new “Wait, butter can taste like this?” moment. Cultured butter feels like butter with depth: a little tang, a little complexity, and the kind of flavor that makes toast seem like a respectable meal choice.
Finally, you’ll learn the biggest truth of all: homemade butter is less about perfection and more about rhythm. Temperature, timing, and a little patience. Your second batch will be easier. Your third batch will be confident. By your fourth, you’ll be casually saving the buttermilk for pancakes like you’ve been doing this your whole life. And that’s the real beginner-to-butter-maker journey: not just making butter, but becoming the type of person who keeps a small container in the fridge and thinks, “Yeah. I could make more whenever I want.”


